Last Updated on January 20, 2021 by Staff
A while back we reported that we started printing prototypes of modified chopsticks. Then we put 3D printing on hold, when we took a detour to publish the family tree of alternative grips.
But we are now back to 3D printing, because of COVID-19. At the time of this writing in early April 2020, the US is facing an unprecedented shortage of PPEs for folks fighting at the frontline. Three equipments are urgently needed: face masks, medical gowns, and face shields.
We can’t print filters for face masks. We can’t make gowns. But face shield is within reach. Most face shields require only a head band and a transparency sheet. So, that’s what we print.
Table of Contents
Which shield to print?
3D printable face shields abound. Countless folks have designed their own, or remixed other people’s models, in just the last month alone. But few have been listed by the NIH for use in the US. None had been yet approved by FDA. That process would take months.
In response to the crisis, FDA did issue a special guidance spelling out how hospitals can use 3d-printed face shields, as long as makers of these face shields provide proper documentation describing what these are, including stating that they are not FDA approved, clearly labeling materials used, etc.
We counted 32 listed models at the time of this writing. See the face shield section at the NIH 3D Print Exchange. Always check this section for latest revisions of shields – they evolve fast and often.
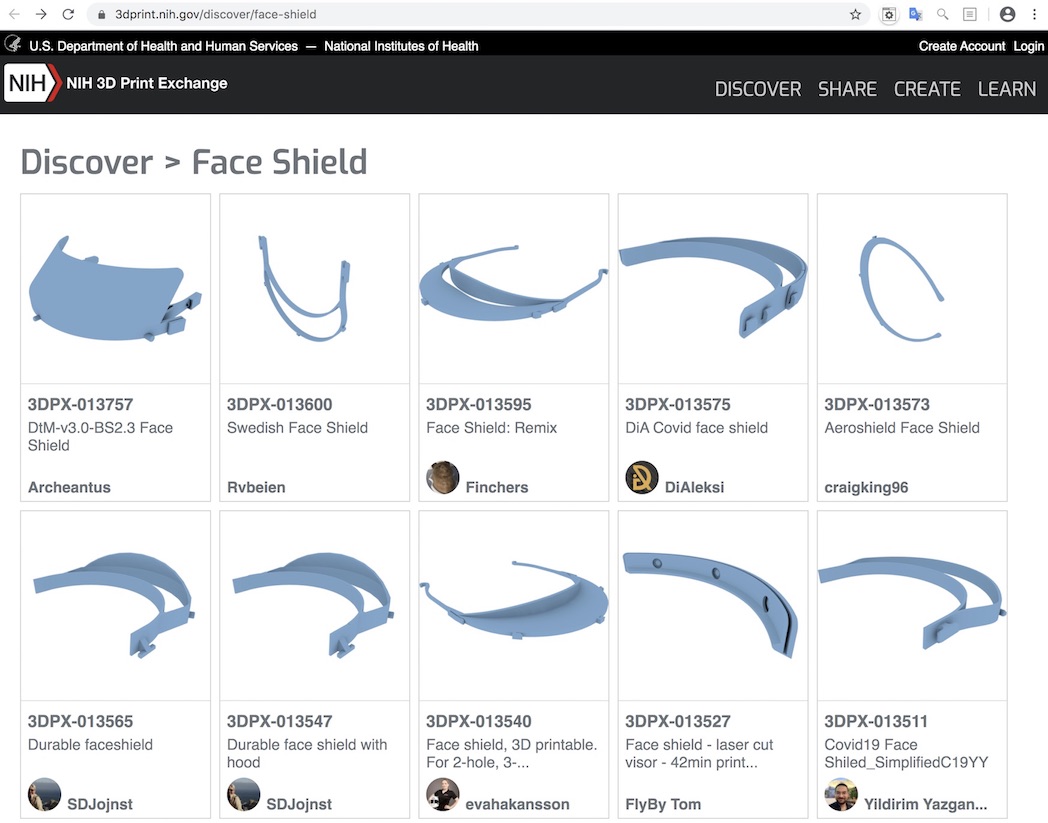
We have considered printing one of the first face shields adopted by official government entities, the Prusa Face Shield. It is designed by Josef Prusa’s company. But it is not NIH-listed.
Luckily, a remix of the Prusa shield by tprestero is. The latest version is NIH model 3DPX-013757. Many organizations in the US are printing this shield.
3DVerkstan face shield
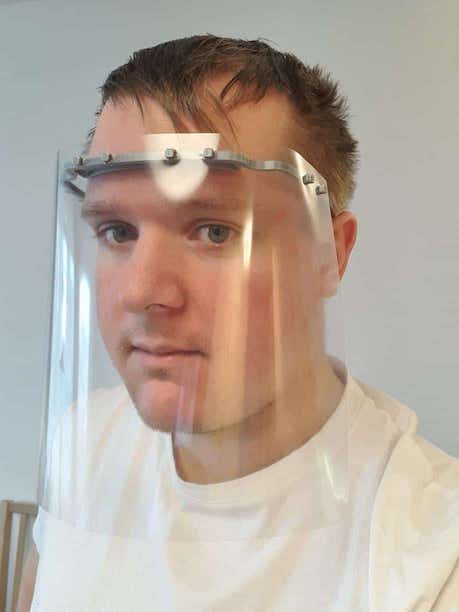
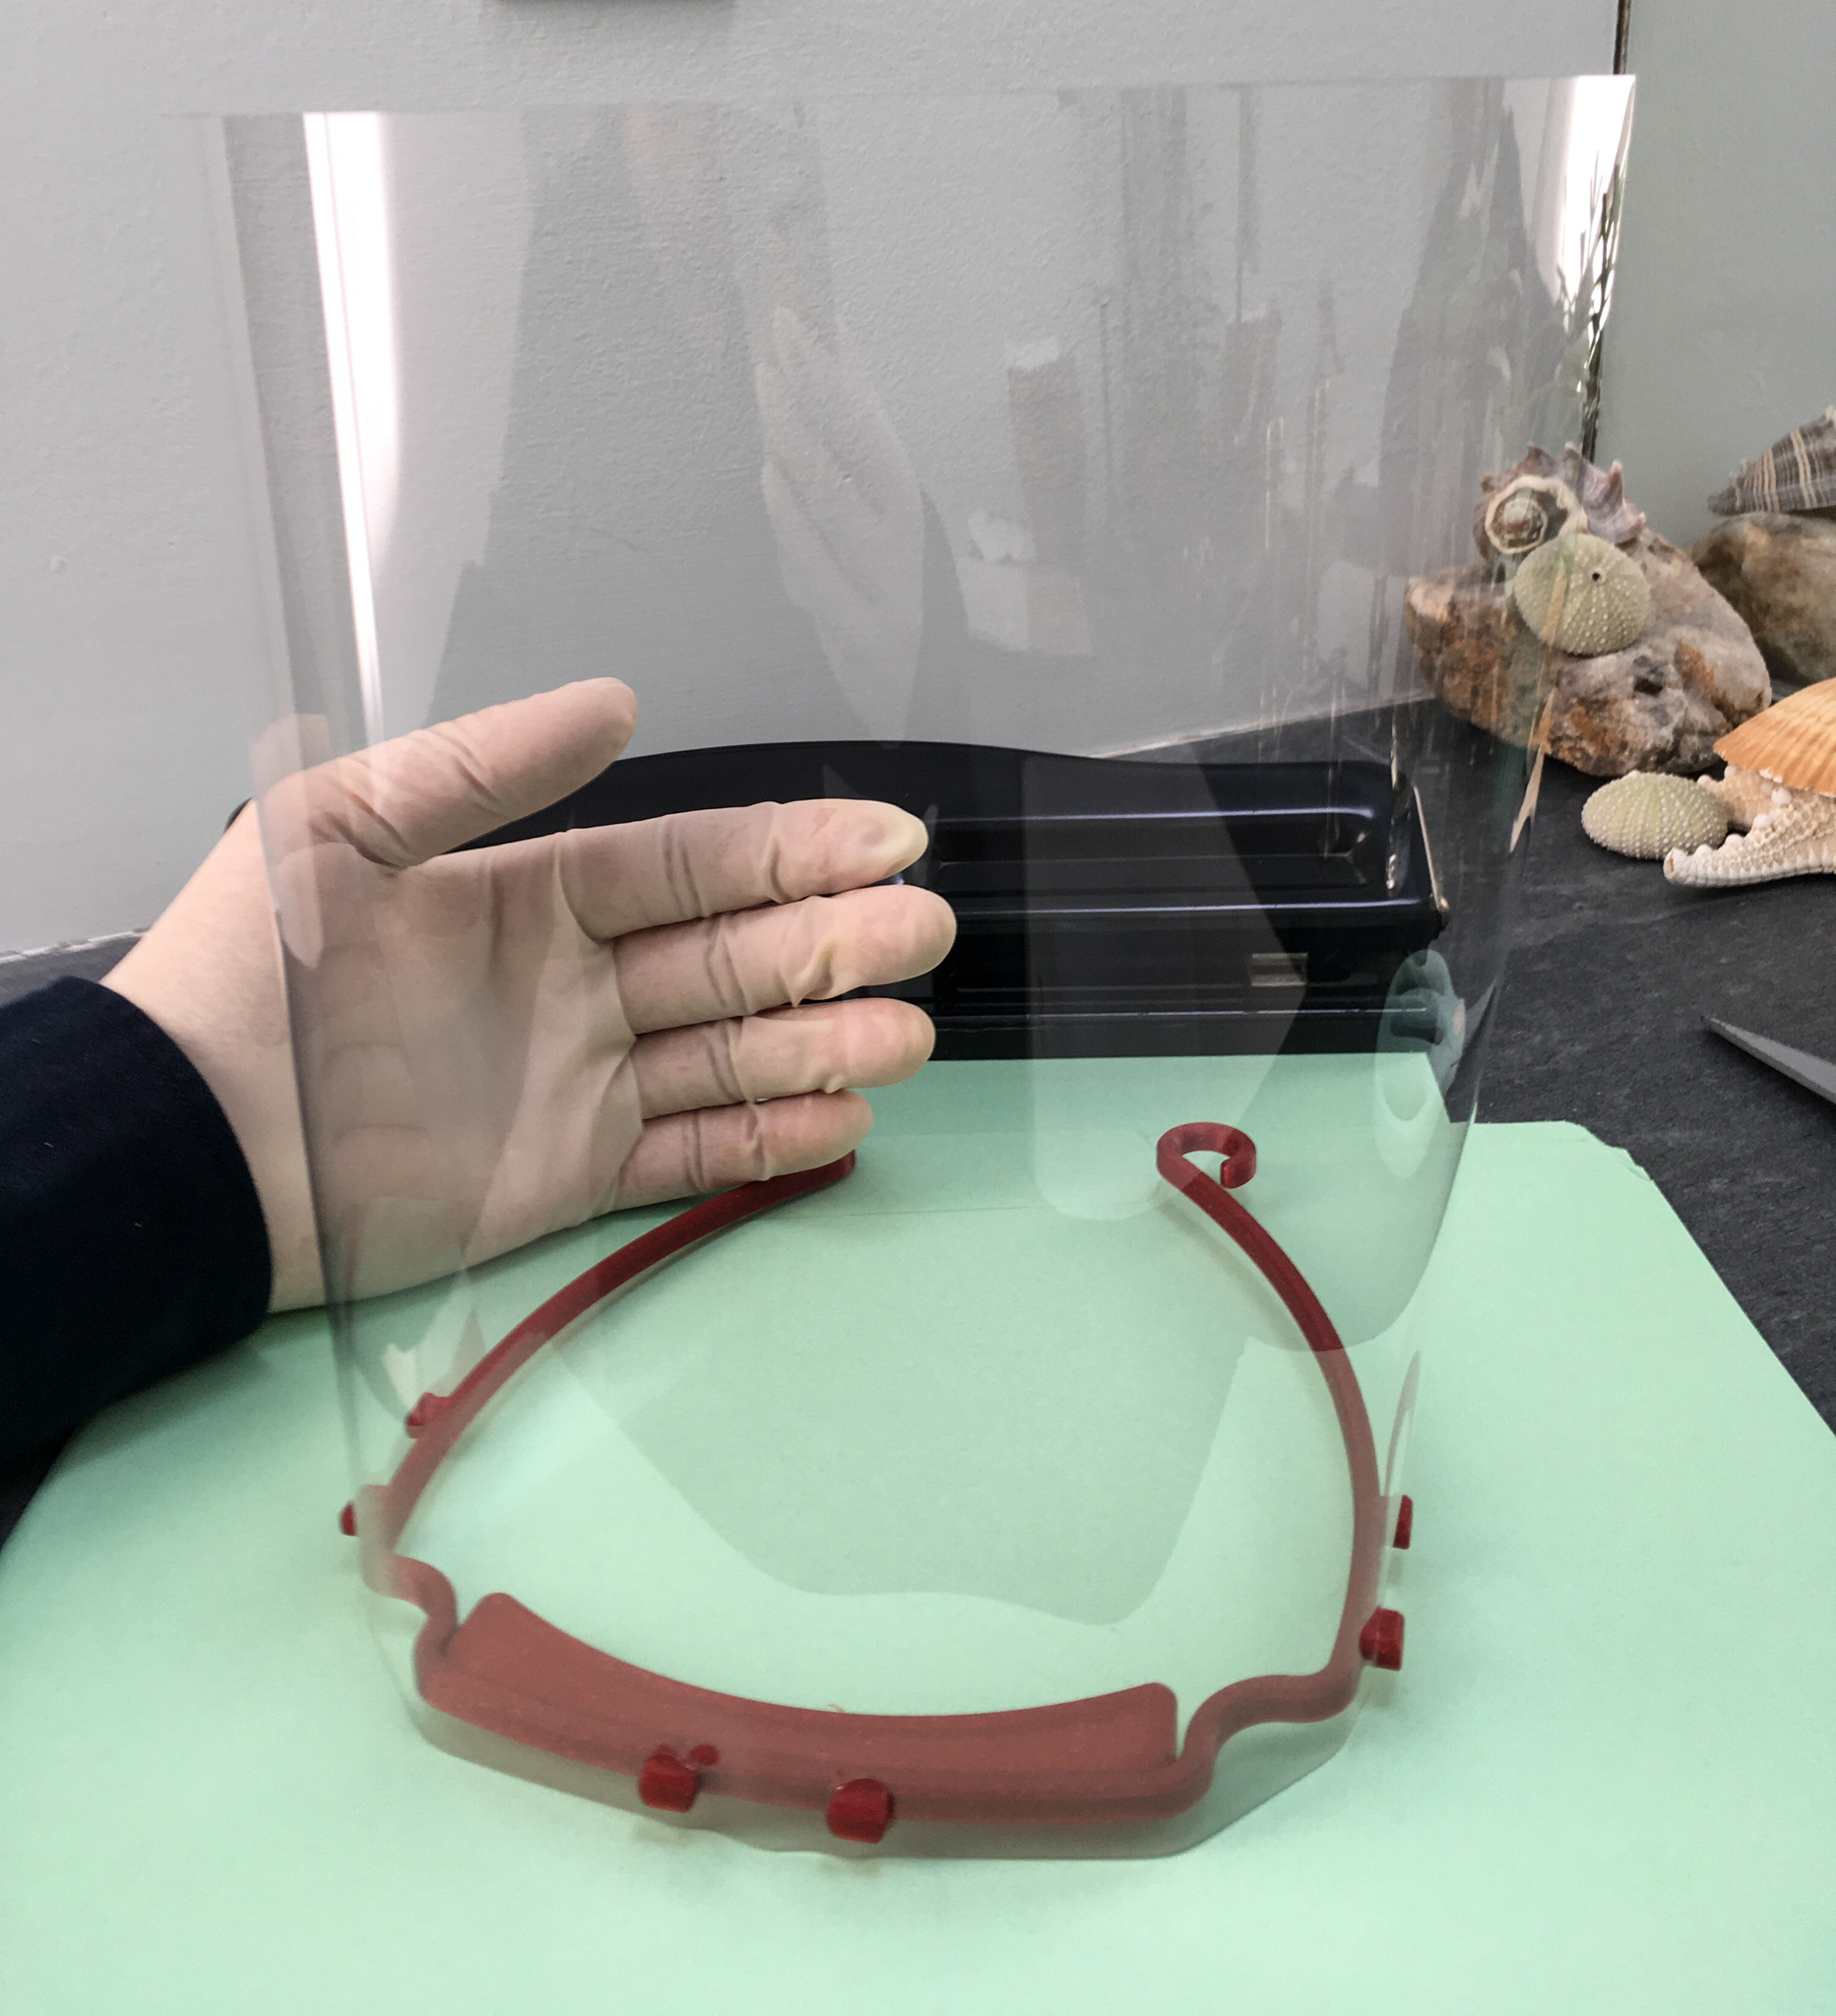
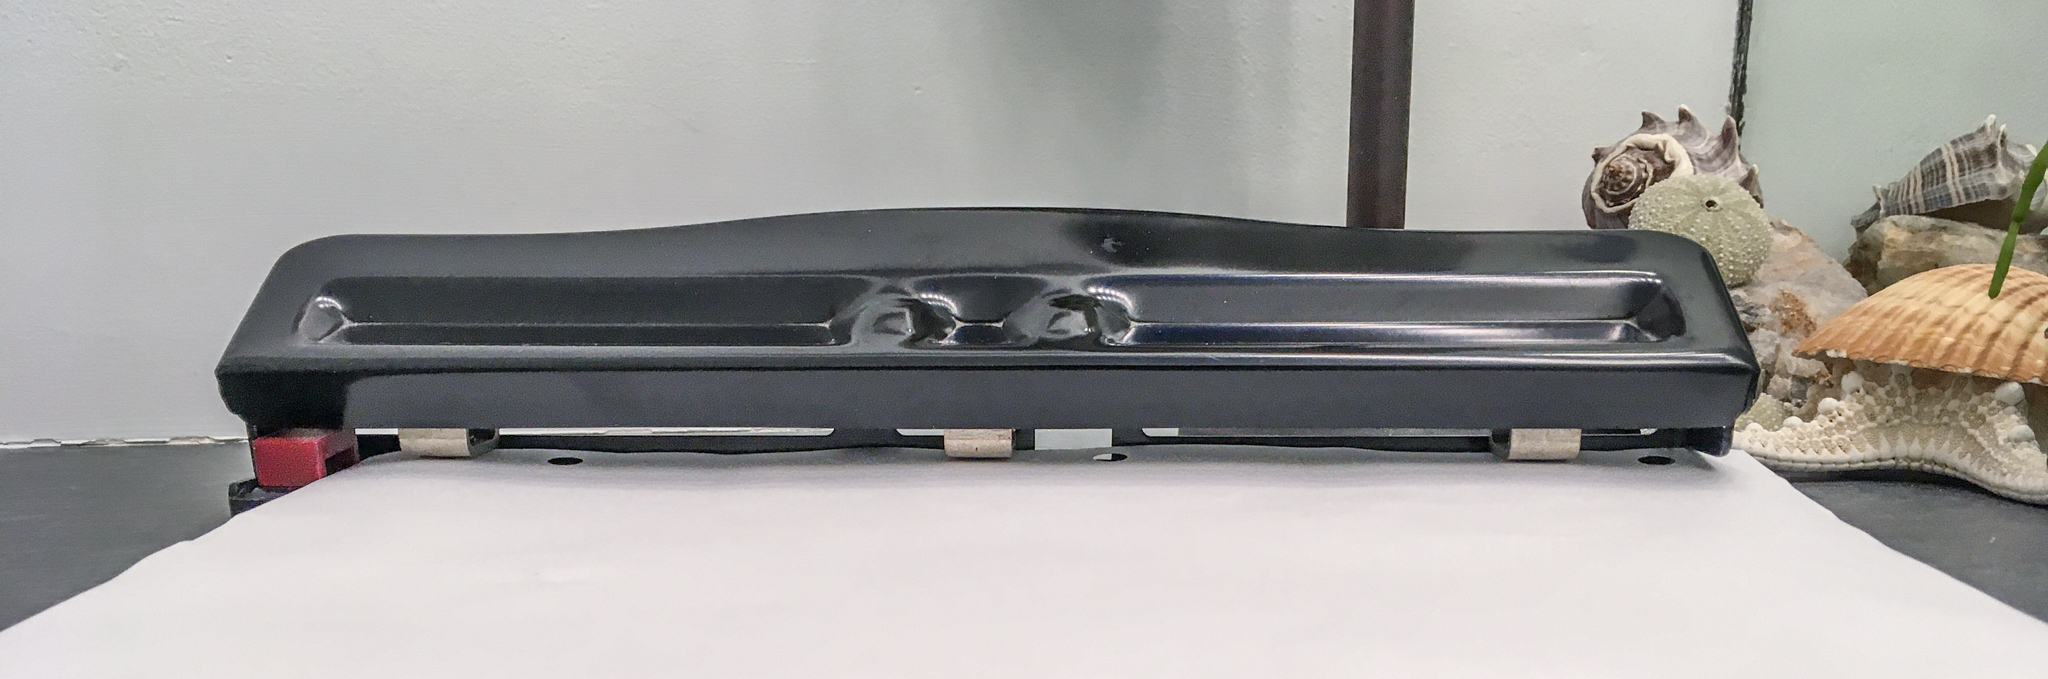
But we are partial to a different face shield. It is very simple, yet it is approved by NIH. We give you the NIH model 3DPX-013306, by 3DVerkstan. This model requires only one printed head band, and one sheet of projector transparency. The head band prints very fast, in less than an hour with the common 0.4mm nozzle that most hobbyists use.
Many organizations in the US has chosen this model to rally volunteers around their aid efforts. This includes the Maker Response Hub campaign by filament maker MatterHackers, and the 3D printing aid campaign by Nassau County Library Association in Long Island. There is Rapid Maker Response Group in Jersey City coordinating massive responses to the crisis (jcrmrg). We recommend that volunteers join one of these organizations, instead of trying to find recipients themselves.
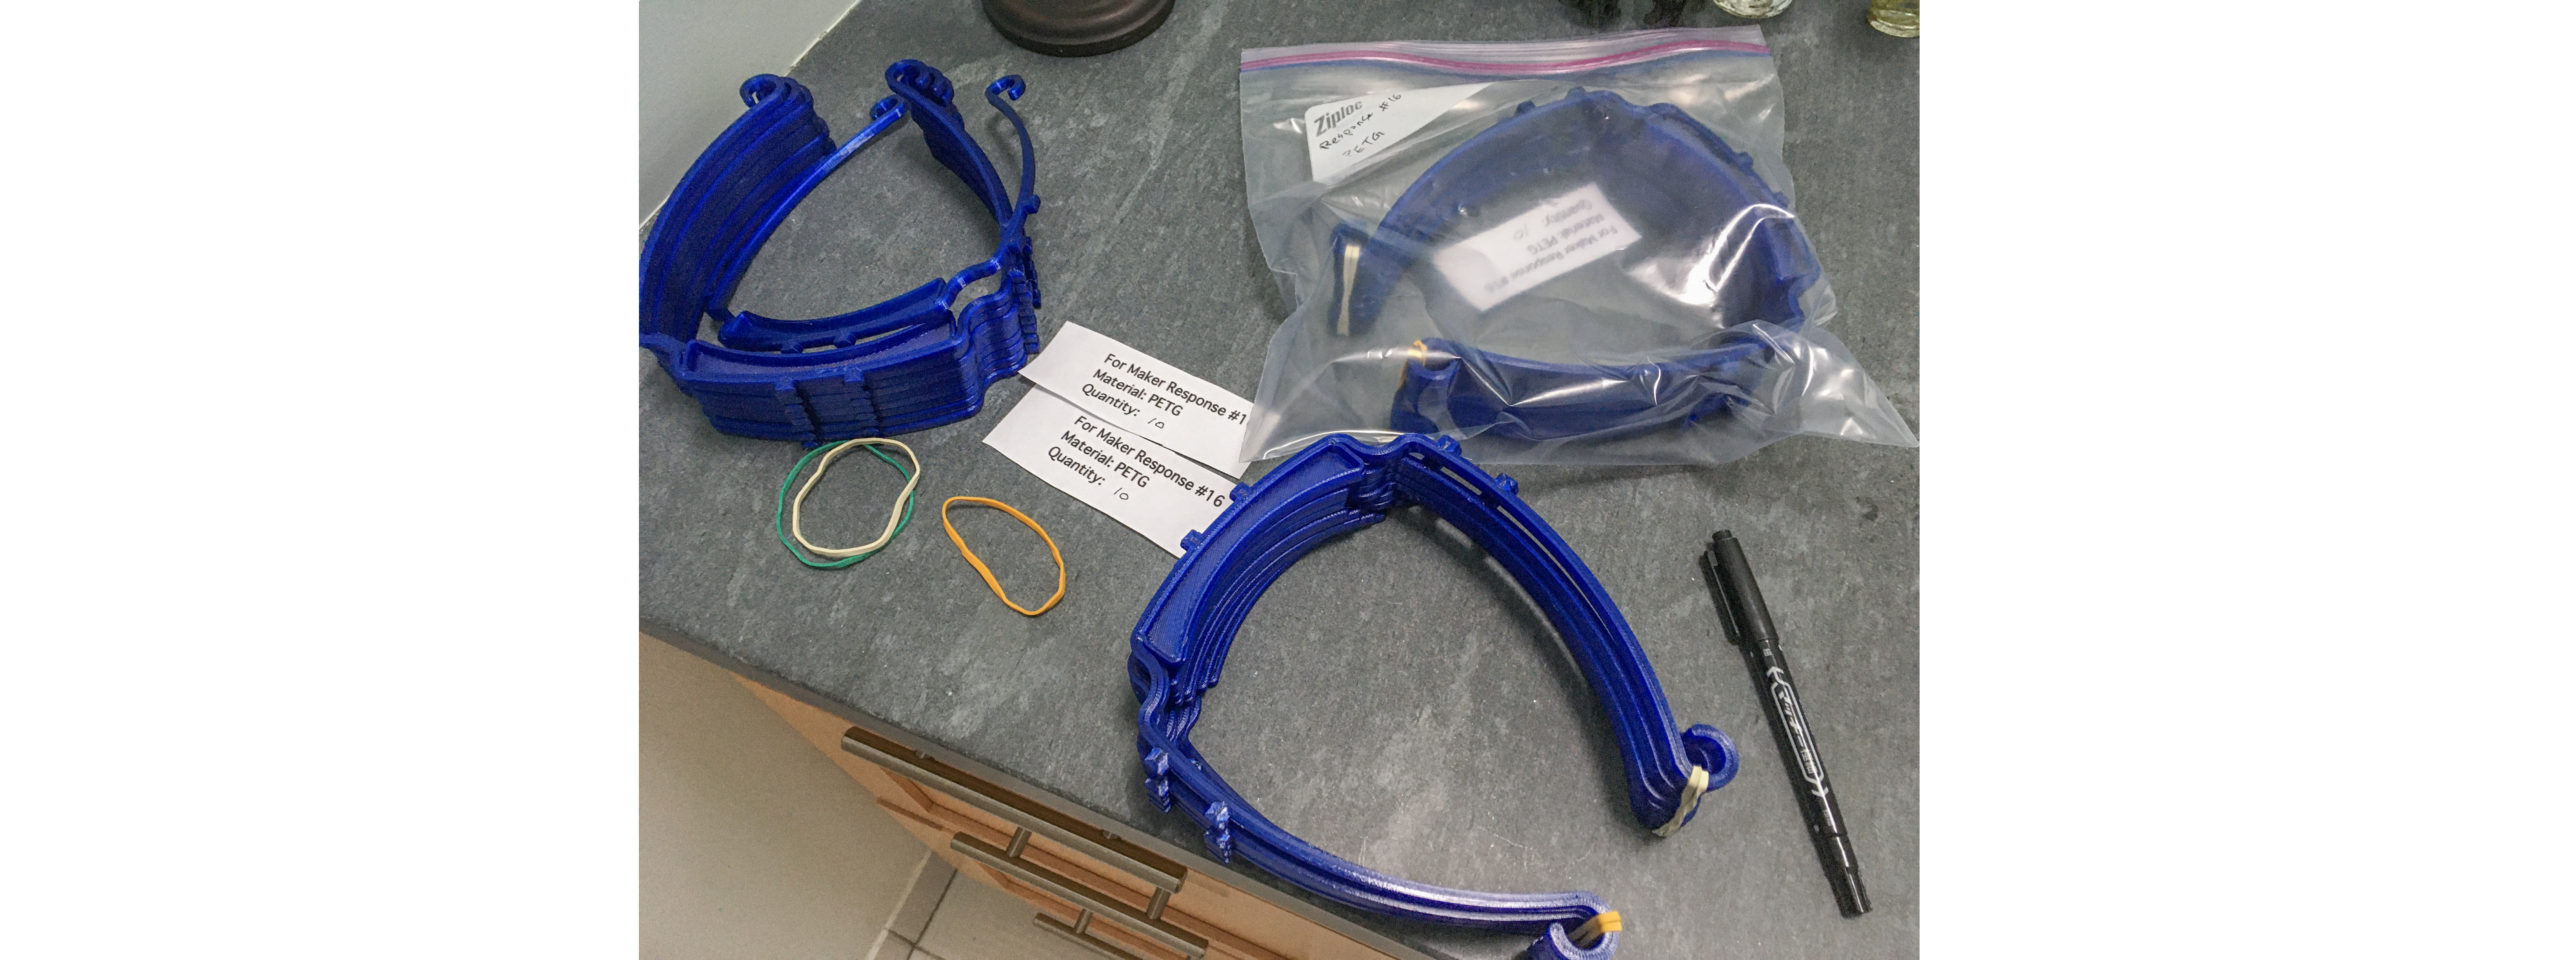
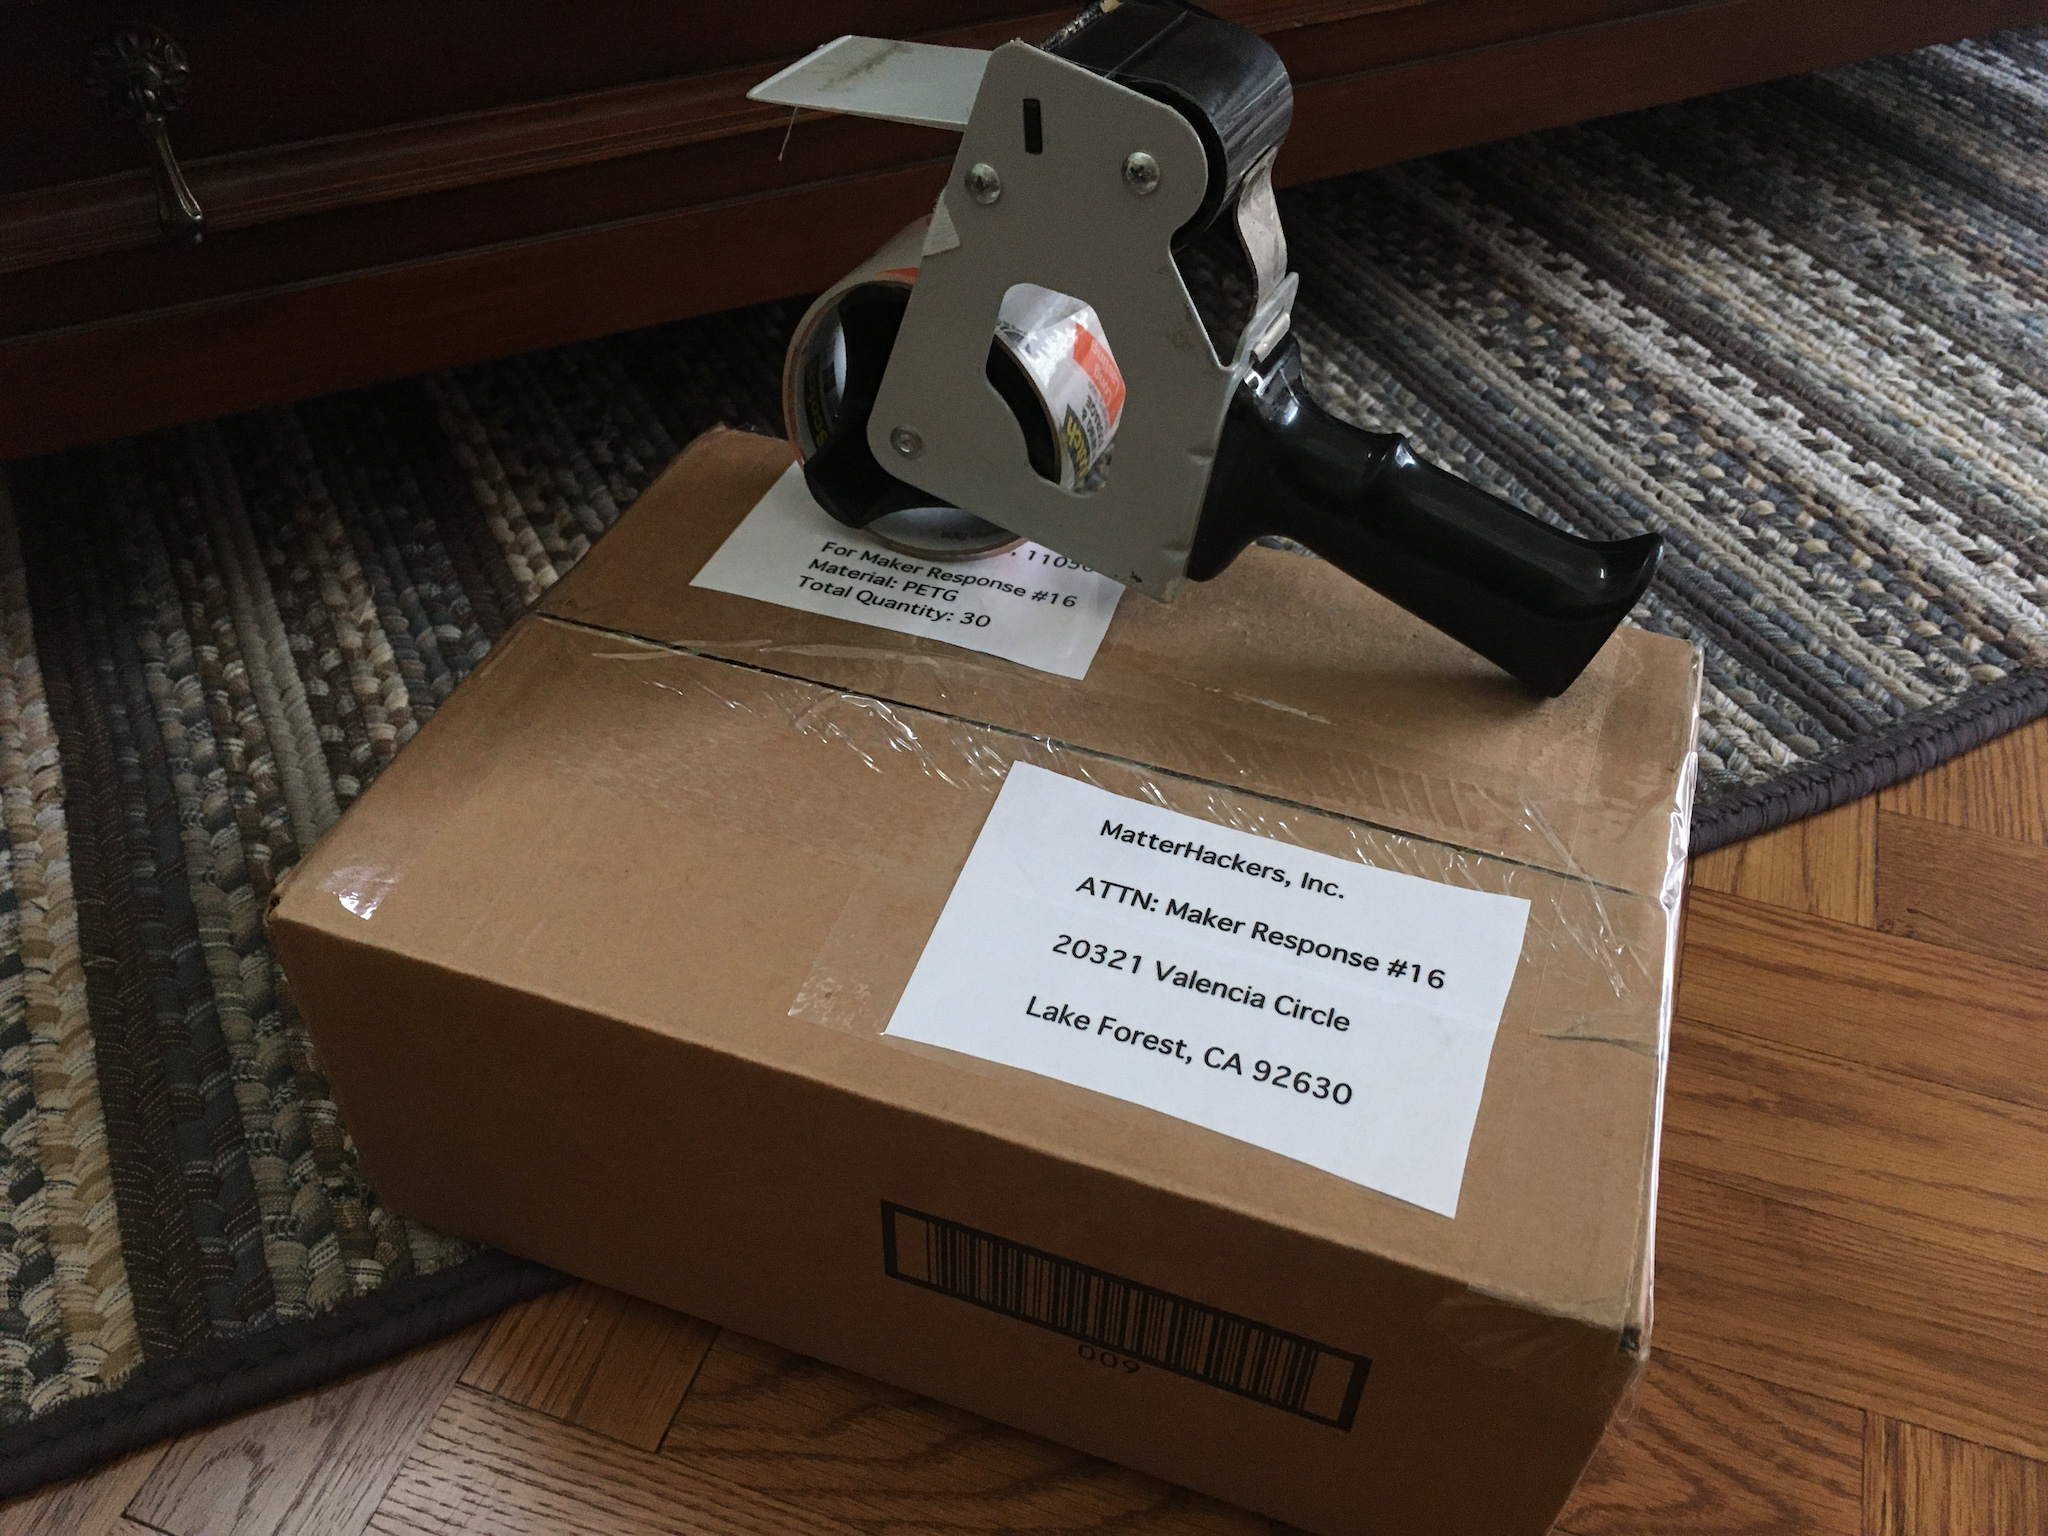
#MakerResponseHub mission #16
We received an invitation to commit to making at least 30 head bands for #MakerResponseHub. Challenge was accepted.
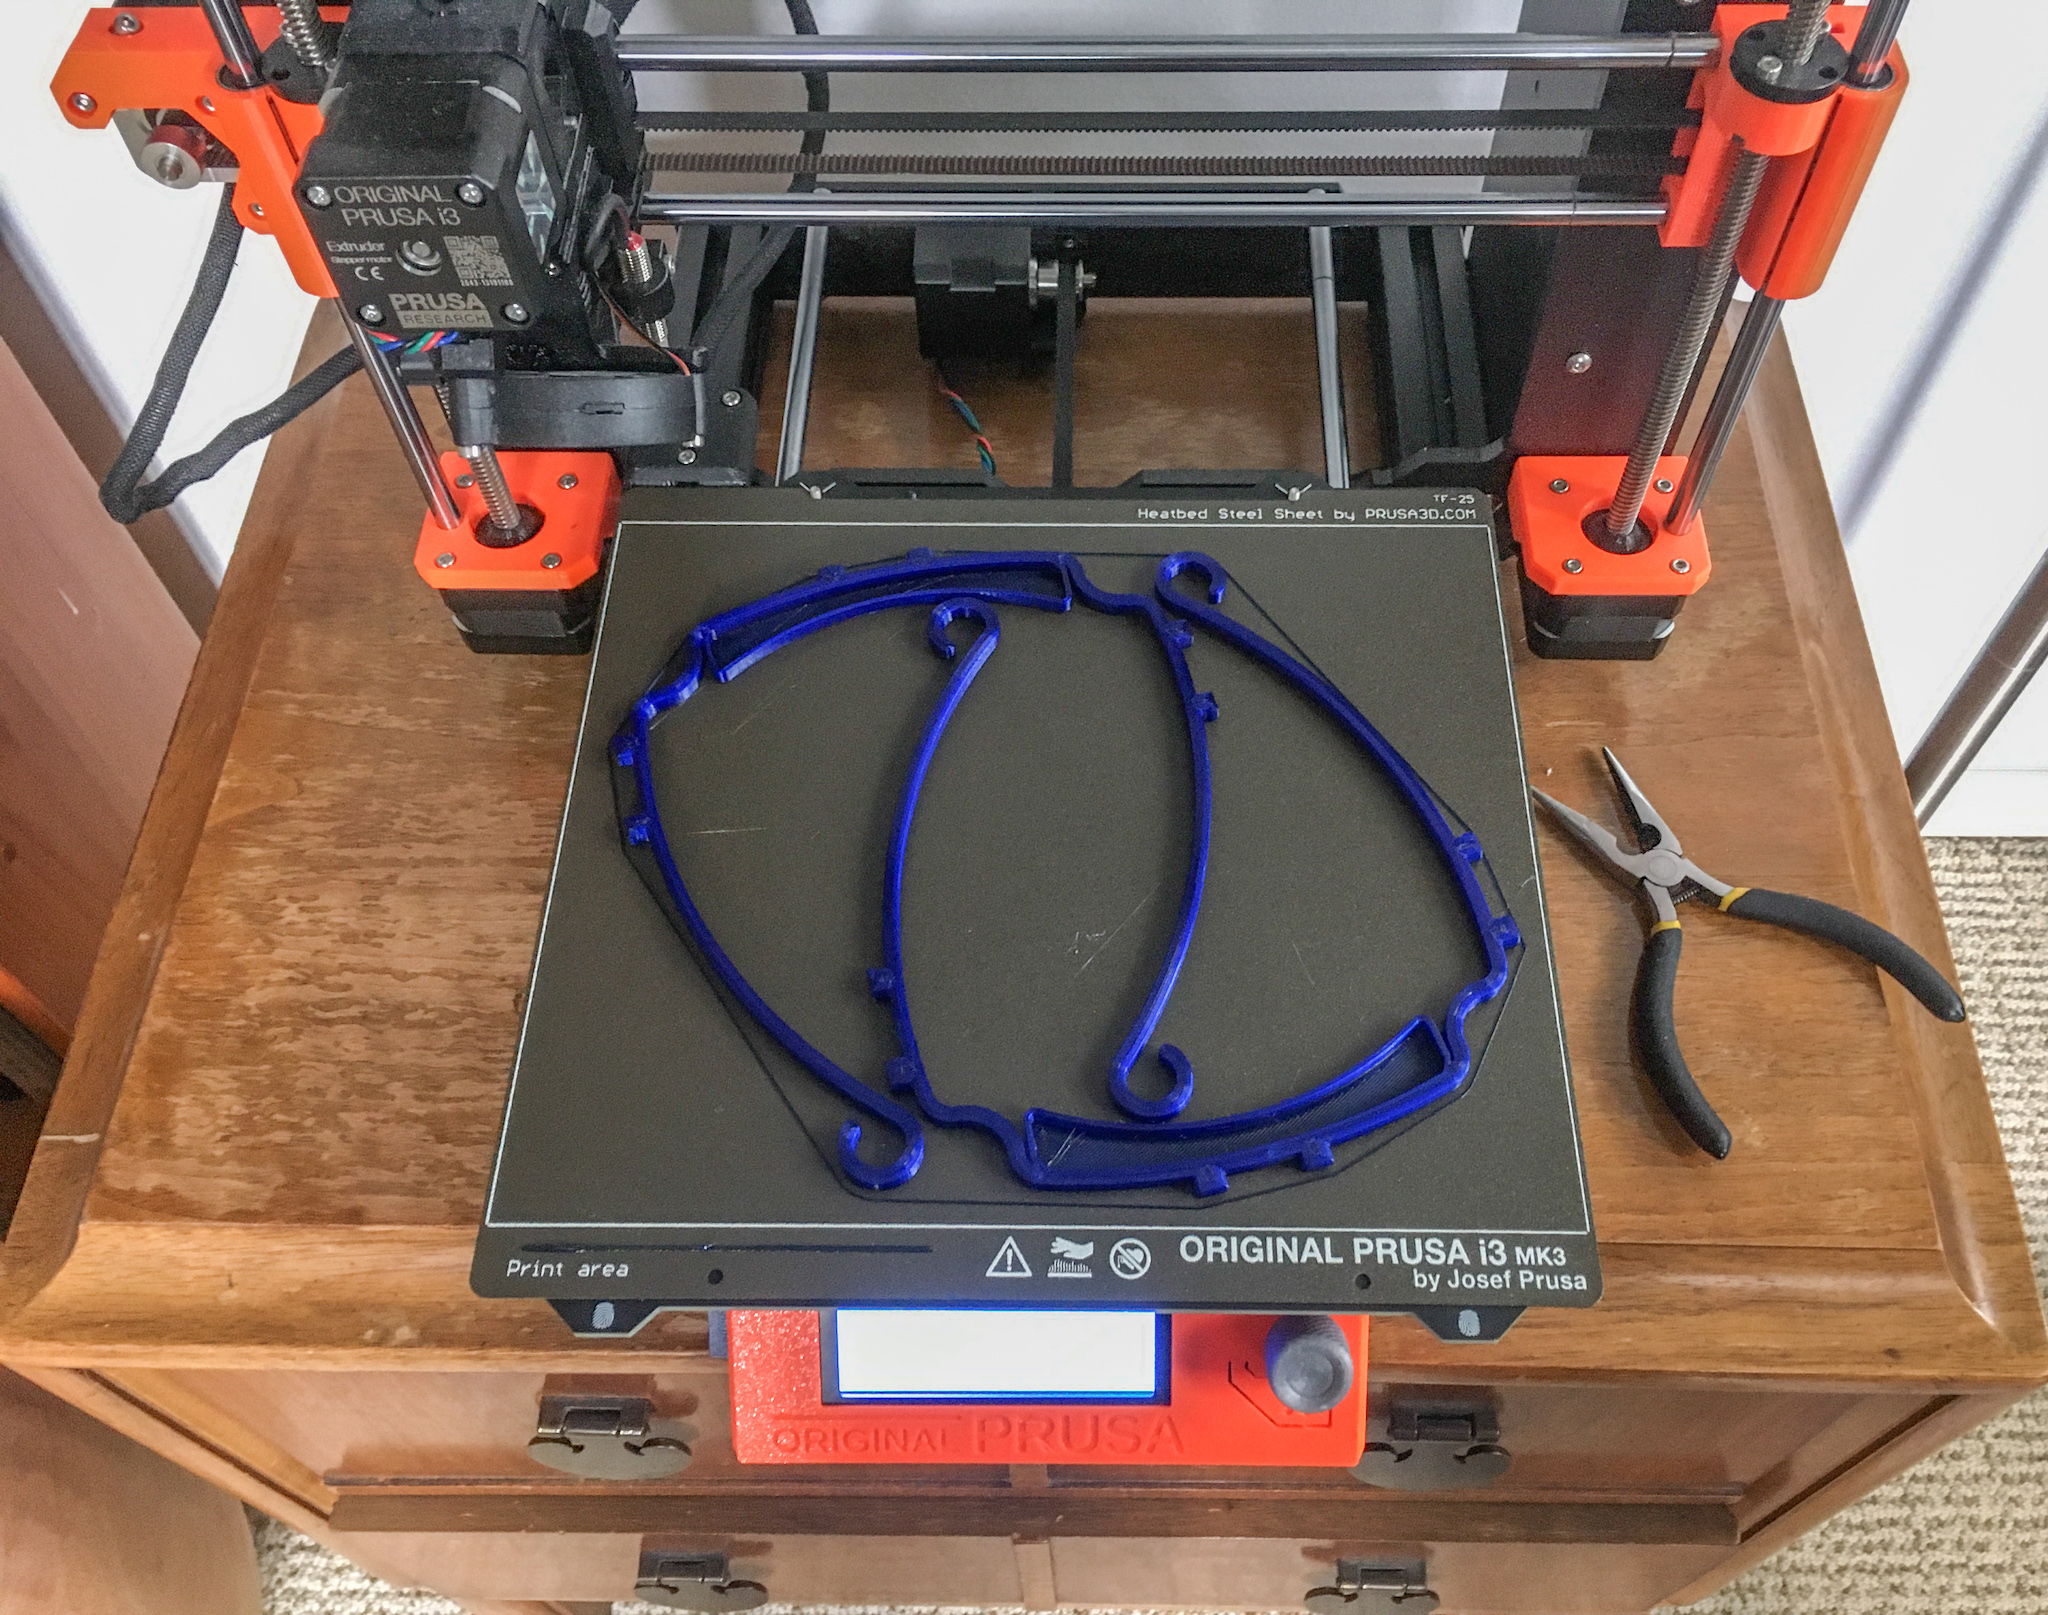
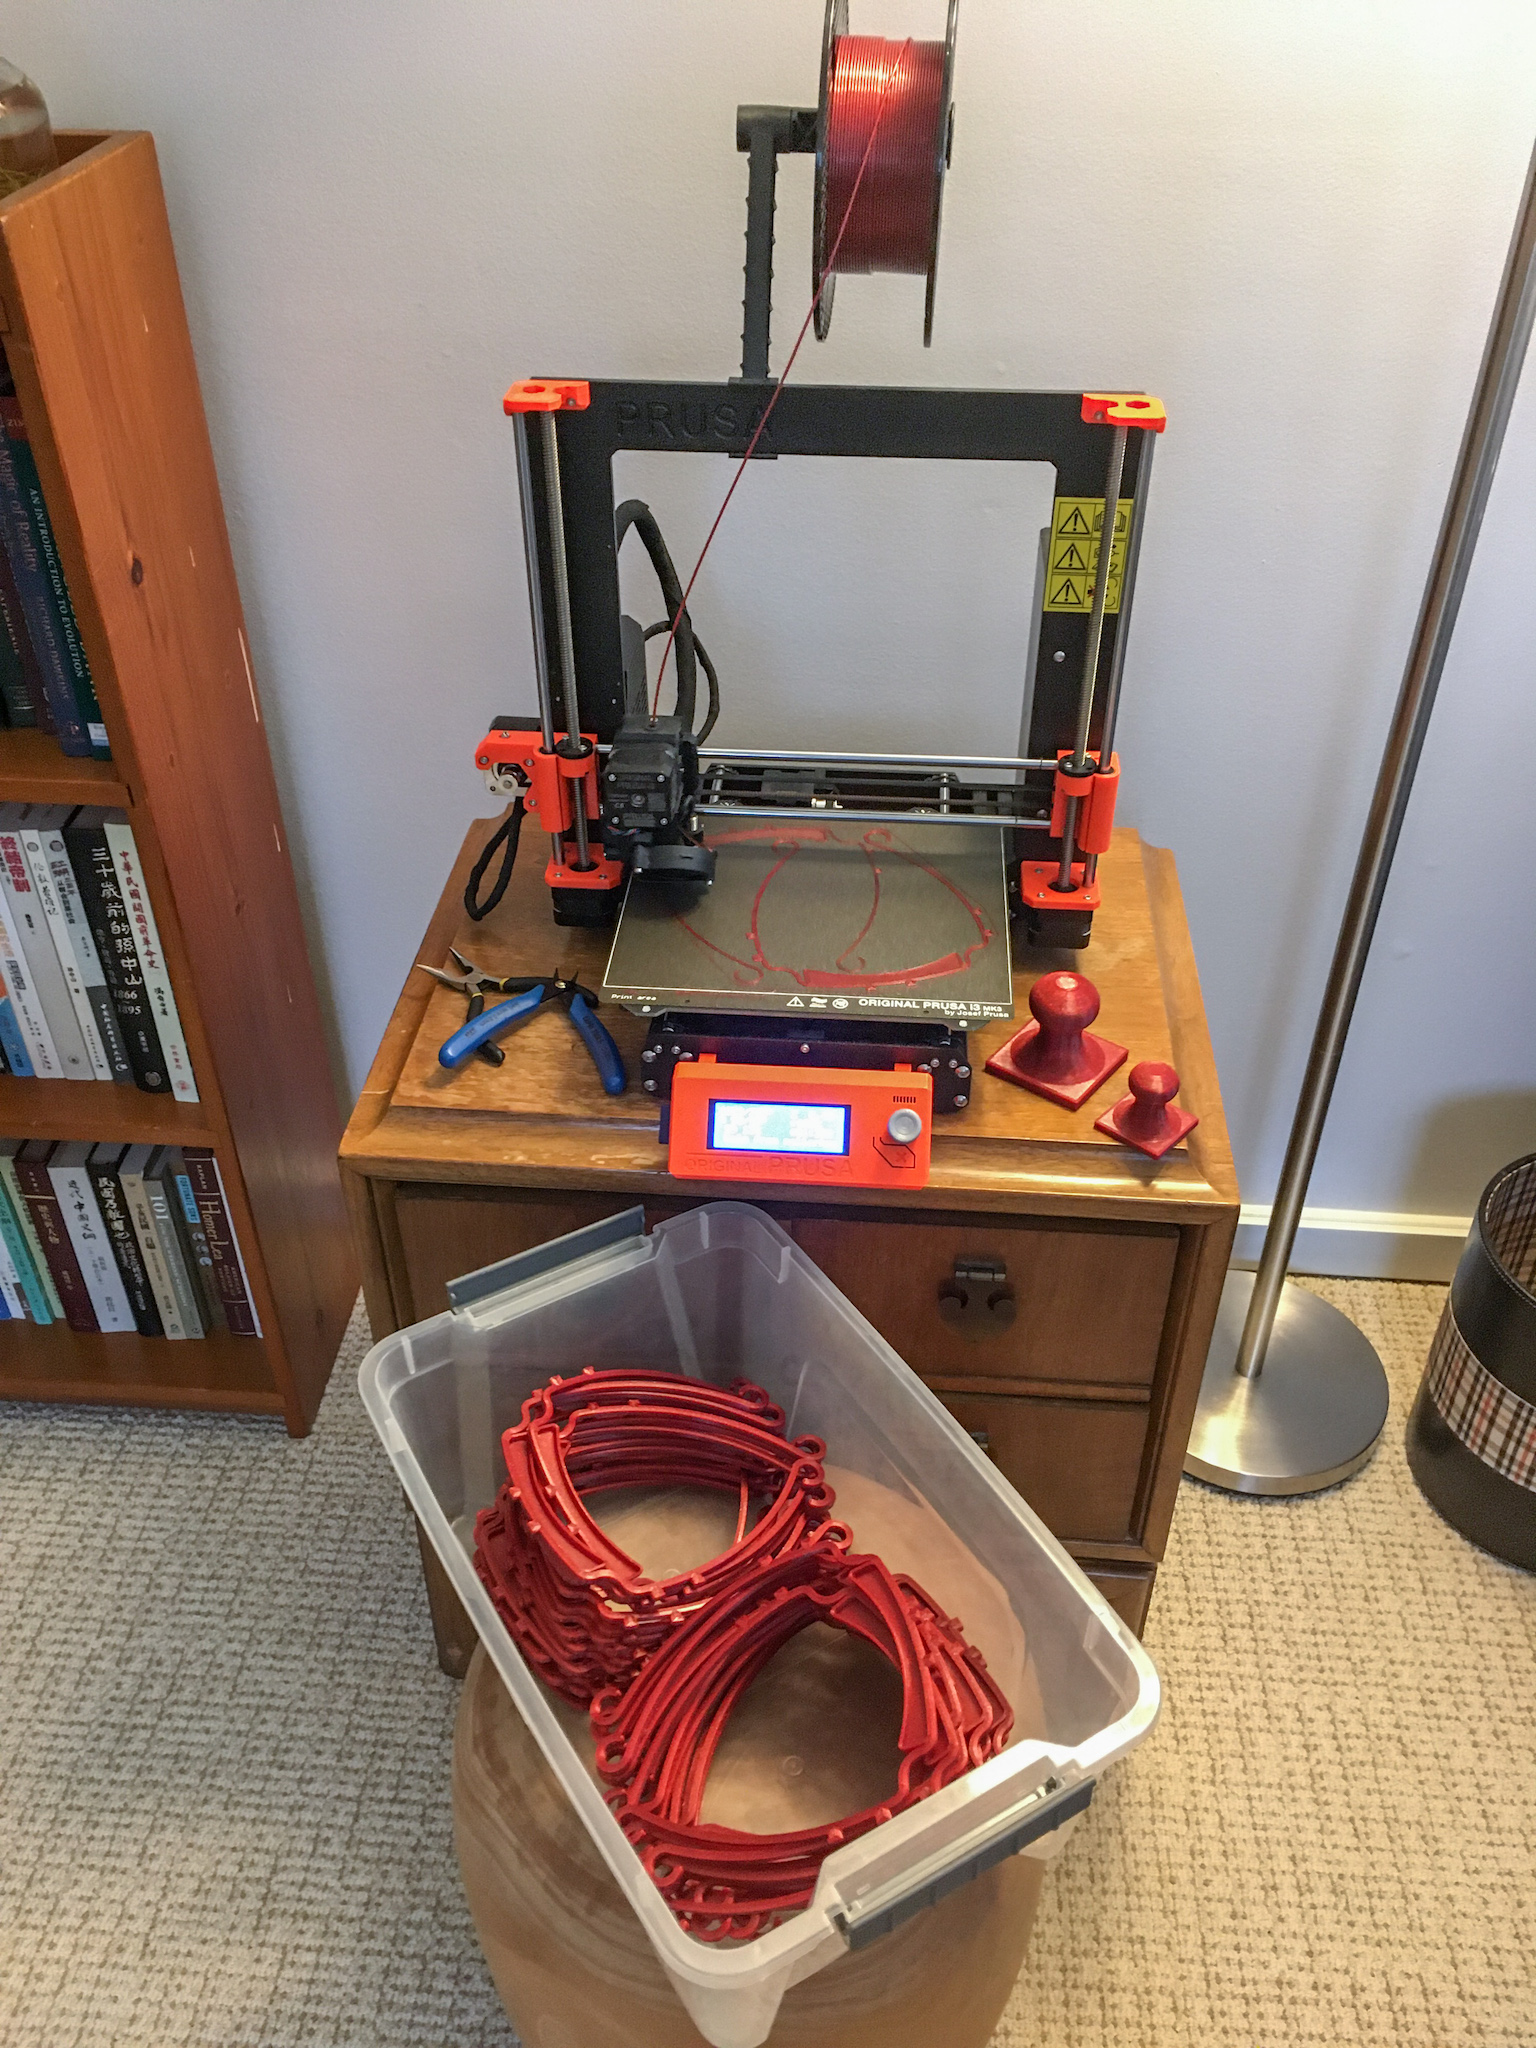
We were able to squeeze in two copies of the head band on the 25cm x 21cm printer bed of a Prusa MK3S. This allowed us to print two head bands at a time, reducing the frequency of manual intervention required to remove a print and start the next.
With a 0.4mm nozzle, we were able to print 30 head bands in less than 30 (printing) hours. The effort actually took 3 days, over 15 print jobs, after work. The real hassle was having to remove prints and restart a new job every 2 hours, even in the dead of the night.
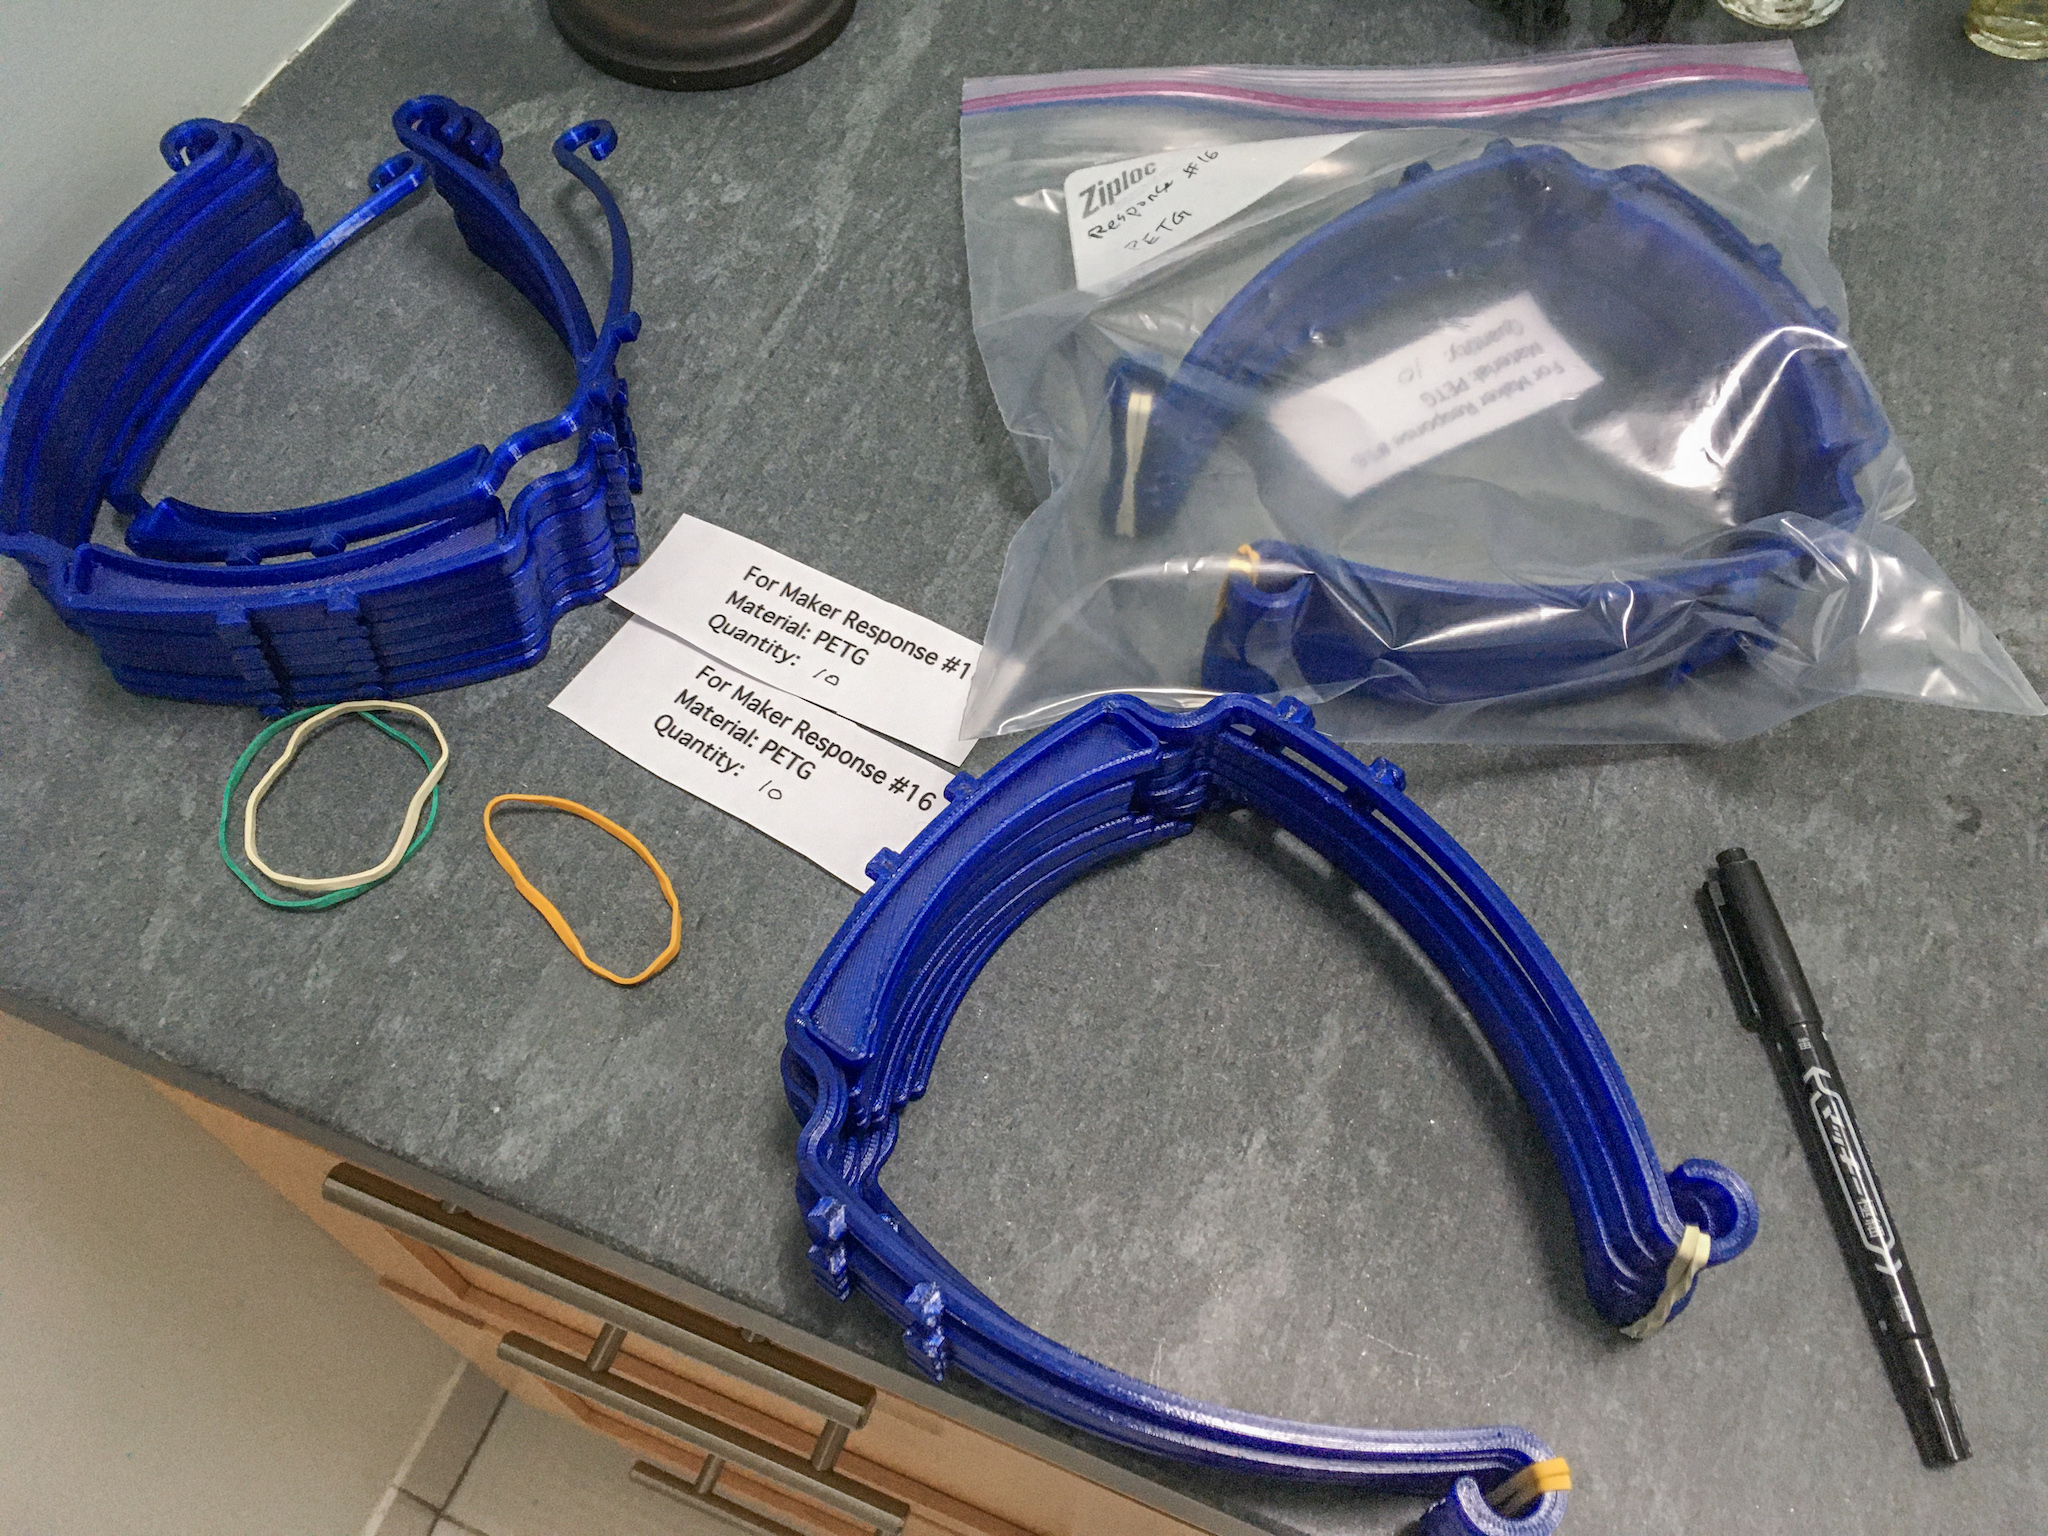
We chose to print with PETG, the recommended material. It is more resistant to cleaning chemicals. But unlike PLA, this material stringed like crazy. All leftover strings were manually cleaned. Each head band was wiped down. And all 30 prints were packed.
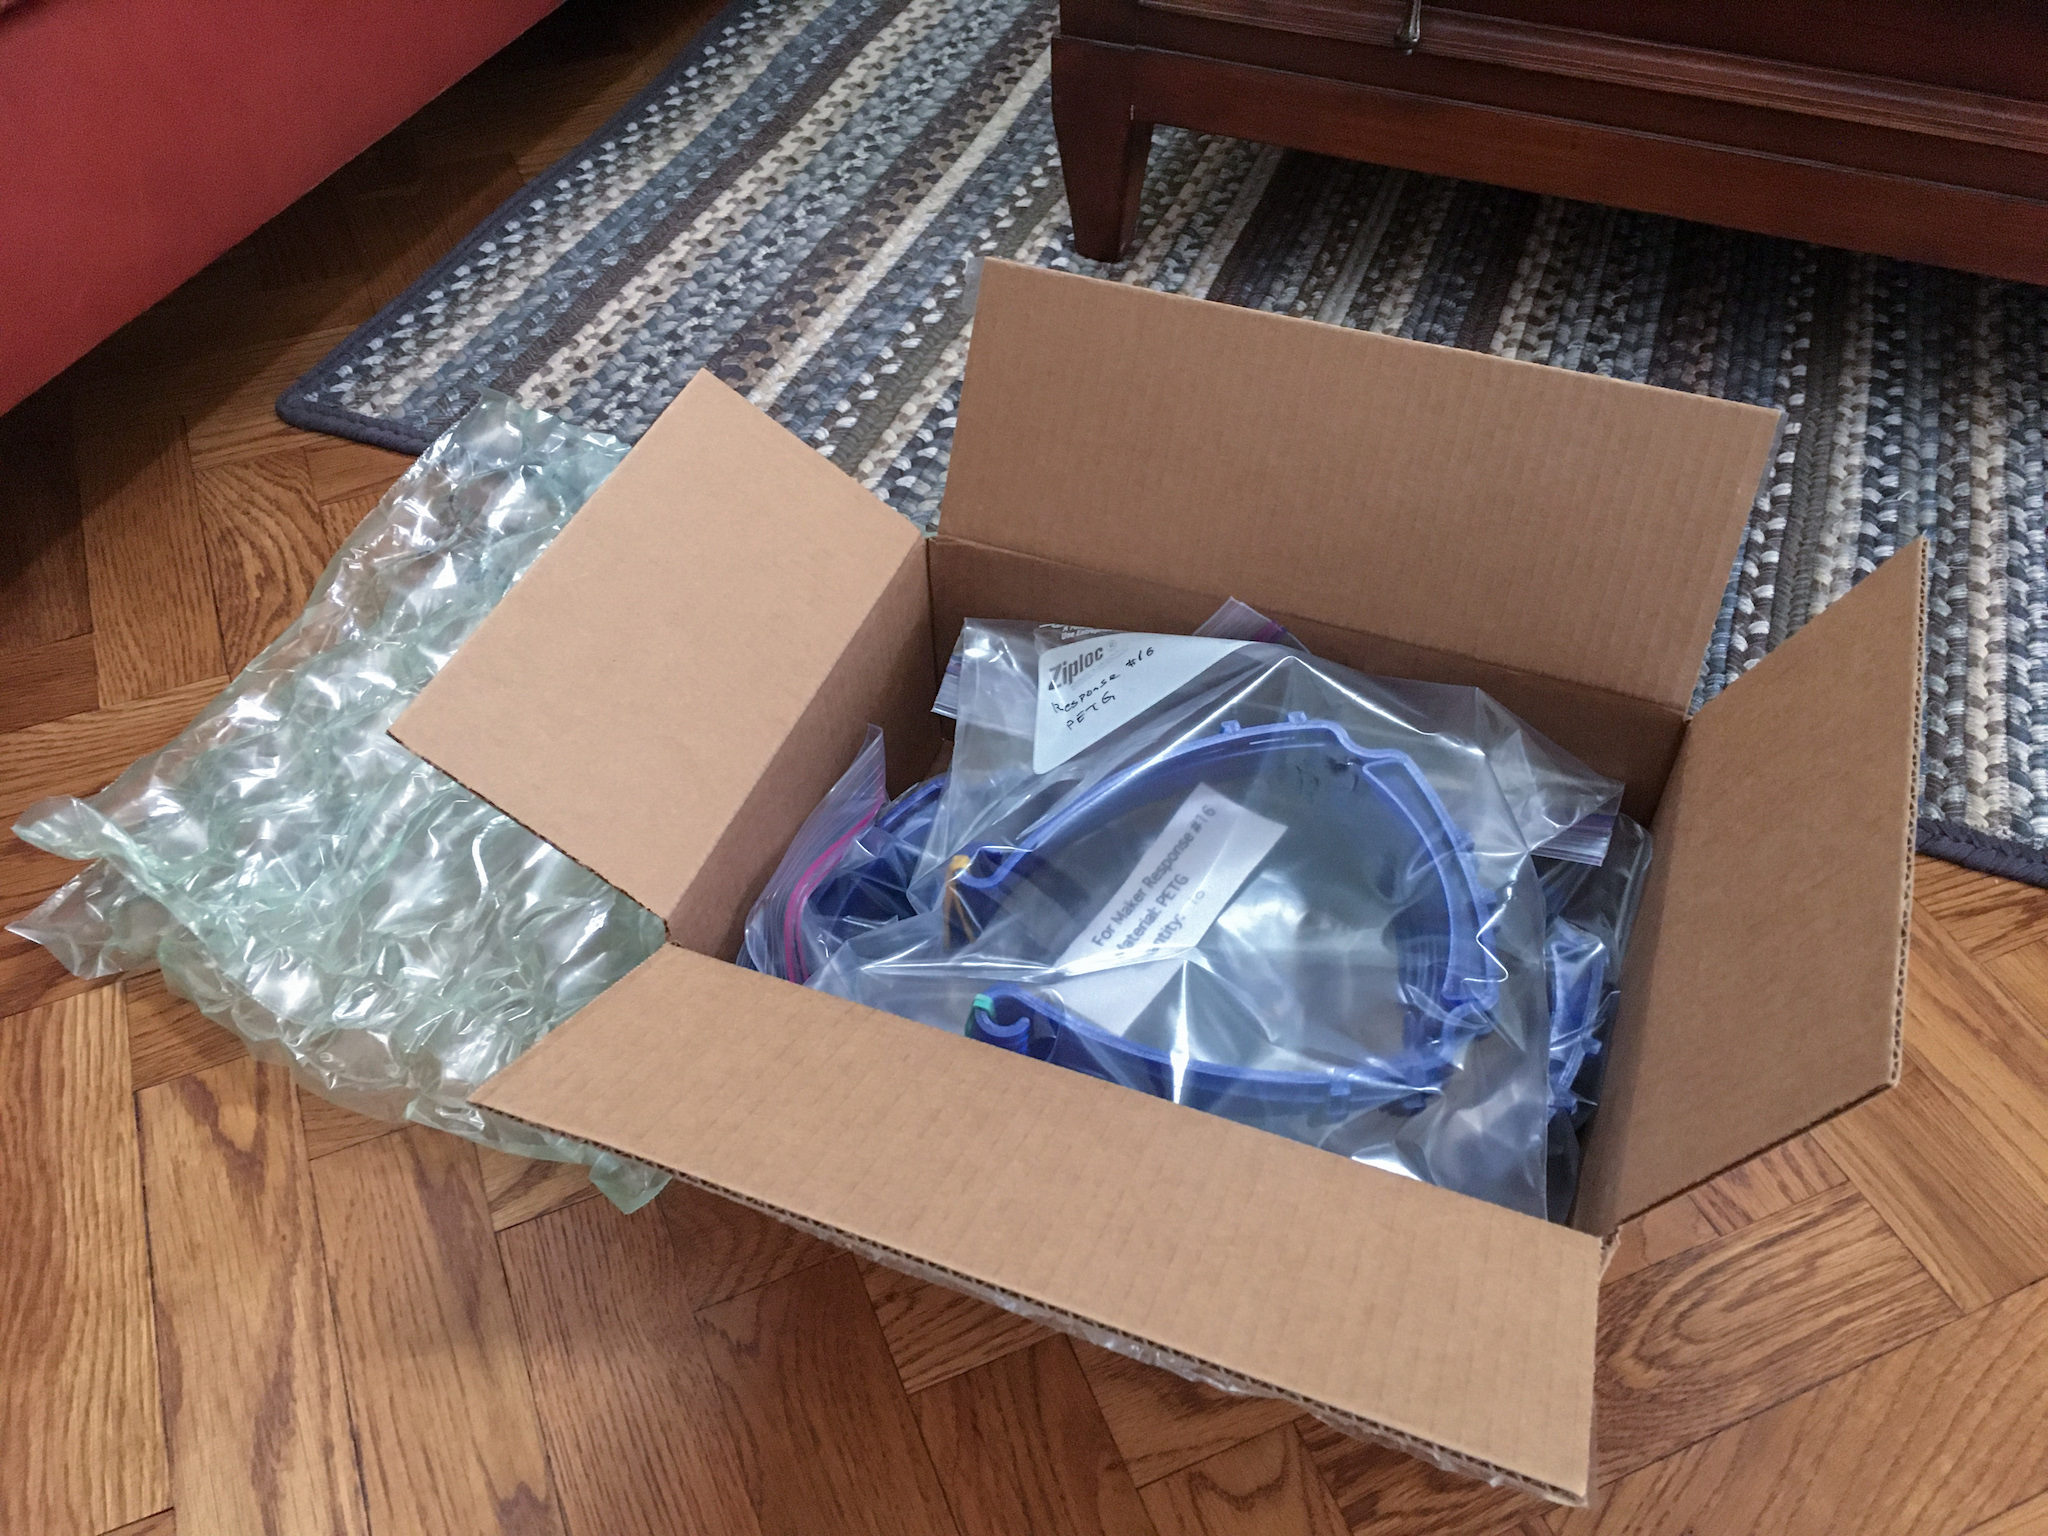
Mission accomplished!
How do I help?
If you have a 3D printer, you should sign up with one of the organizations that coordinate between folks who can print, and hospitals that need them. We mentioned the MatterHackers campaign and the Long Island library association campaign earlier. If you are in the New York/New Jersey area, we strongly recommend that you donate to the Rapid Maker Response Group in Jersey City (jcrmrg.org) which we are now a member of. If you print are able to contribute 3d prints, please join the group.
Usually these campaigns will have their chosen face shield model(s). You should go by their instructions. Additionally you should consult the creator’s own article which includes links to videos. Also consult the creator’s printing guide.
However, if they have chosen the same #3dvfaceshield model, and you have a Prusa MK3S, then you can consult our quick instructions below, to supplement what you find elsewhere.
Instructions for Prusa MK3S
If you happen to have a Prusa MK2, MK3, or MK3S, then you may find these supplementary information useful. You will have a 25cm x 21cm printer bed. Your initial print was probably done with PLA. Perhaps you have also moved onto printing with PETG. And you probably run the PrusaSlicer. Very likely you are still using the E3D V6 Hotend and the 0.4mm nozzle that came with your printer.
If that is your setup, you can simply download .3mf projects we have created for PLA and PETG. It is based on the version of #3dvfaceshield STL model that #MakerResponseHub chose for mission #16. You can skip most of steps shown in below subsections, if you start with these .3mf projects.
Download this zip file to find the following files:
- STL model of Face Shield Head Band from mission #16
- 3mf project file for PrusaSlicer for PLA
- 3mf project file for PrusaSlicer for PETG
- STL model of a spacer for punching 6 holes on transparencies
- PDF template showing holes to punch and corners to round off
Arranging head band on printer bed
The average 3d printing enthusiast is unable to produce face shields non-stop, 24-hours 7-days. The biggest hurdle is that we must manually remove a printed model from the printer bed, before starting up the next job. Some folks have created automated print ejection systems. Devin from MakeAnything writes gcode to force the print head to bump a printed model off the bed.
But we are not auto-ejecting anything like that. The head band is only 5mm tall. We’d have to use the nozzle to nudge it. And we would never publish risky gcode here, even if we made it work ourselves.
The best we can do is to arrange as many copies of a model on the printer bed, so we can minimize the numbers of manual interventions. A good arrangement is shown below, allowing us to print 2 head bands at a time, on a 25cm x 21cm printer bed.
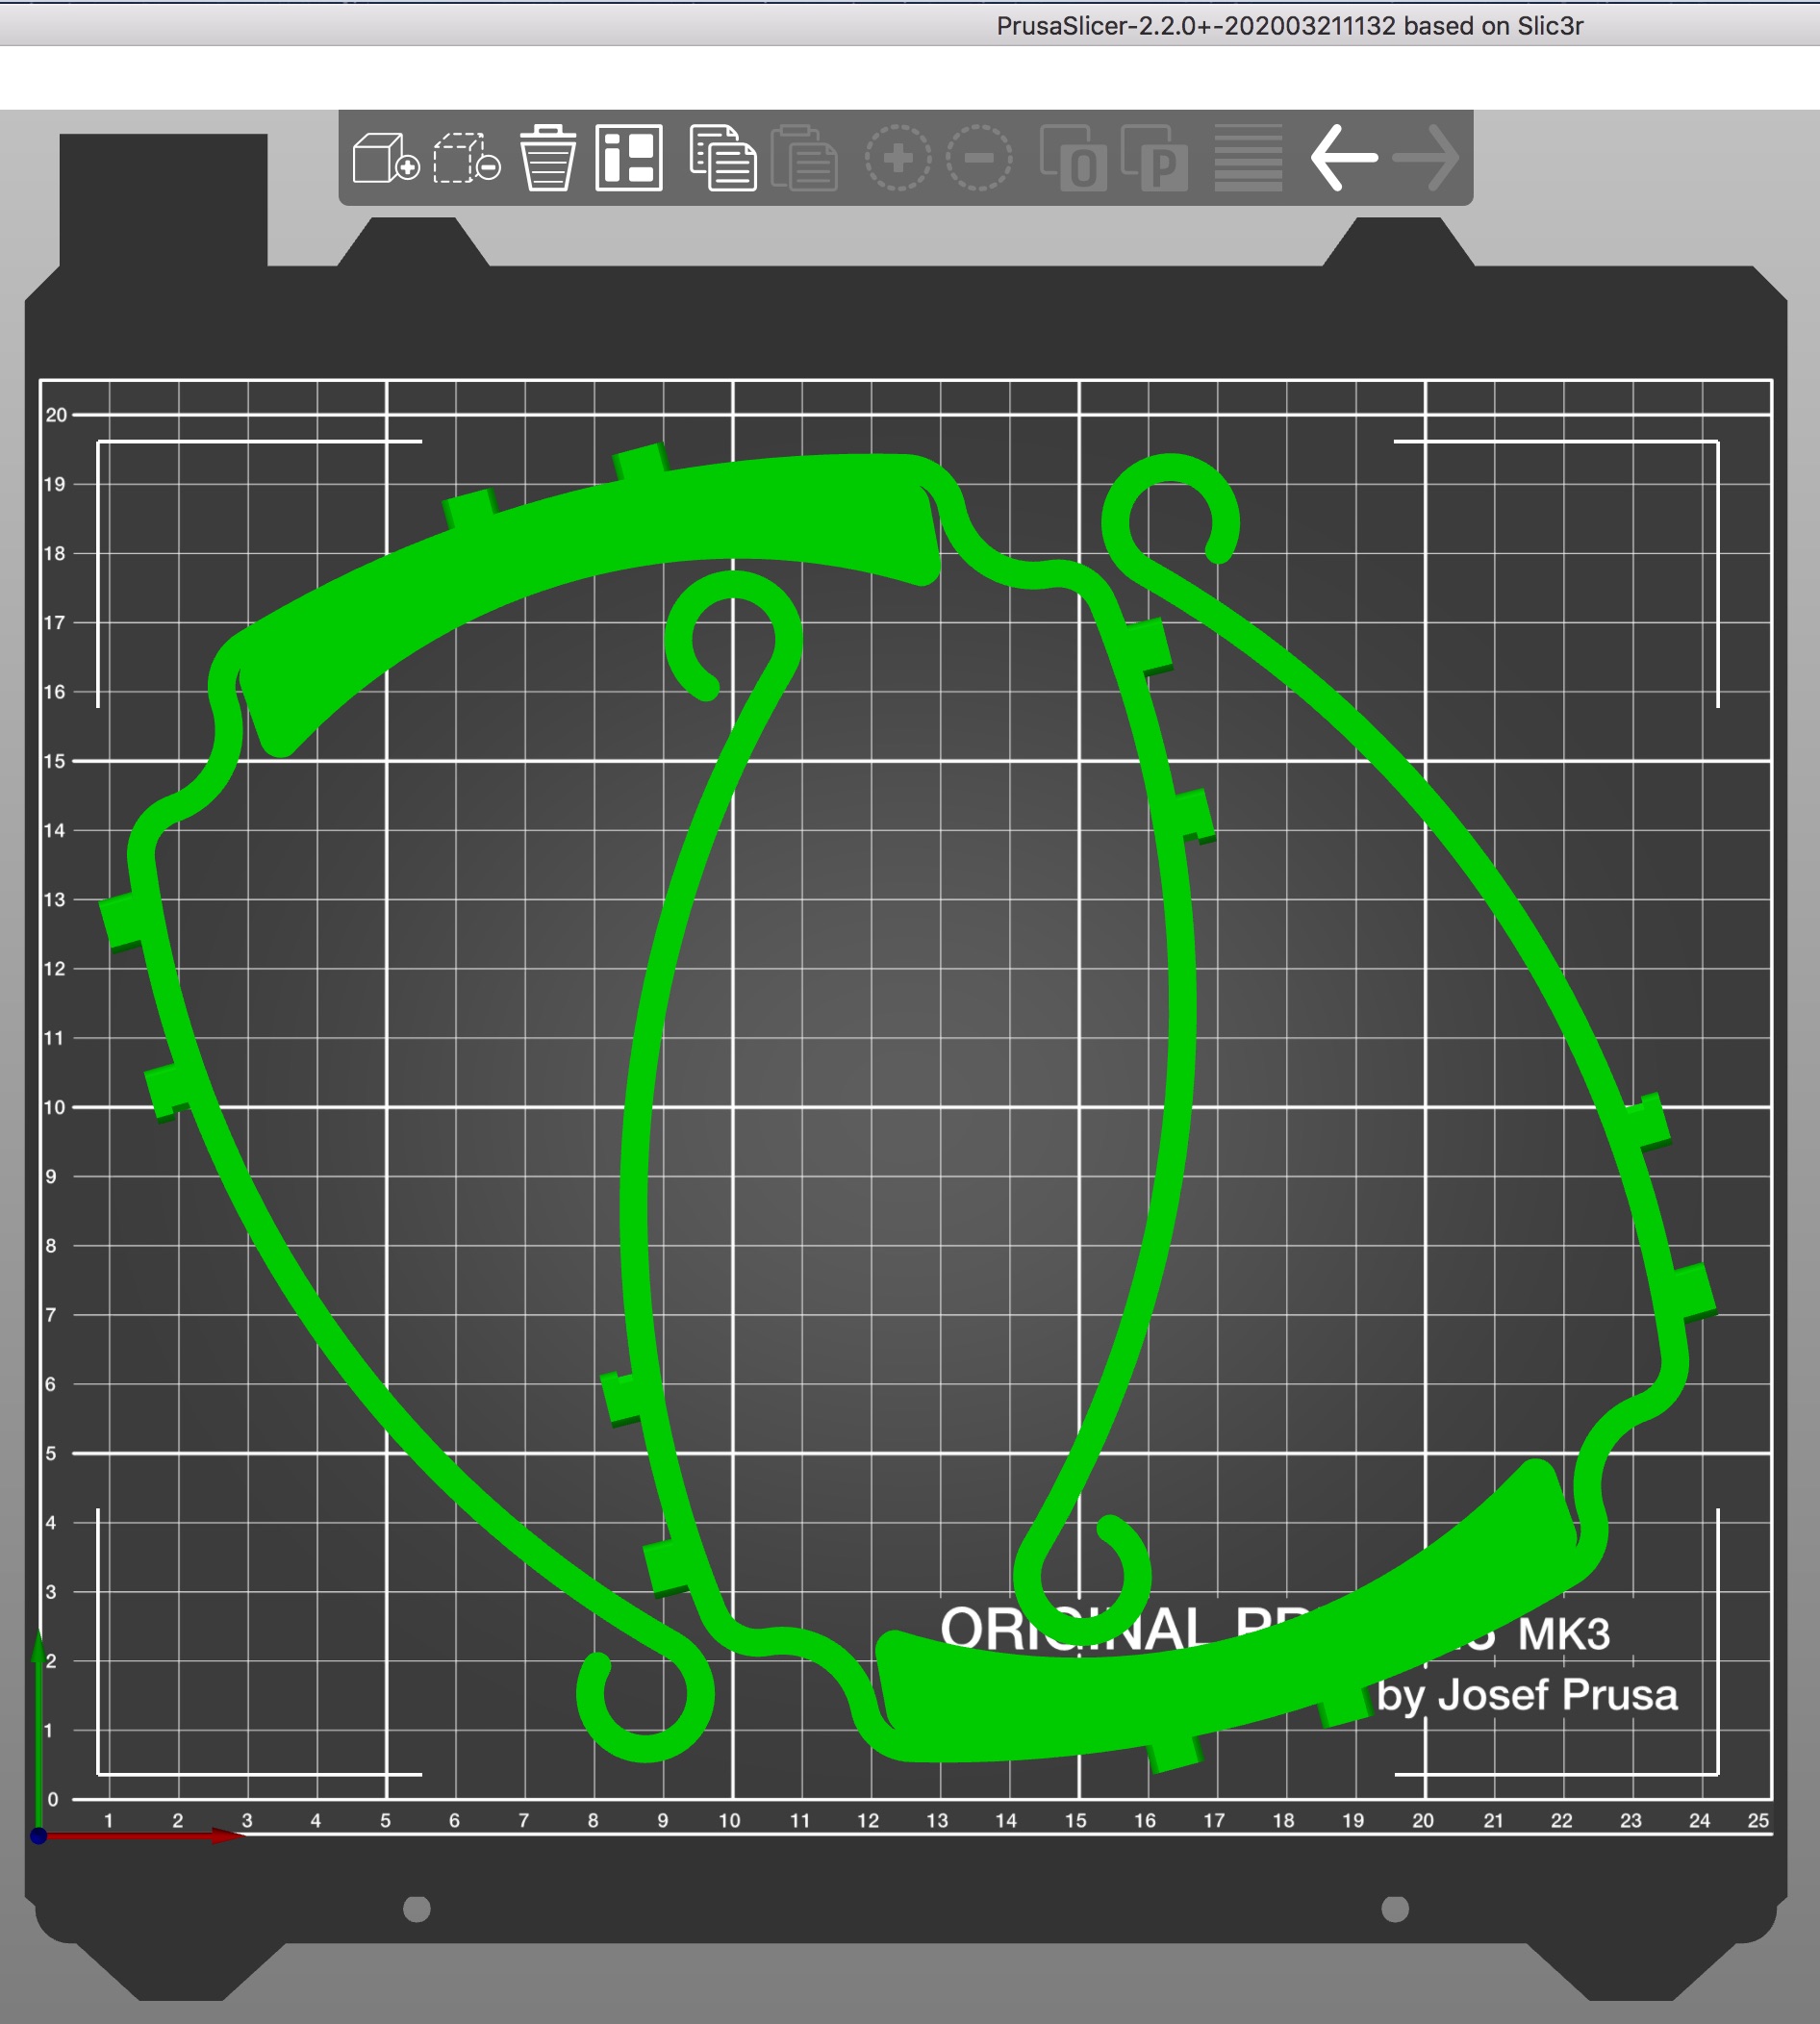
To fit the head band into this printer bed, you’ll need to do the following:
- Take the original STL model, and make a copy of it.
- Rotate the copy around the Z-axis by 180°.
- Move it around to make it hug the original as closely as possible, yet leaving a safe margin between the two models. At this point, parts of the copy will lie outside bed boundaries. PrusaSlicer will warn you. Ignore it.
- Select both copies, and rotate the combination by the Z-axis by 15°.
- Move the combo around until they fit the printer bed with a safe margin on all sides.
PLA or PETG?
We chose to print with PETG, the recommended material. It is more resistant to cleaning chemicals. But unlike PLA, this material strings like crazy. All leftover strings need to be manually cleaned. Despite stringing, PETG is a better choice, as it is more resistant to high temperature and to cleaning chemicals.
Nozzle size
With the 0.4mm nozzle that comes with the MK3S, it takes 1 hour and 50 minutes to print the two head bands. The printing guide by 3dverkstan has detailed instructions on how you can print drastically faster, with a larger nozzle size.
Do not just go ahead and buy a 1.2mm nozzle. Perhaps you think that you can then print 20 head bands, in the same amount of time we print 2 with the 0.4mm nozzle. You can’t. The MK3S comes with an E3D V6 Hotend which only accommodates at most a 0.6mm nozzle, assuming that you want it to print at the same extrusion speed. For larger nozzles, you will have to replace the hotend with E3D Volcano, or the like. Otherwise you won’t get the increase in throughput you want.
Print settings
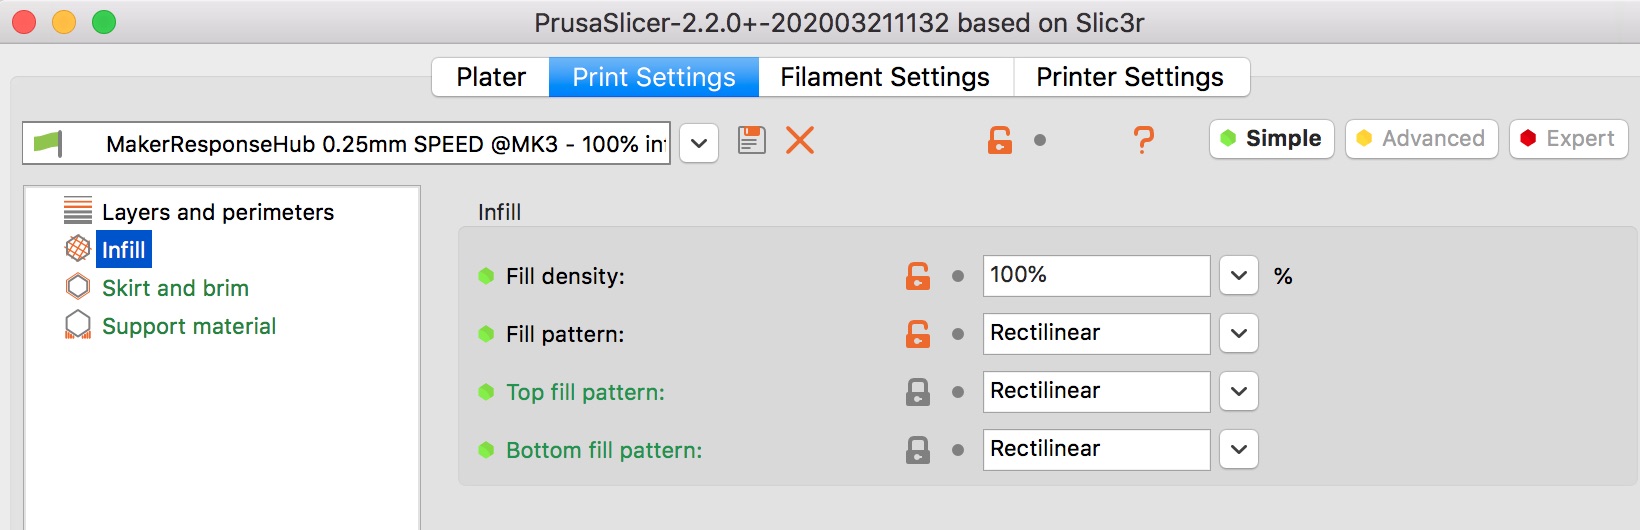
Start with the built-in “20mm SPEED” as your selected print. Then make these Print Setting changes. You can remain in the “Simple” mode.
- Change Layer Height to 0.25mm
- Change Vertical Shell Perimeters to 6 shells

- Set Infill to 100%
- Accept the suggestion to also change Fill Pattern to Rectilinear
MatterHacker’s guide and 3DVerkstan’s guide go into great details discussing how you can tweak settings to get increased print speed. If you are using a 0.4mm nozzle, these largely do not apply to you. We already set perimeter shells to a large number, such that there is little to no infill left to deal with. Just leave the Speed tab alone. You can’t even see this tab in the “Simple” mode anyway.
Keep printing
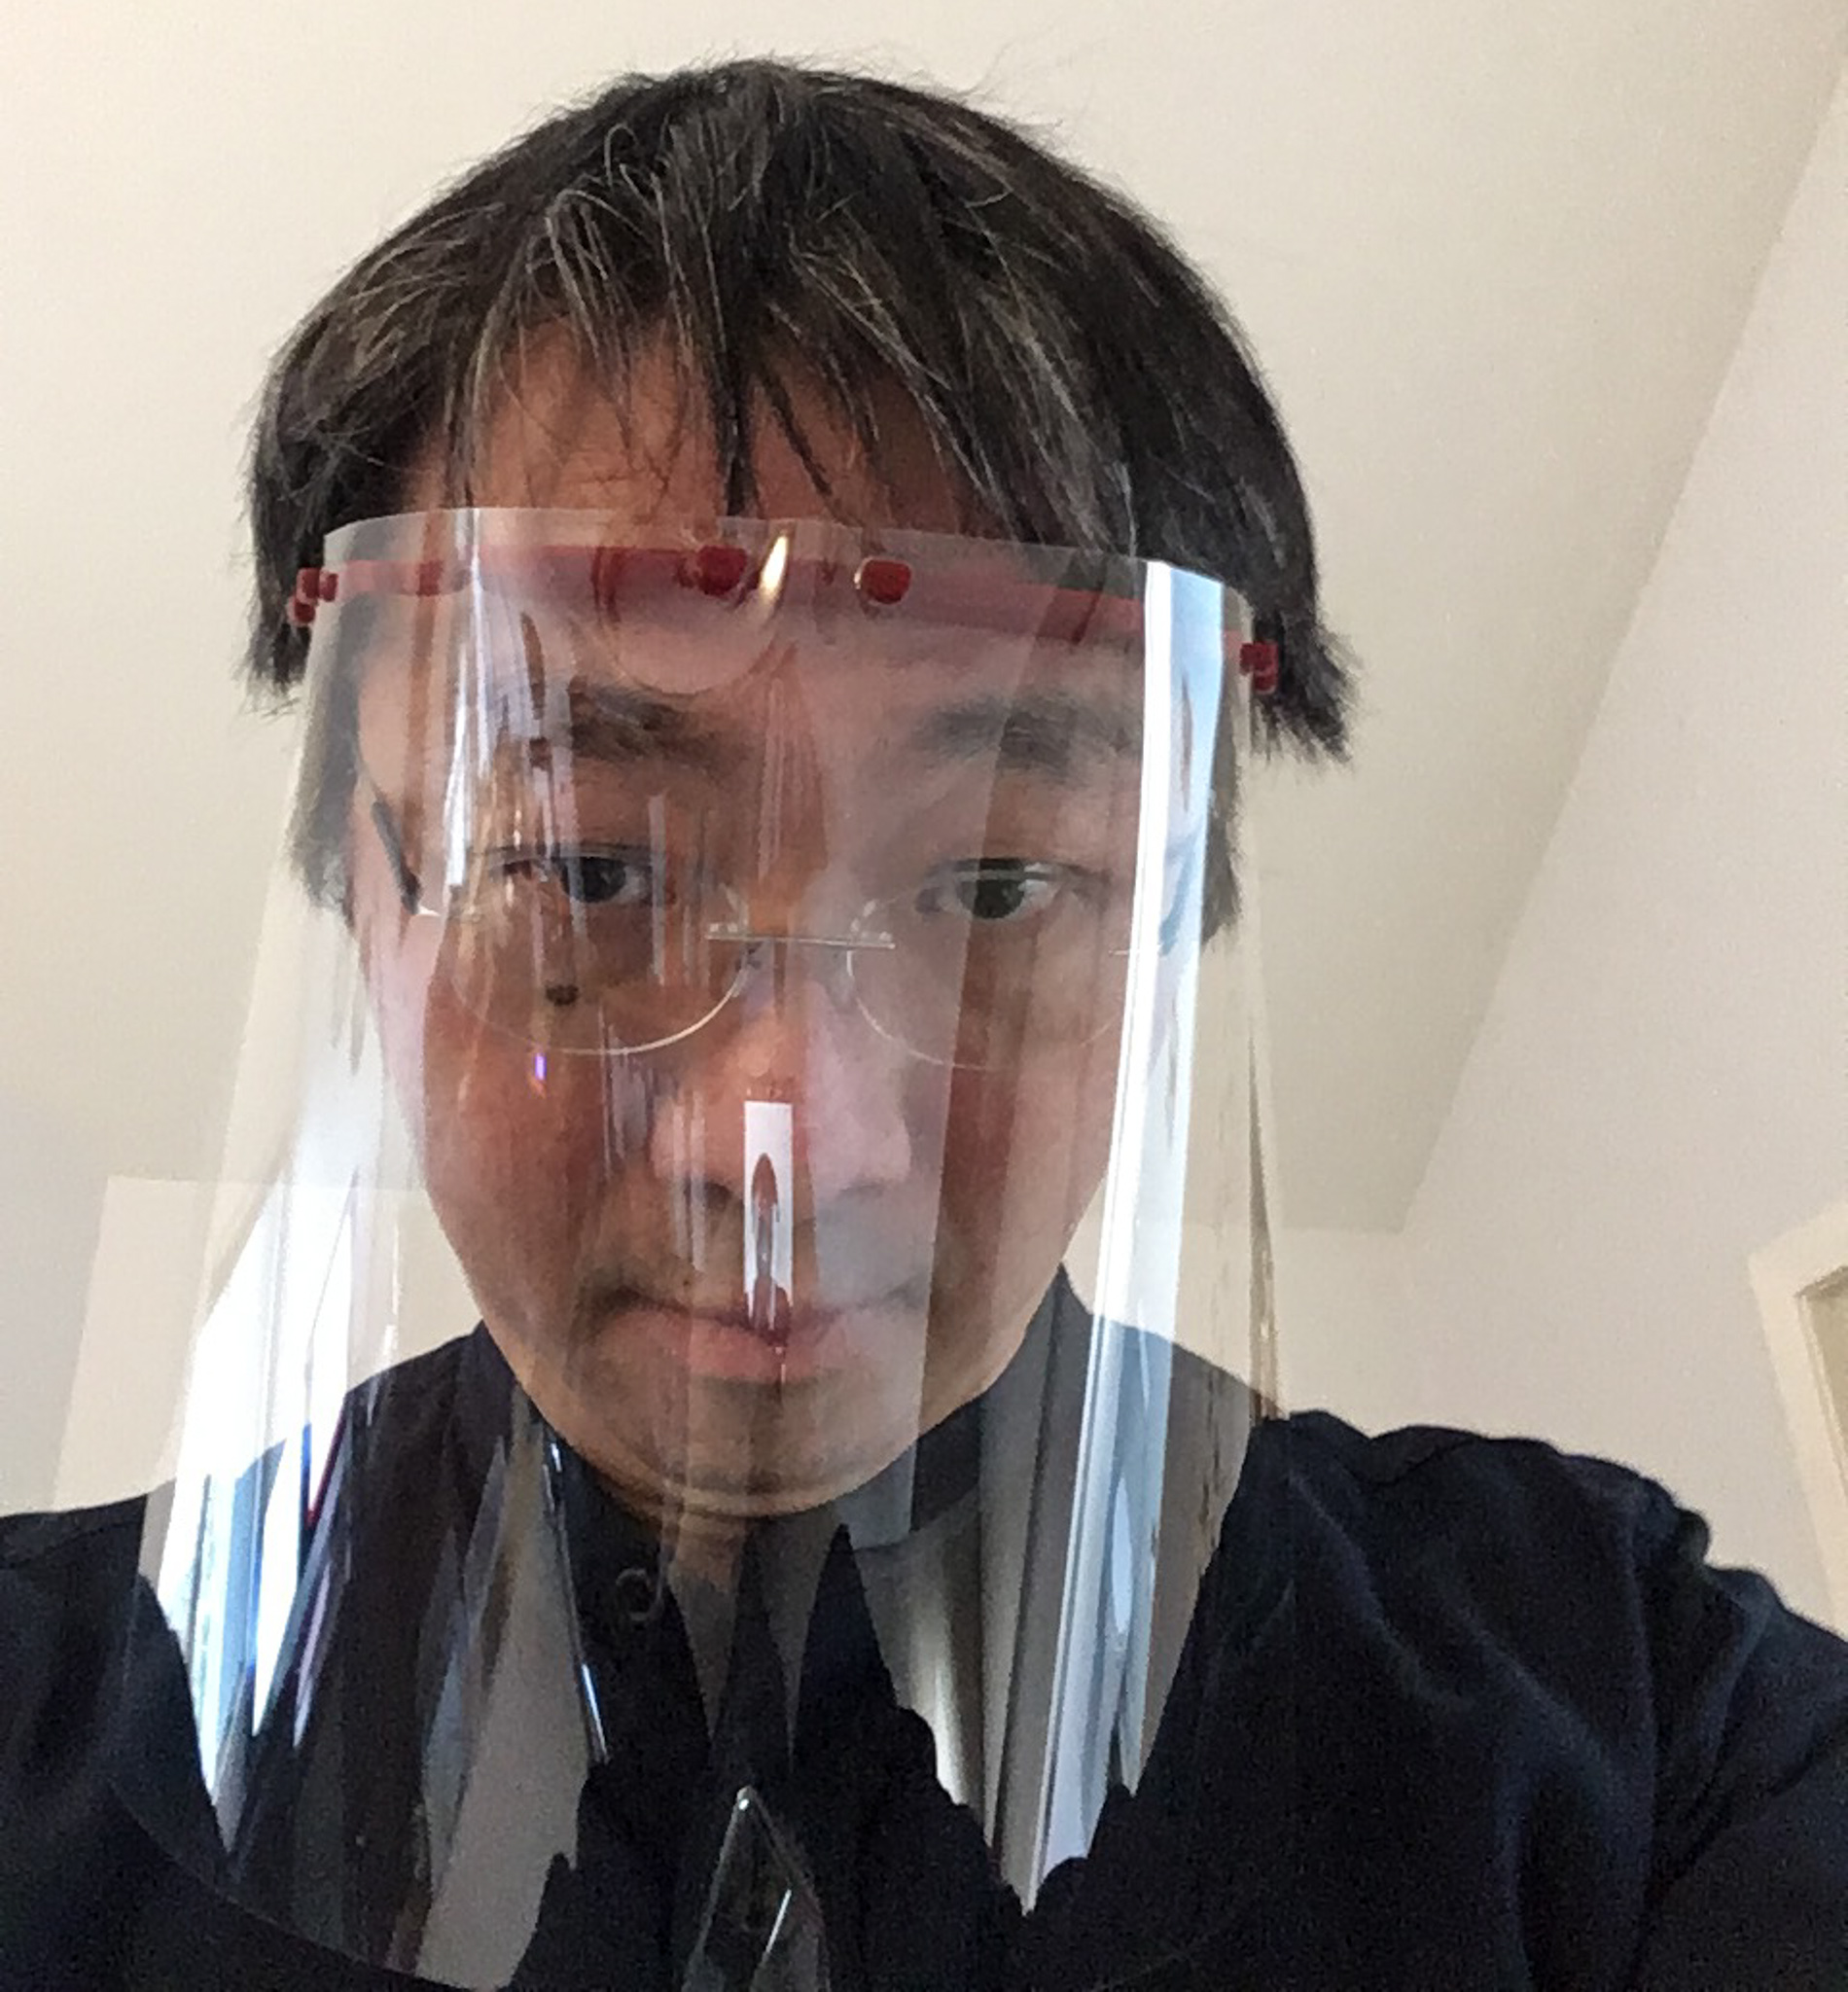
Now keep printing them. You can upload pictures to Instagram, and tag them with both #3dvfaceshield and #makerresponsehub, so they show up alongside pictures from other volunteers.
The visor
If you are sending these head bands to an organization which adds actual transparent shields to them, then you are done.
But if you are making face shields for your local medical facilities, you will need to deliver the complete set – head bad plus the visor.
First, you need to get transparency films. Read all subsections below if you proceed. You need all facts first.
PVC Binder Covers
Some people buy “Clear Transparency Film for Inkjet Printers” such as this one. Others swear that films meant for Inkject printing have a coating that does not weather repeated cleaning. Some suggest that only the old-school “write-on” transparency films work well. All of these are either out of stock, or have become prohibitively expensive.
Folks at the matterhackers page pointed out an inexpensive yet sturdy option. Nice folks at CFS Building Supplies have acquired a large inventory of films and are selling 7mil clear binder covers at a discount until April 30th, 2020, as an aid to the COVID-19 effort. We were able to buy 100 sheets for $9. Orders with an amount greater than $50 are shipped for free by ground (US).
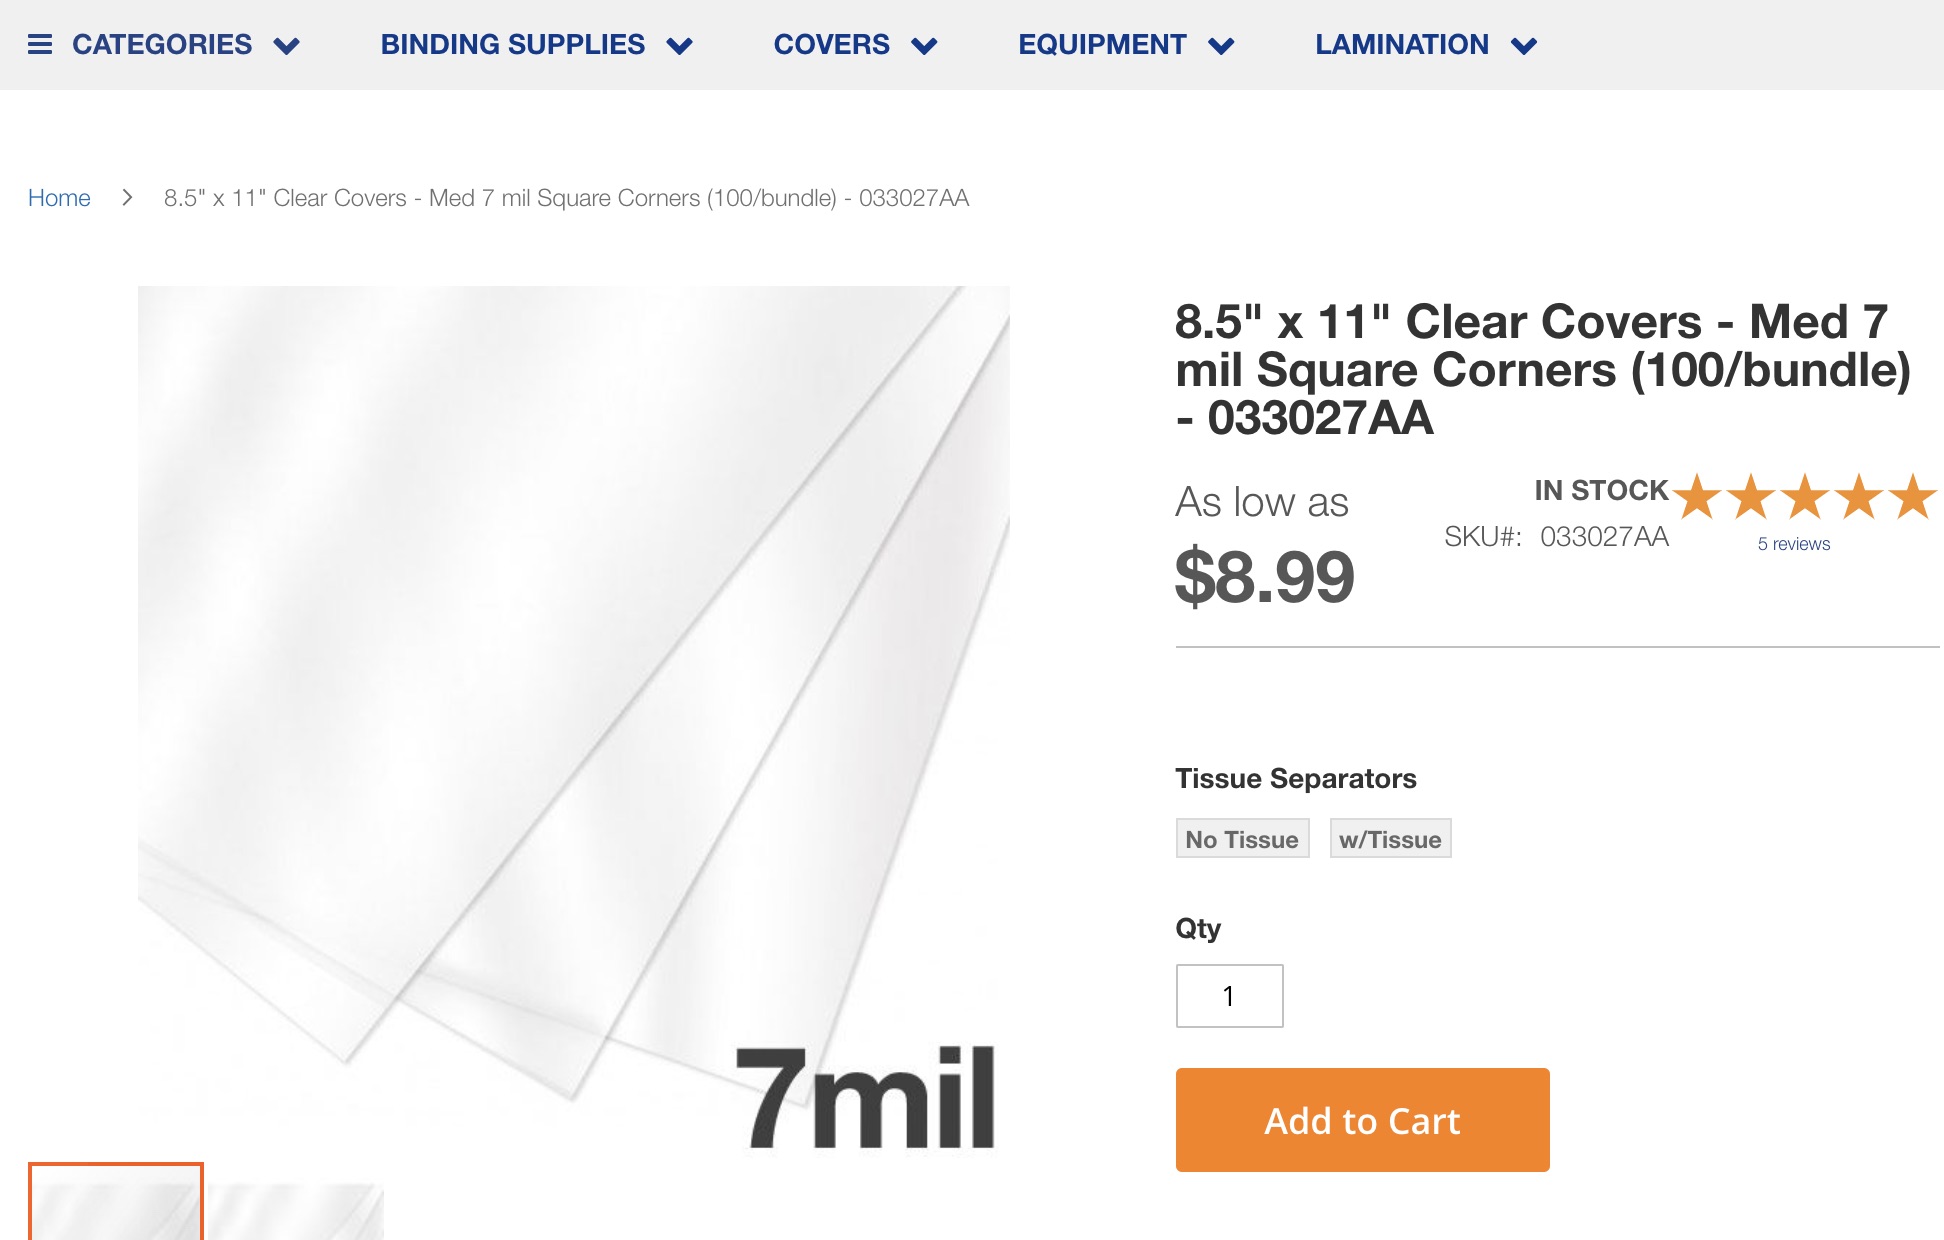
We received these in two business days. Very impressive. But these covers are not 100% transparent. They have microscopic textures making them a bit hazy to look through. But when 100% clear sheets are nowhere to be found, this is not a bad alternative.

On the other hand, it appears that old-school, write-on transparencies that professors of the past used with overhead projectors will be more transparent. But many are 4mil, and barely thick enough to hold their shape.
The CFS manufacturer shot a video showing you how the 7mil cover looks like when used on a face shield. Kudos to them for going out of their way to help. At 4:26s, they show you what the view is, behind the shield. There is perceptible haze. They are being honest with everyone, as they try to help.
PET transparency sheets
We were told that that PET transparencies would be much clearer than PVC transparencies. But they are significantly more expensive. The same manufacturer, CFS, is running of of these PET sheets (April 15th). We bought 300 PET sheets, after observing the clarity issue with PVC sheets. You can find these PET sheets here: 7mil PET sheets from CFS.
The manufacturer created on April 27th, after the initial writing of this article, a special video comparing PVC covers to PET sheet. You will find it informative.
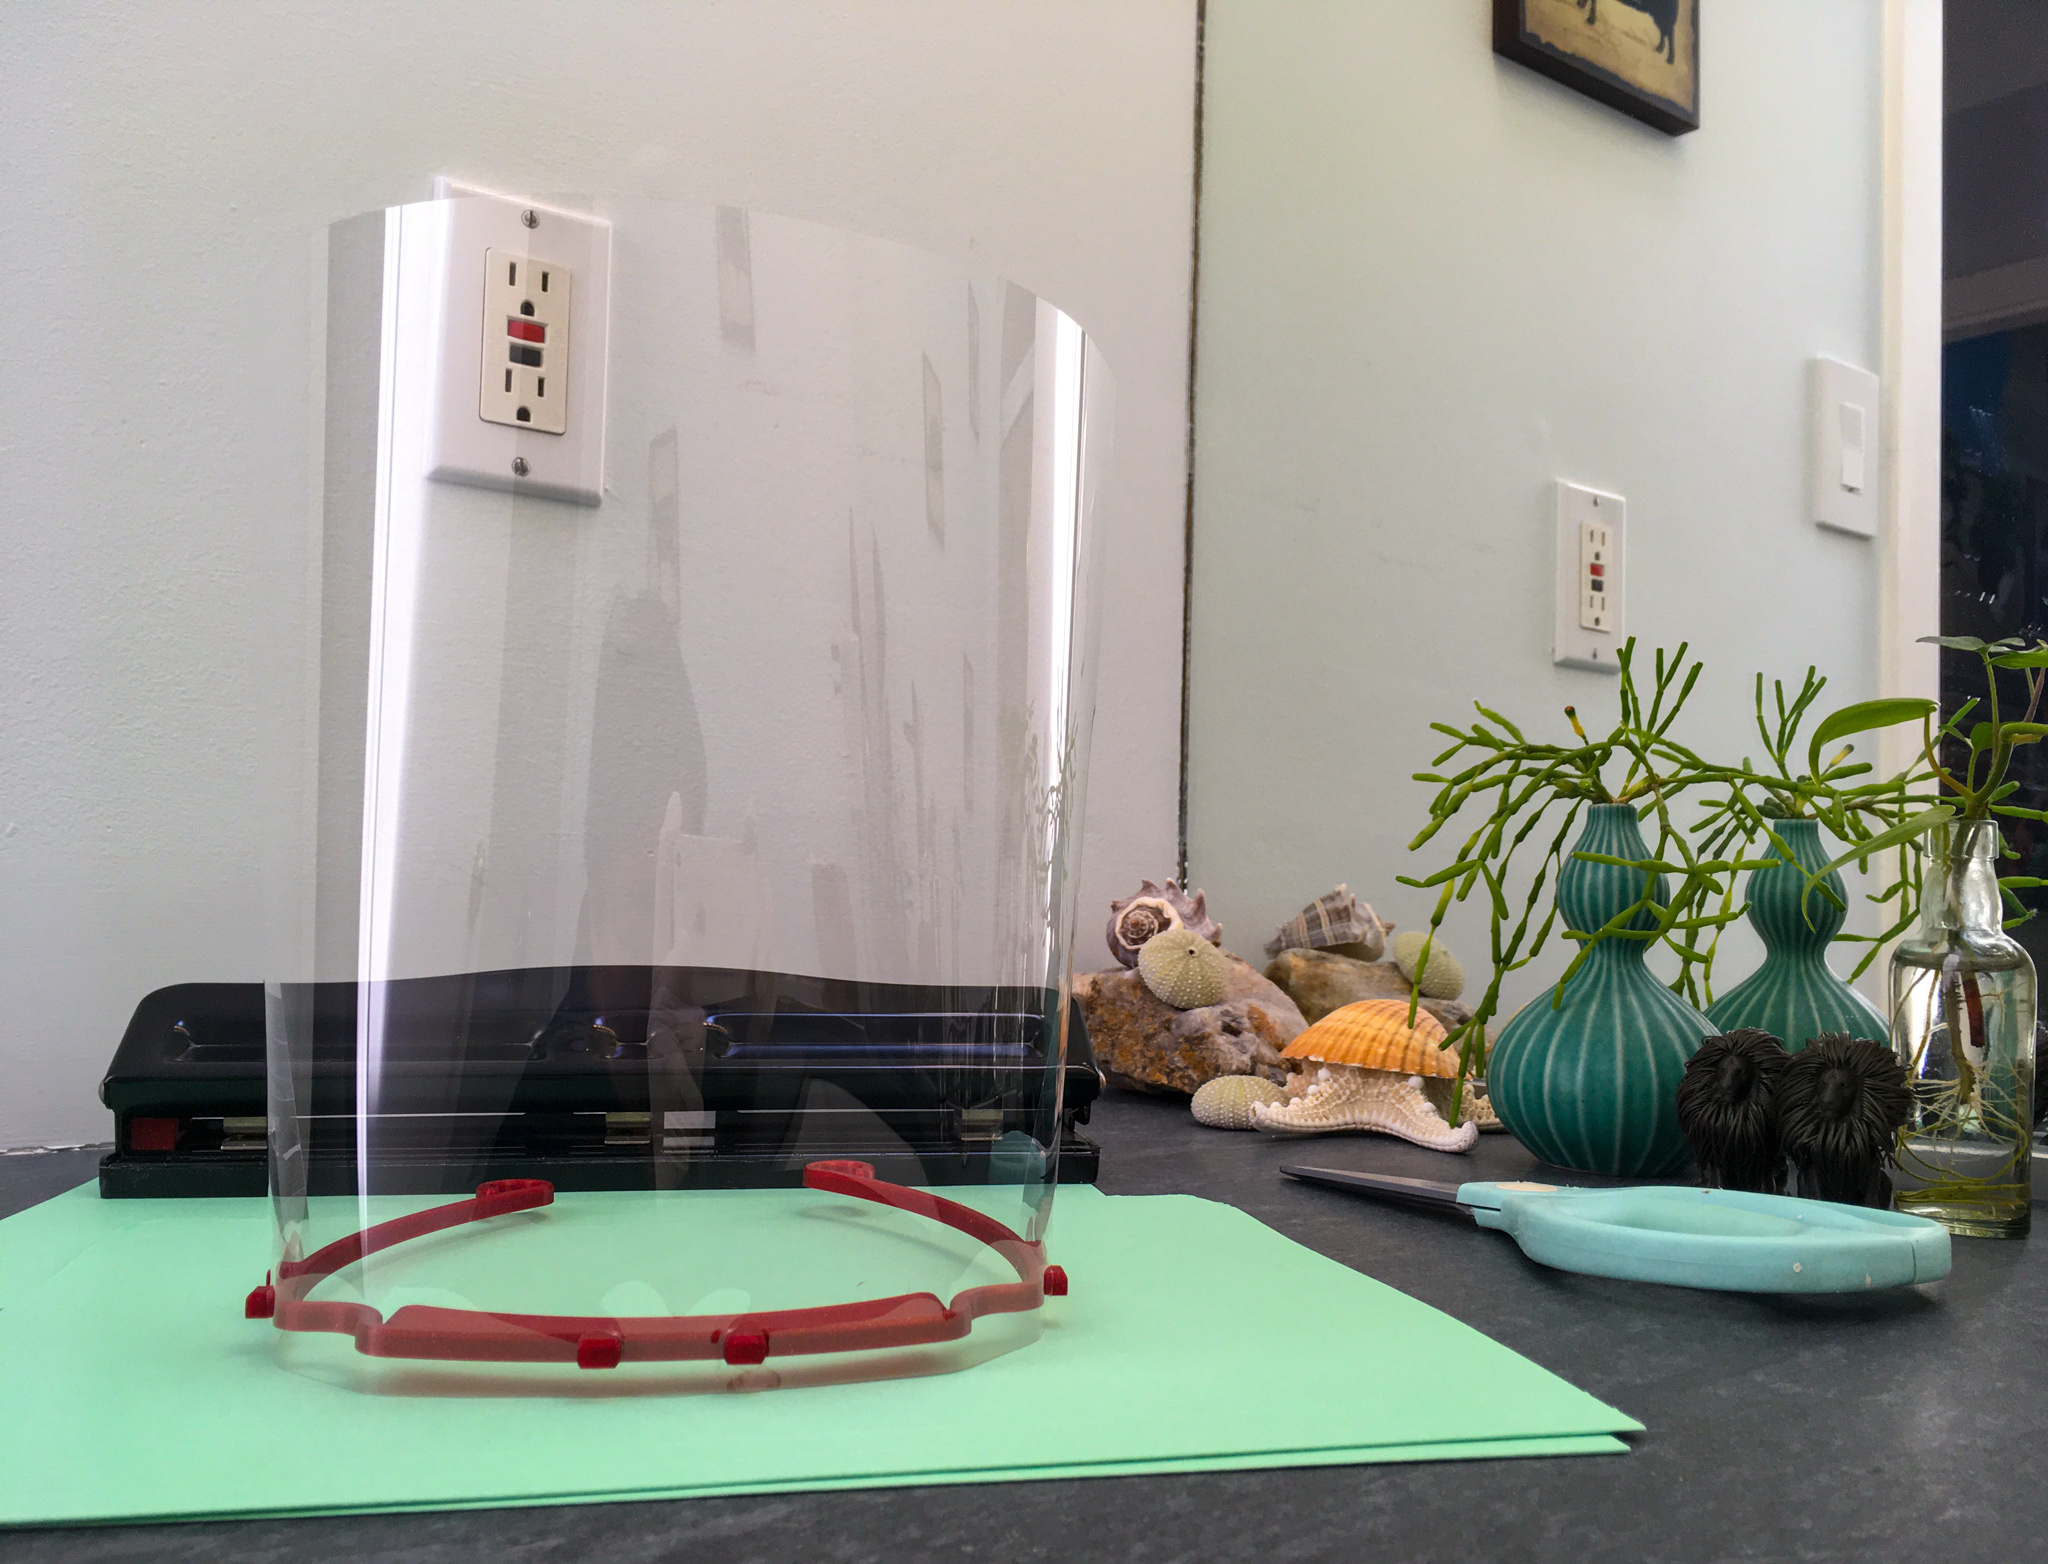
We received them the next day (April 16th). They are marvelous. Complete clarity. They were mirror-smooth. There are no surface micro textures whatsoever. Here it is, in all its glory.
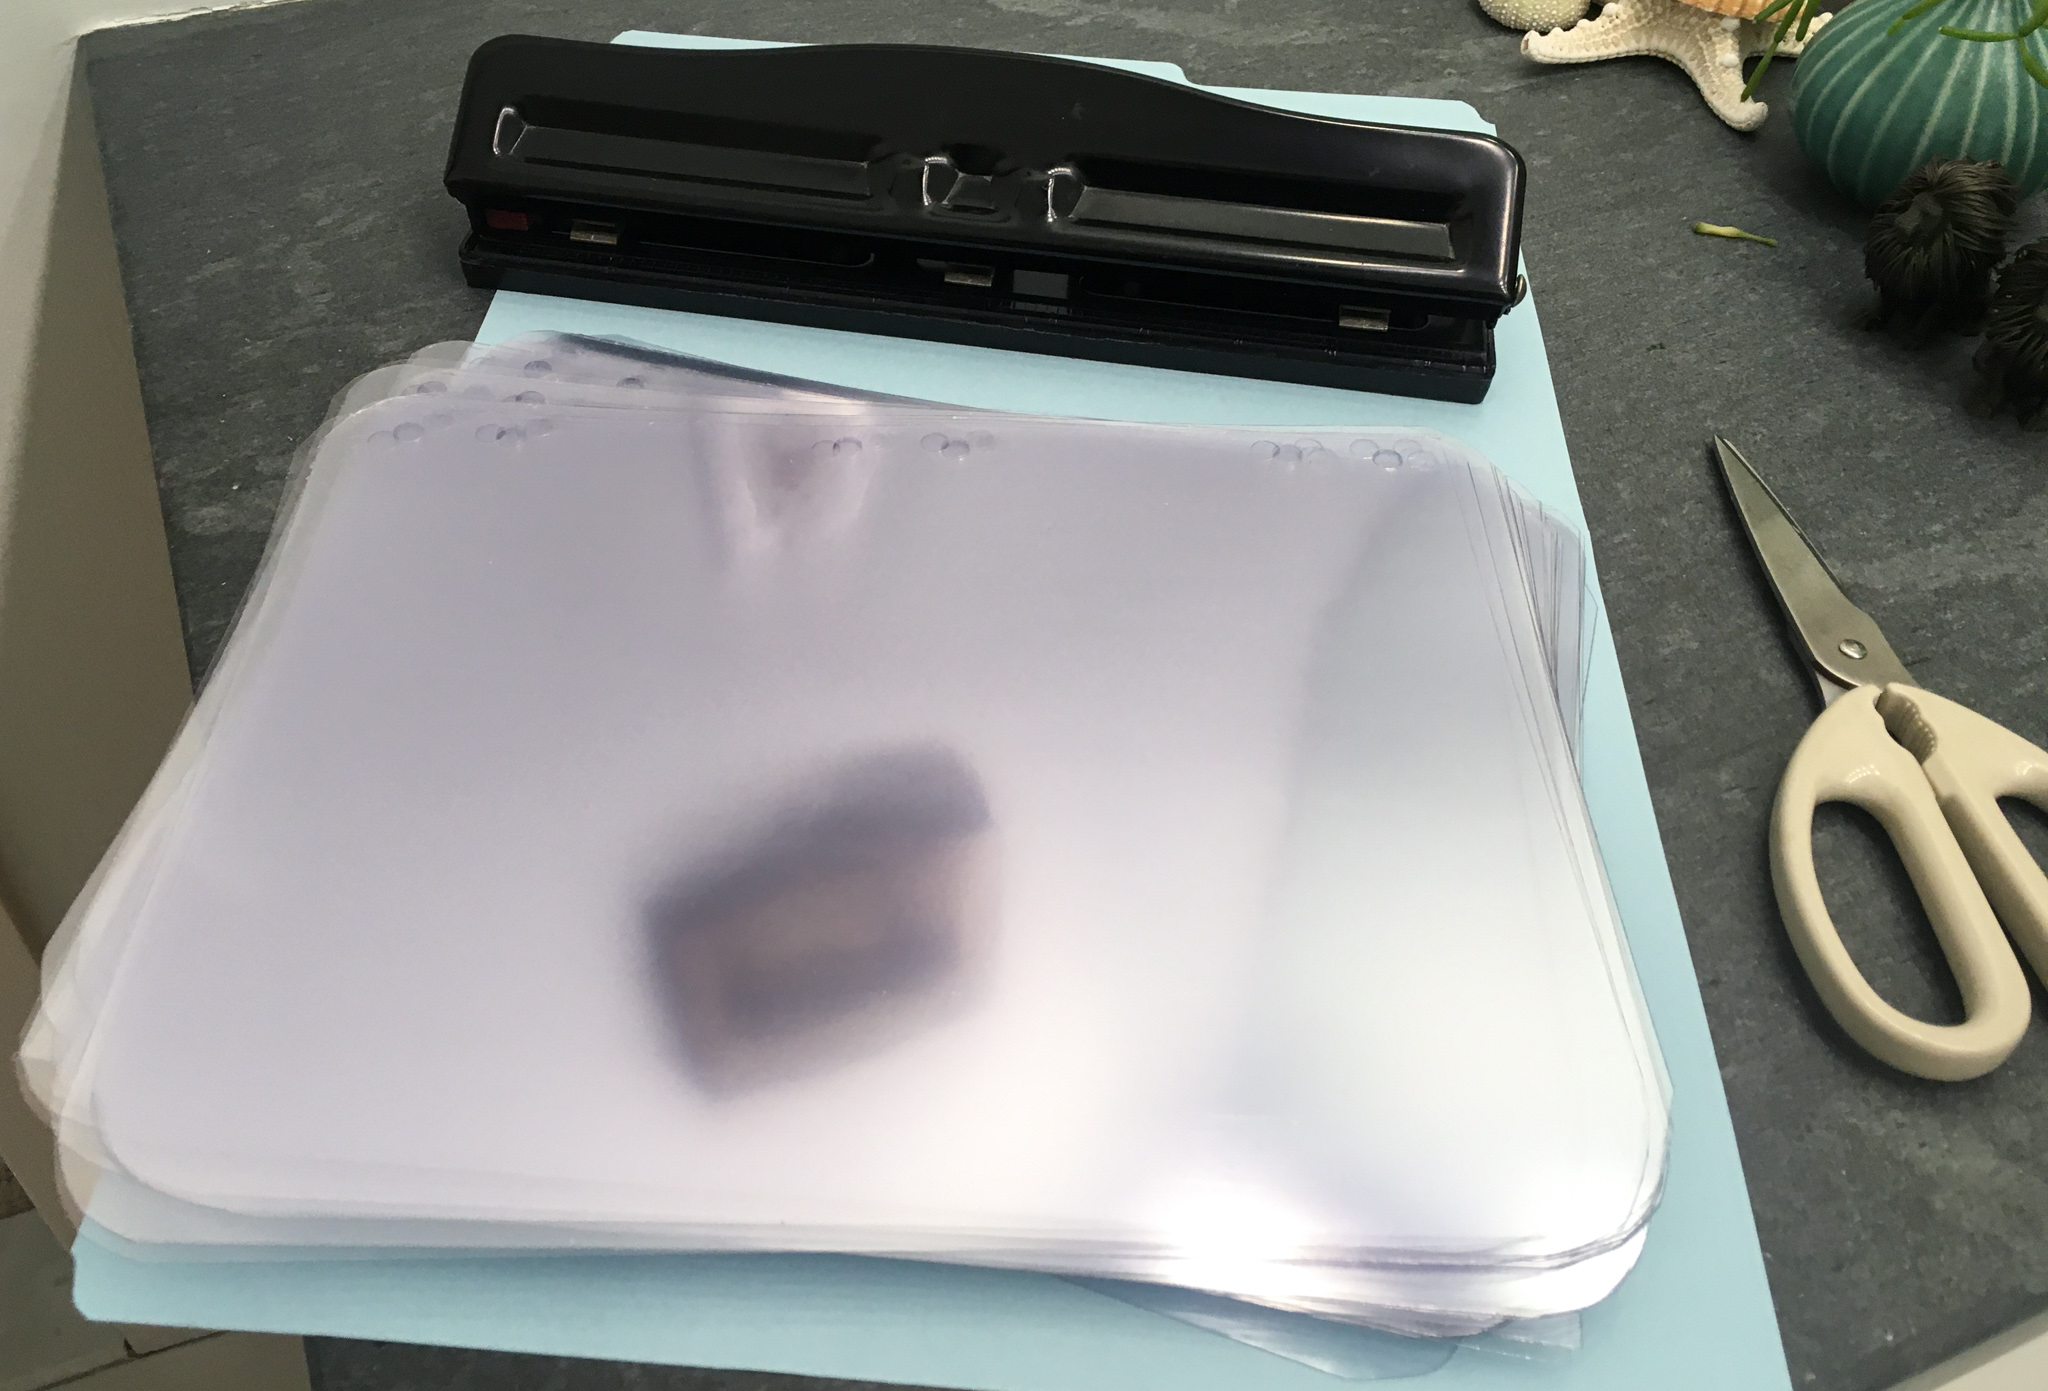
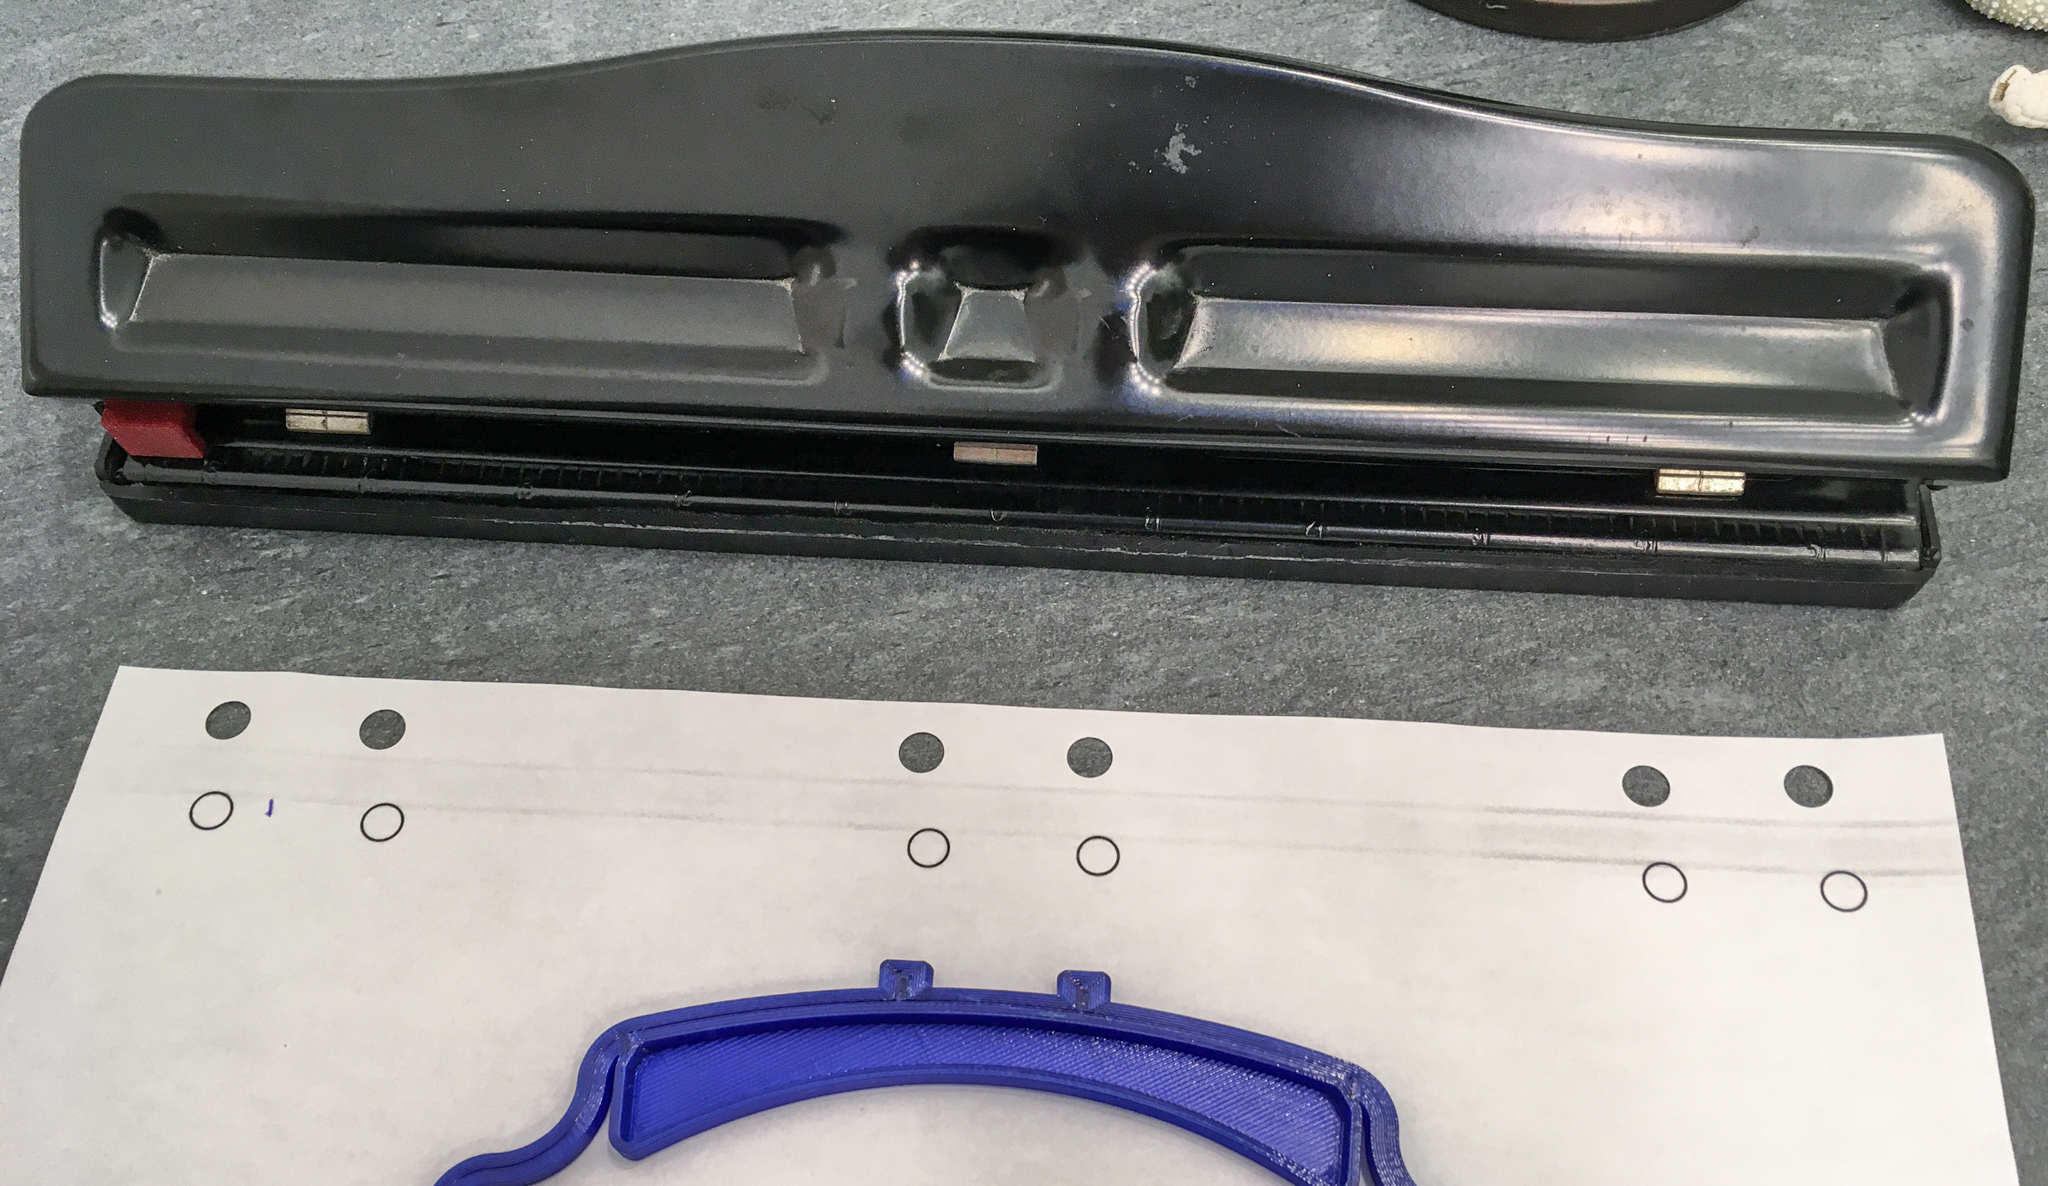
How to make 6 holes
Many people learned of the 3dverkstan shield from Joel at 3D Printing Nerd channel. Unfortunately, his episode 3D Printing Face Shields and YOU CAN TOO misleads many viewers. People came off thinking that a laser engraver is required to make holes on transparency films, and to round film corners.
In reality, the 3dverkstan shield is designed such that standard letter-size films can be used. It is designed so that regular 3-hole punchers such as this one can be used to punch holes on films. As for those sharp corners… well, you cut them off with a pair of scissor.
The head band requires that 6 holes be punched on a film. To do that with a 3-hole puncher, you print a simple spacer which you can attach to the side of the film, as a guide, for making 3 holes. Then you move the spacer to the other side of the film, and make 3 more holes.
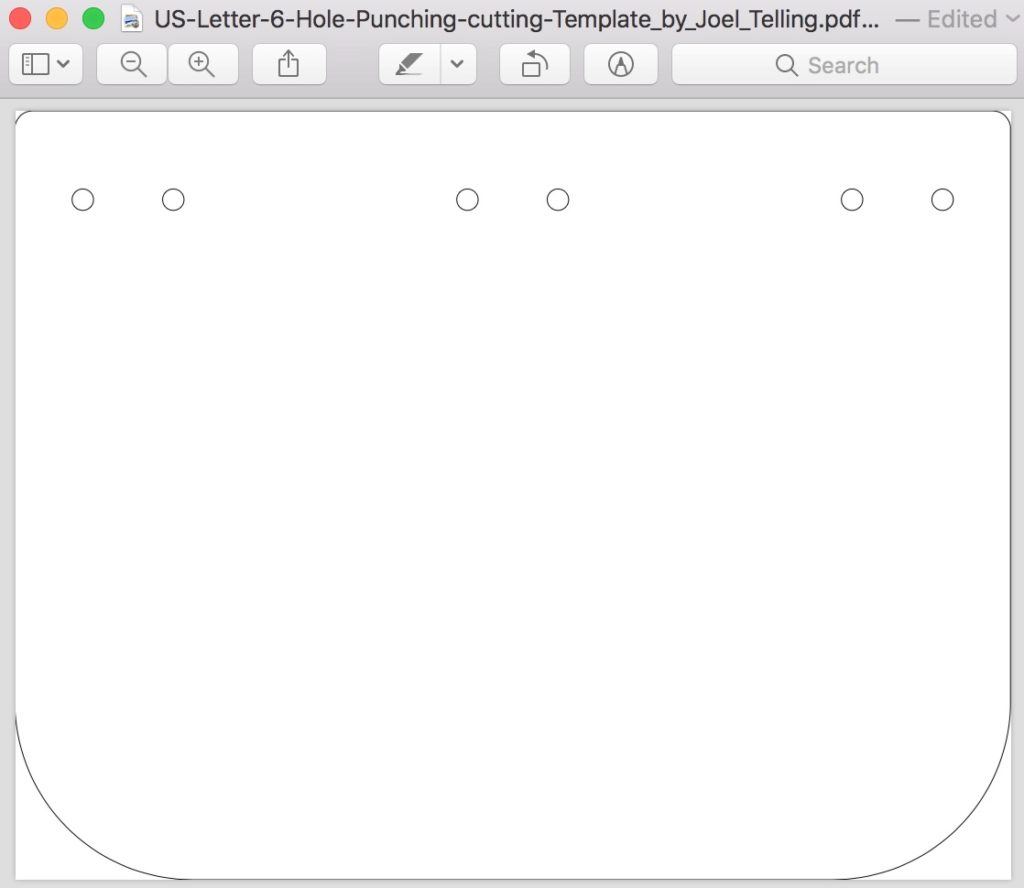
You can get the right spacer STL from the zip file mentioned earlier. You will also find a PDF file that Joel Telling created, showing where to punch holes, and how to round off corners. See additional info at 3DVerkstan’s own article – look for the US section at the bottom.
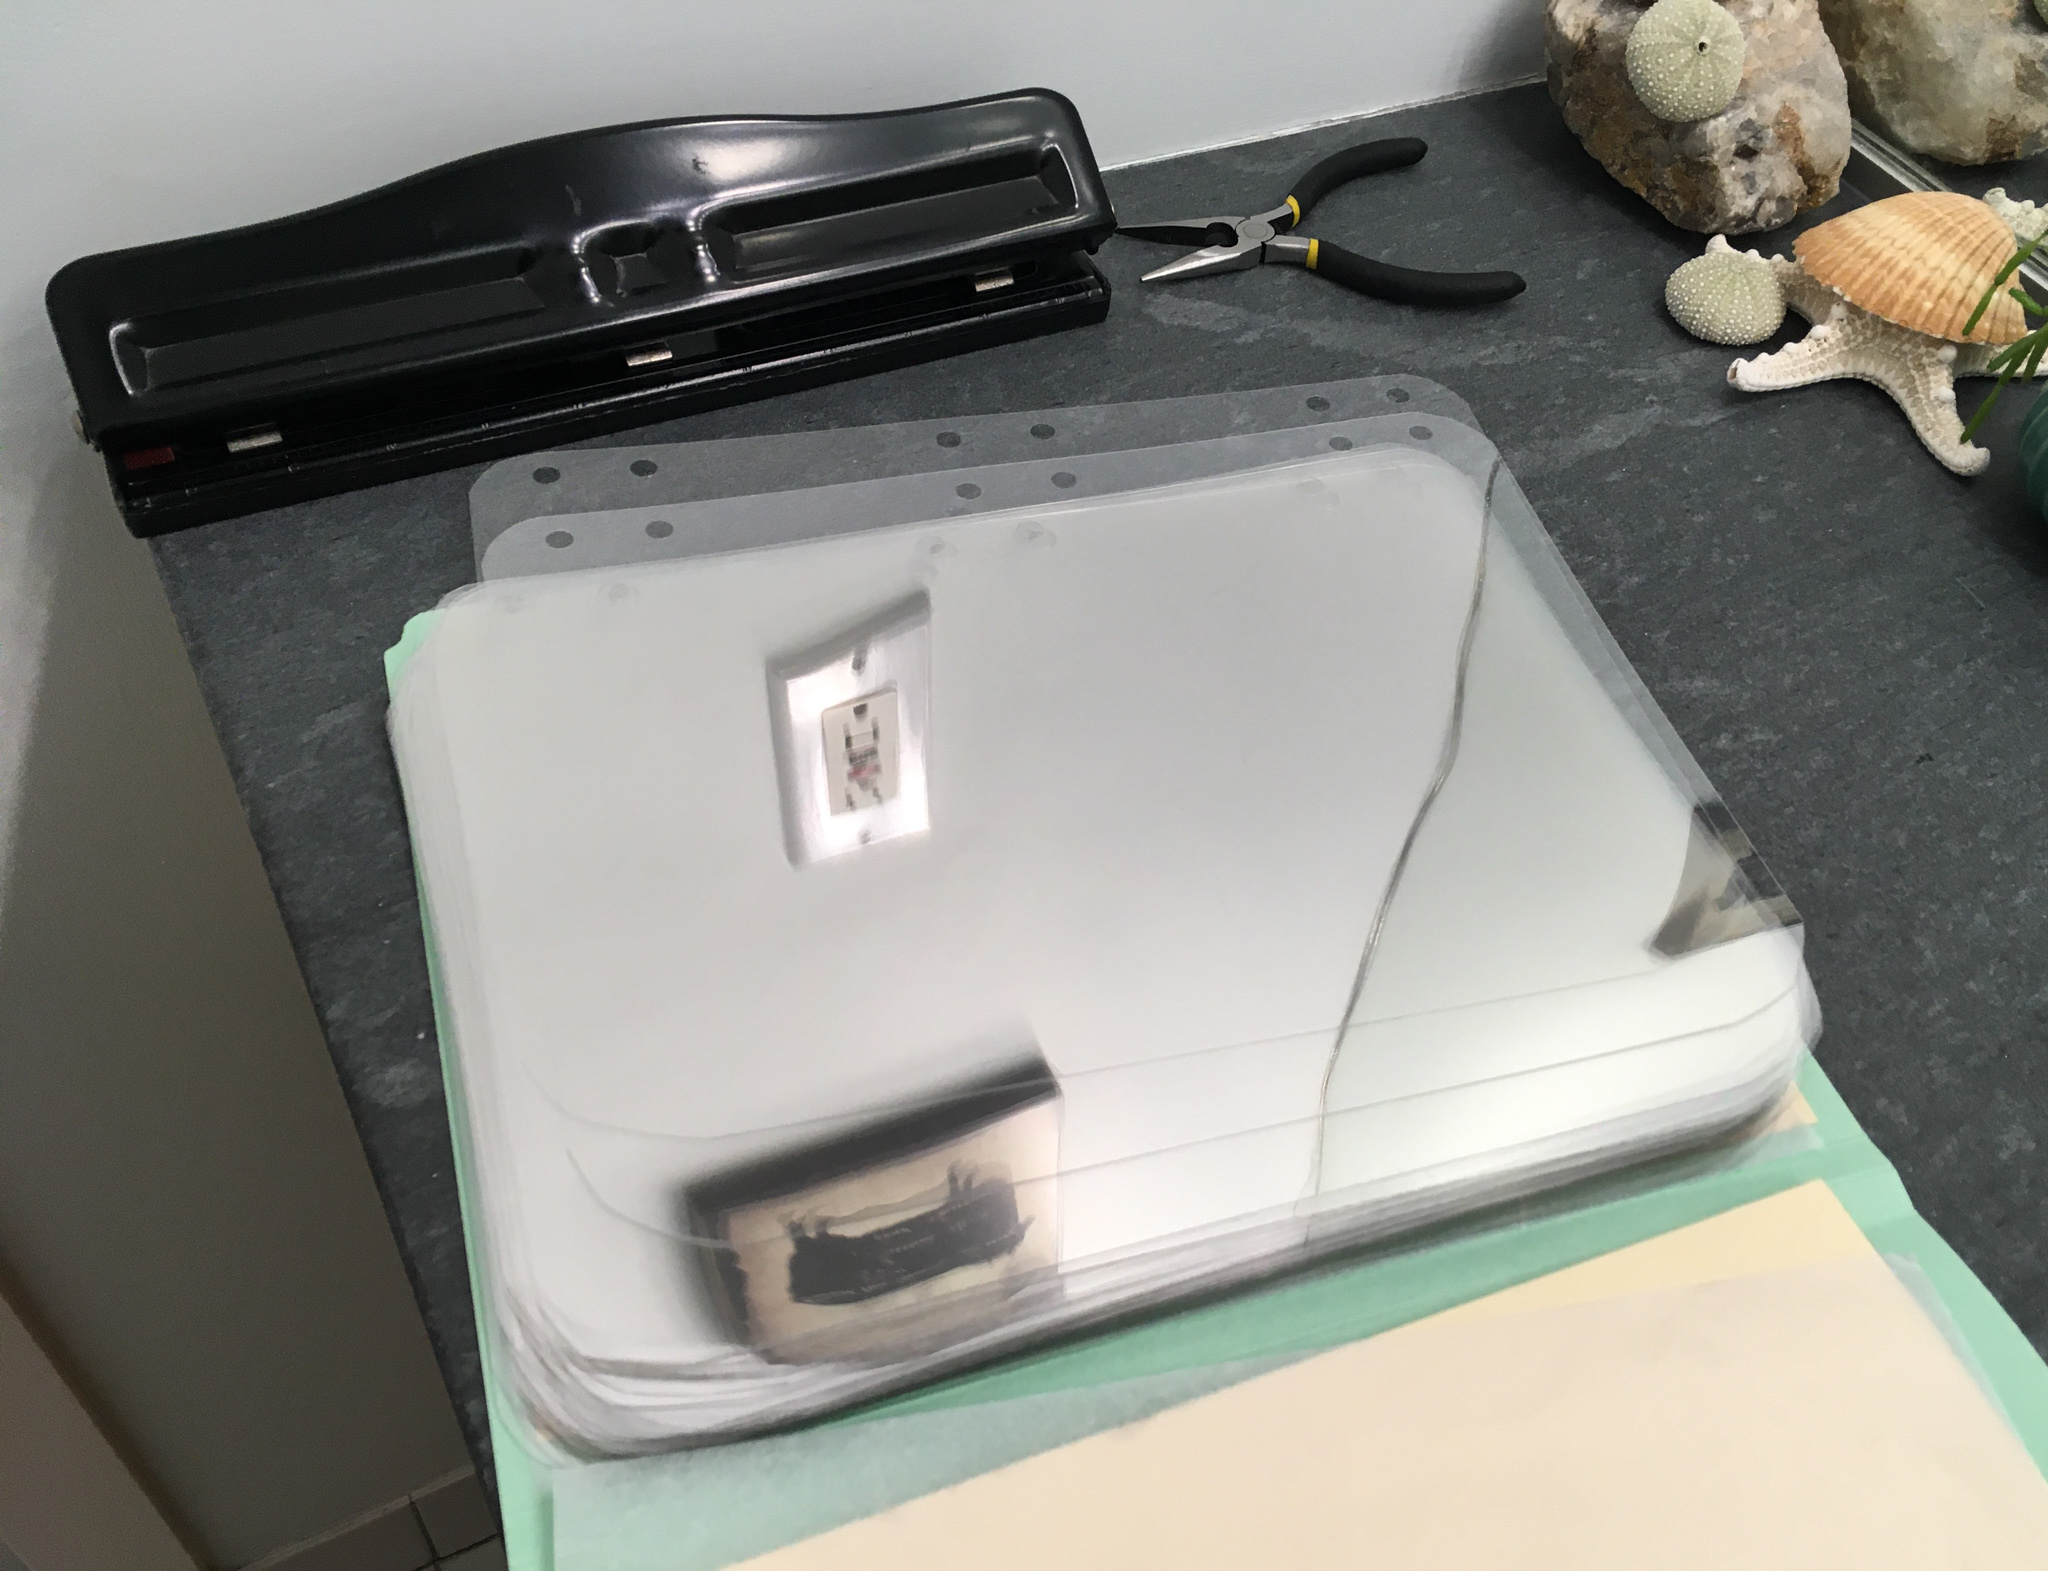
The spacer
The spacer is the red piece in the picture shown below. Practice with a piece of paper first. It may help to print out Joel’s template. Note that Joel left a large margin between holes and the edge of the film. Most hole punchers do not allow margins that big. But you will still generate a good shield with less margin than shown on Joel’s template.
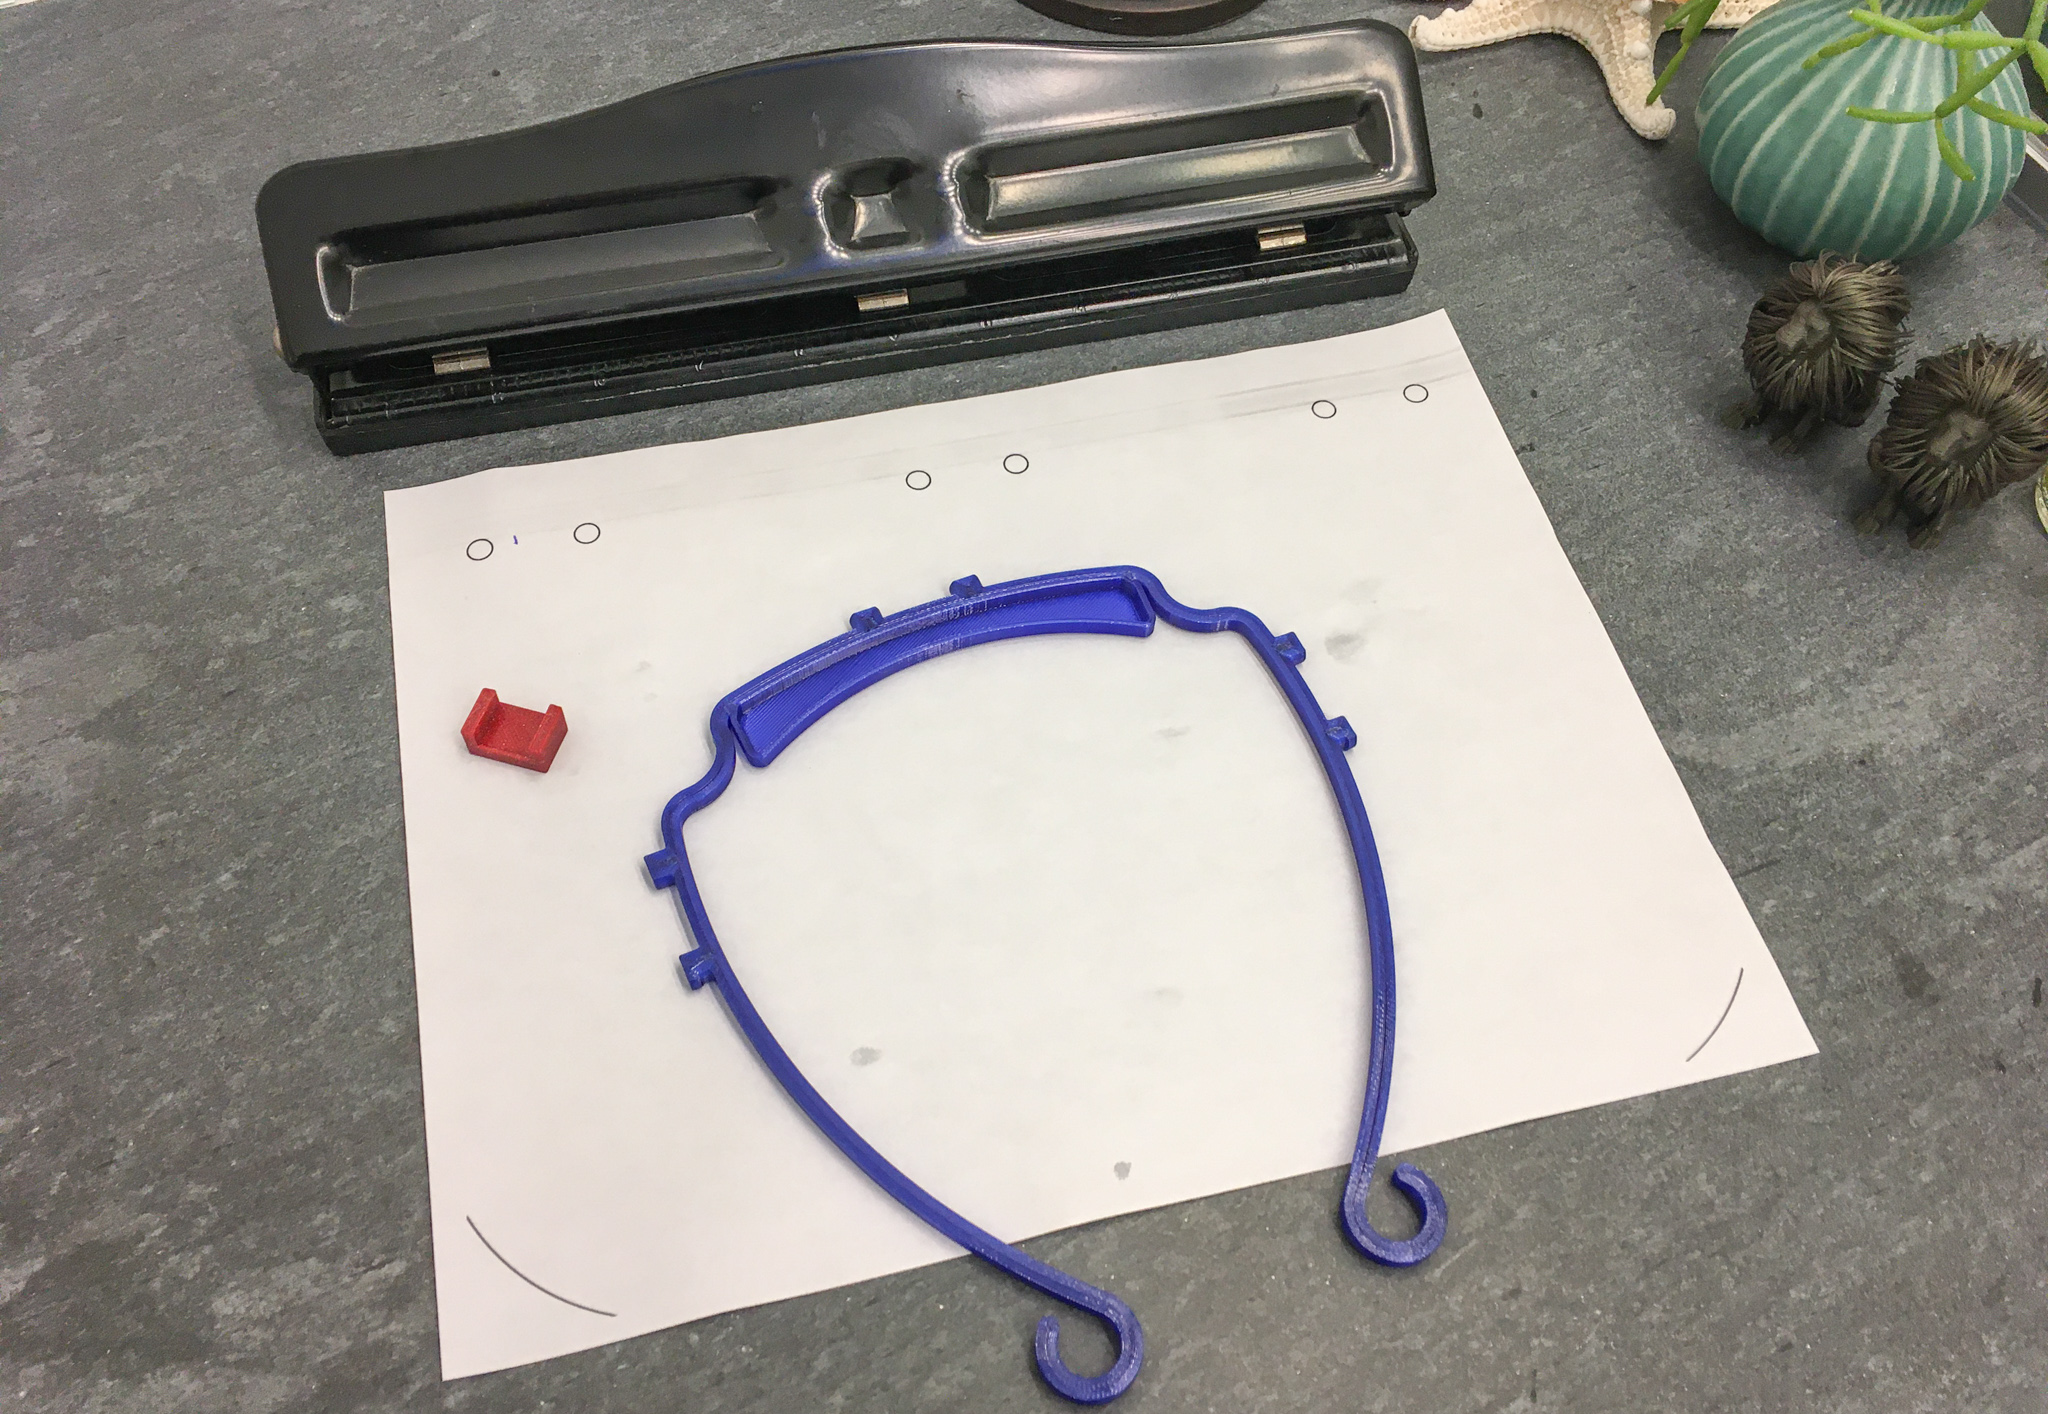
The standard US letter-size hole puncher can make three holes. This face shield requires 6 holes. The purpose of the spacer is to allow you to create the right offset between the two sets of holes. The width of the spacer measures exactly half the distance between the two holes. The purpose of this half distance becomes apparent in the next few steps.
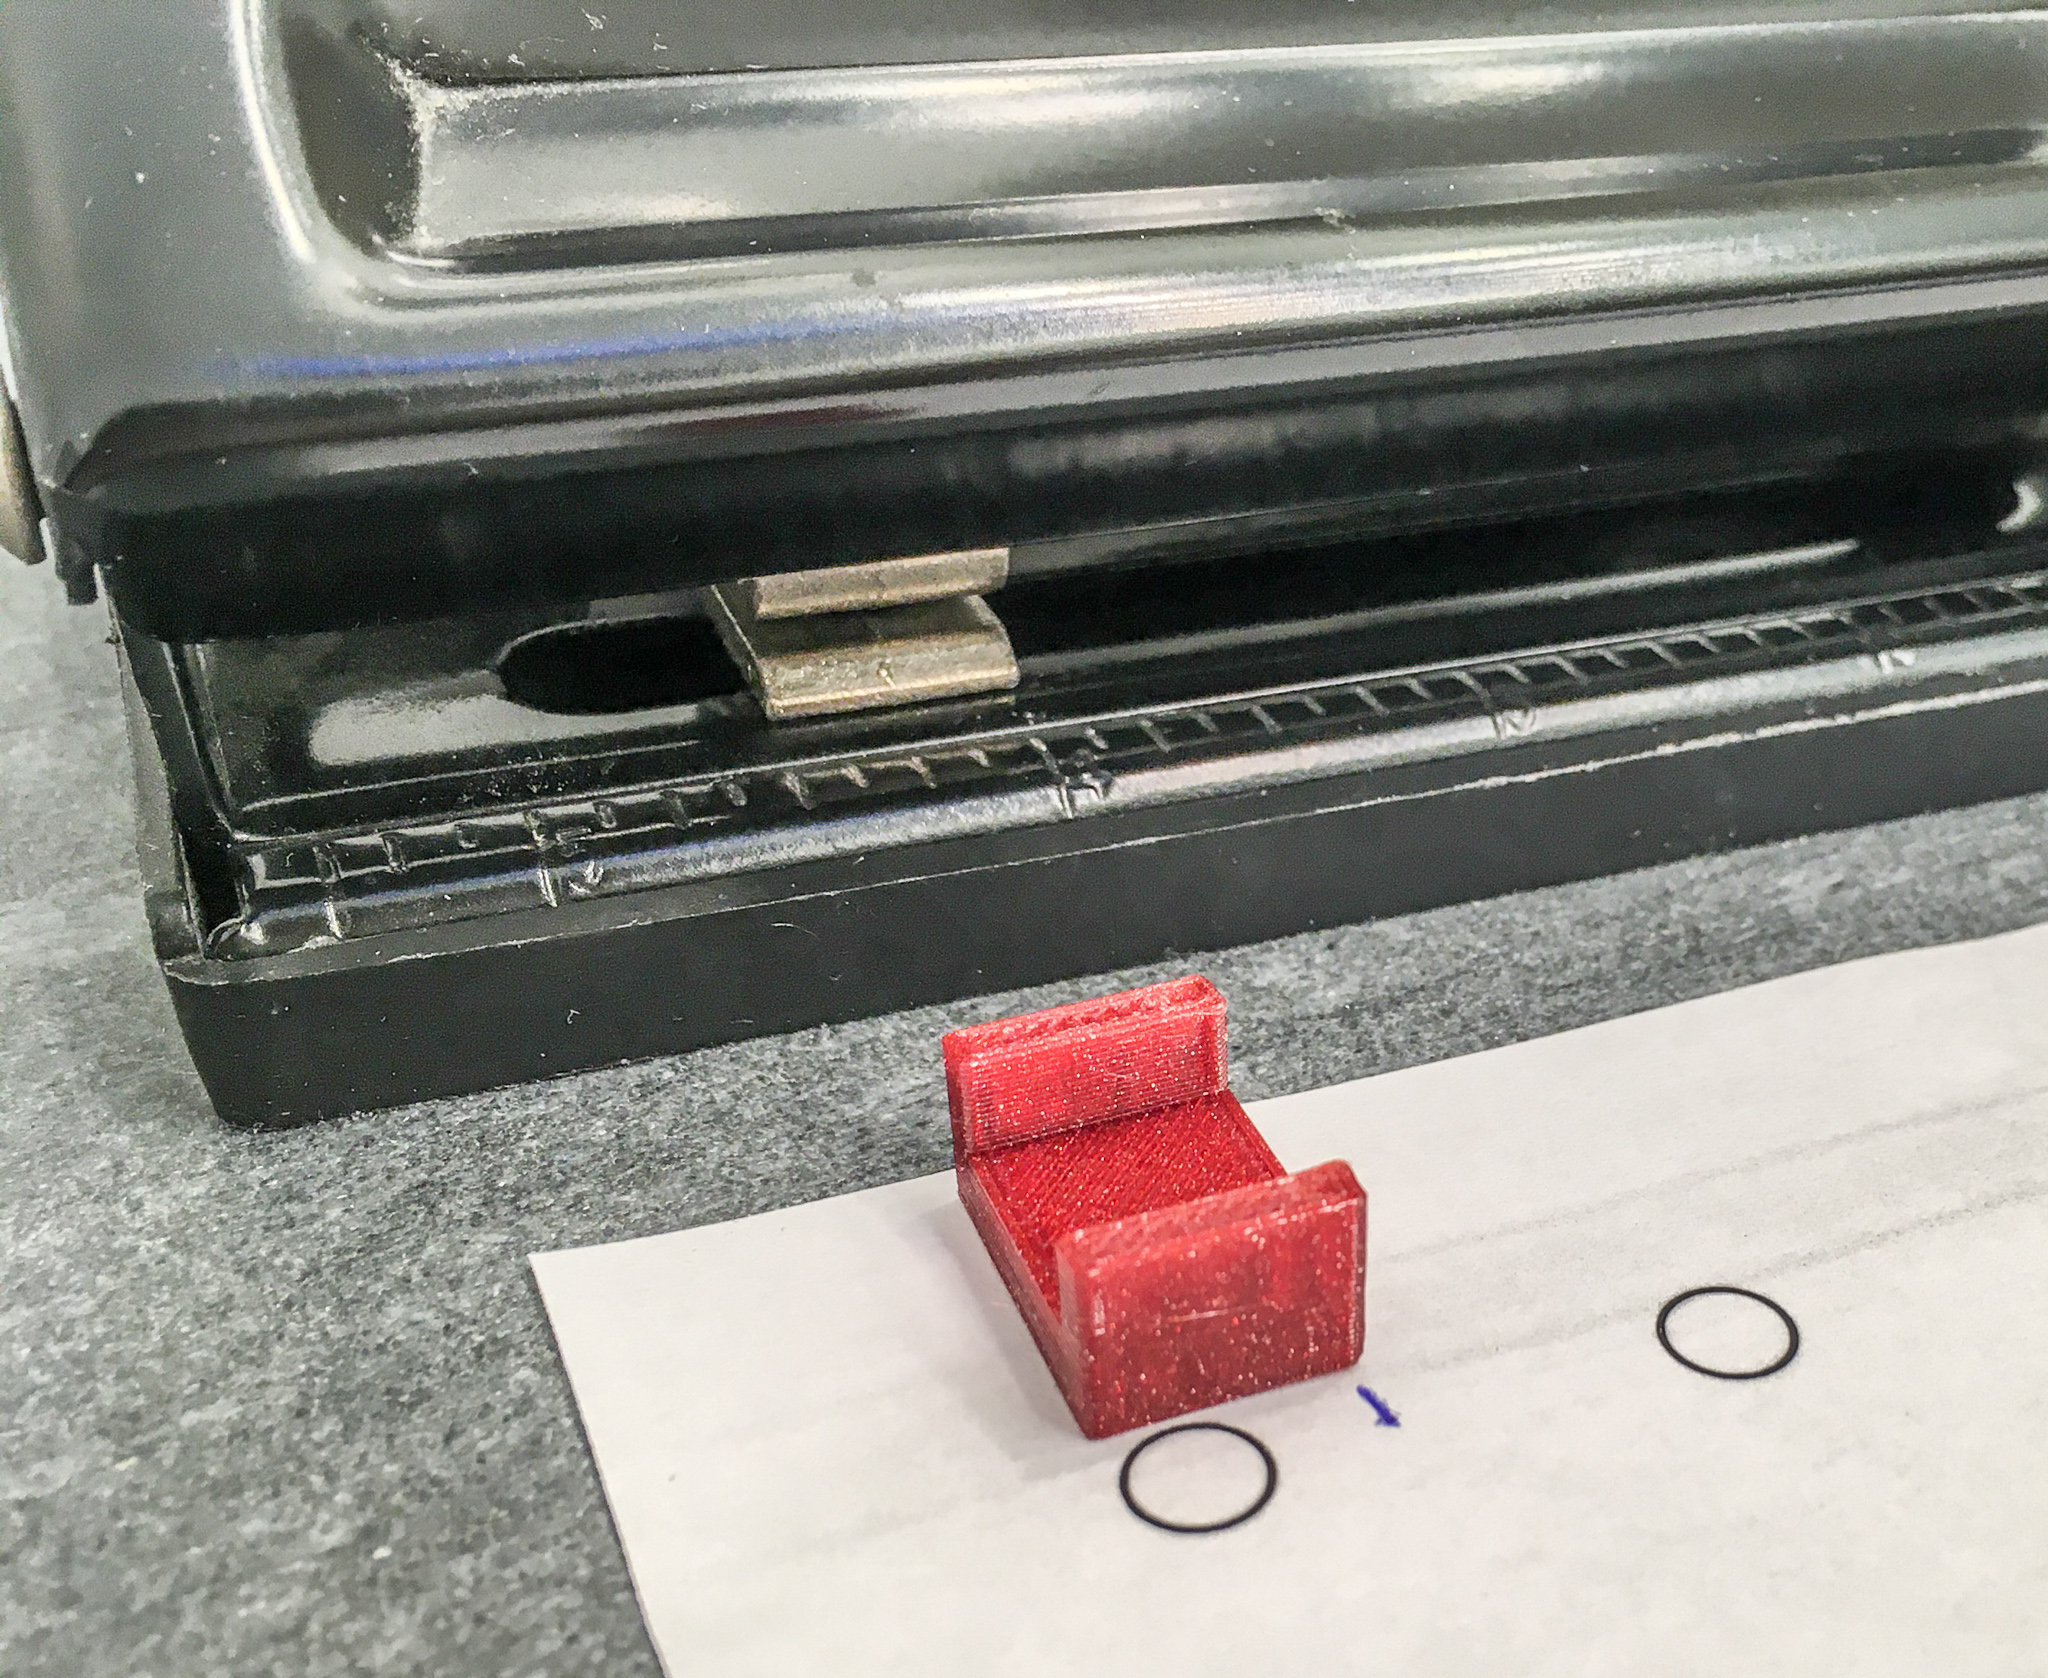
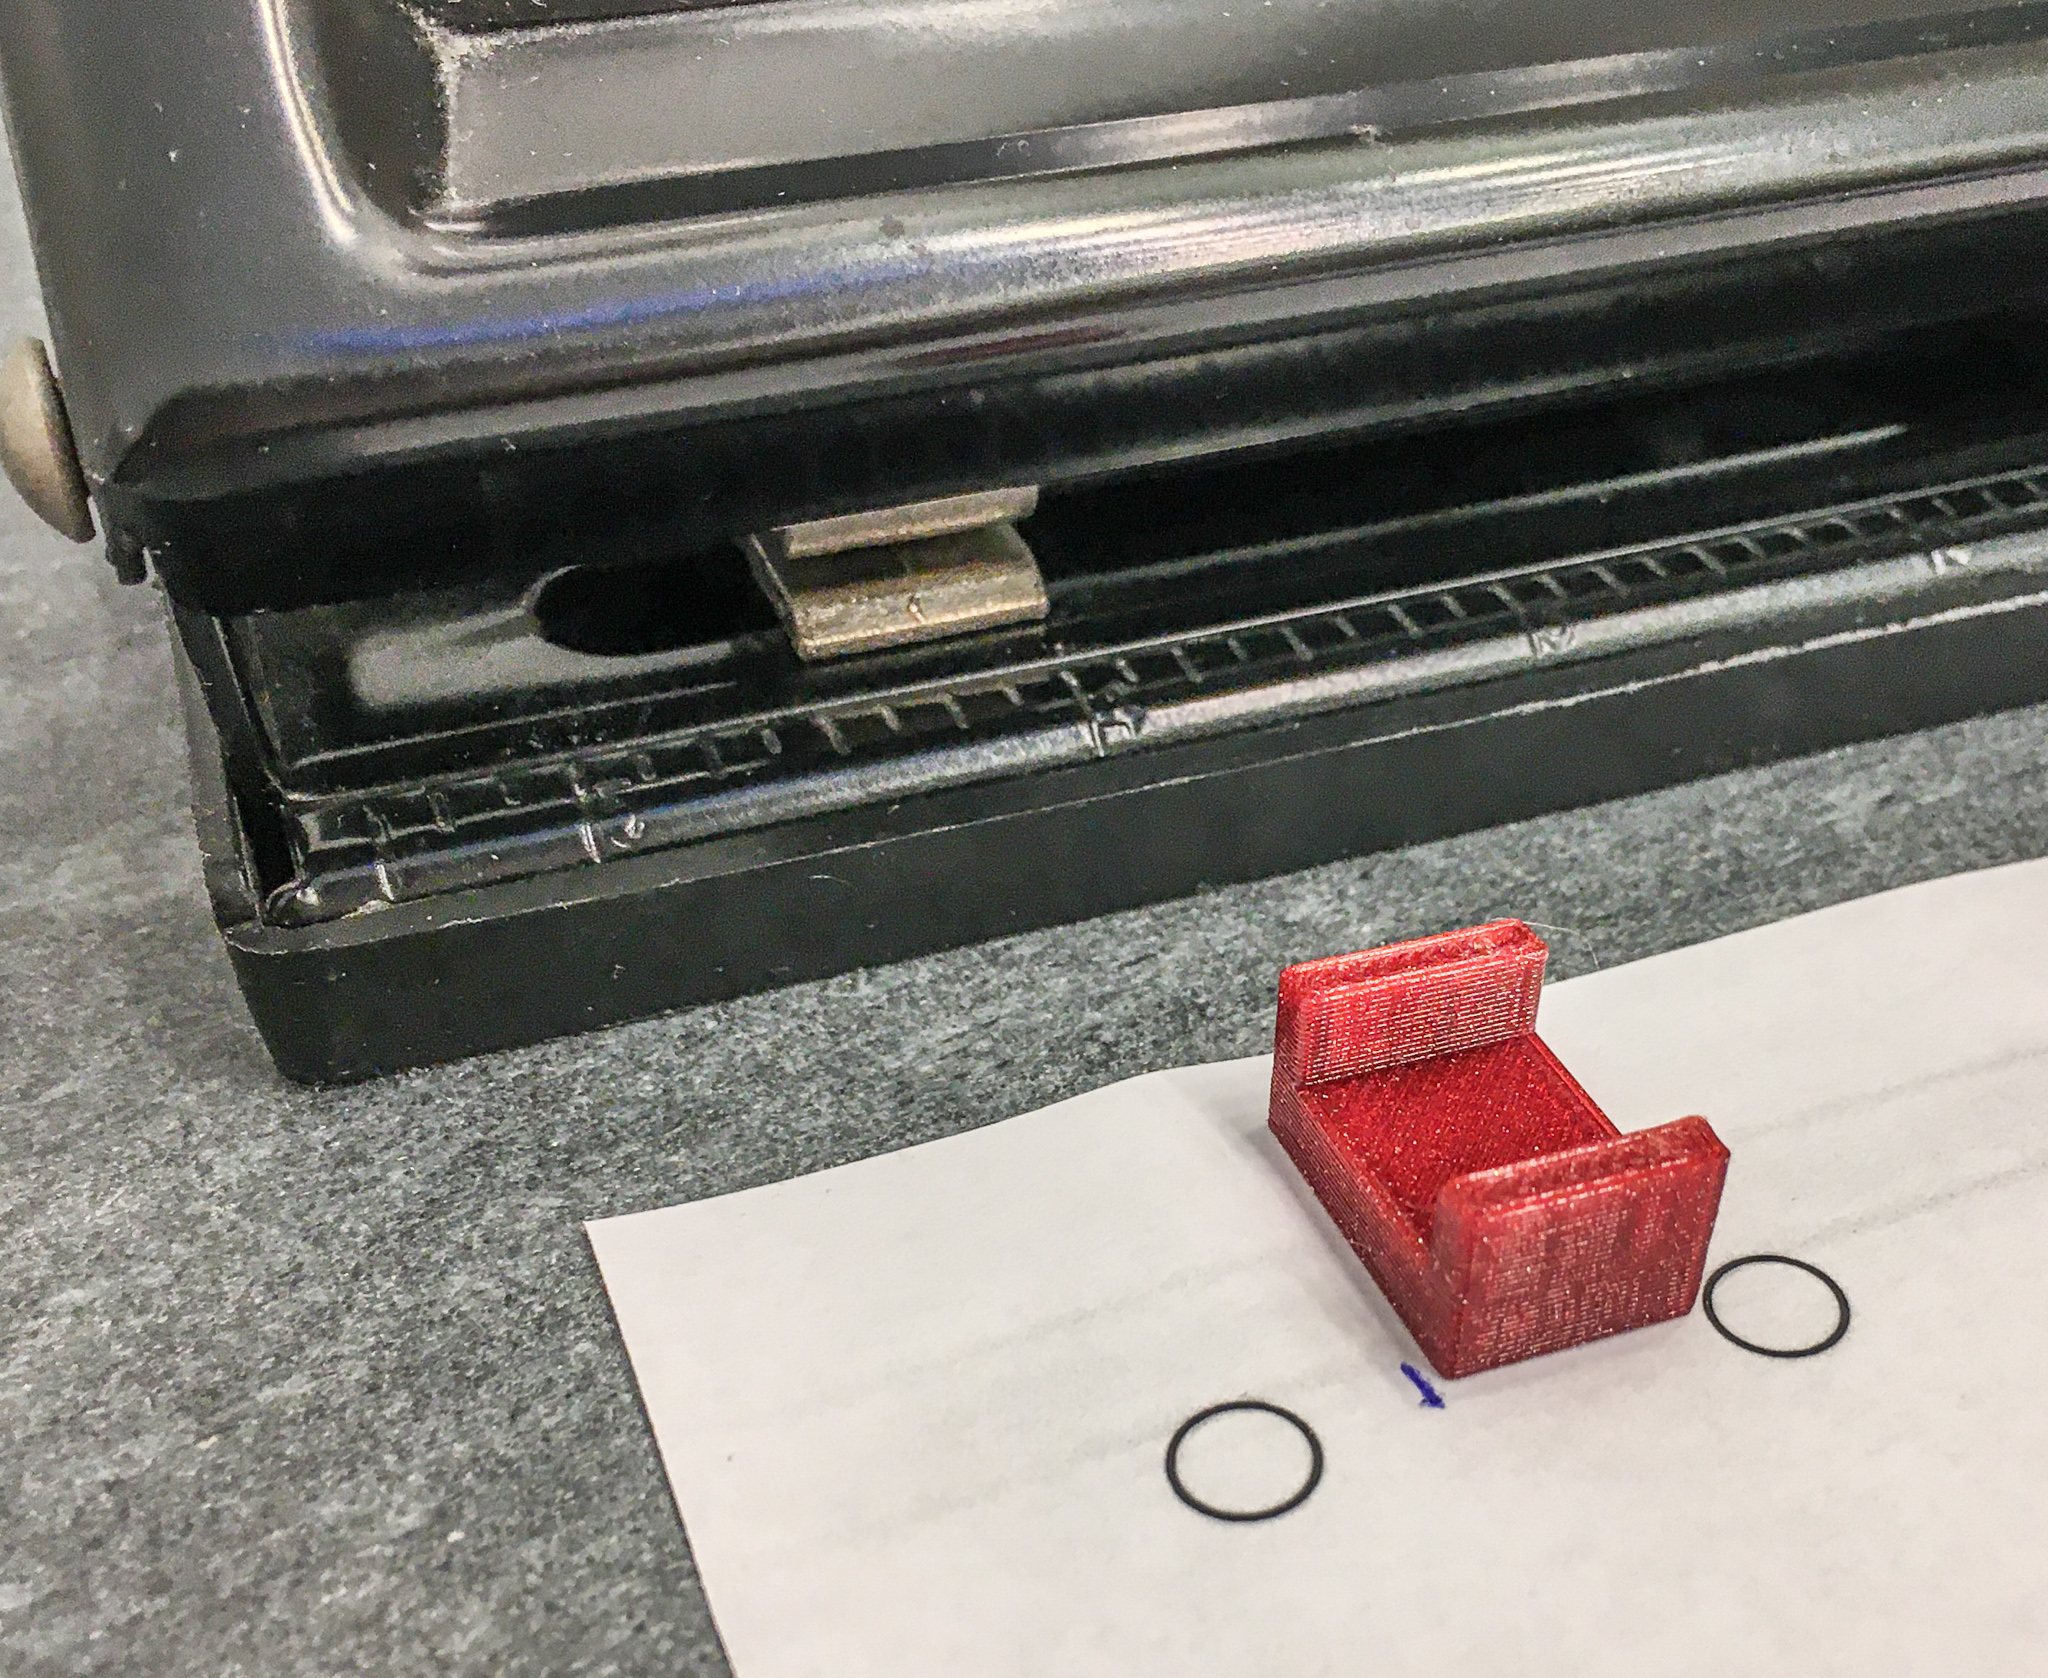
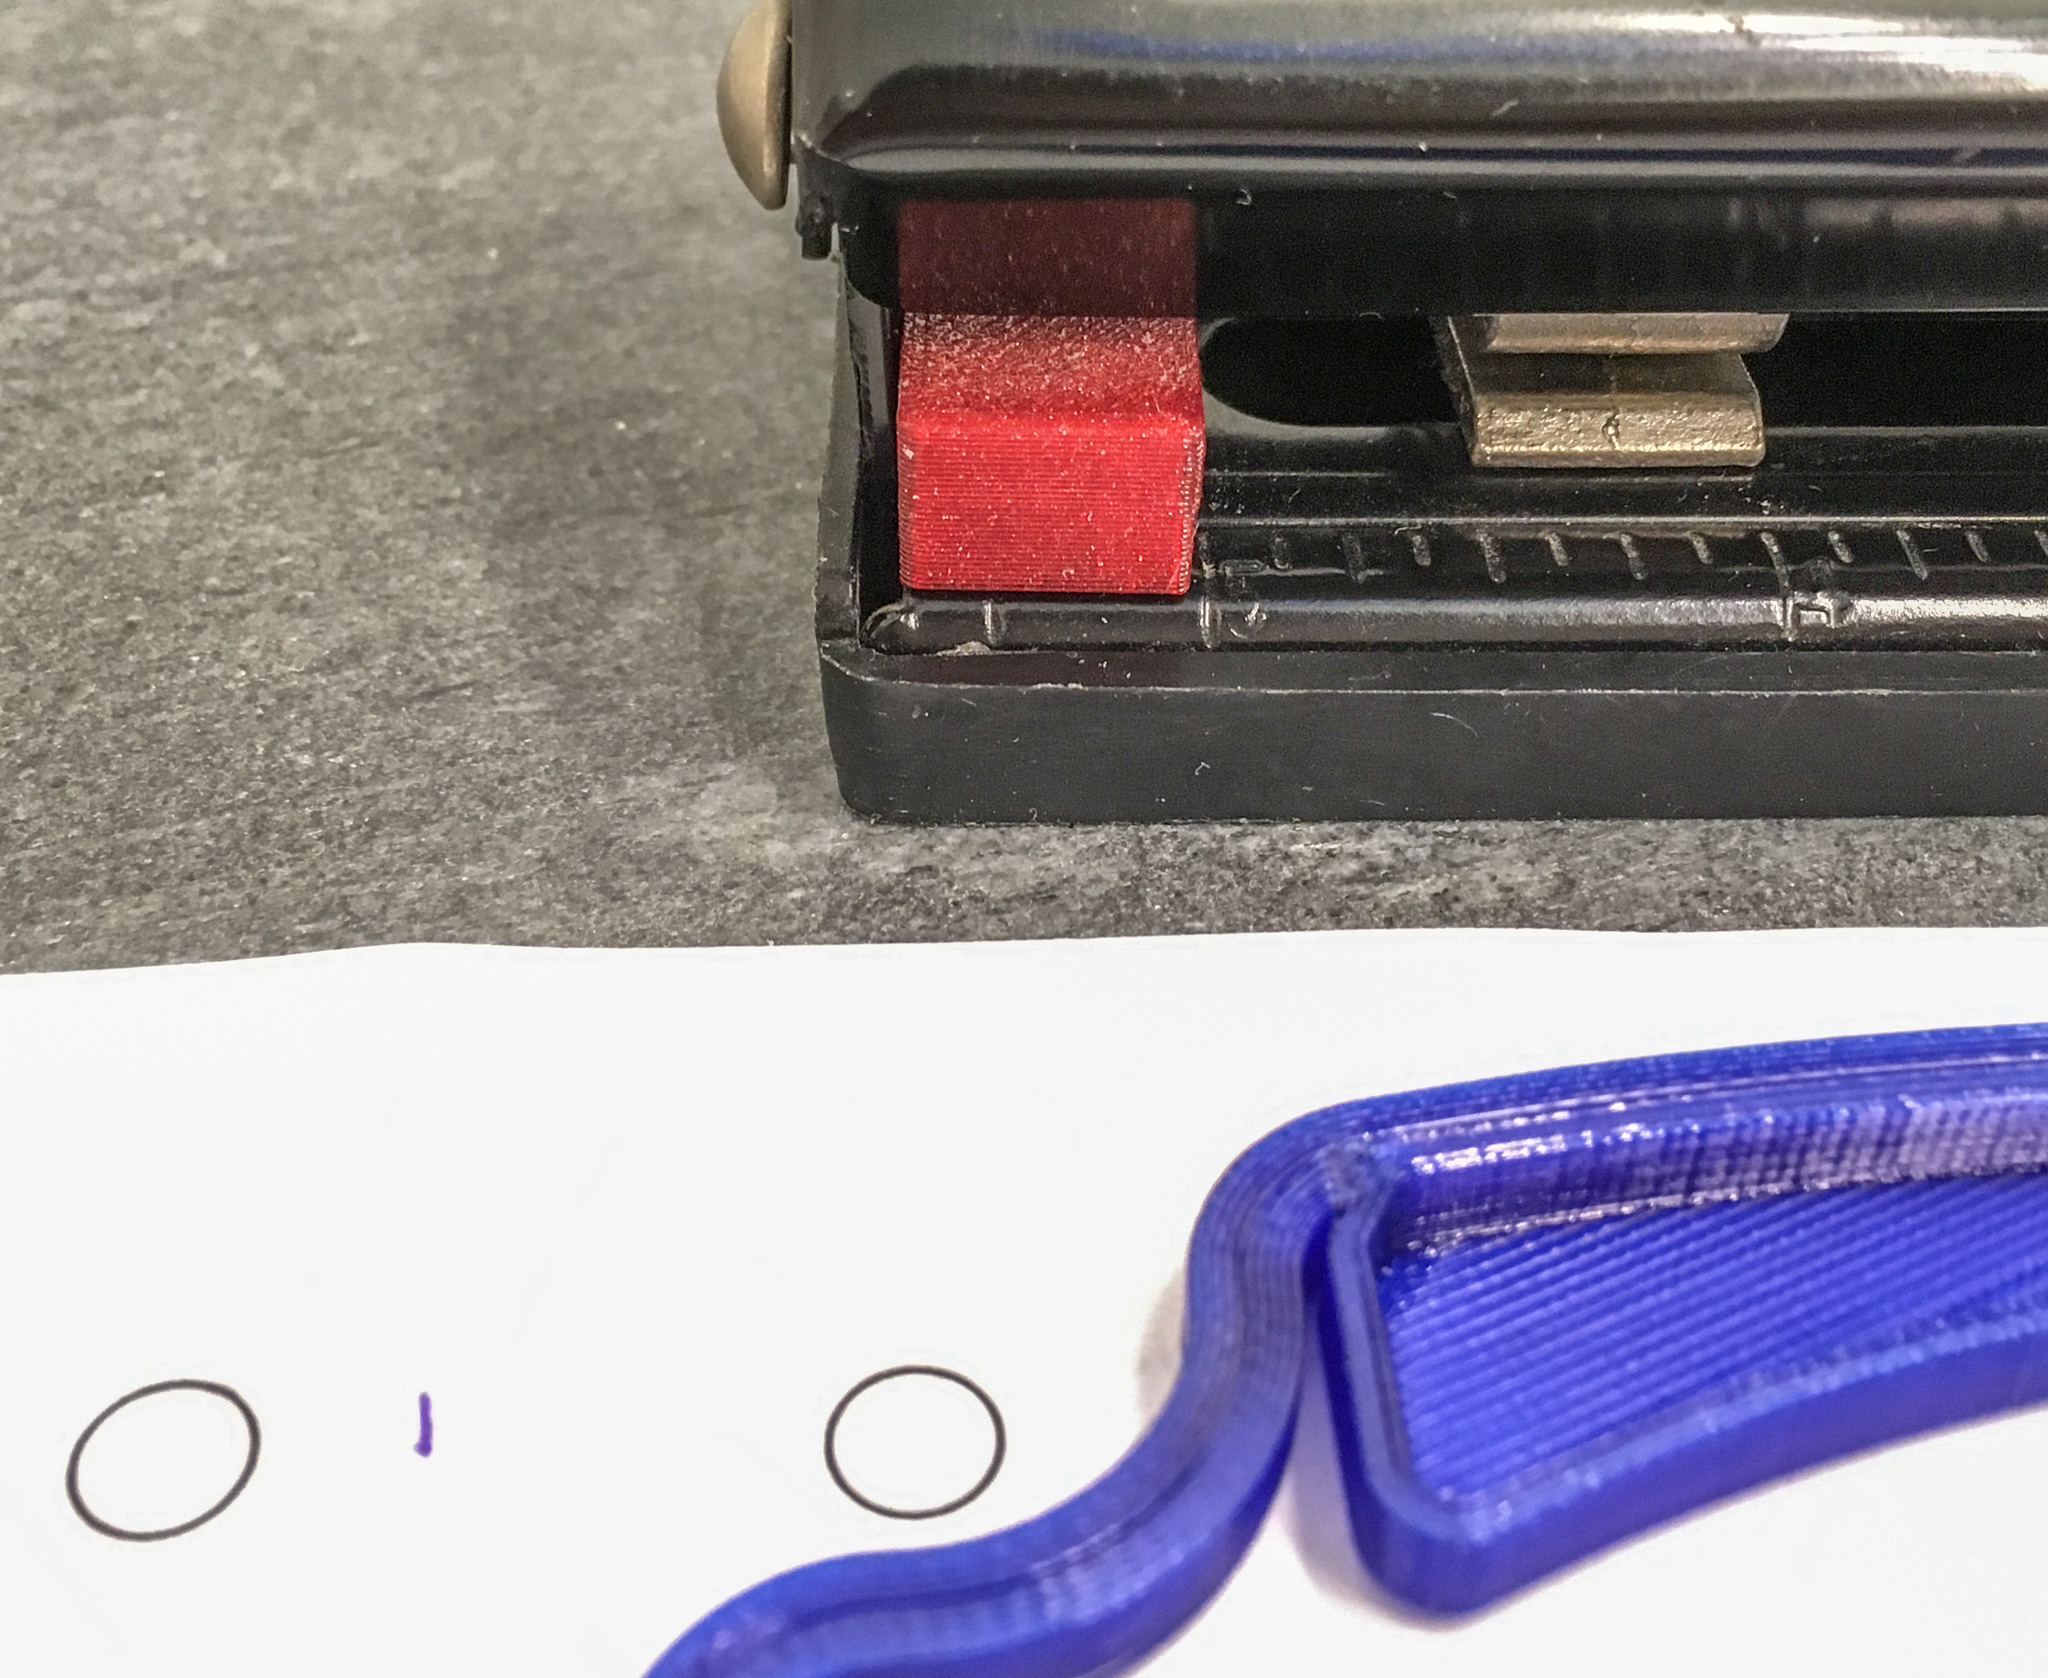
Insert the spacer into the puncher. Push it flush against the end guard on the left side. It may help to glue the space to the hole puncher.
The hole puncher
Now insert the sheet, and set it to sit flush against the spacer. This effectively shifts the three holes a little bit towards the left edge of the sheet. Punch away.
Now flip the sheet. And insert it into the hole puncher. Again set it flush against the spacer. Then punch another three holes.
You have just made 6 holes with perfect spacing. By shifting 3 holes half a distance to the left, and 3 holes half a distance to the right, we end up spacing the two sets of holes exactly the right distance apart.
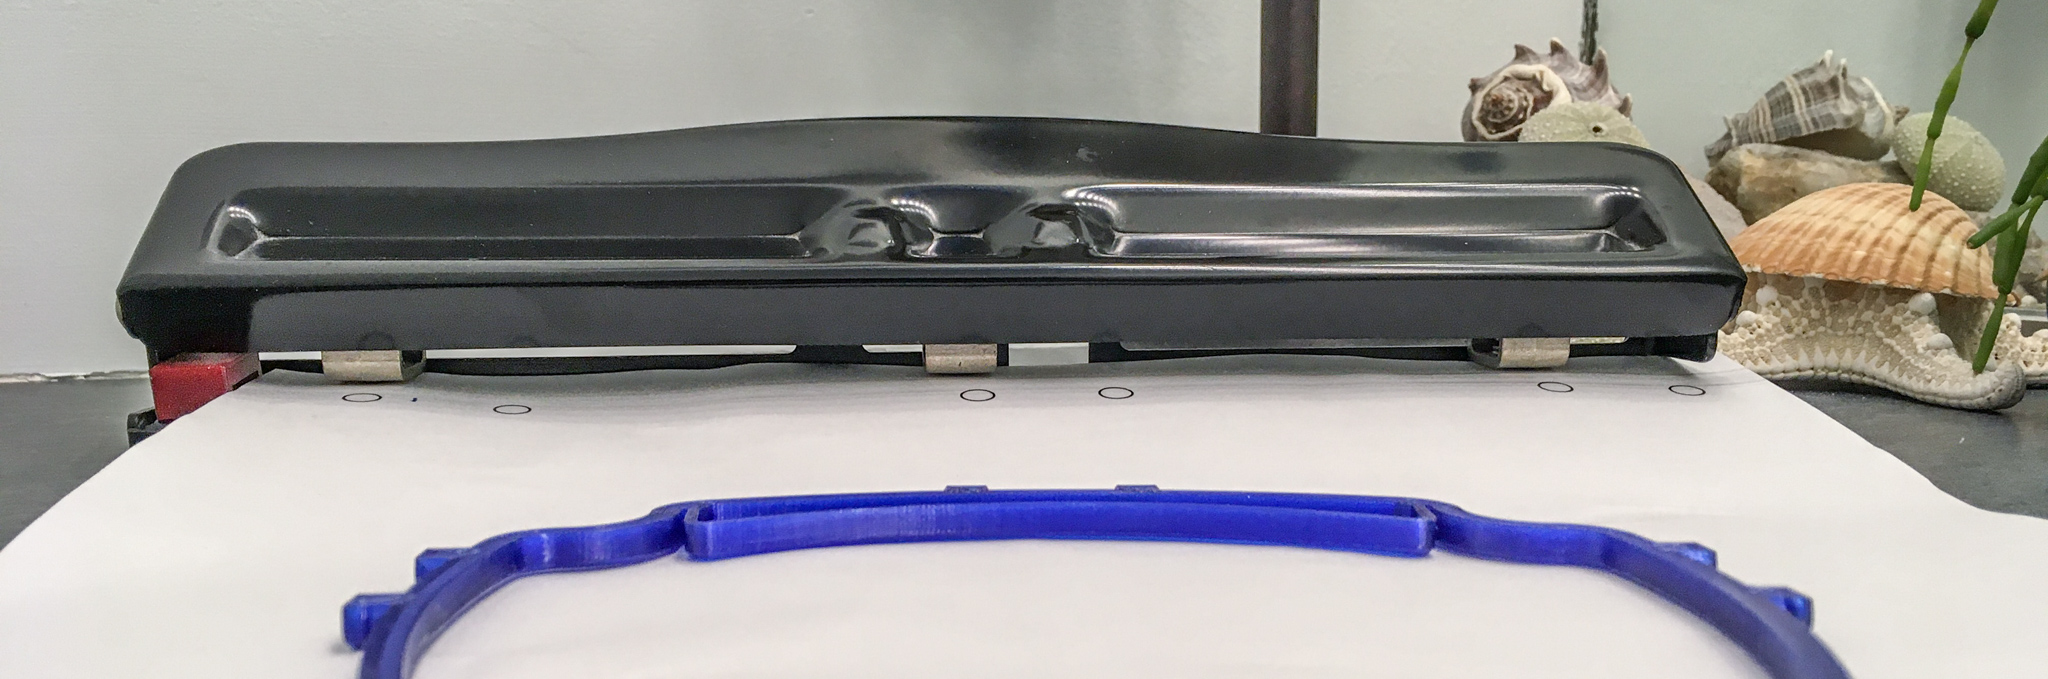
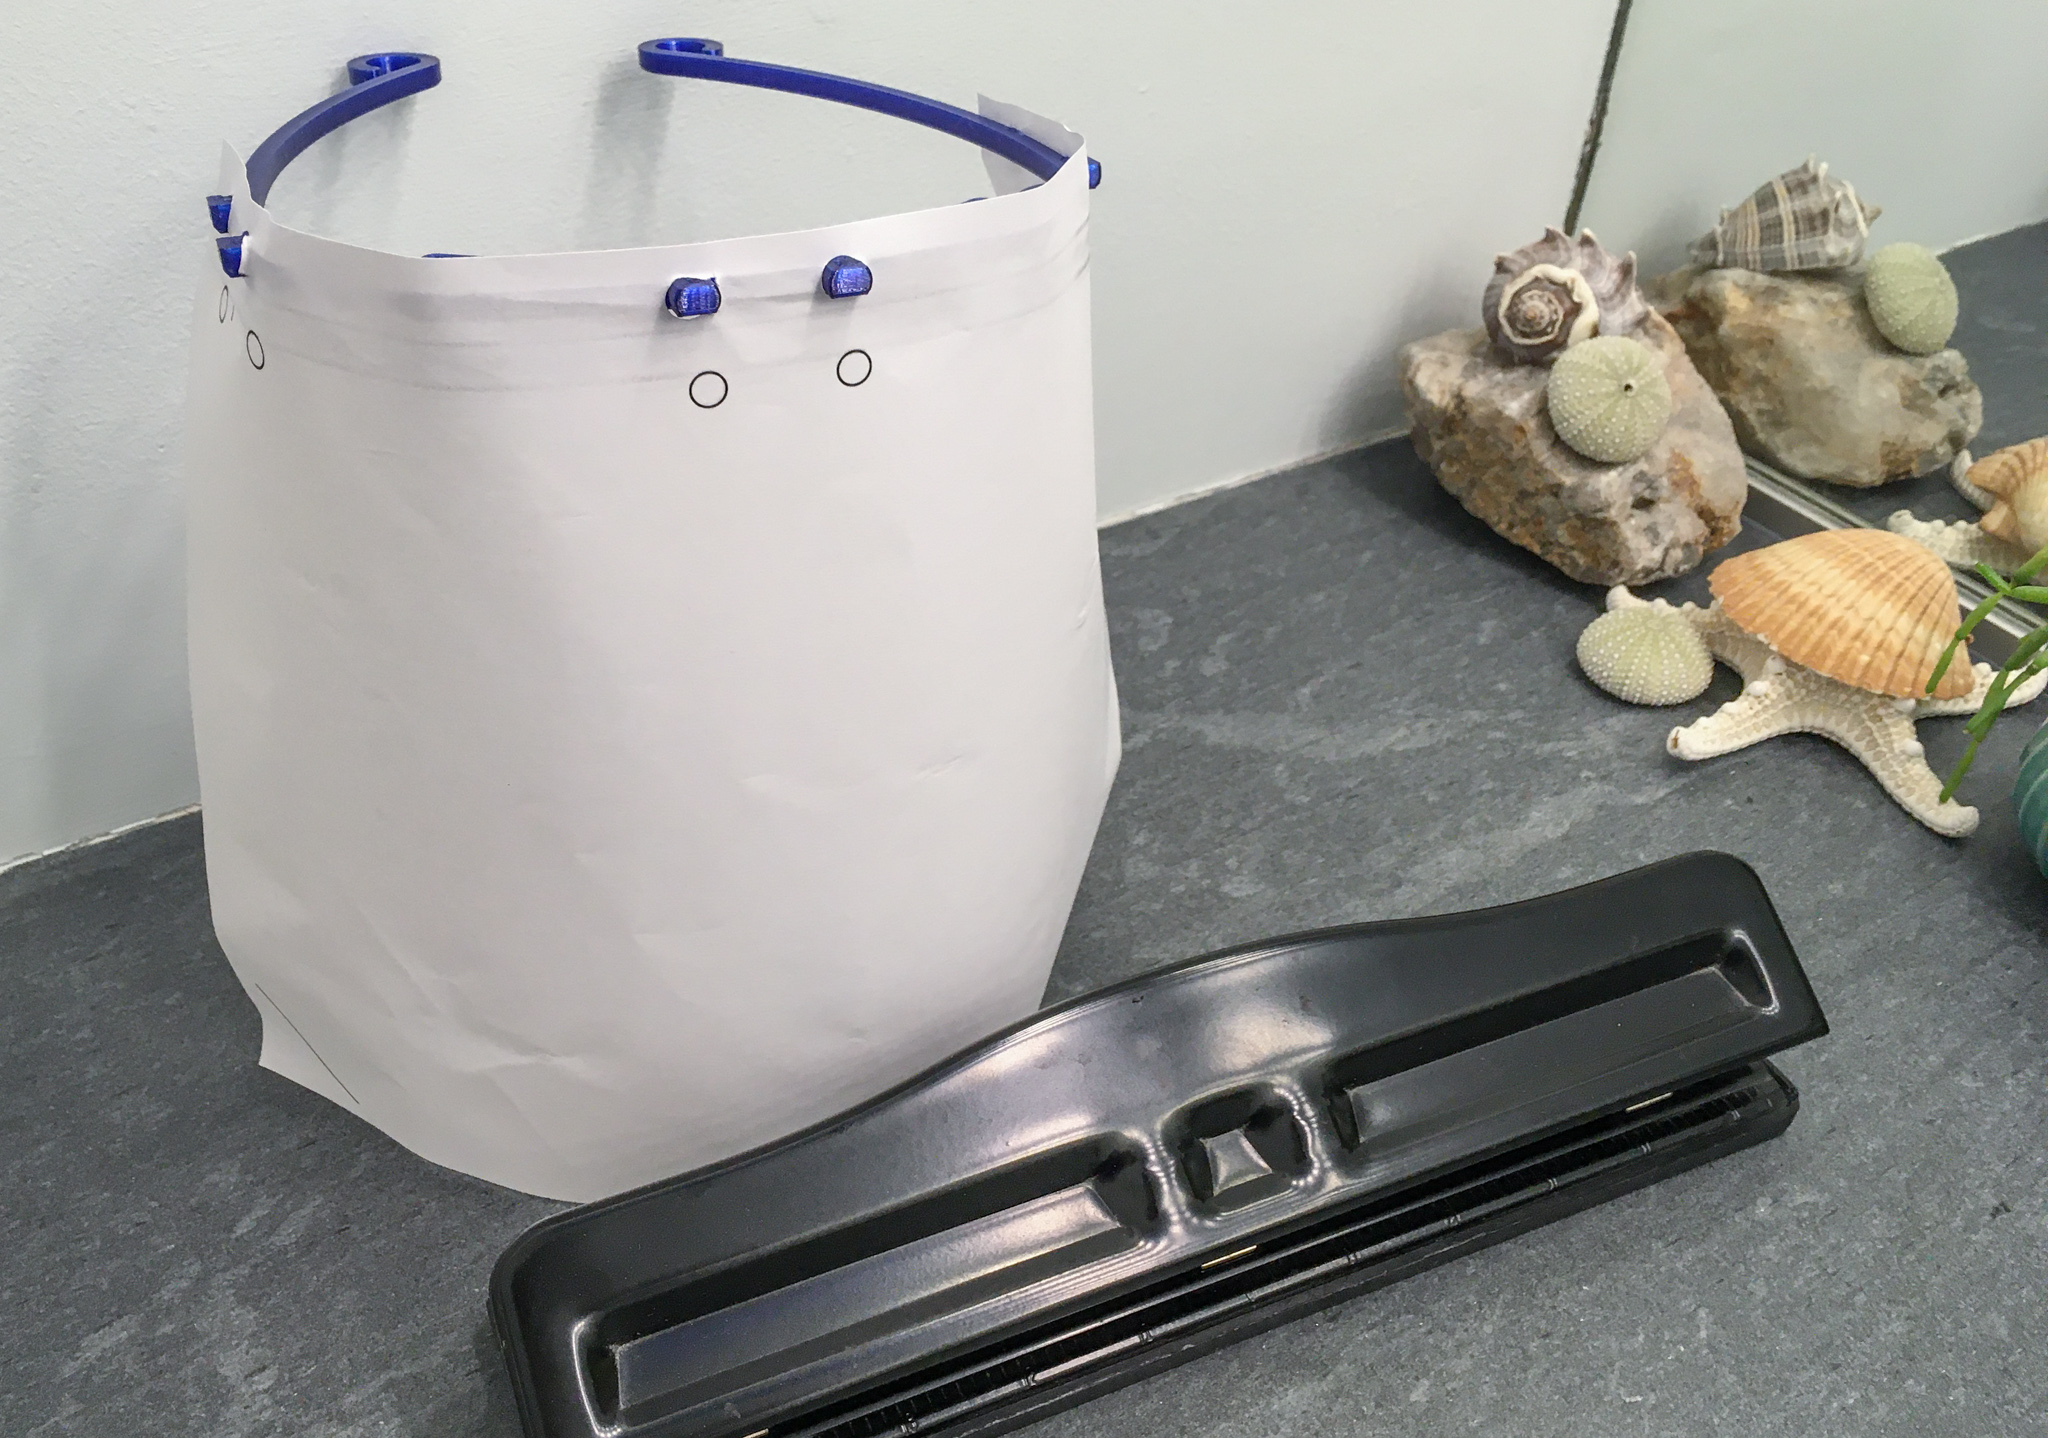
Now assemble the sheet onto the head band. I did not bother rounding off the four corners with scissors in this demonstration.
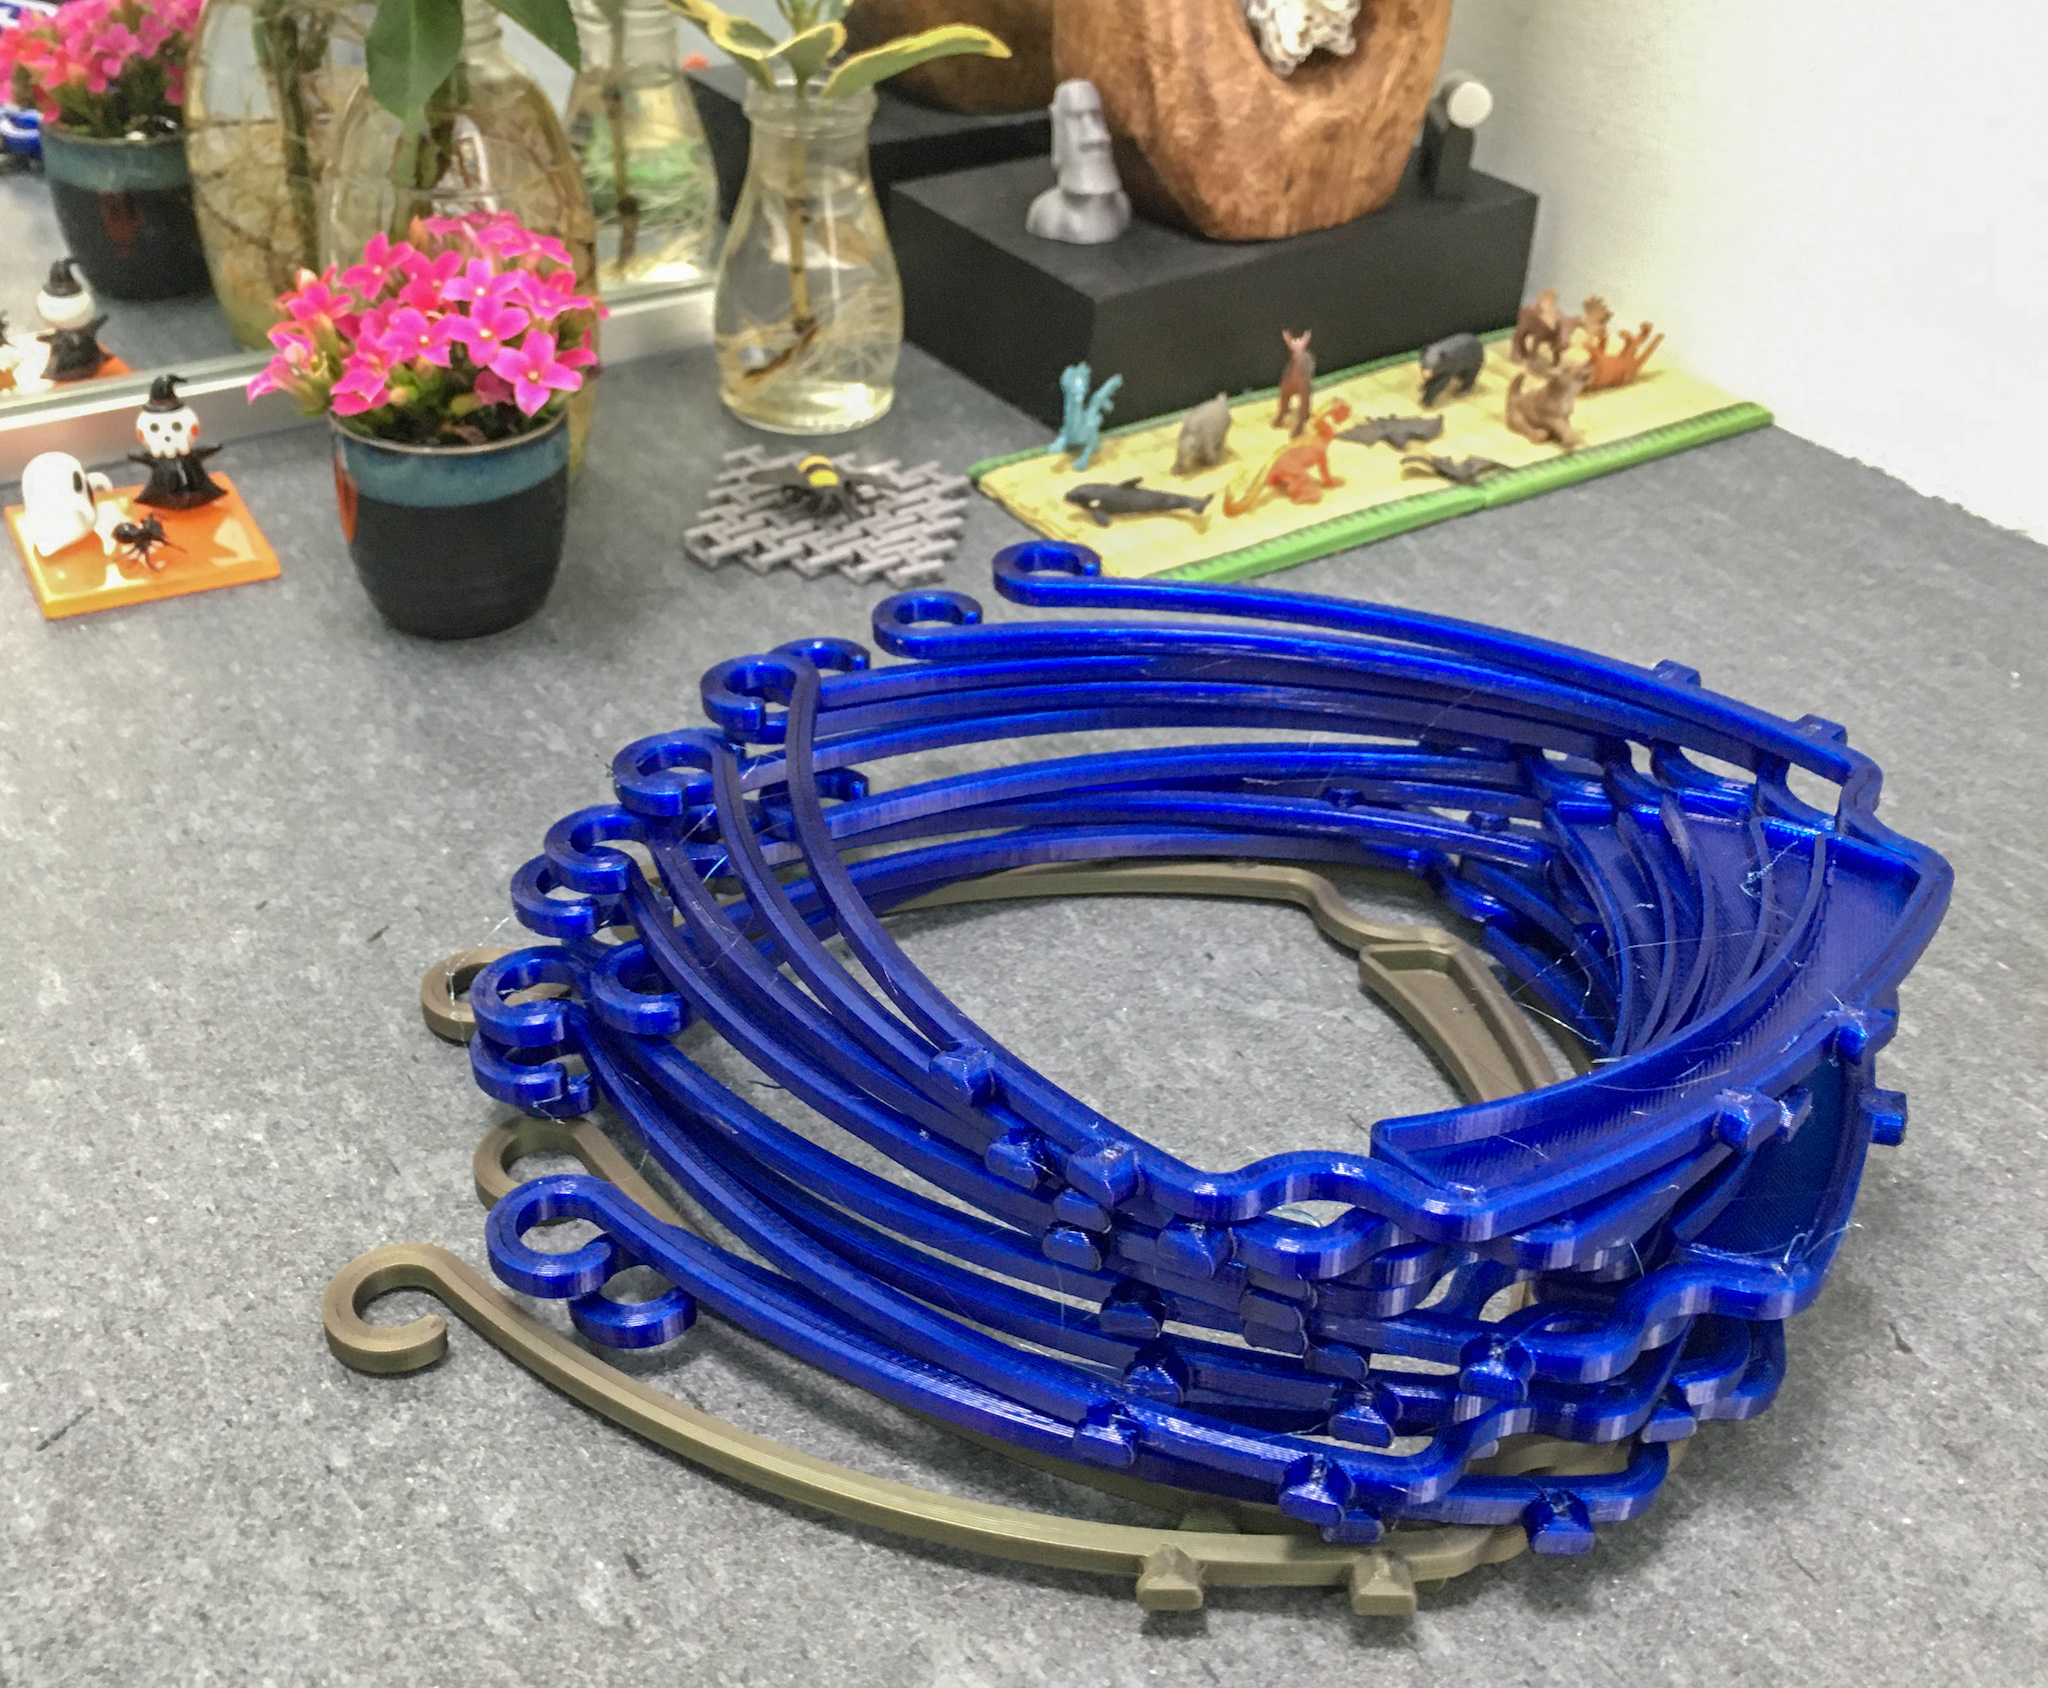
Print more!
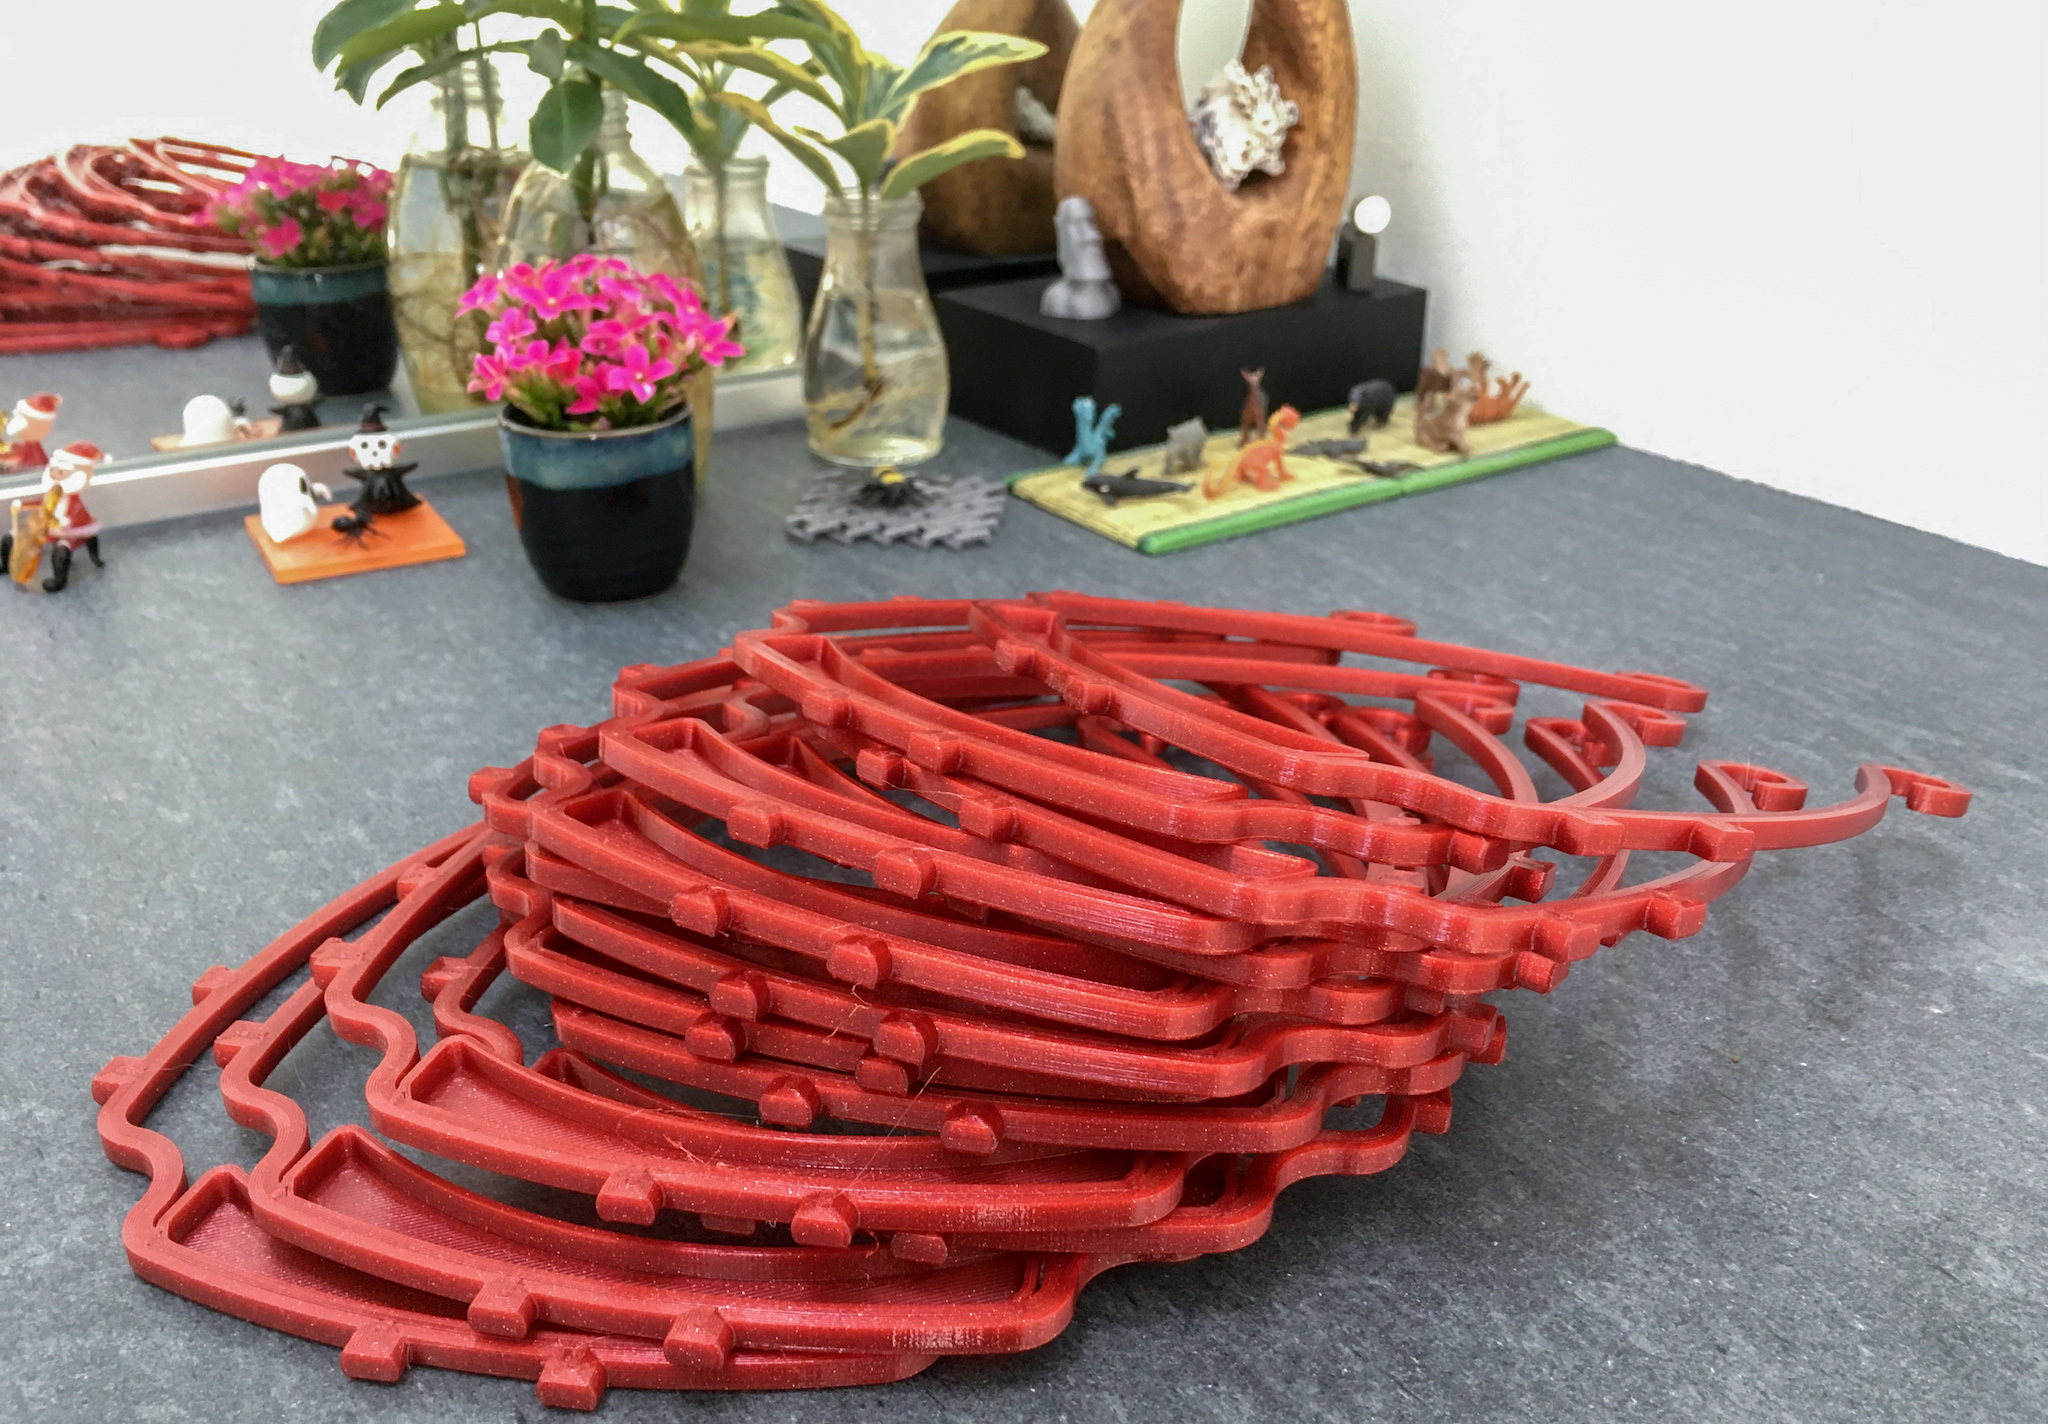
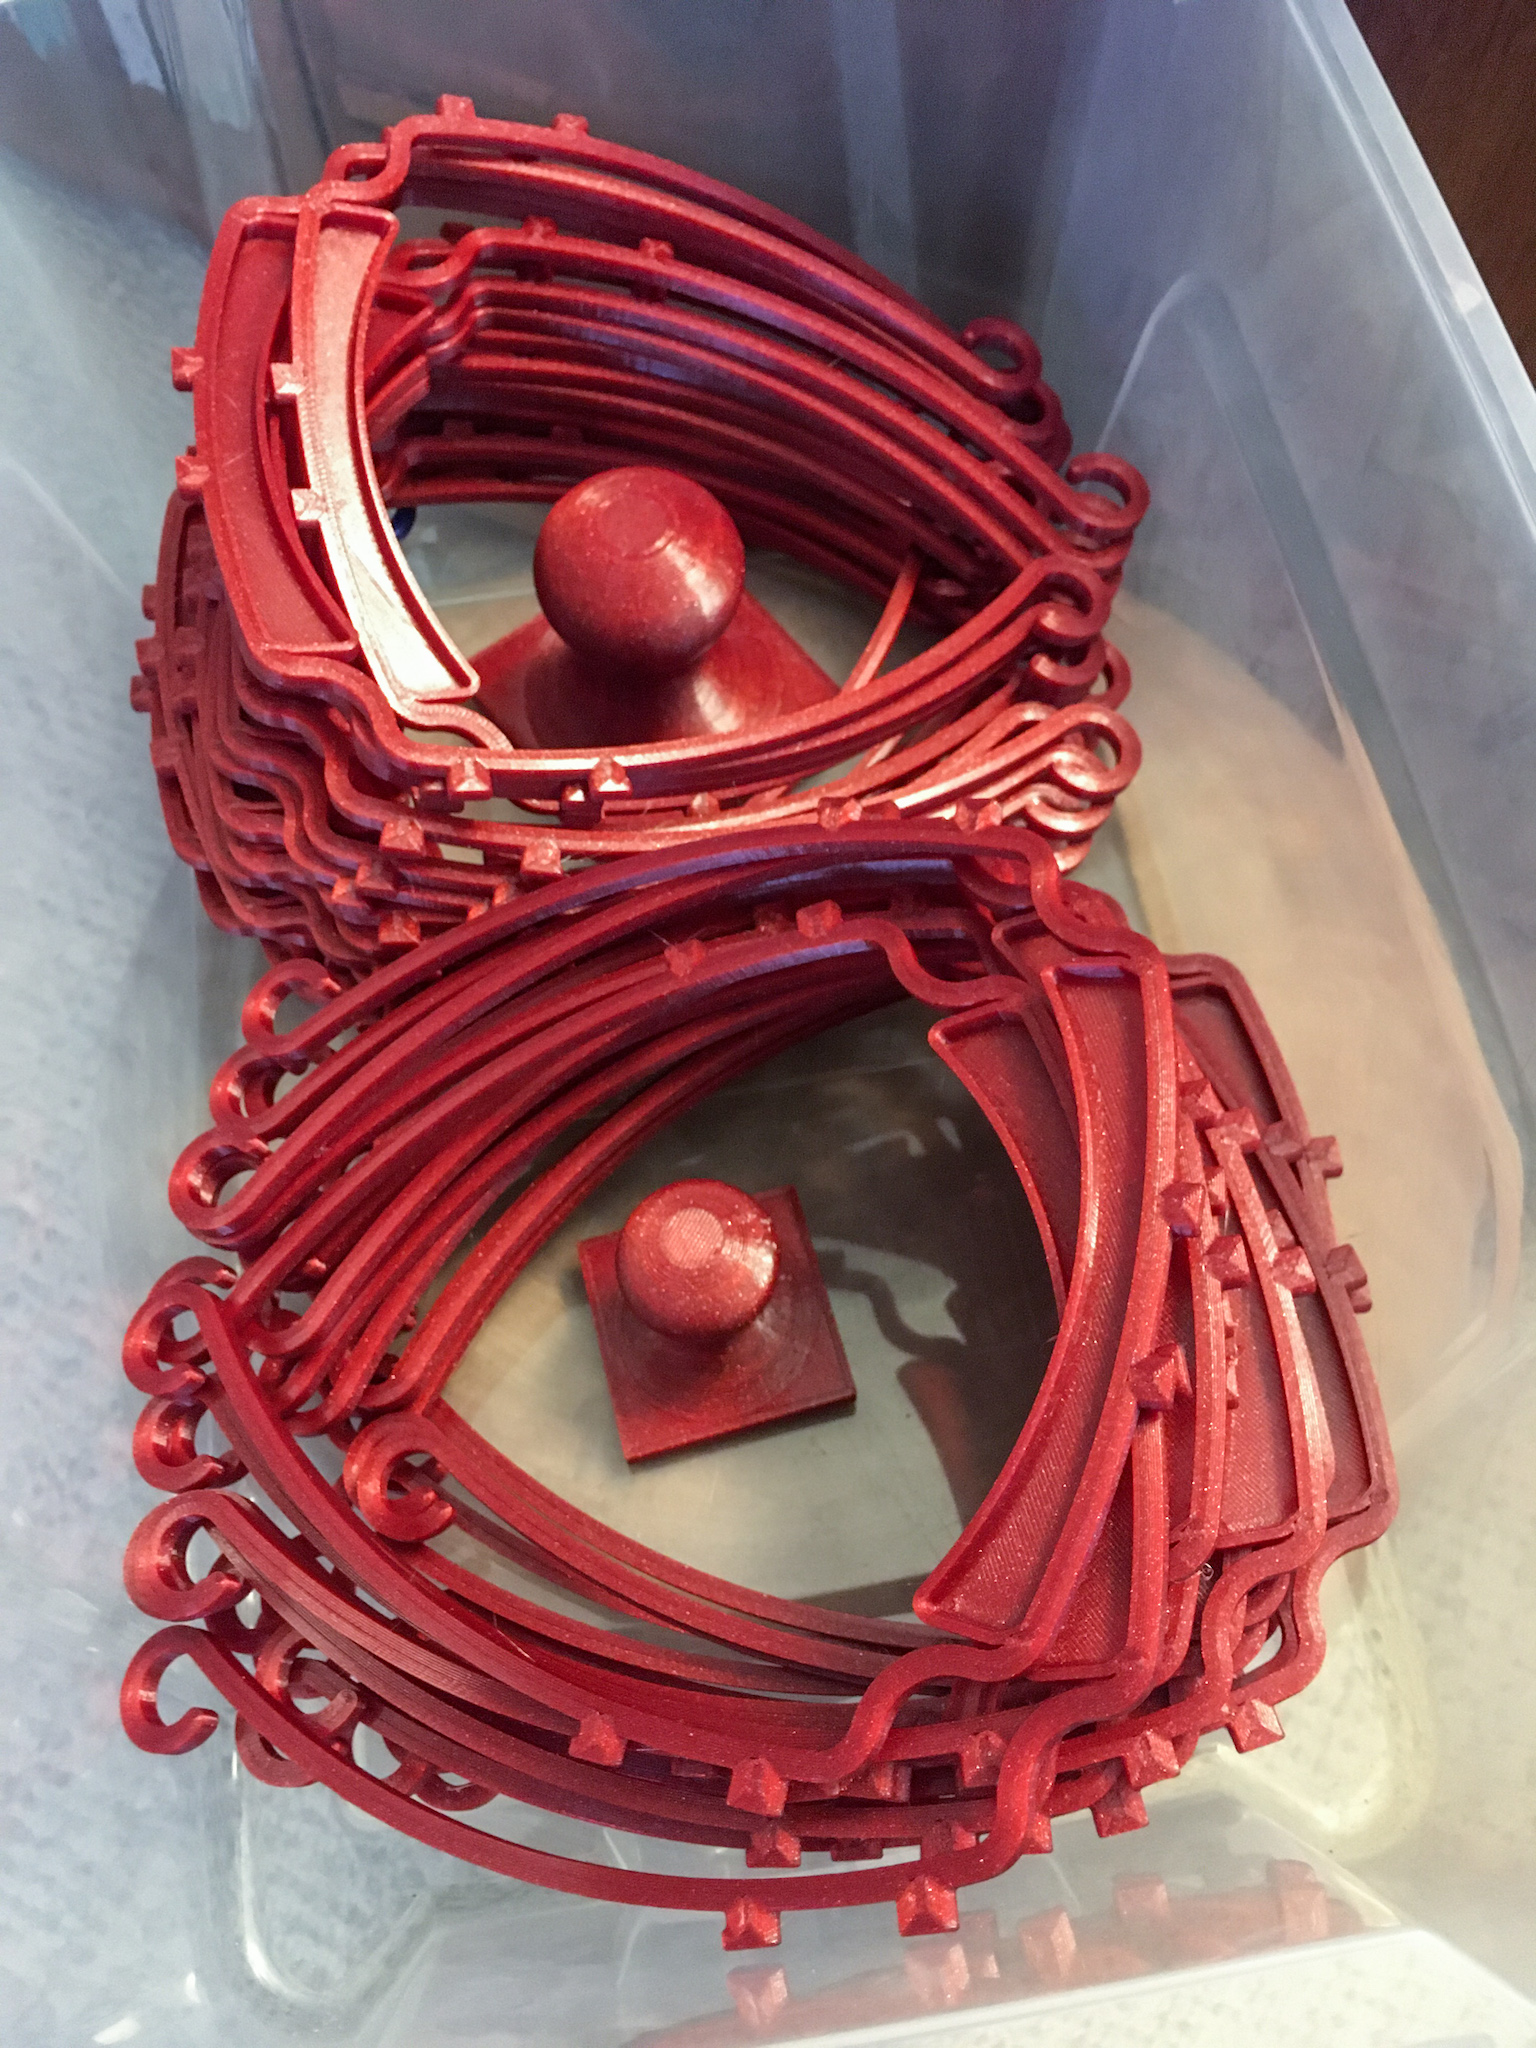
Now go on, and print more. Here is our next batch, featuring Prusament PETG Carmine Red. This color has become our favorite.

The cost
The most common question we are asked when people find out about 3D printing of face shields is… “how much does it cost to print these?”
The answer is, not much. The cost is negligible, in light of the plight of our frontline workers. Each head band requires 15g of filament to print. A typical spool of PETG filament weighs 1kg, and costs anywhere from $20 to $30. So each spool can be used to make more than 60 head bands. That sets the raw material cost of each head band to be less than 50¢ each.
This 1kg spool of filament is still churning out face shields. Including the two being printed on the printer bed, there are 48 face shields. We also printed out those two wet-sanding blocks. There are still plenty of filament left on the spool.
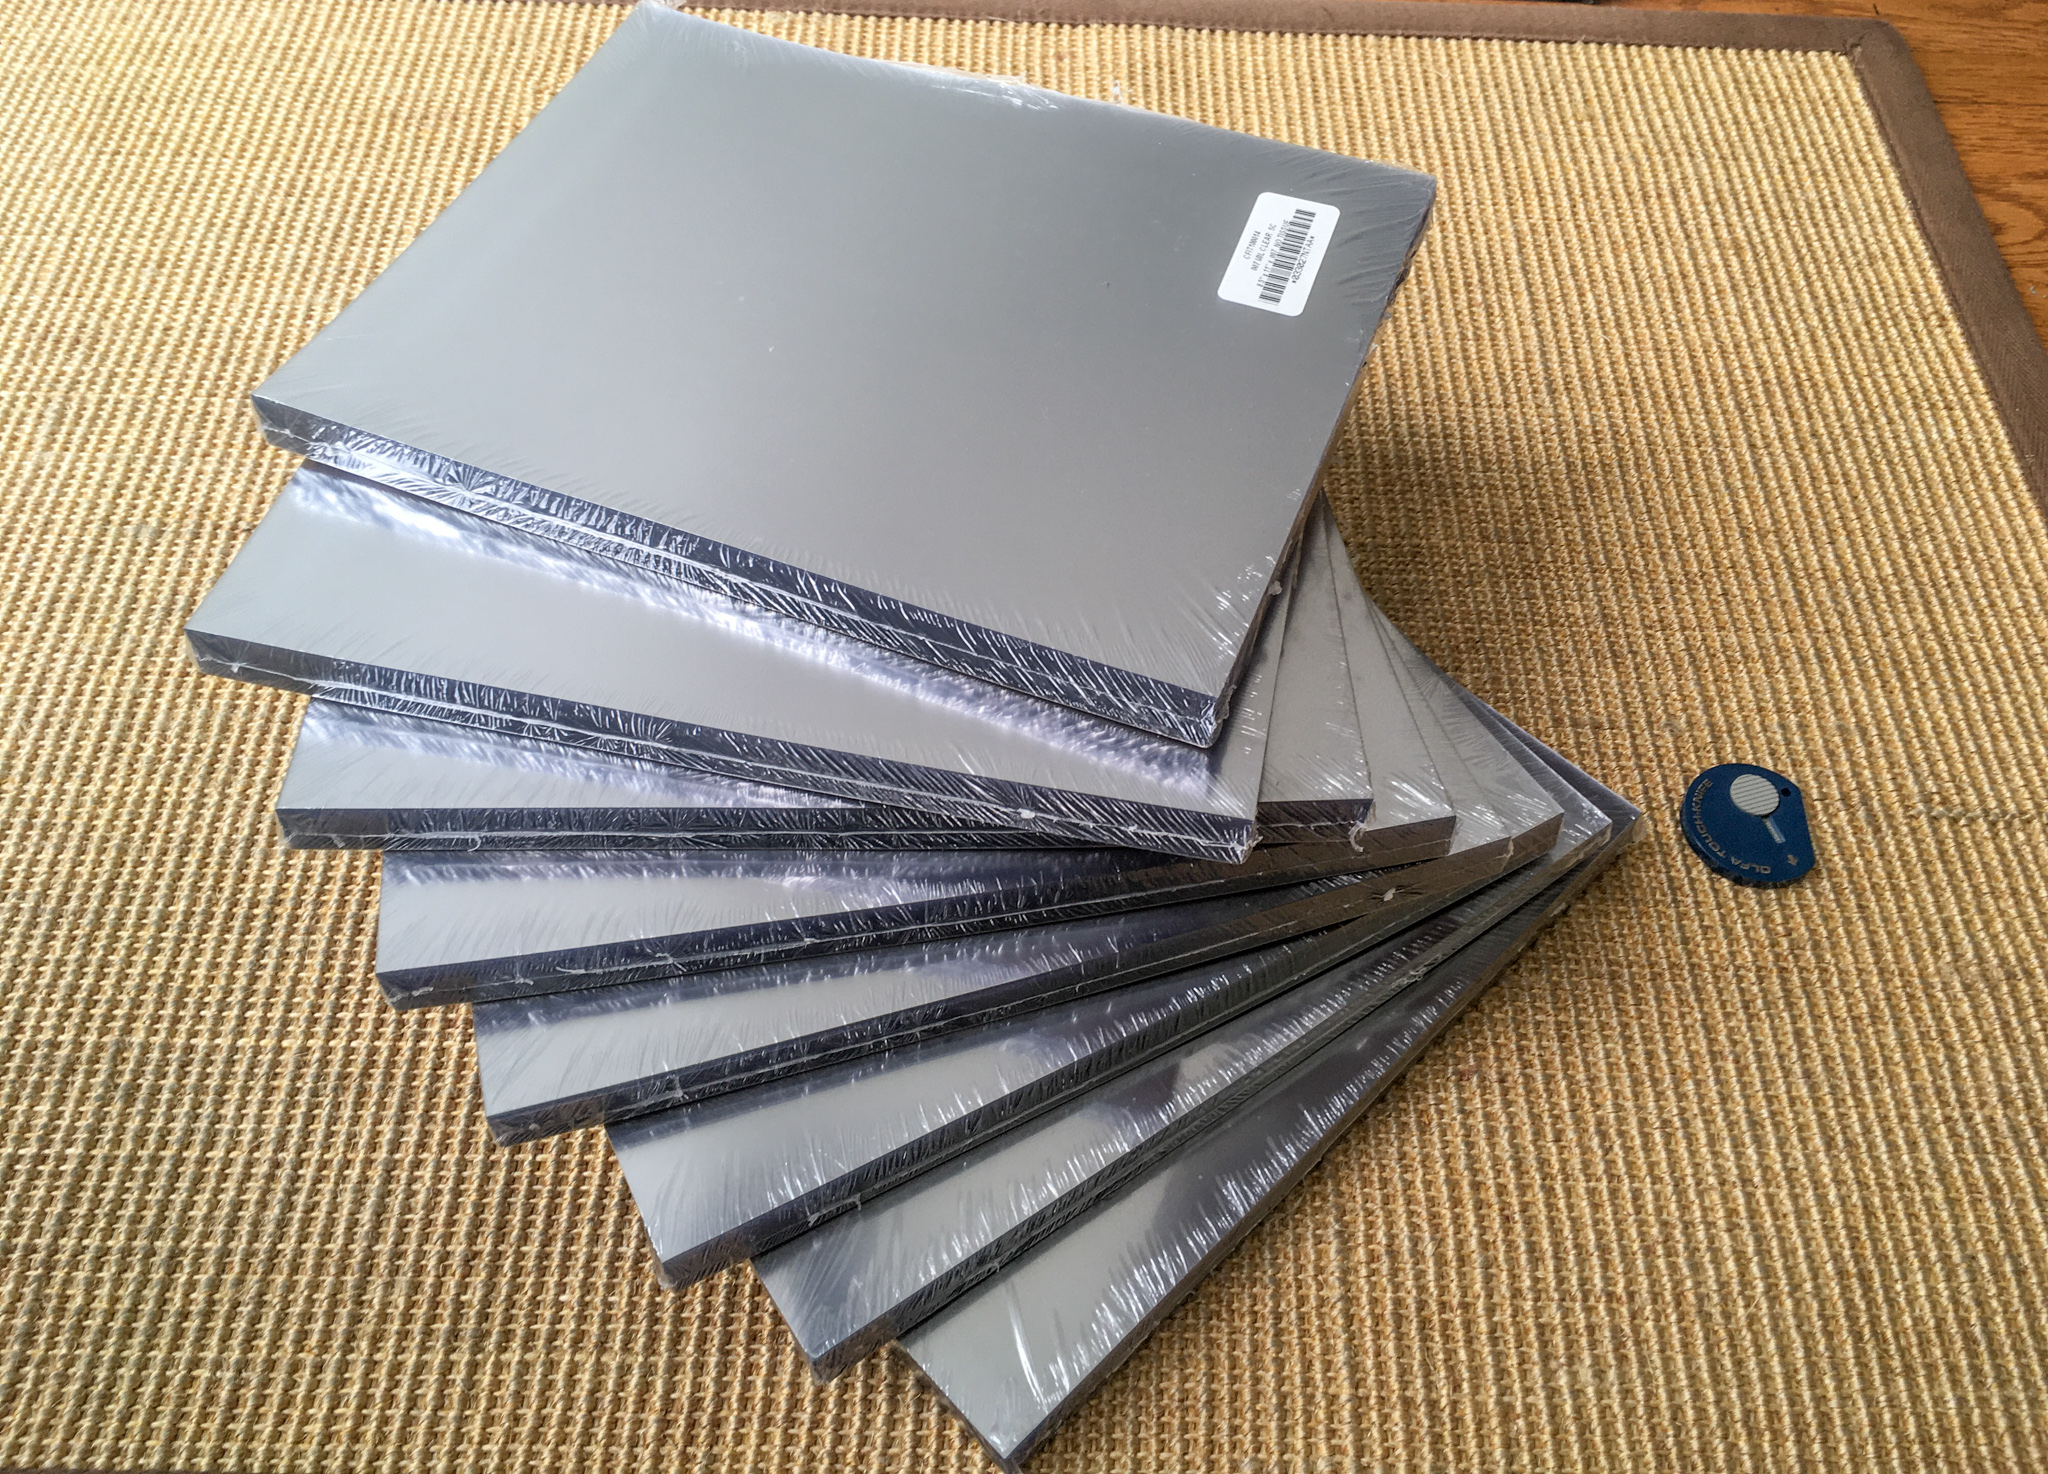
We bought 800 sheets of PVC transparencies from CFS for $72, with free ground shipping. So the cost of the PVC shield itself is almost nothing, compared to the filament cost, when you find the right source.
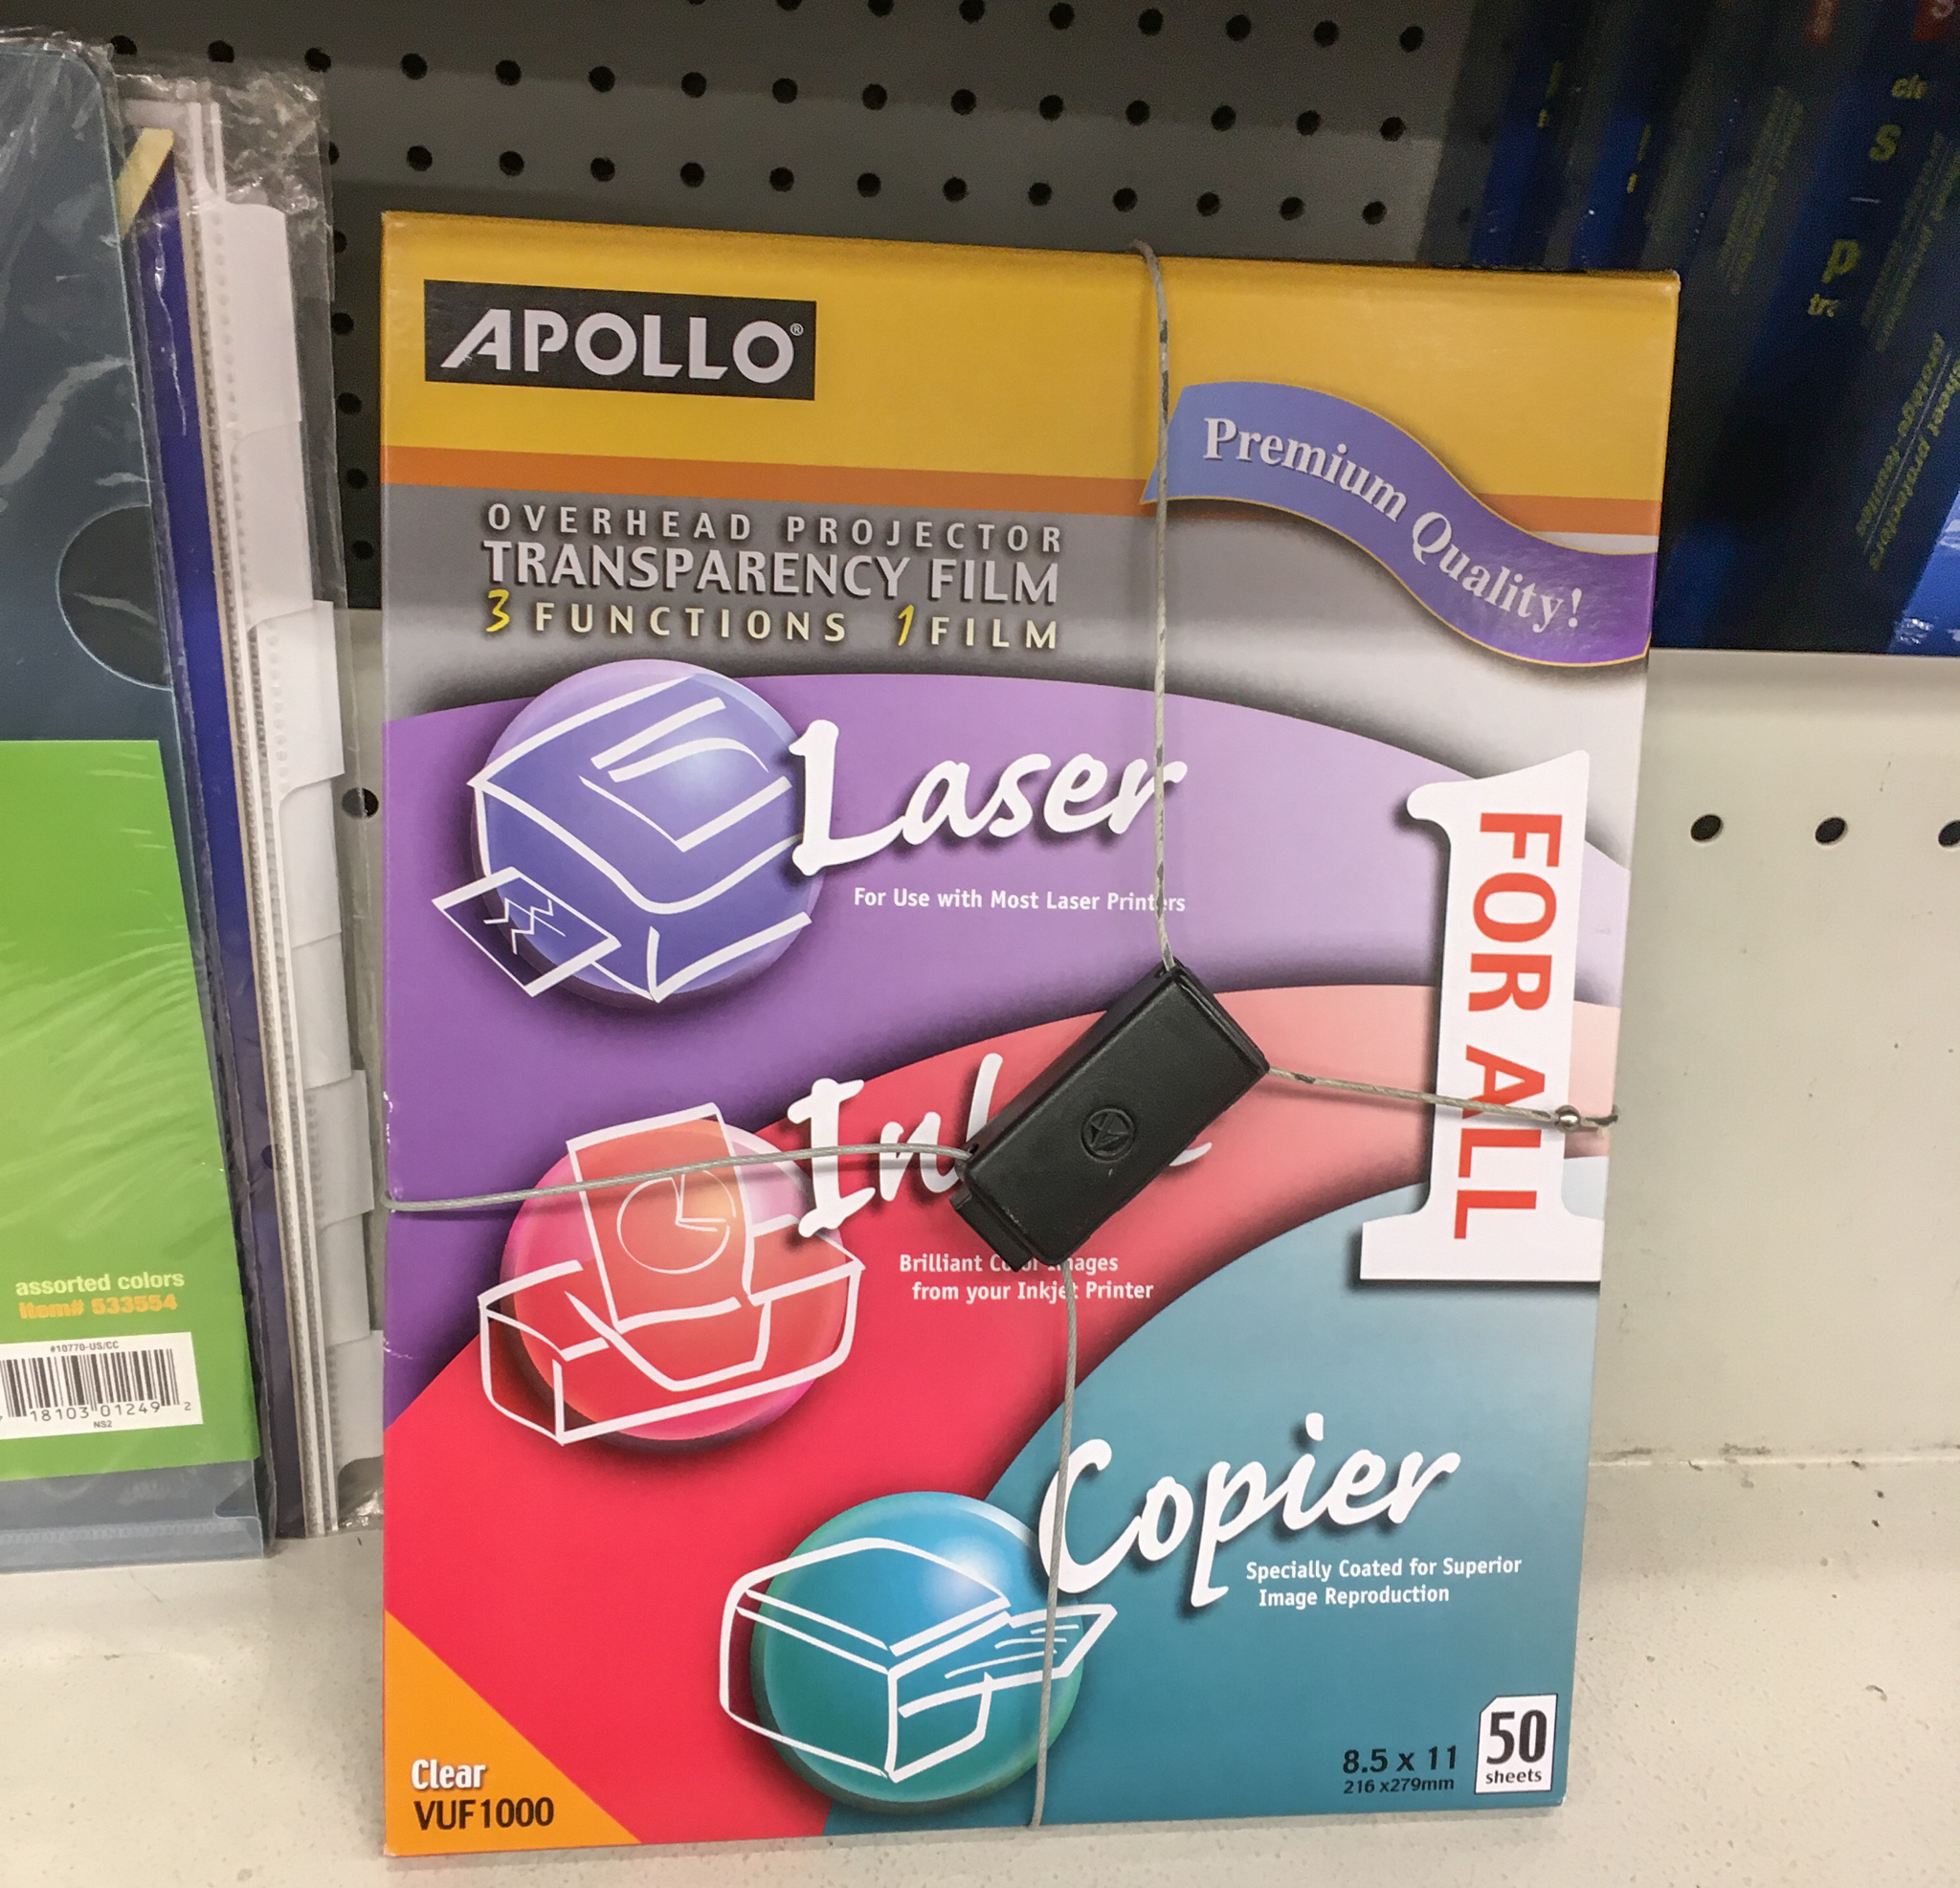
However, as noted above, PVC sheets are not completely transparent. PET sheets are clearer. But they are out of stock everywhere. And they are more expensive. Even regular PVC transparencies are becoming more expensive by the day. Our local Staples has exactly one box of transparencies left (bottom row) on 2020-04-15.
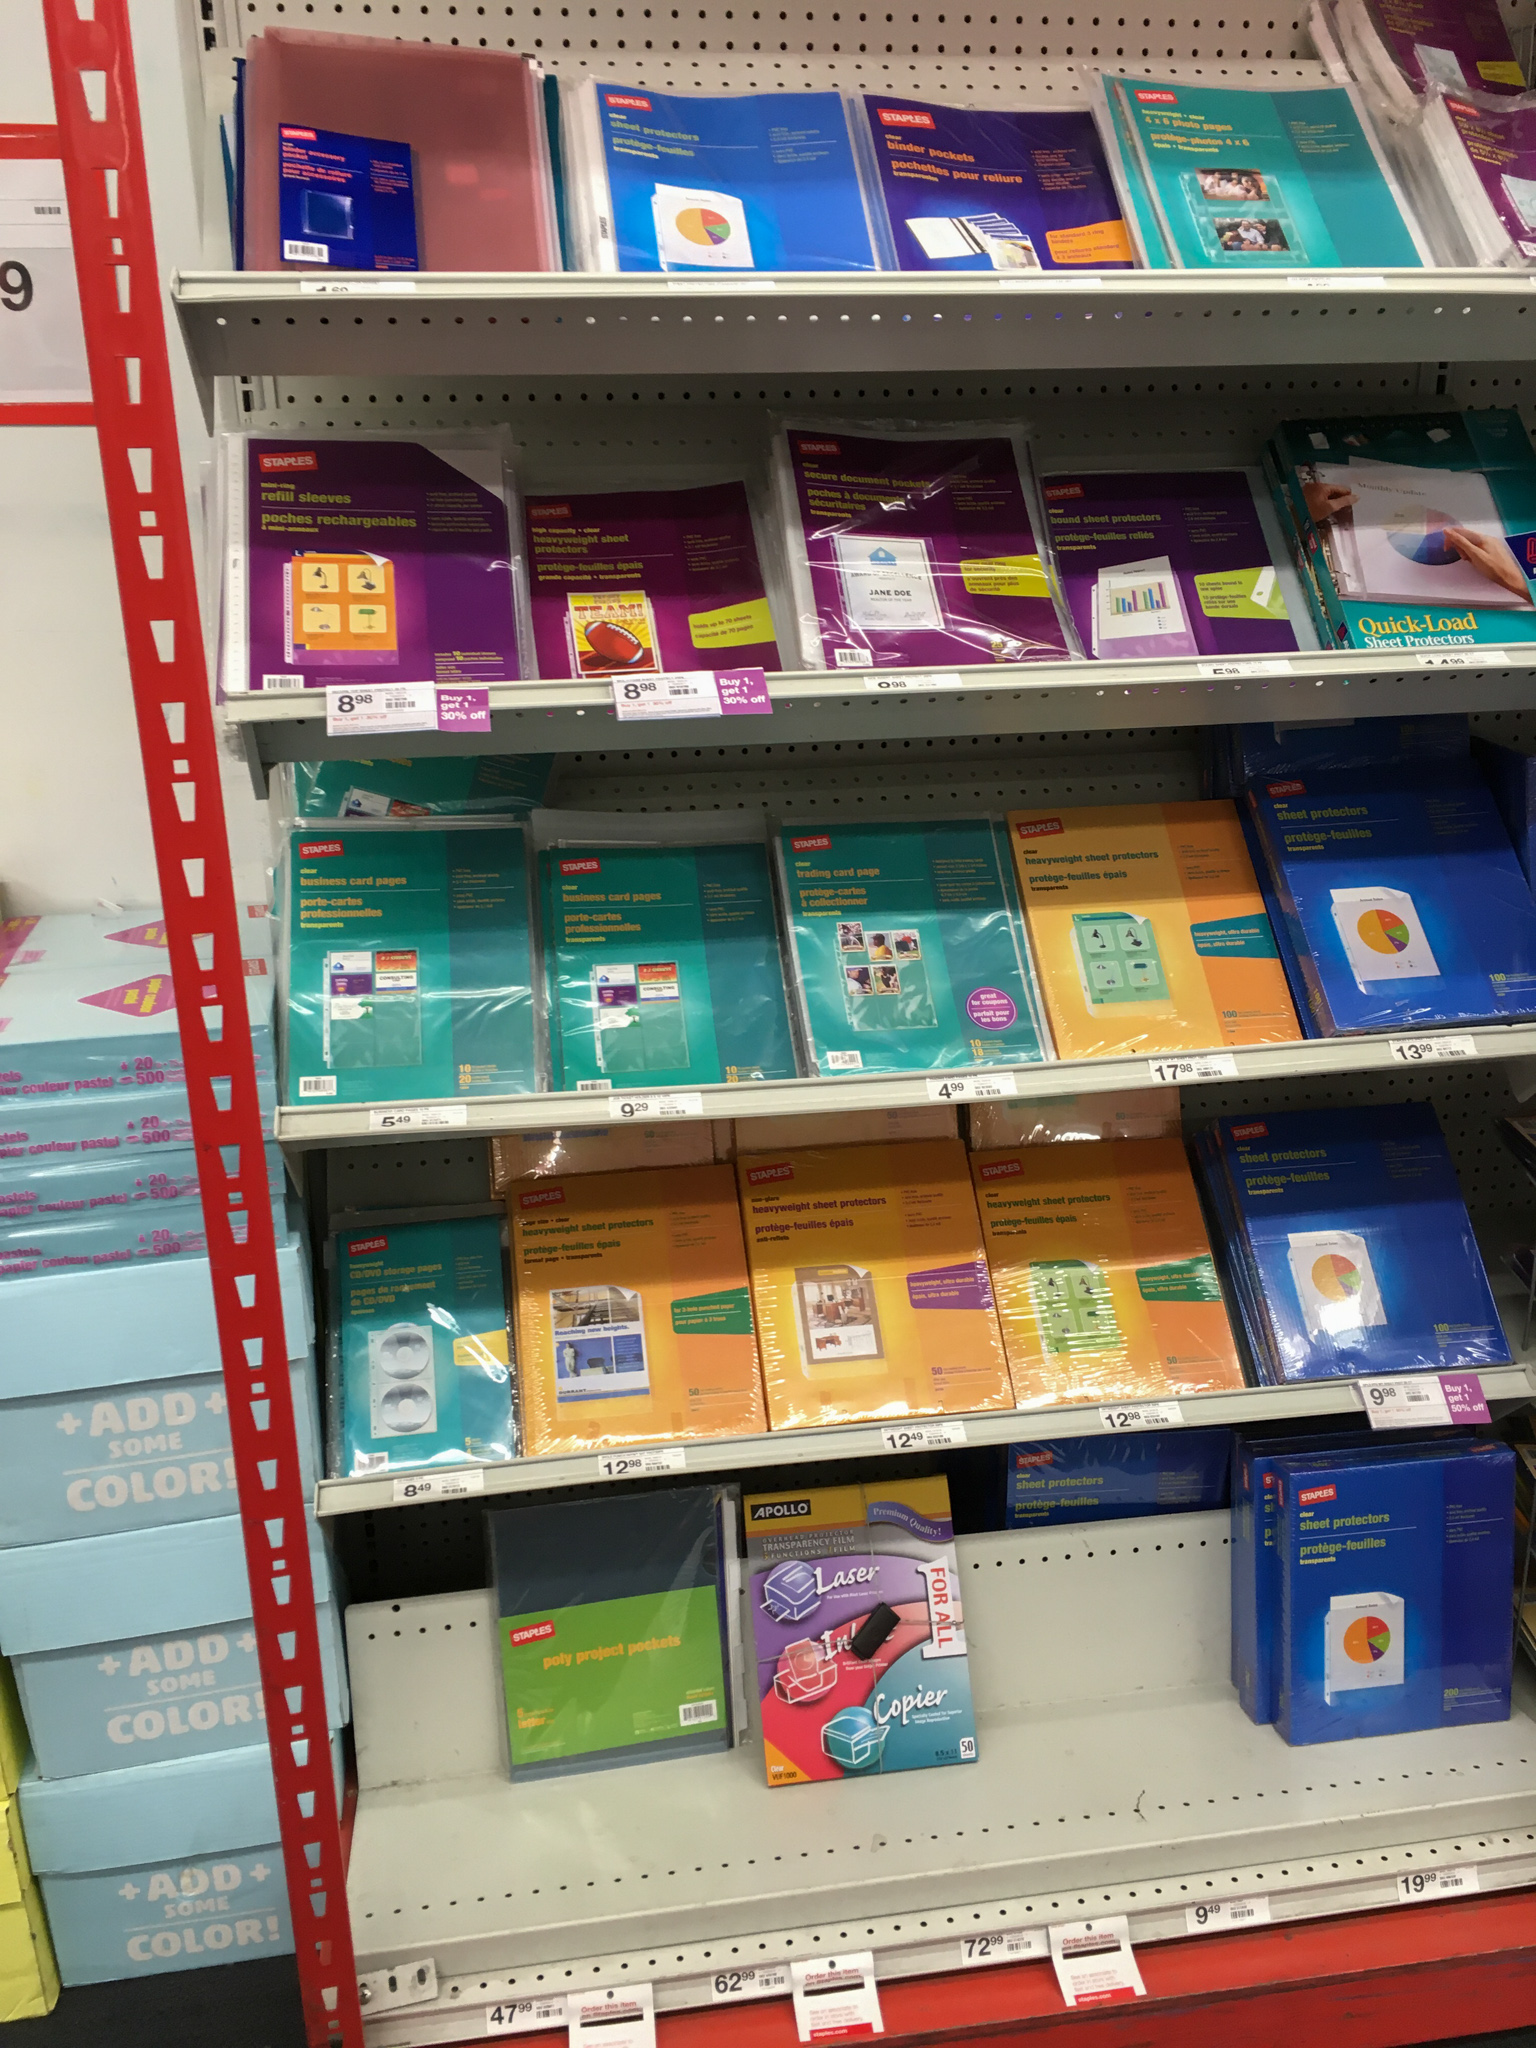
The lonely box is locked down with anti-theft device. The registers rings it up at $74 for this box of 50 sheets.
Even with the increasing cost of transparencies, the printing time is still the main bottleneck right now. No matter how much money one puts into this project, the constraint is still the number of 3D printing machines churning out head bands. That is why we need more people to print them.