Last Updated on February 8, 2023 by Staff
We surveyed the best learning chopsticks you can buy online, or print for free on your 3D-printer. We dived into their patent applications for insights. The research resulted in the classification of all these learning chopsticks into just 6 types.
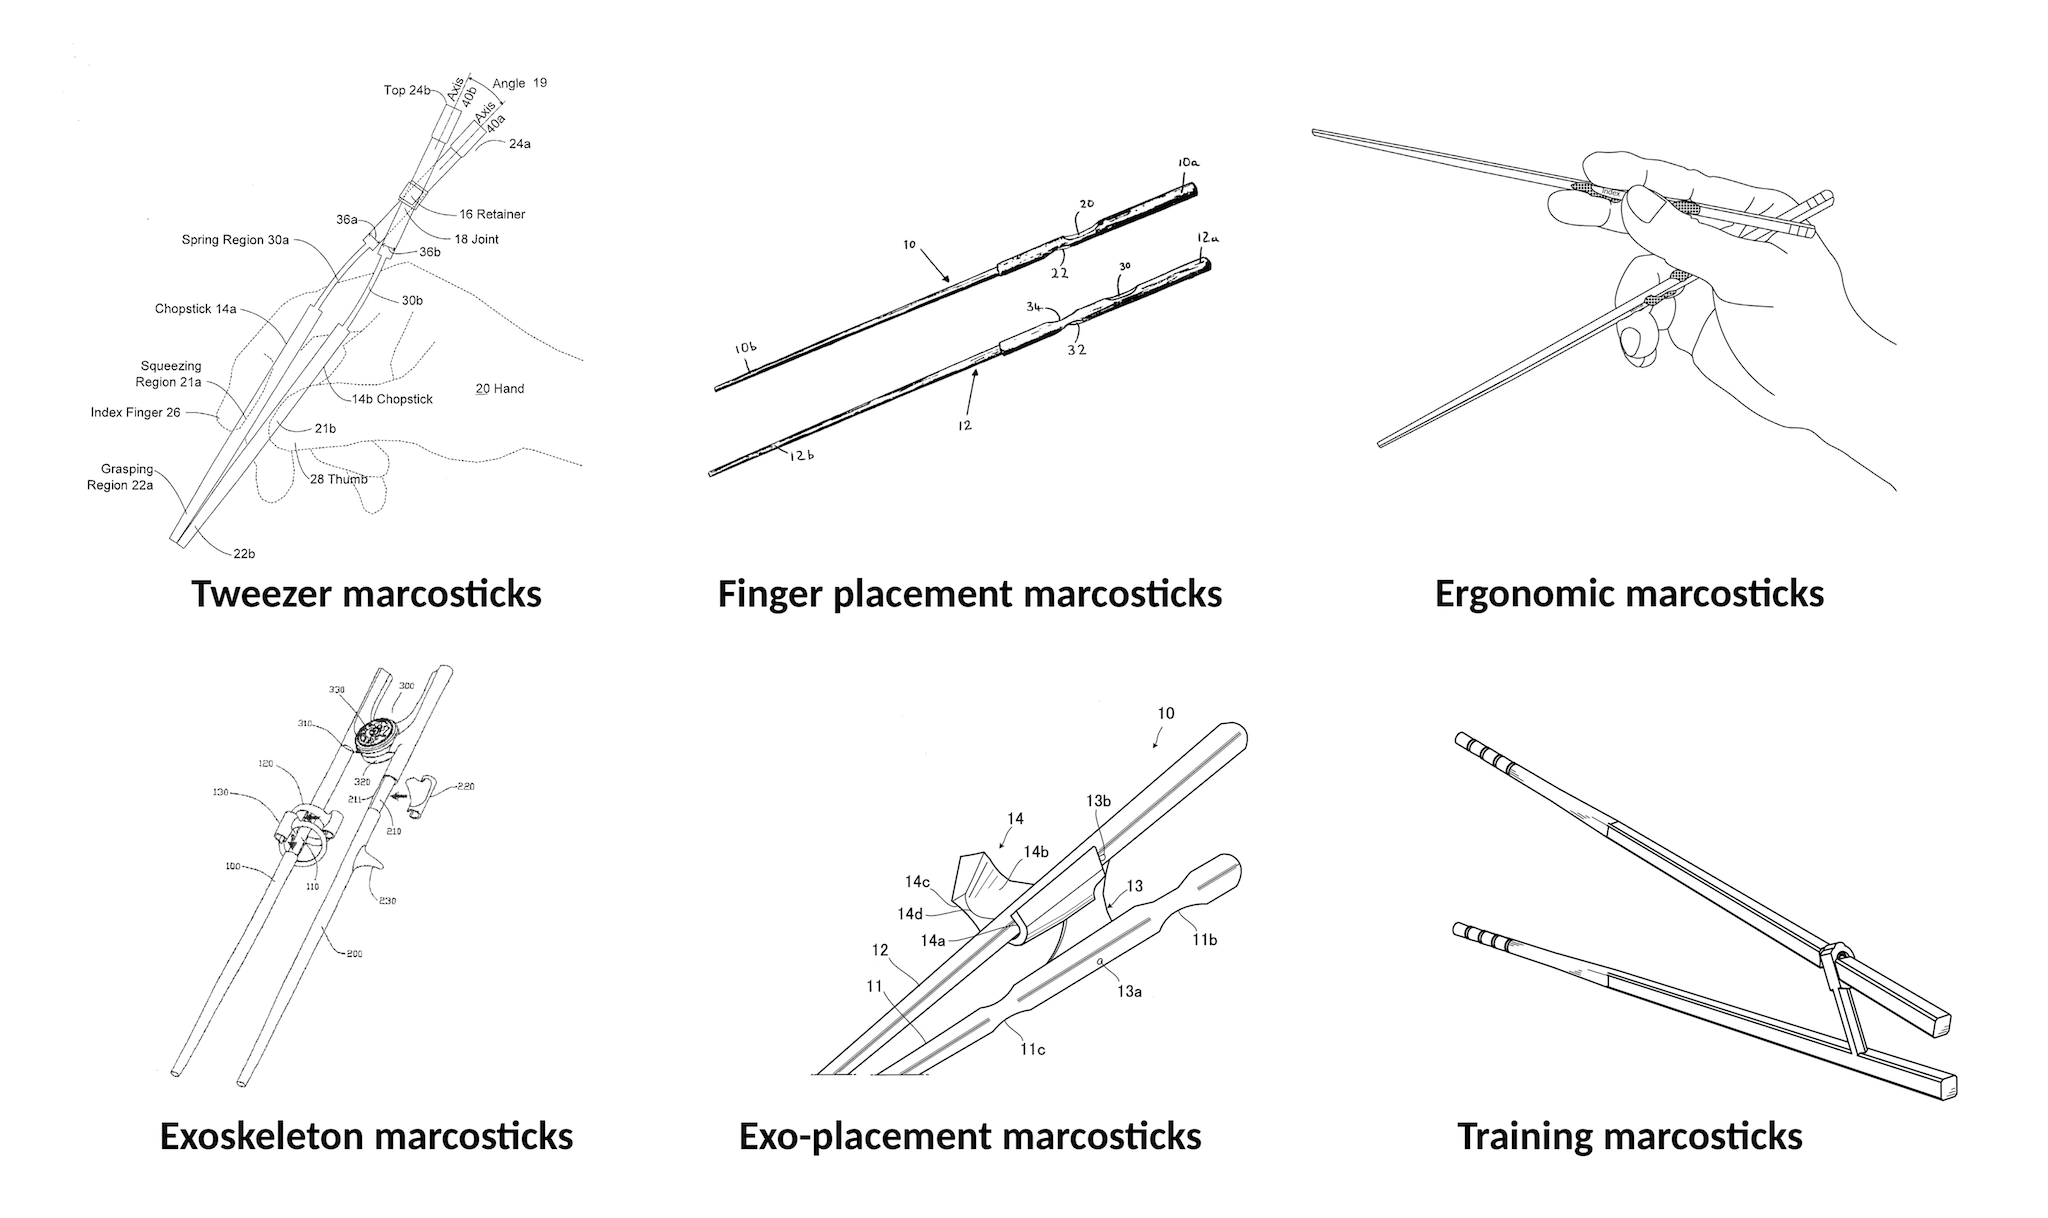
We have named the 6 types of chopsticks after their function. These are: tweezer chopsticks, finger placement chopsticks, exoskeleton chopsticks, exo-placement chopsticks, ergonomic chopsticks, and training marcosticks.
This is a standalone article. But you will enjoy it even more, if you also check out The Standard Grip, Learn to Use Chopsticks, Training Marcosticks that Work, and The Art and Science of Chopsticking. The following is our YouTube companion episode to this written article.
Table of Contents
Classification and naming
While learning chopsticks is also referred to colloquially as “correction chopsticks”, “beginner chopsticks”, “ergonomic chopsticks”, and even “training chopsticks”, at marcosticks.org we’d like to be stricter with naming things. So, we consistently refer to all learning tools and aids as “learning chopsticks”, when it comes to learning to use chopsticks in any way. We reserved the label “training anything” for only the subset that teach the Standard Grip finger placement and finger motion. At the time of this writing, only our marcosticks teach the Standard Grip. So we just call our models “training marcosticks”.
Here is a summary of the 6 types of learning chopsticks. Subsequent sections will expand each type with details. Each type is assessed for its ability to teach various aspects of the Standard Grip finger motion. These include: initial finger placement, how to grip chopsticks firmly, and how to roll the two chopsticks in order to open and close tips. These aspects are labeled as following columns:
- Pose: teaches proper initial finger placement
- Grip: teaches proper gripping of chopsticks
- Roll: allows rolling of the top chopstick
- Open: supports proper open posture
- Reach: allows extended reach for bottom chopstick
| Type | Description | Pose | Grip | Roll | Open | Reach |
|---|---|---|---|---|---|---|
| Tweezer | Two sticks are bound together near the rear end to keep tips open until fingers compress sticks like tweezers. | ❌ | ❌ | ❌ | ❌ | ❌ |
| Finger placement | Finger-shaped grooves or circumferential grooves are carved into sticks to help with initial finger placement. | ✅ | ✅ | ✅ | ❌ | ❌ |
| Ergonomic | Low-profile ergonomic nuggets provide tactile feedback to fingers, for both placement and limits throughout the twirling motion, without interfering with contacts between fingers and sticks. | ✅ | ✅ | ✅ | ✅ | ✅ |
| Exoskeleton | Fingers are bound to sticks by hoops and tabs, as if sticks were exoskeleton armor. Usually a bridge with a hinge connects the two sticks. | ✅ | ❌ | ❌ | ❌ | ❌ |
| Exo-placement | Combination of exoskeleton and finger placement features. | ✅ | ✅❌ | ❌ | ❌ | ❌ |
| Training | A bridge connects the two sticks in a way that enforces and teaches the twirling of top stick using the tripod hold, without interfering with contacts between fingers and sticks. | ✅ | ✅ | ✅ | ✅ | ❌ |
As stated earlier, the above summary table is only concerned about aspects of each type of learning chopsticks, with respect to how they teach a learner to master the Standard Grip. All of these learning chopsticks obviously do allow users to pick up food, in one way or another. The summary table does not capture factors which are not related to Standard Grip, such as how fast a complete beginner can learn to pick up food with them. For that, tweezers surely come out ahead. And exoskeleton aids probably a close second.
Tweezer chopsticks
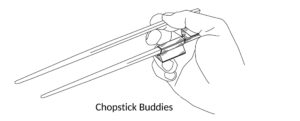
Tweezer-type chopsticks abound. This is the most popular type of learning aid. They are also known as kiddie chopsticks. Many people have experiences folding a wrapper sleeve into a bundle, and then binding it between two sticks with a rubber band.

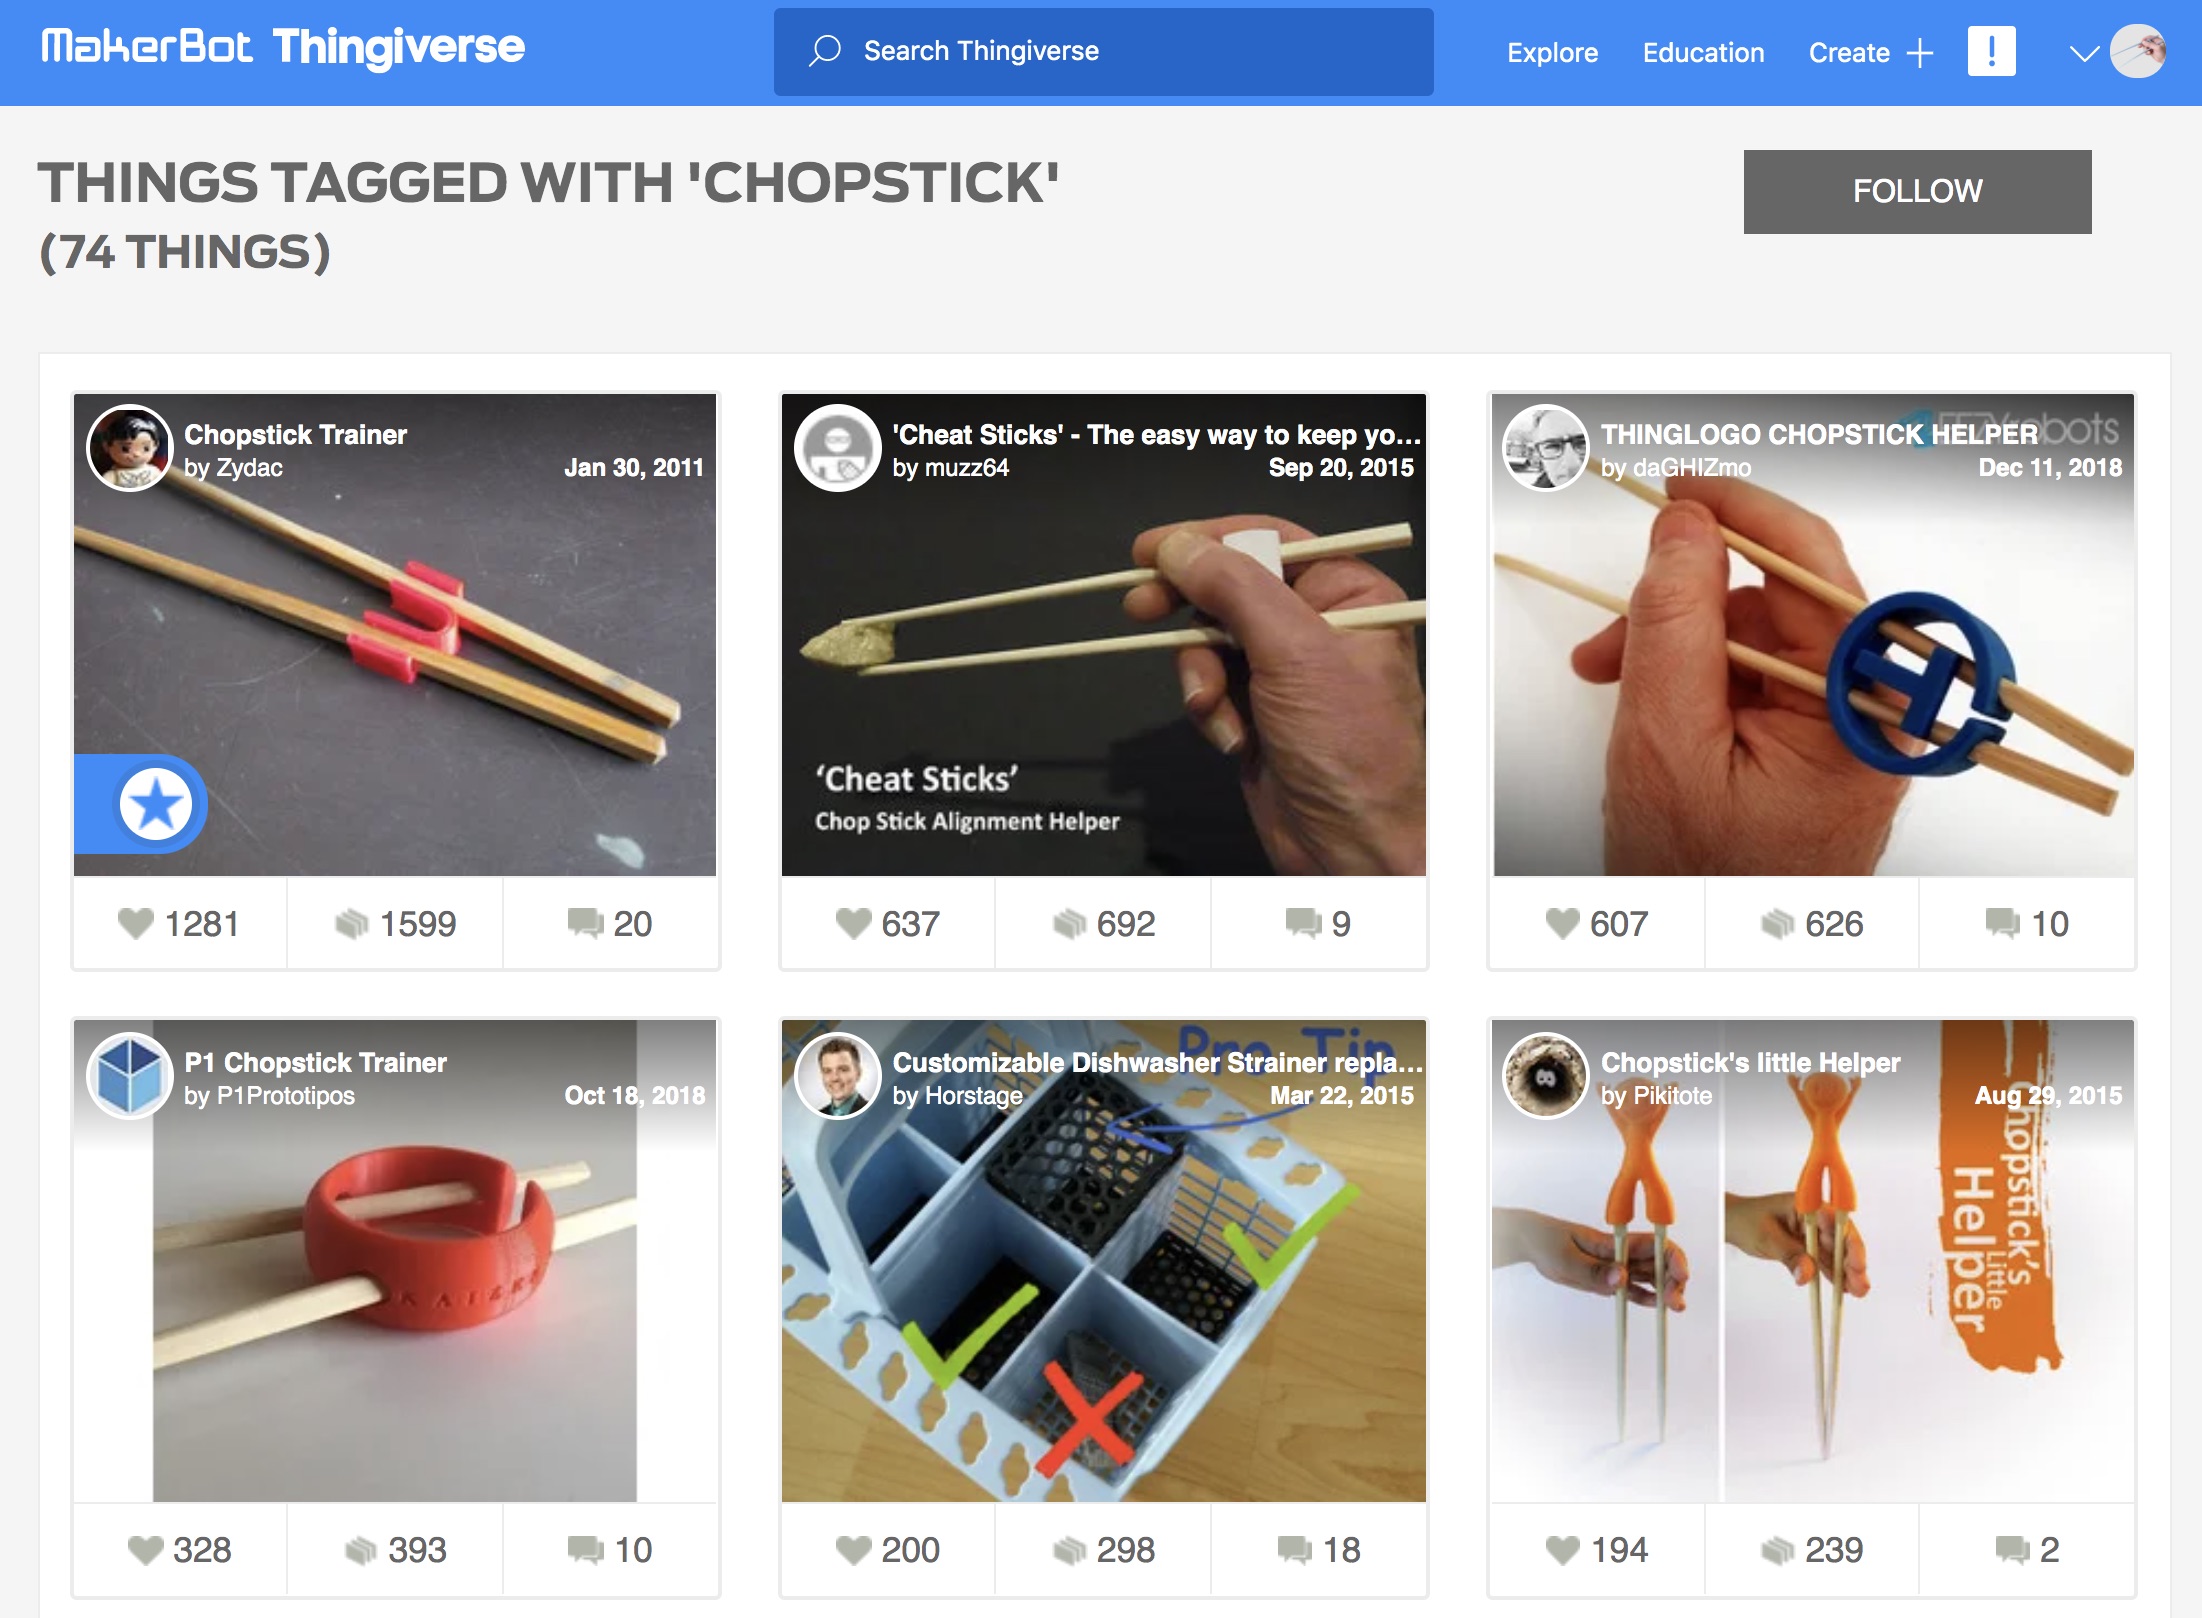
Most custom chopsticks found in popular 3D model repositories are in fact gadgets for binding plain chopsticks, to turn them into tweezers. The following is the first page showing 3D models under the “chopsticks” tag on Thingiverse.
Most inventors have the best intentions, and show pictures of these tweezers being used with finger poses that look almost like Standard Grip. Sadly, Standard Grip finger dynamics doesn’t work on tweezers. So all users of tweezer chopsticks end up switching to finger grips that work better on tweezers. The truth is that everyone intuitively knows how to use a pair of tweezers. Standard Grip, on the other hand, is an acquired skill.
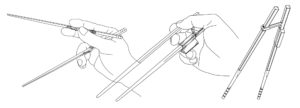
Clever folks have capitalized on this asymmetry. The following is a well-designed pair of Kwik Stix that can be used as plain chopsticks, for folks who already use chopsticks.
The same two sticks can be interlocked, forming a pair of tweezers, for non-chopstick users. The following is how most users will wield these tweezers. At marcosticks.org, we are not terribly impressed by these tweezer-style aids. They do not teach anything useful about Standard Grip. Not its finger movements. Not the tripod hold for gripping sticks. And not even the semblance of Standard Grip finger placement.
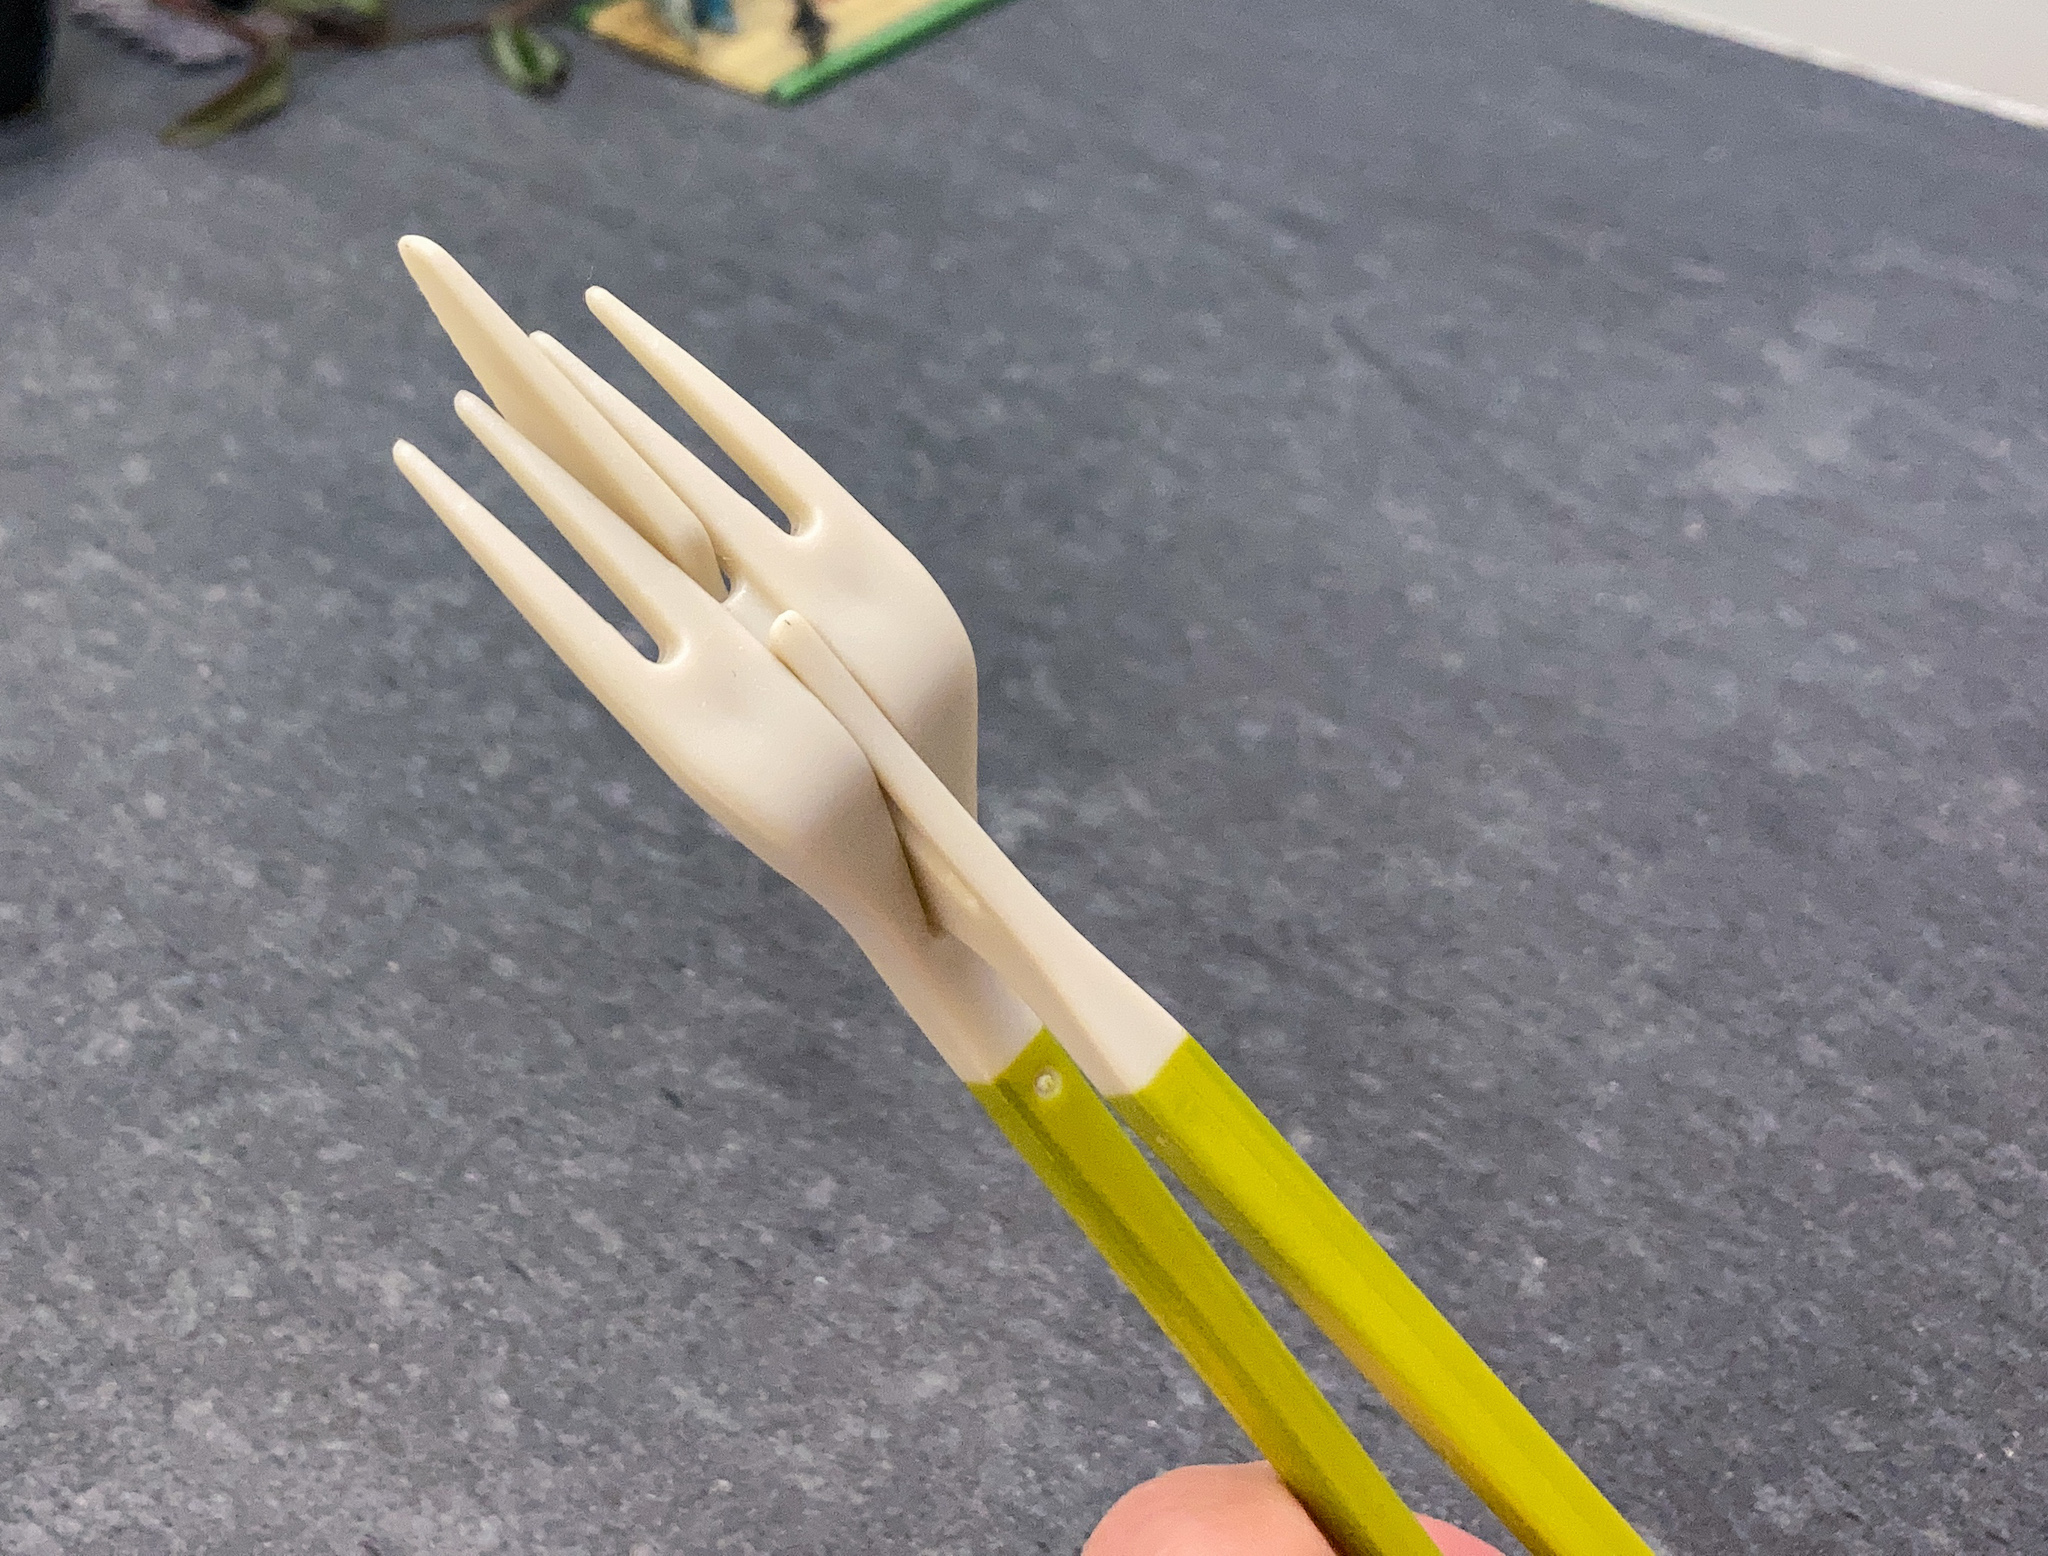
But we can’t ignore tweezers. They are so popular in 3D printing, and in patent archives, that we’ll document a few more here. The following is The Chork. It is a fork. But it can be used as tweezers in the configuration depicted below.
The fork can be split into two. That results in a pair of chopsticks. These split sticks work OK. But they are round, when they should have instead sported a square cross section, for better gripping.
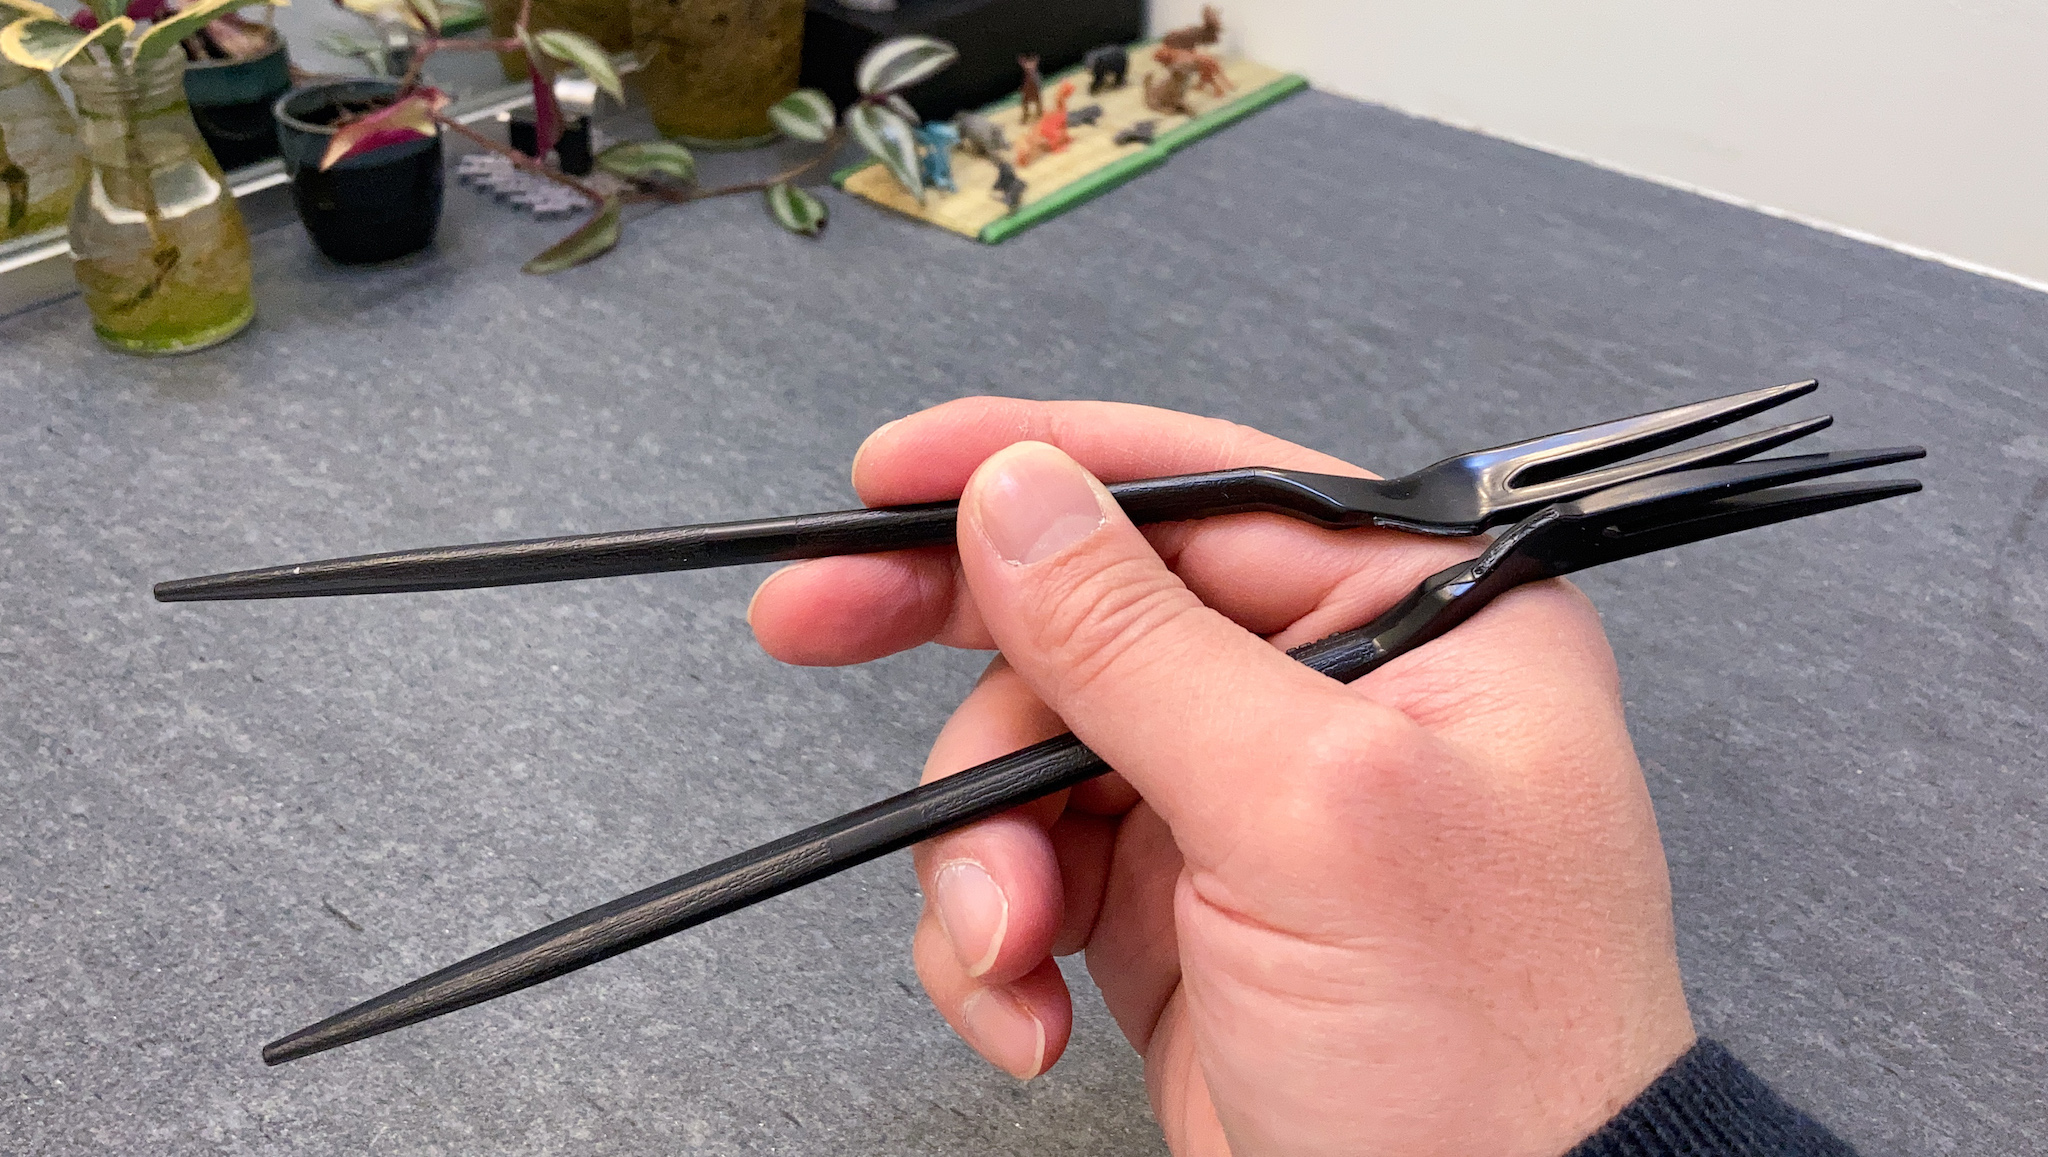
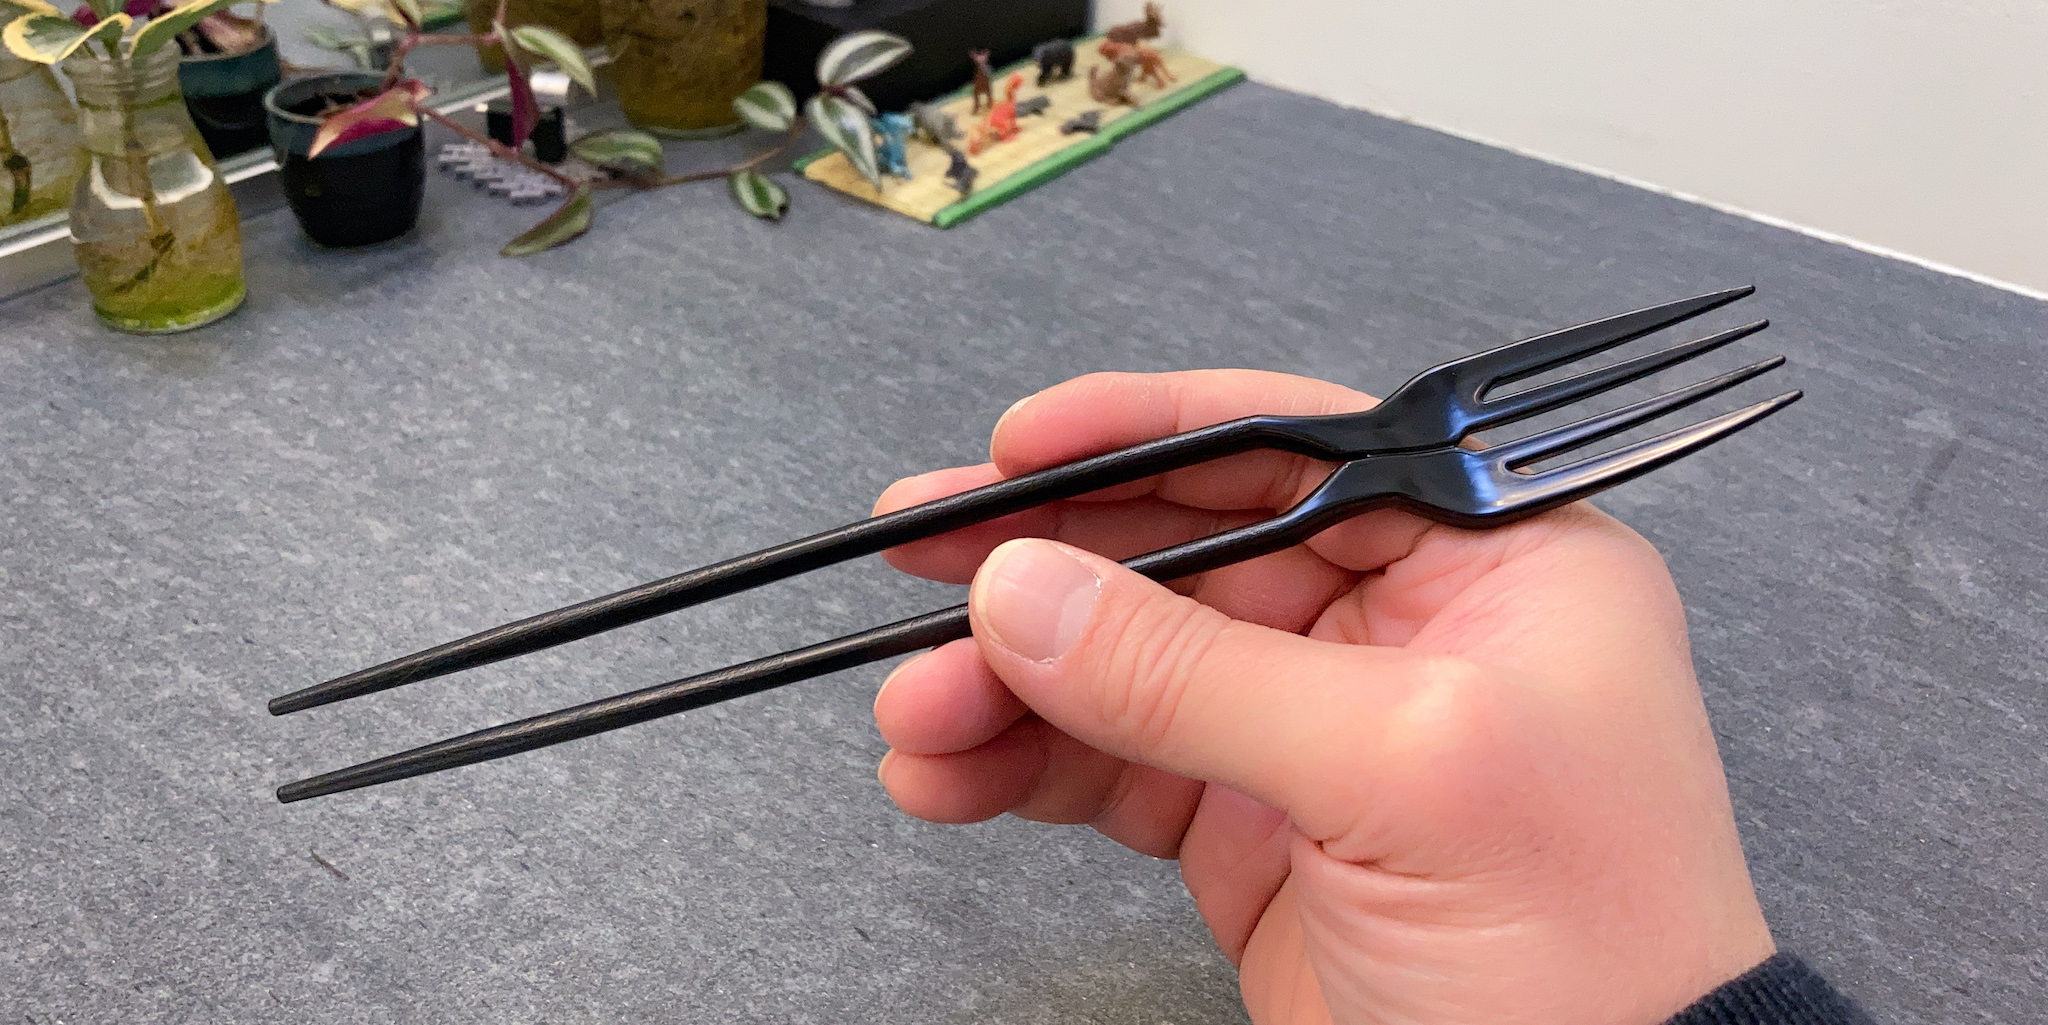
Here is your typical pair of fork and knife. Or is it?

It turns out that you can couple the knife with the fork, for a pseudo-chopstick experience.
We now have a pair of tweezer chopsticks!

Our overall assessment for tweezer chopsticks:
| Tweezer chopsticks | Assessment | |
|---|---|---|
| Pose | Teaches proper initial finger placement | ❌ |
| Grip | Teaches proper gripping of chopsticks | ❌ |
| Roll | Allows rolling of the top chopstick | ❌ |
| Open | Supports proper open posture | ❌ |
| Reach | Allows extended reach for bottom chopstick | ❌ |
Finger placement chopsticks
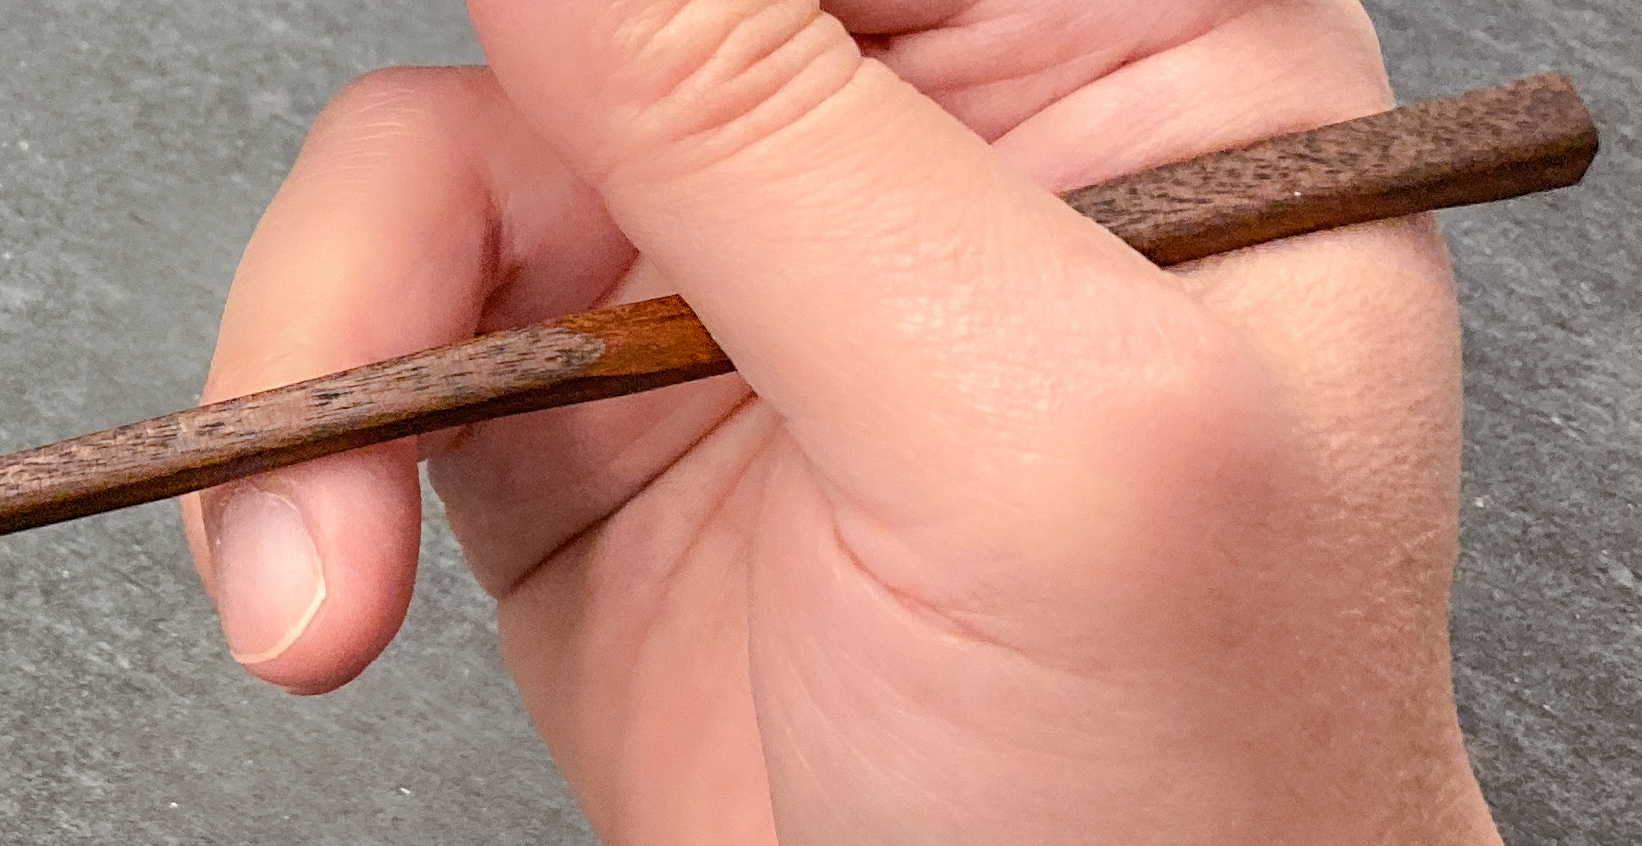
Most learning aids are obsessed with teaching the right finger and hand posture, according to the Standard Grip, as shown below. We too are in this crowd. Some learning aids go one step further, and try to enforce such posture in one way or another.

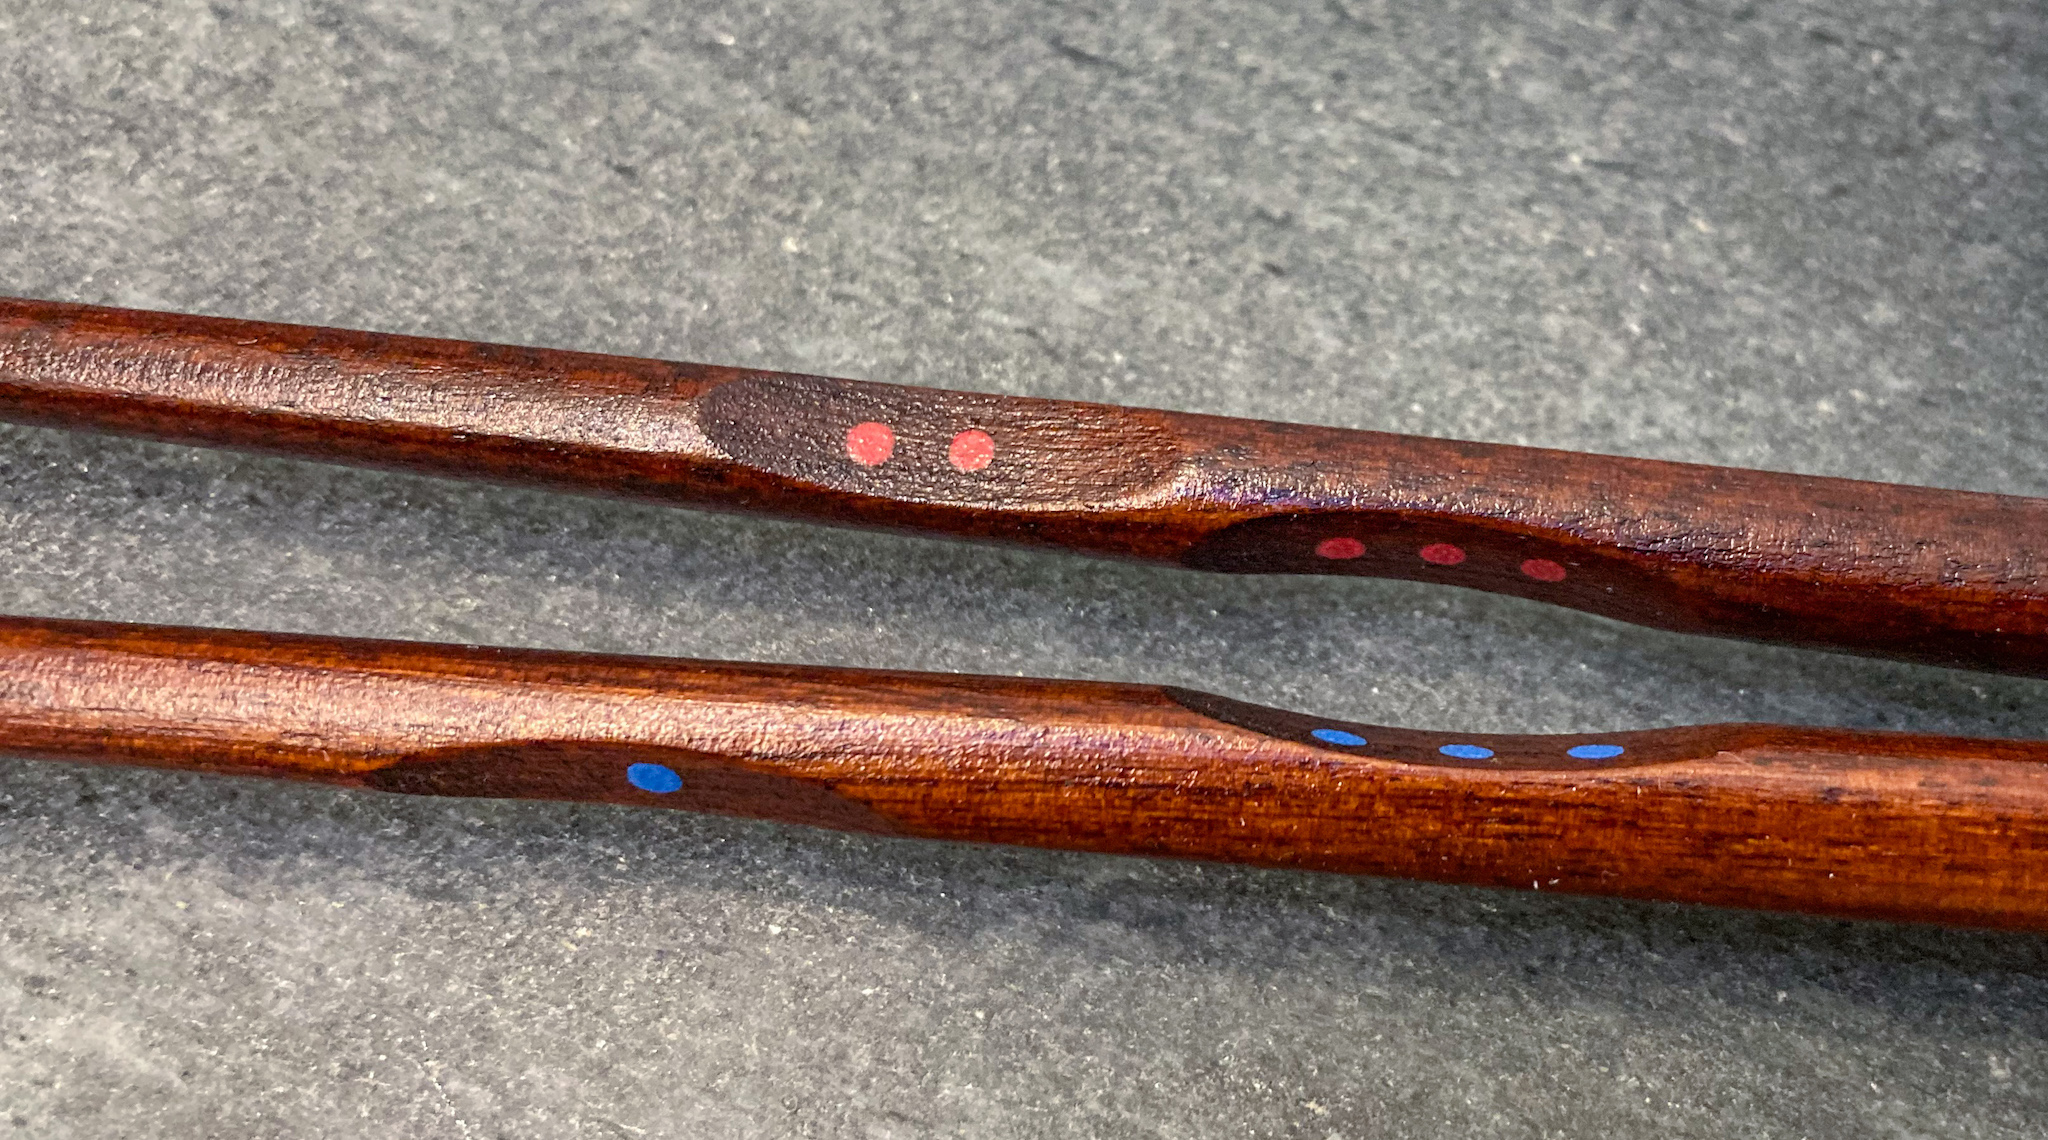
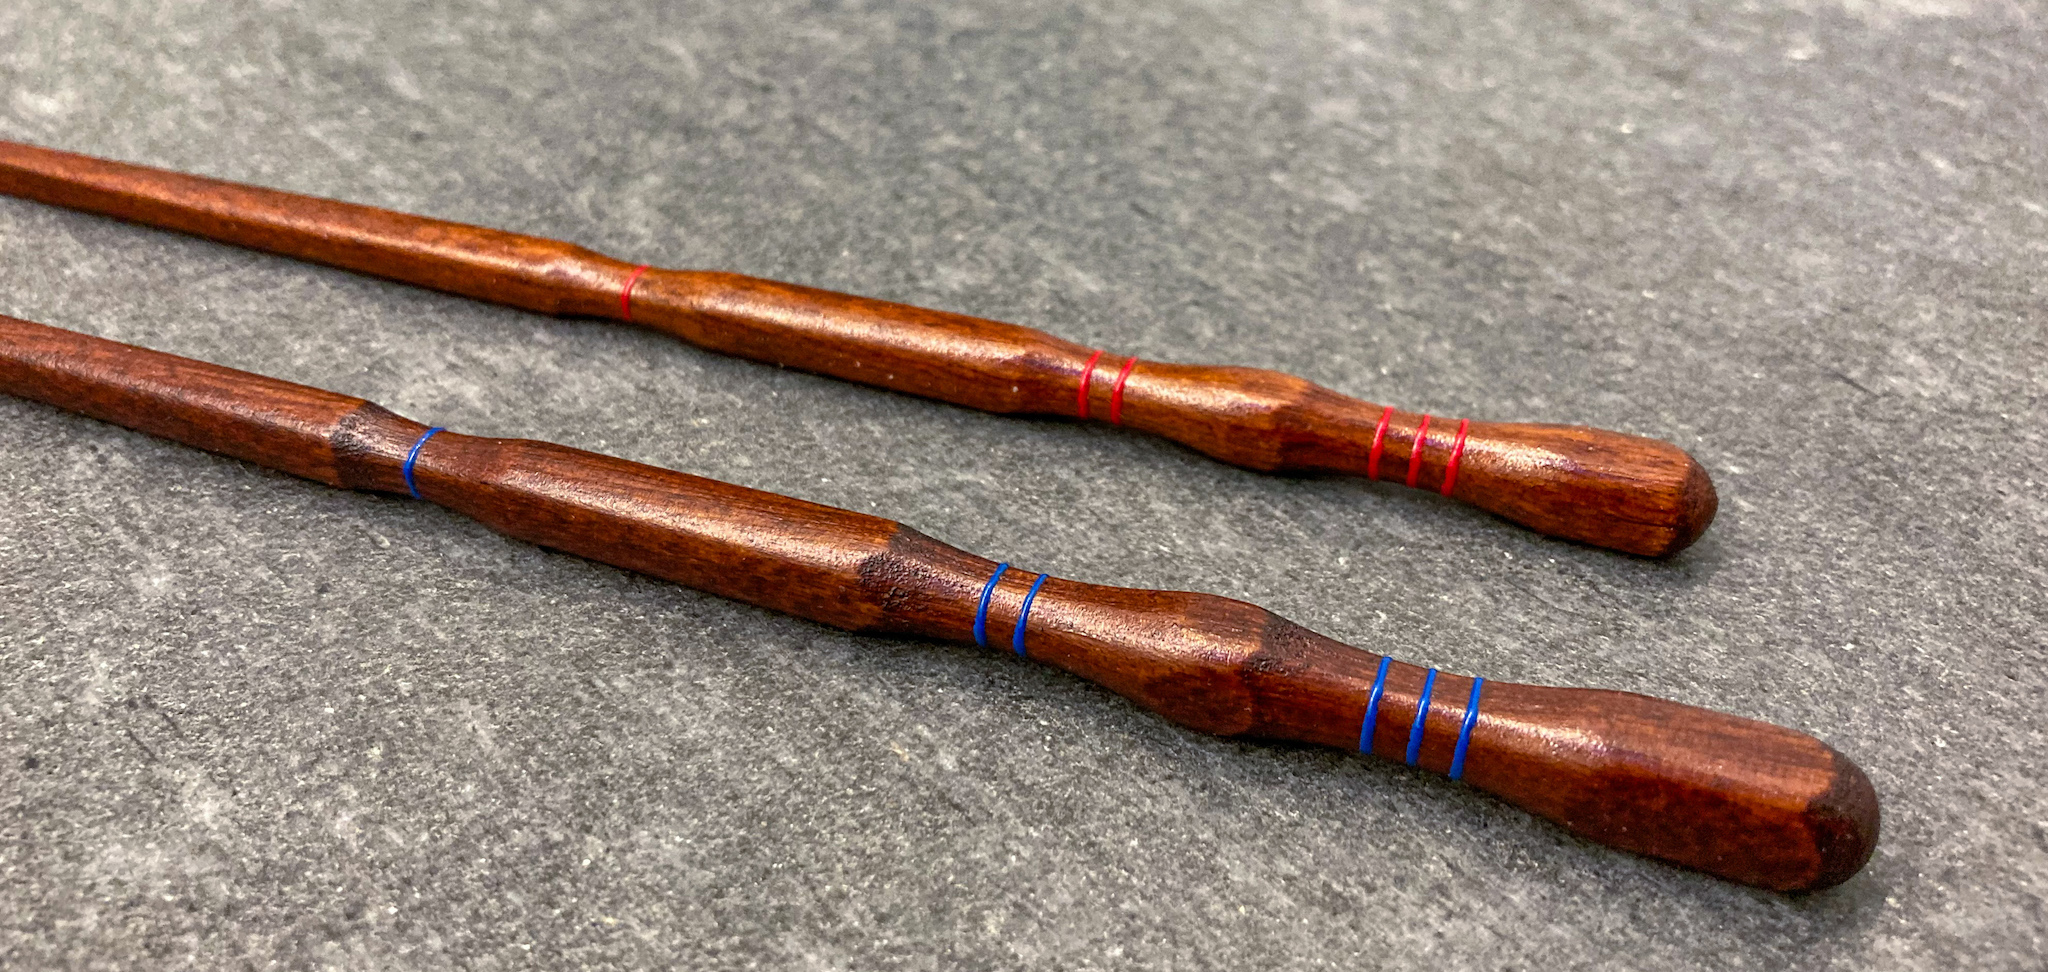
There are many ways to teach such finger and hand arrangement. One common way is to mark “index finger”, “thumb tip”, or equivalent labels at the right places on a chopstick. This allows a beginner to match fingers to their destination locations on a chopstick. We call these “finger placement” chopsticks.
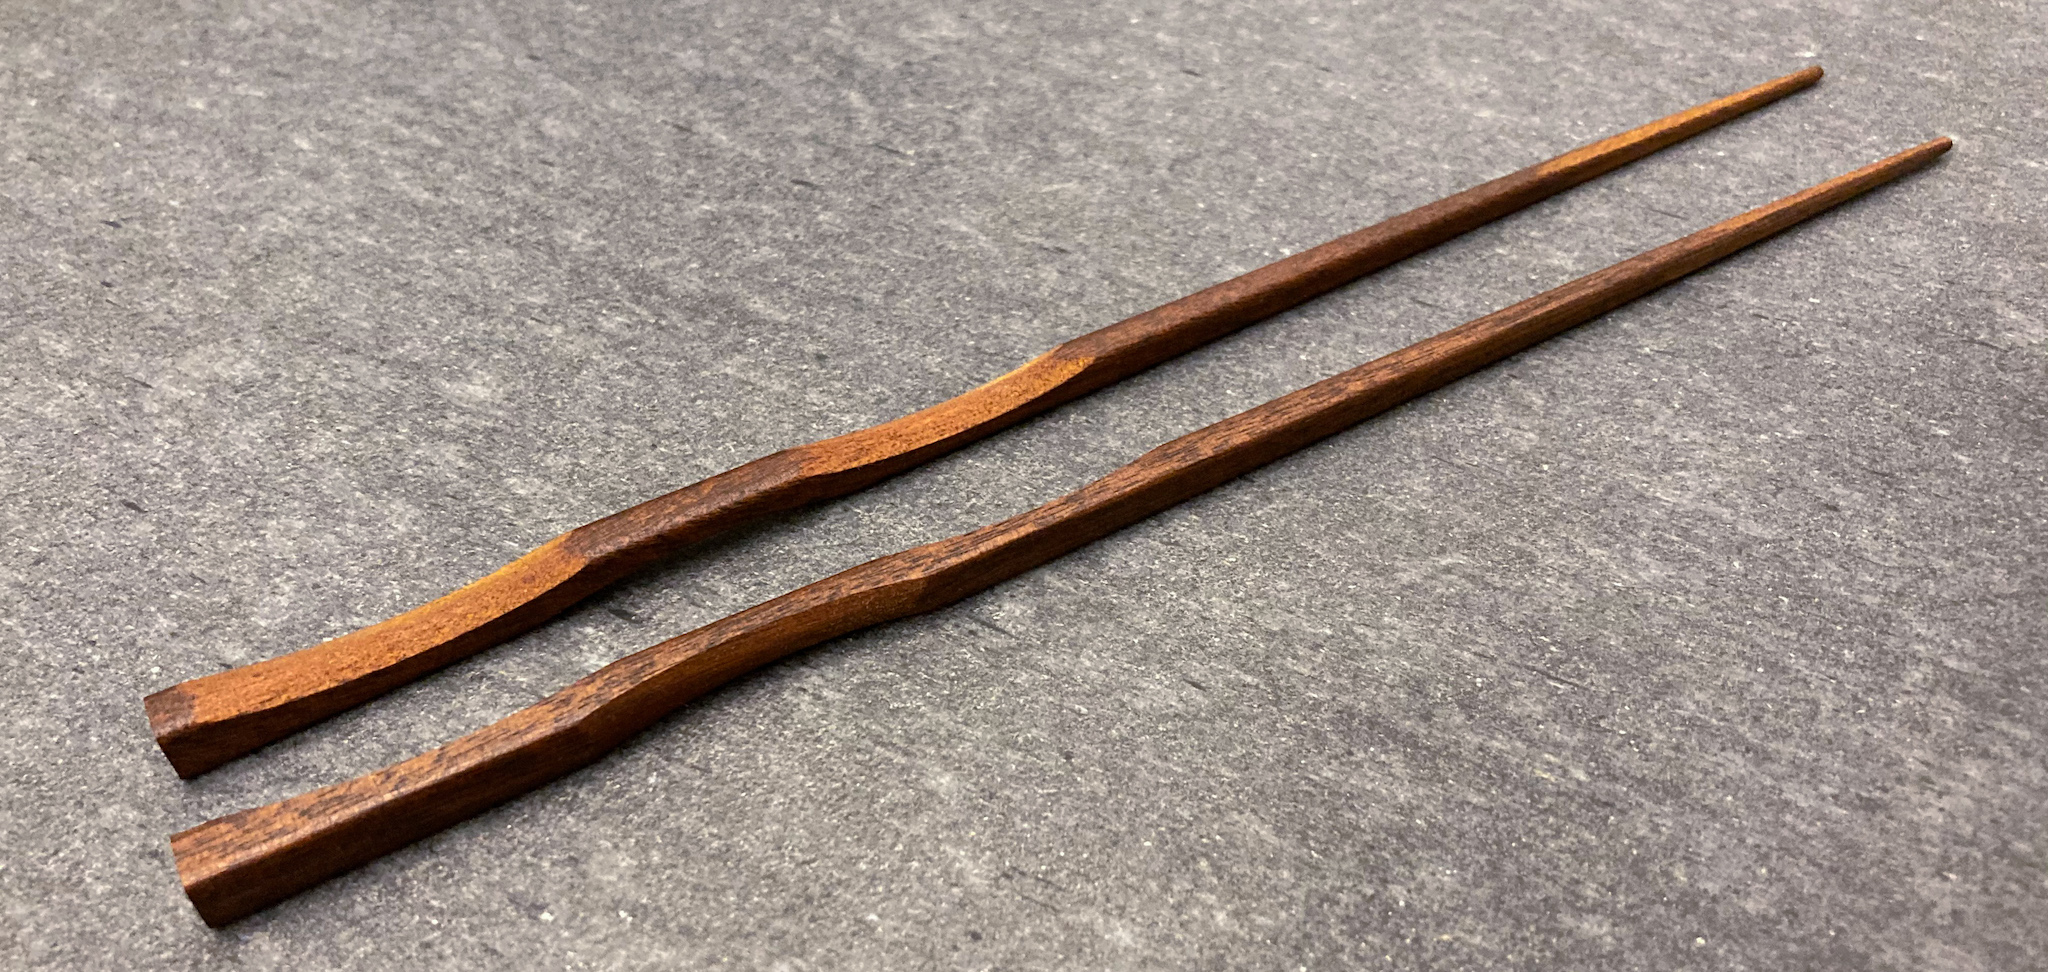
In additional to marking labels, often finger-shaped grooves are carved out of the stick, to “enforce” the placement of correct fingers at the right locations, as shown below.
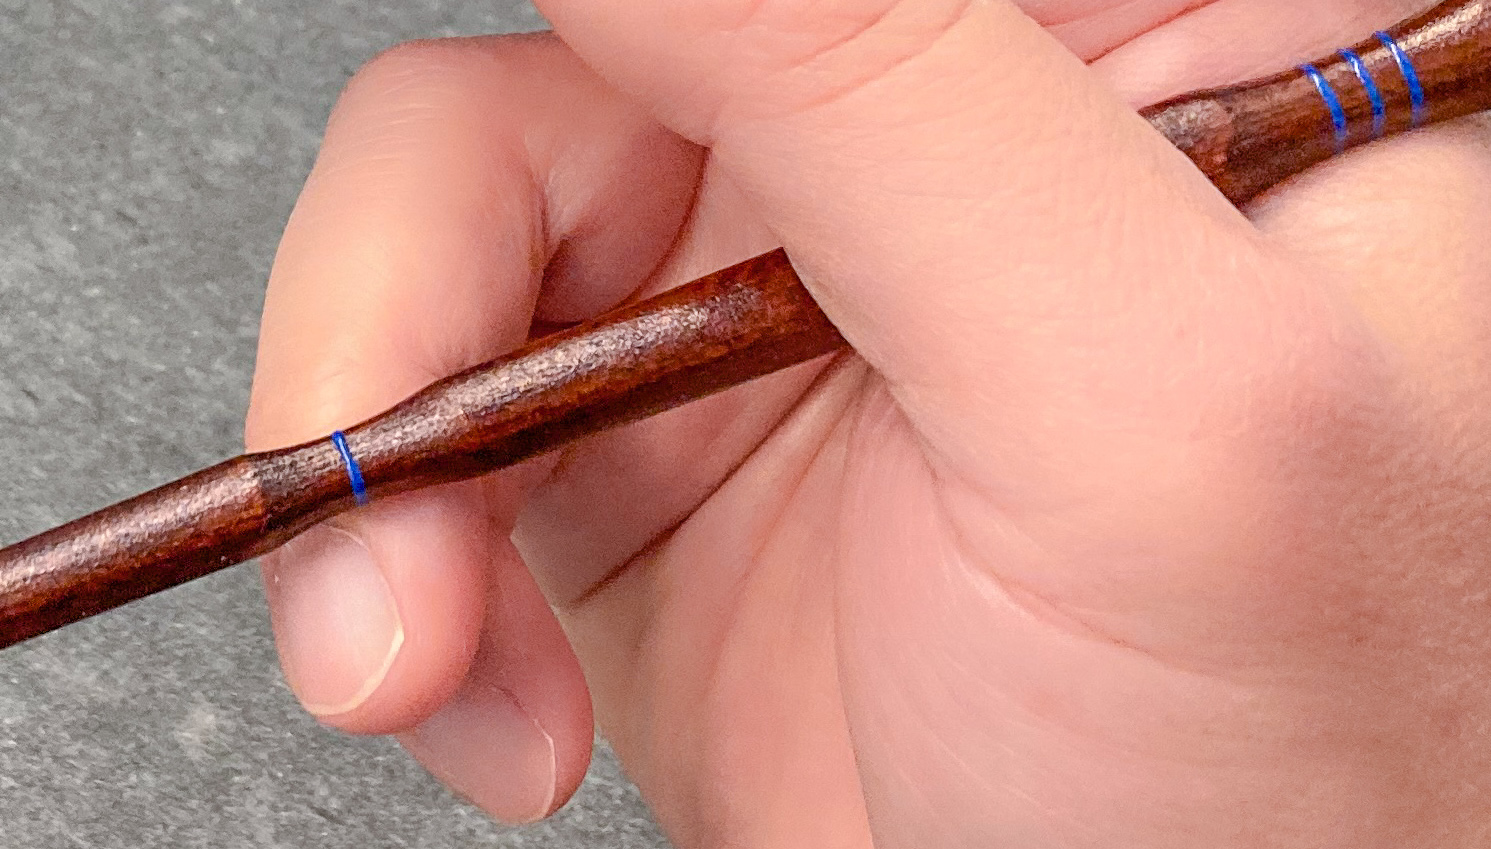
In other instances, circumferential grooves are used, instead of finger-shaped grooves.
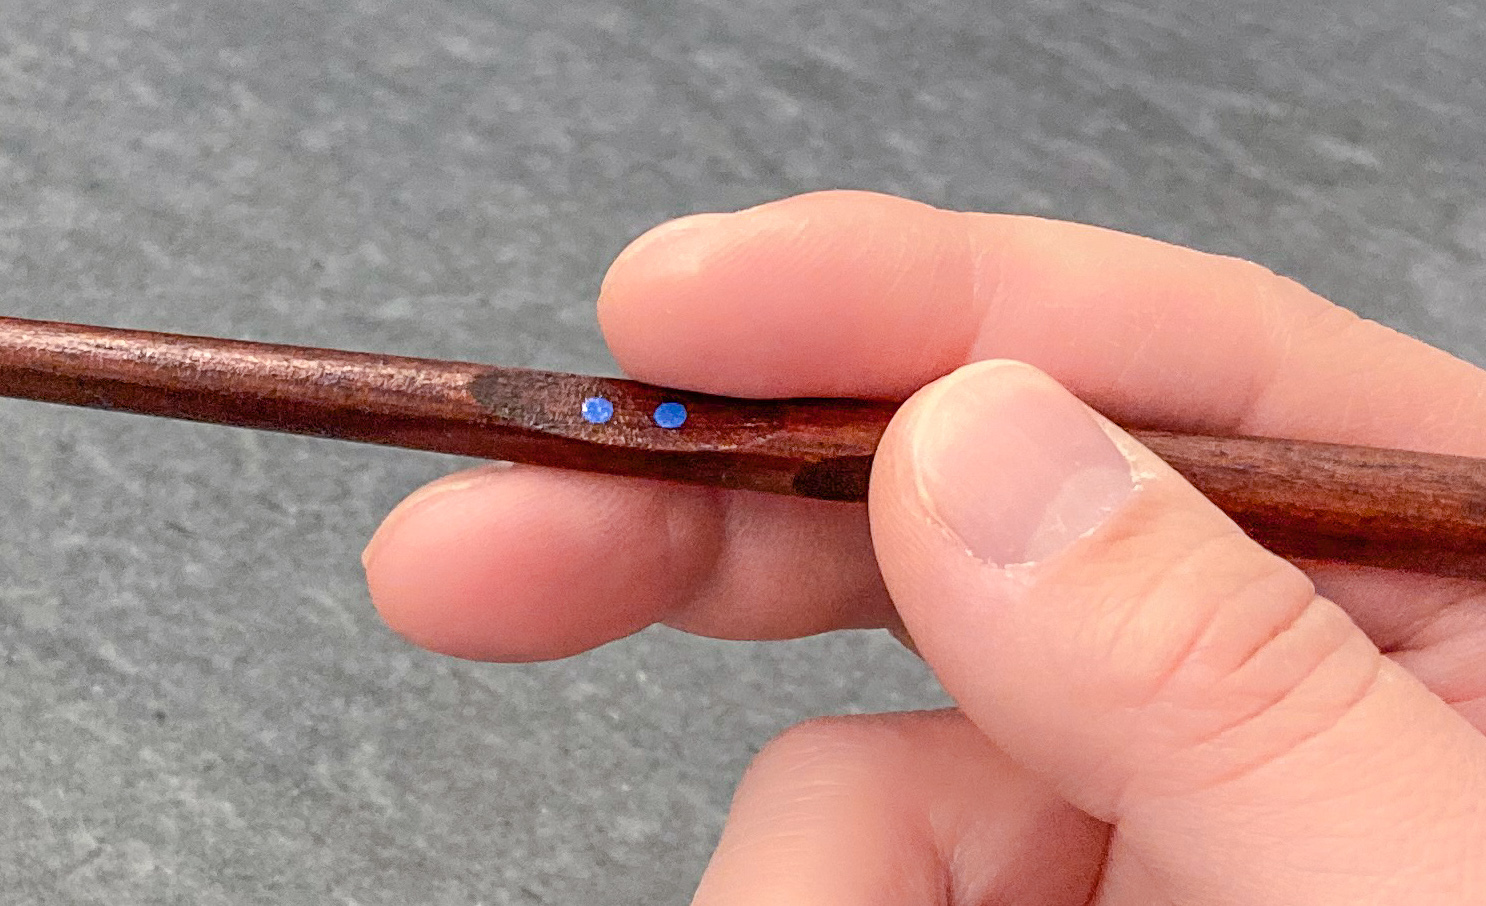
The following picture illustrates the above two variants, used as a pair. This particular model is sold by Ishida as “3-point-support” chopsticks. The model name “3-point-support” refers to the fact that the tripod hold for the top chopstick calls for 3 points of support. Similarly, the 1-on-2-support for the bottom chopstick relies on 3 points of support.
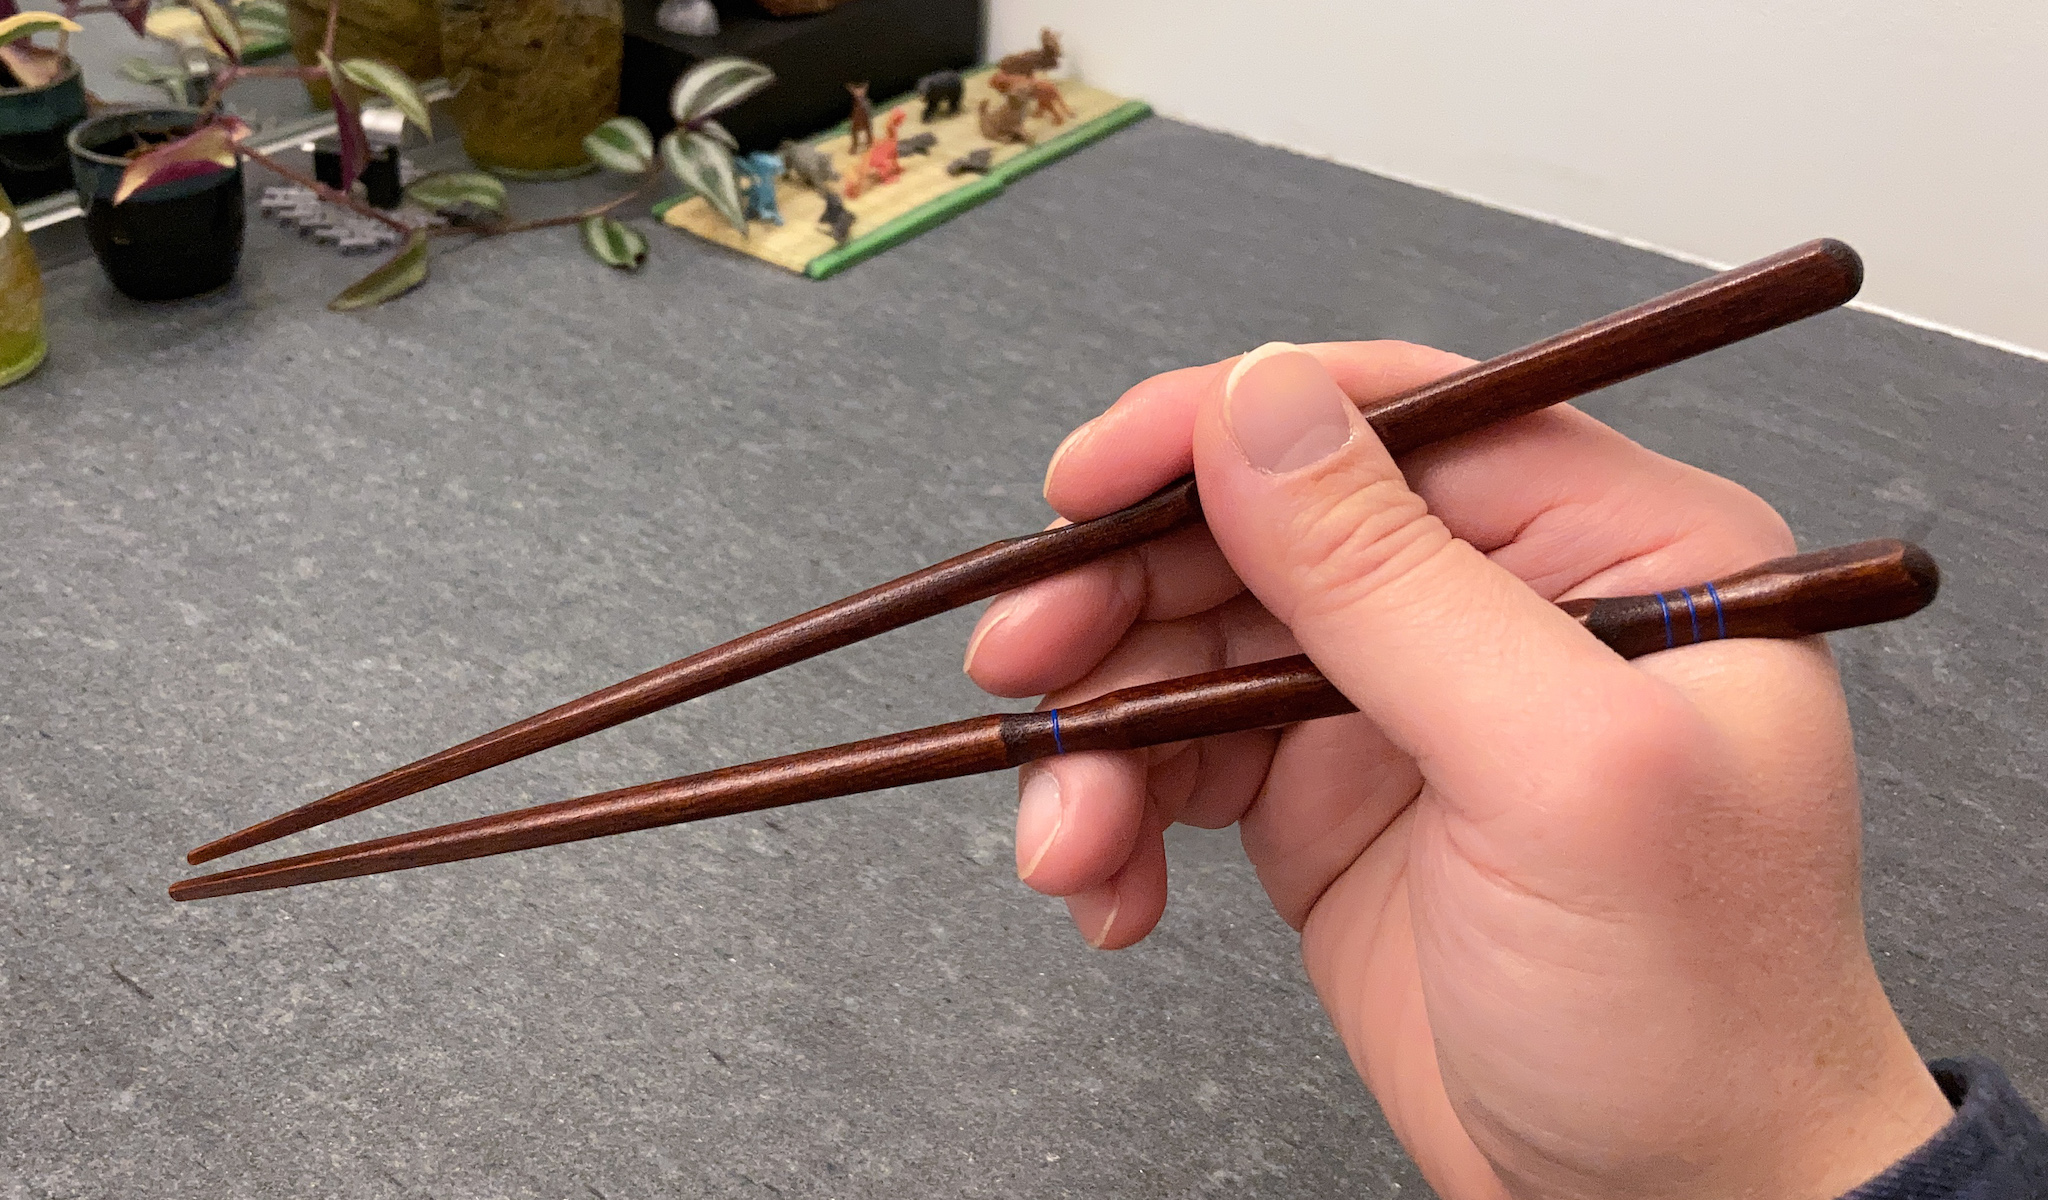
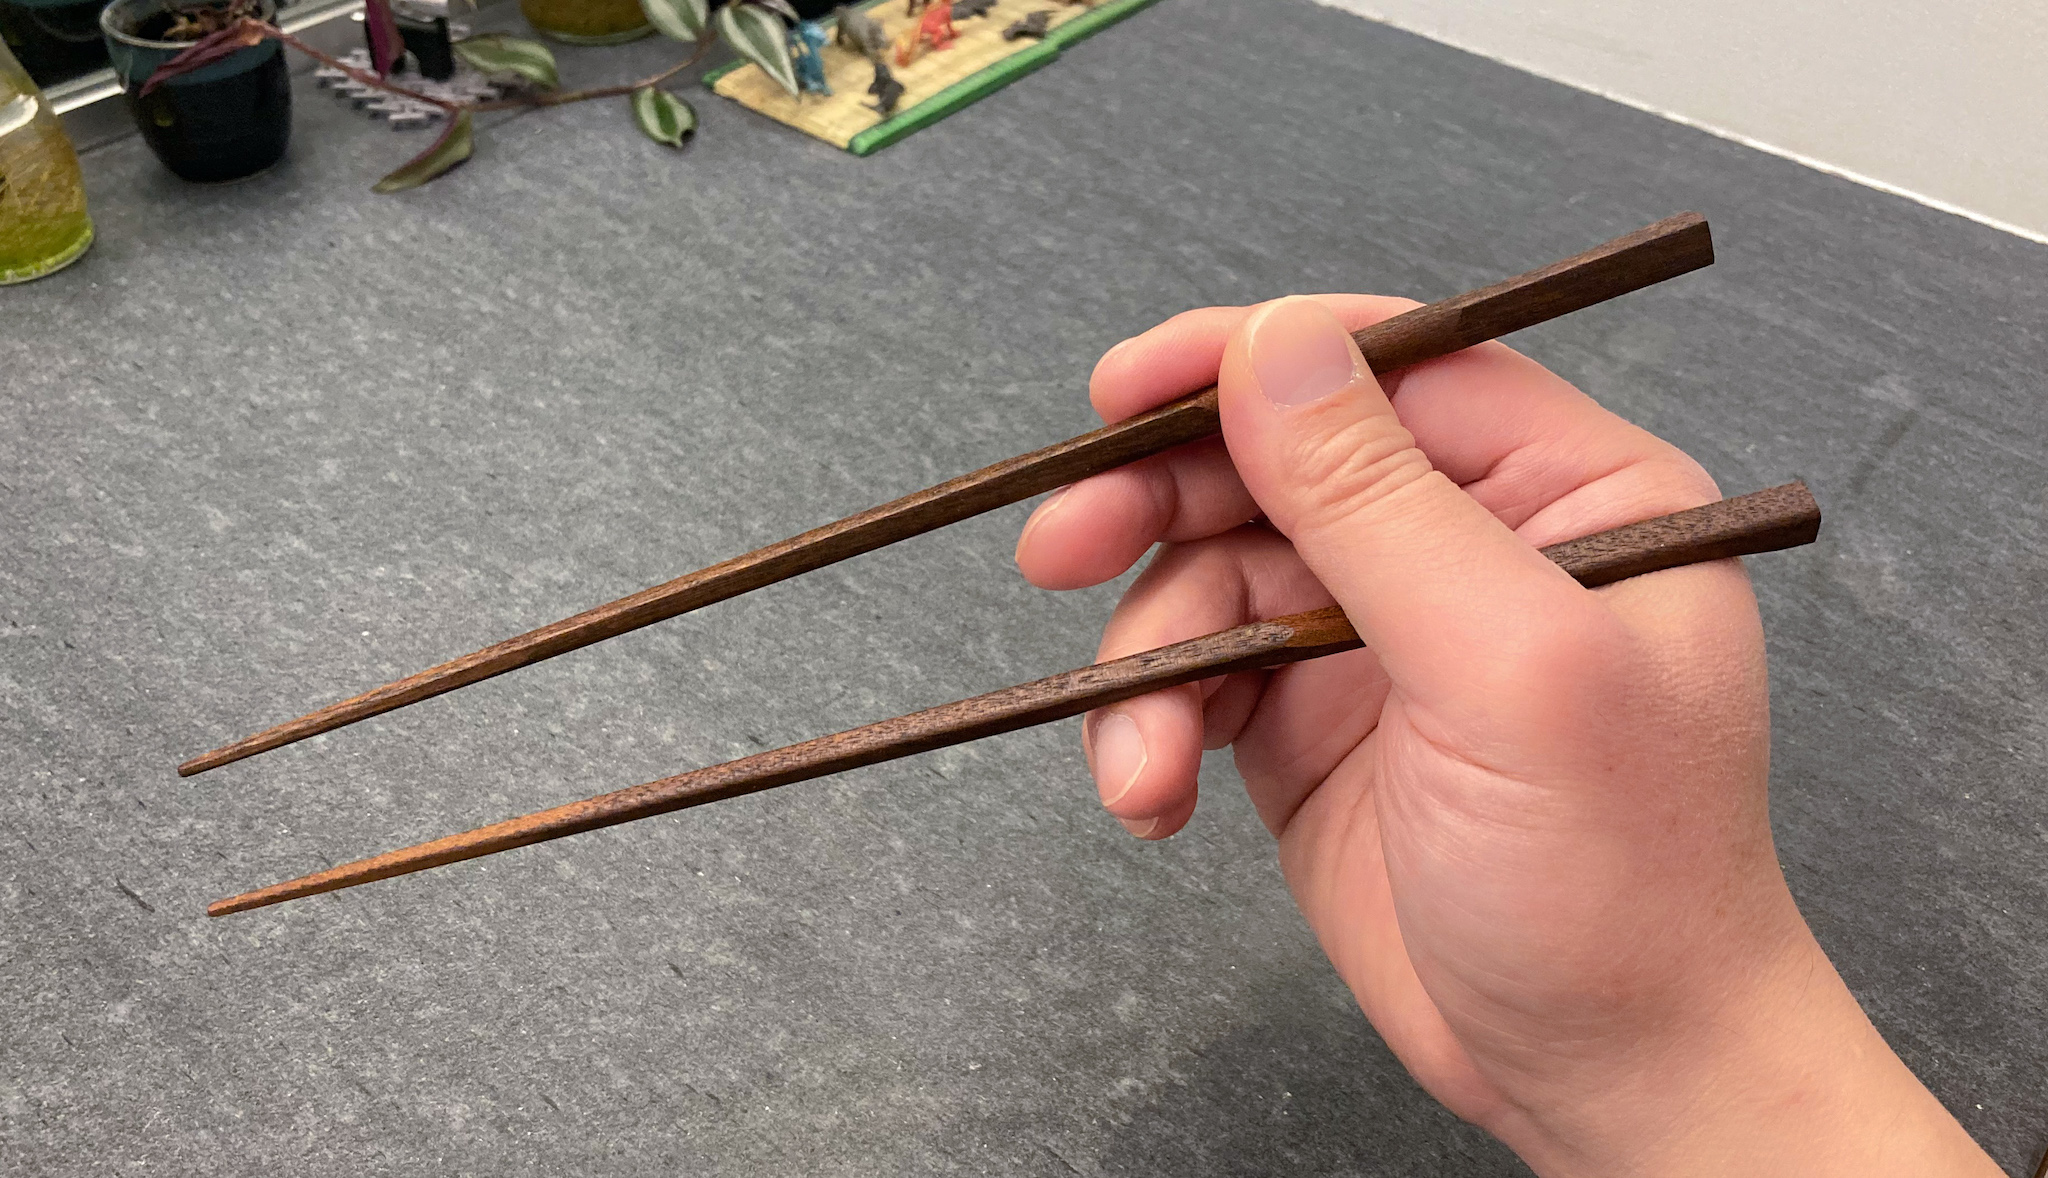
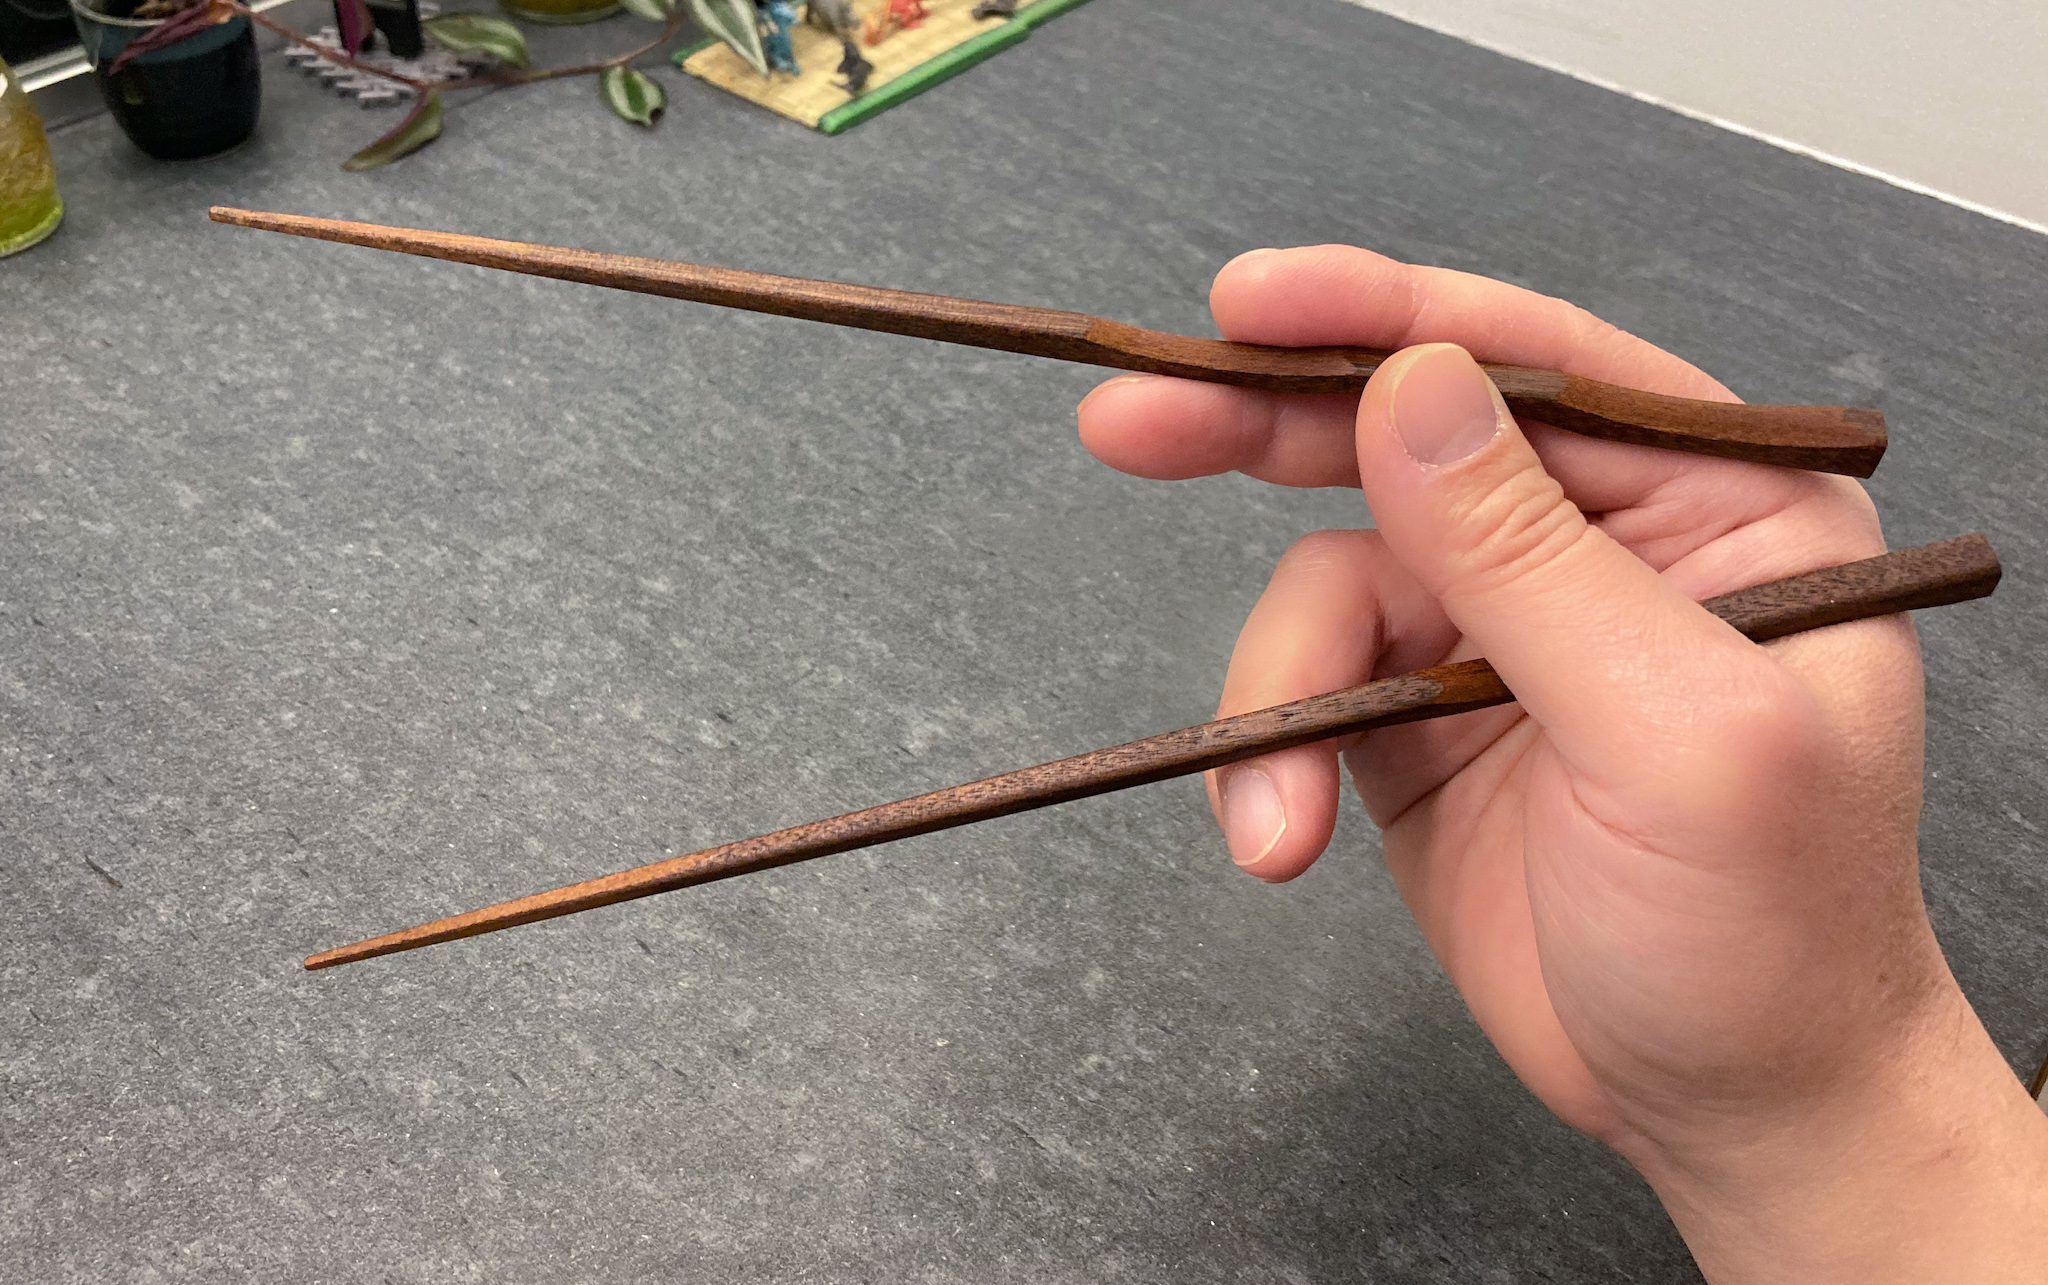
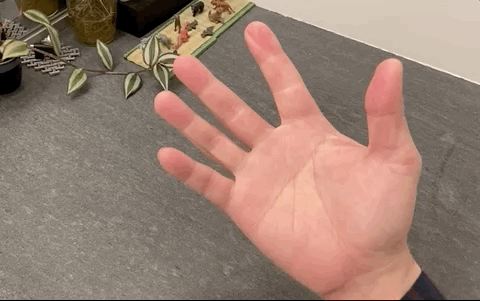
These finger placement chopsticks work very well for the initial placement of fingers, at the “closed posture” shown above. And this is the posture that most learning aids address. What most inventors neglect is the “open posture”, at the other end of the Standard Grip motion. The open posture is shown below.
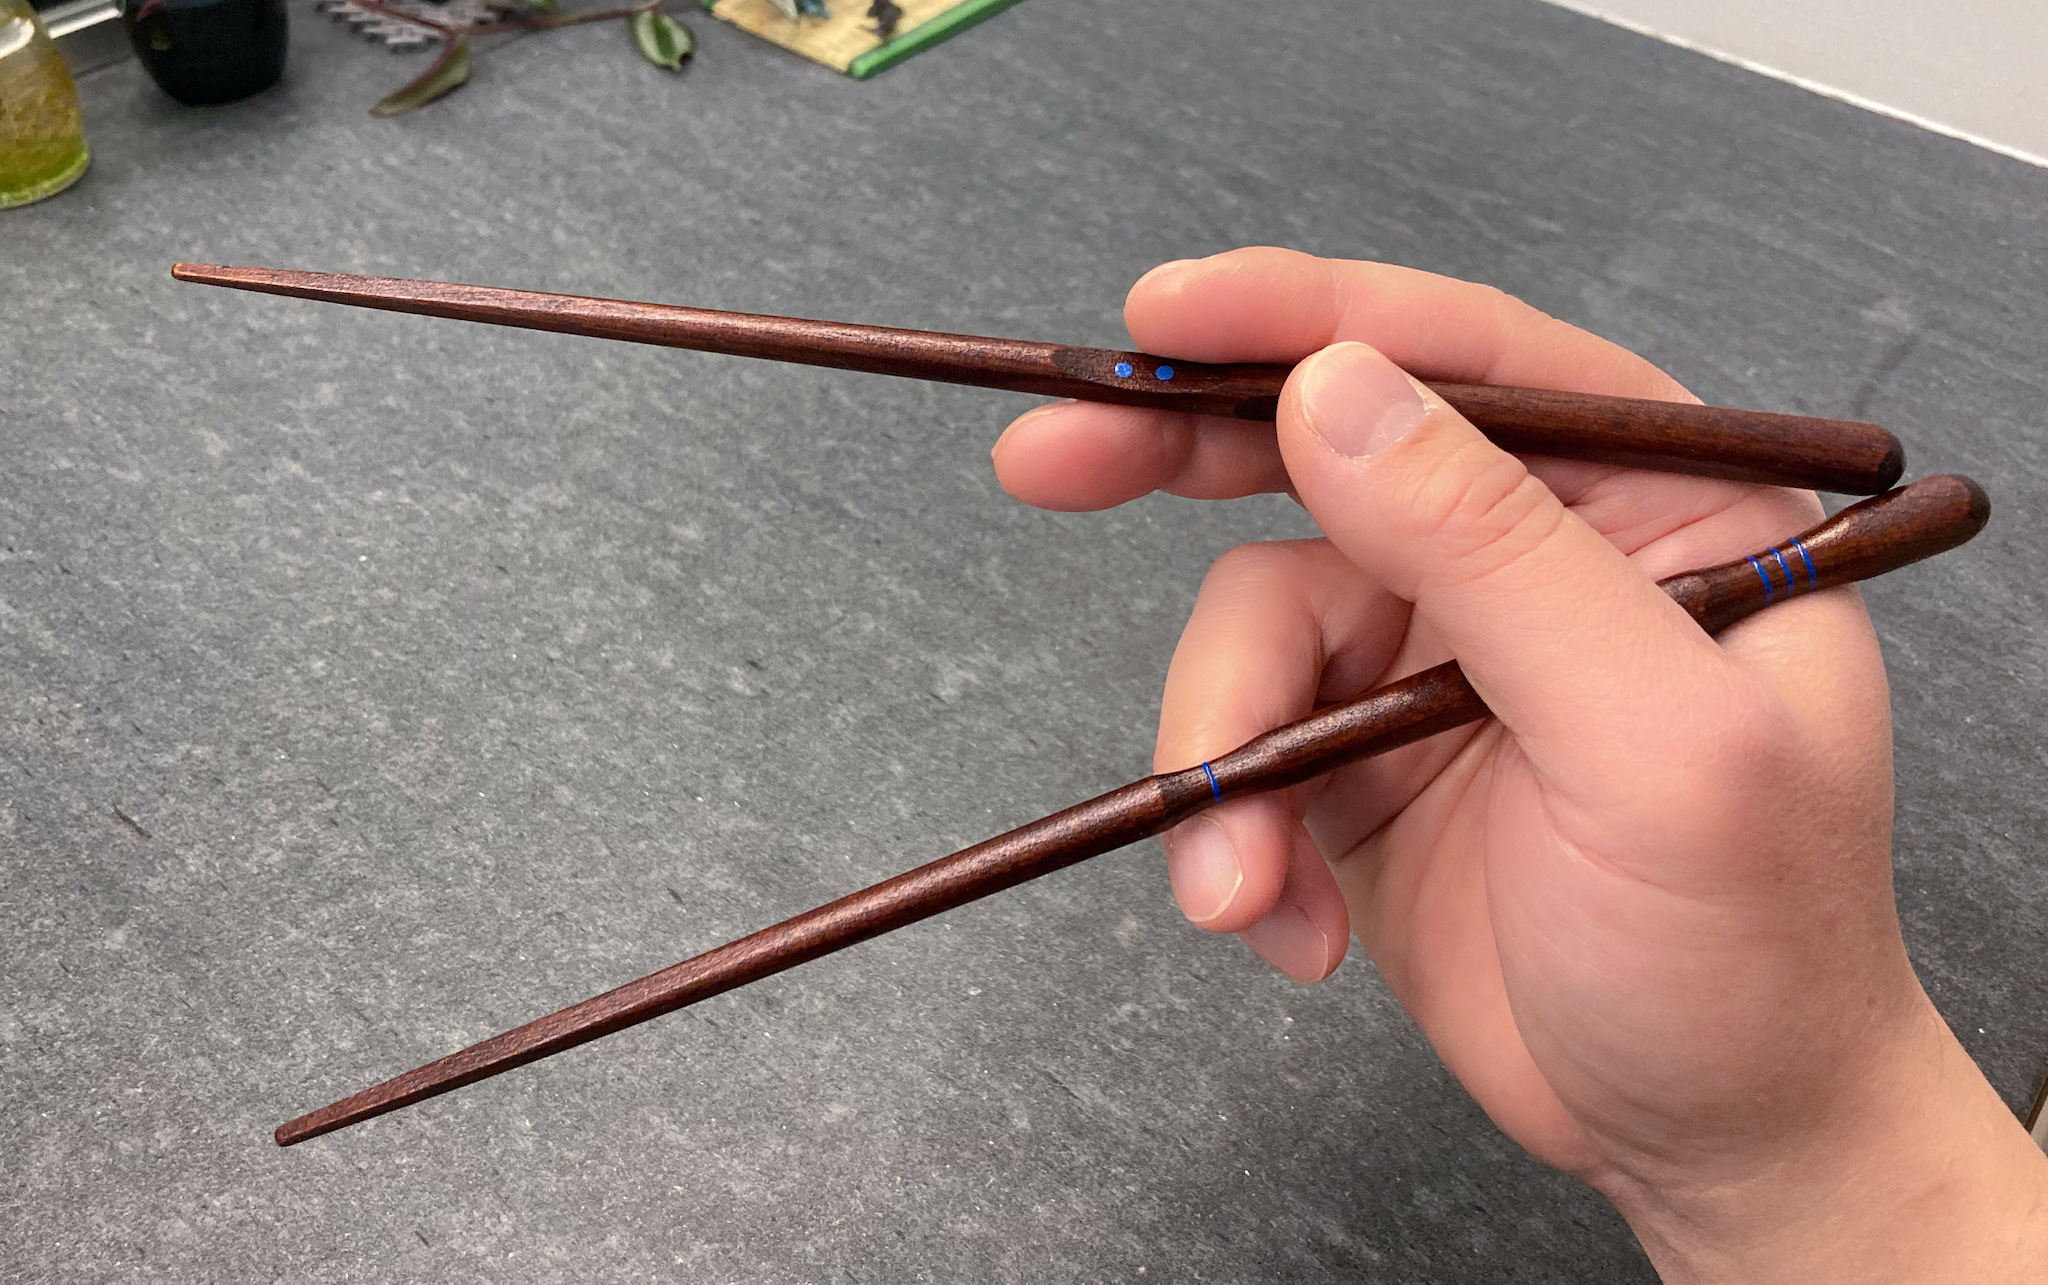
As the top chopstick is rolled from the closed to the open posture, fingers no longer align with the carved grooves. These grooves are designed without taking into account the roll. They fit fingers well only at the initial, closed posture. These grooves actually make it harder to roll the top chopstick.
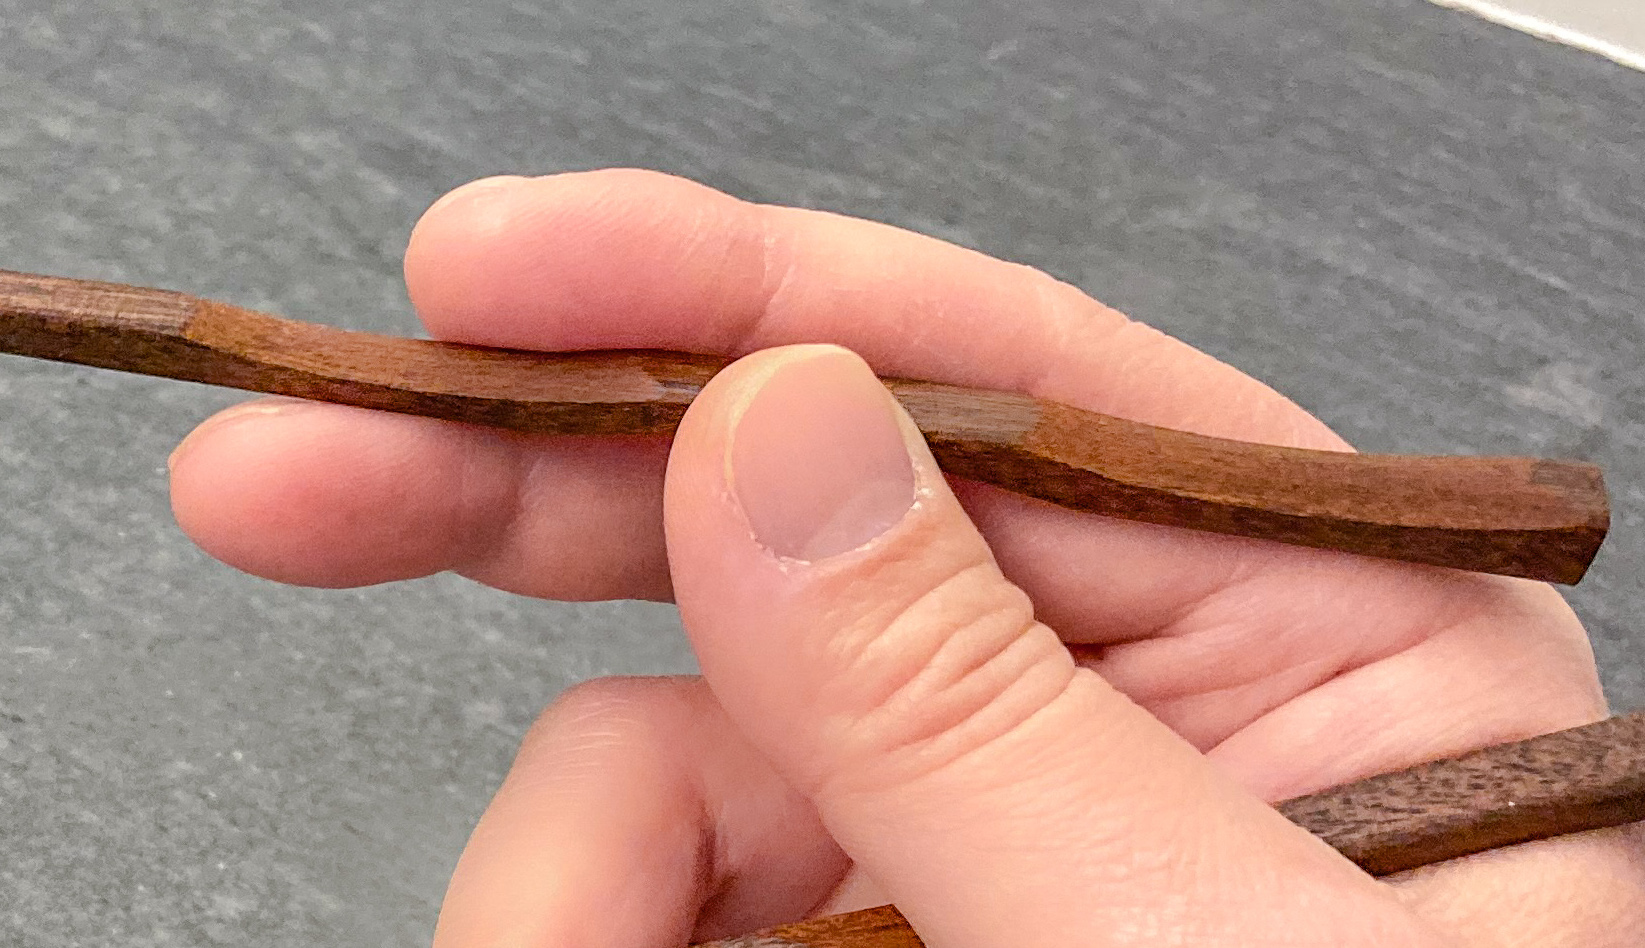
Circumferential grooves appear to be a nice touch. They are presumably more “comfortable” to use. But in reality, circumferential grooves make the bottom stick slippery to hold. Whereas regular square chopsticks provide edges at 90° angles for better “wedging” into skin, circumferential grooves give fingers no purchase. Securing both sticks with the same thumb is already a difficult task in Standard Grip. With circumferential grooves, this task becomes even harder.
As the Standard Grip article showed, the bottom chopstick can actually be rolled, for an extended reach. Such is no longer possible with circumferential grooves. The bottom chopstick slips when an extended reach is attempted.
The above two issues are reasons why we marked finger placement chopsticks as “not good” for the “Open” and “Reach” functions in the summary table. That is, finger placement chopsticks do not support proper open posture, and do not allow tips to extend far apart.
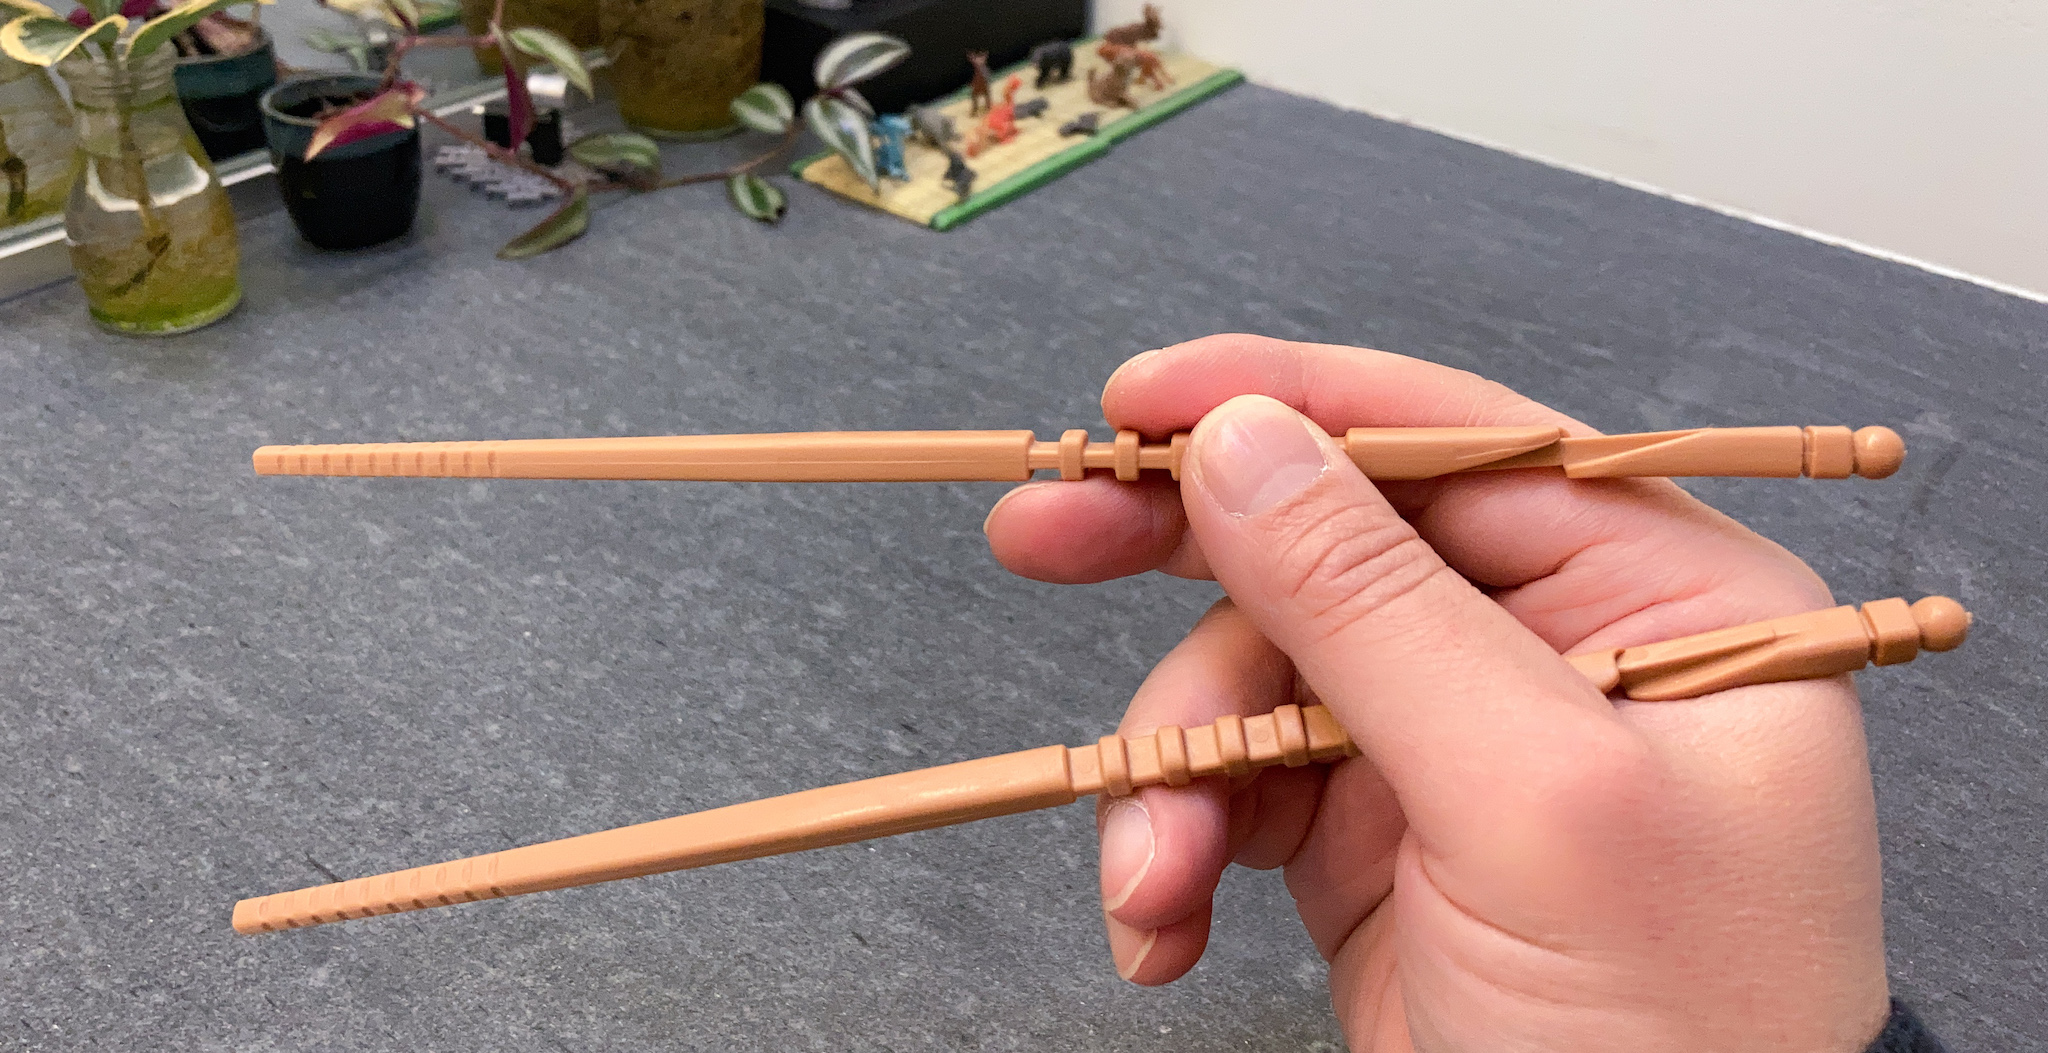
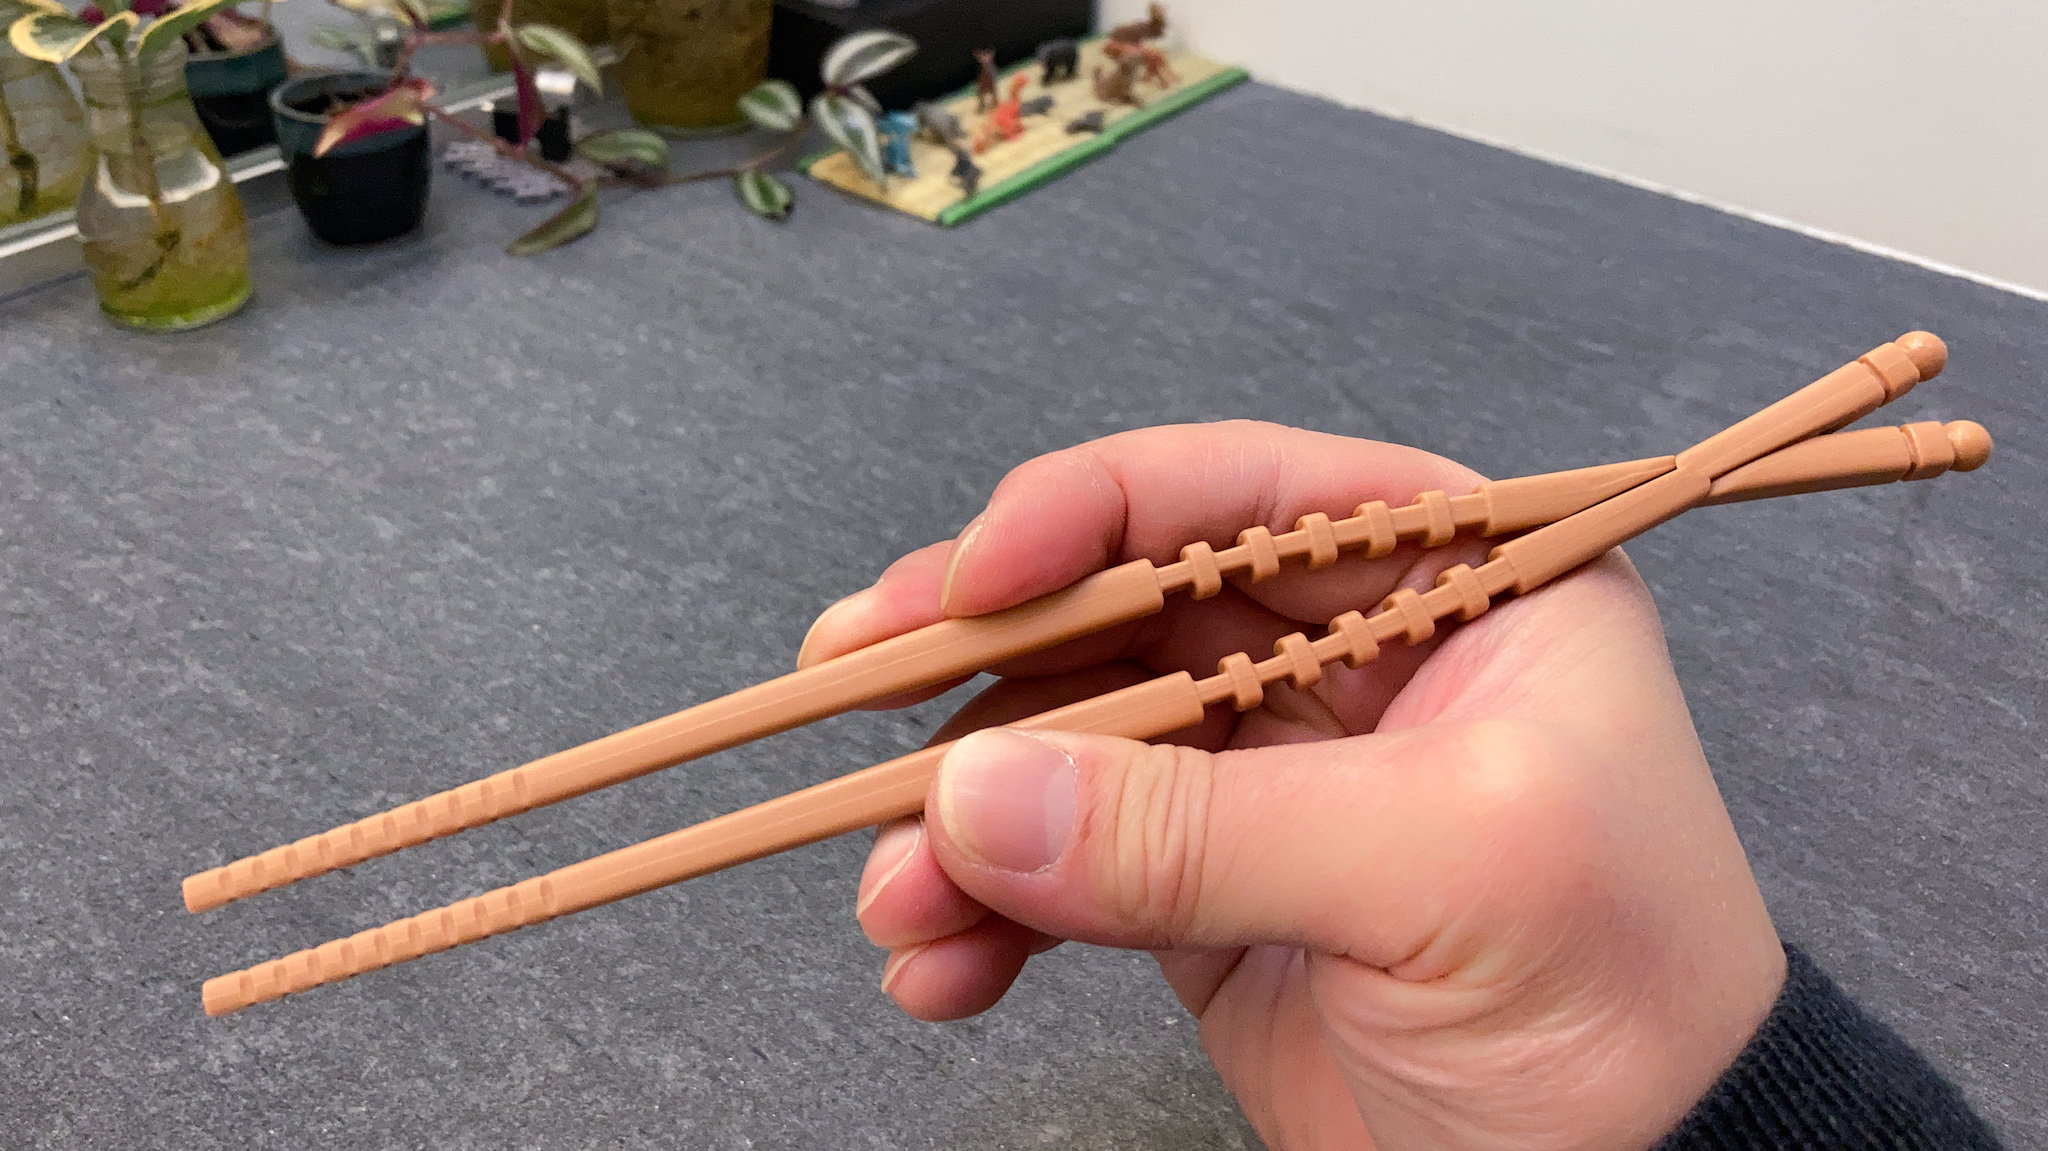
A different brand of finger placement chopsticks is shown below. These are Ink Carved chopsticks by Kobe Hashiya. Both sticks are carved the same way, with three grooves. These grooves are carved with the 1-on-2-support for the bottom chopstick in mind. They don’t fit the tripod hold for the top stick well.
These have the same “Open” and “Roll” issues. Neither sticks can be easily rolled. The next picture shows the open posture.
Our overall assessment for finger placement chopsticks:
| Finger placement chopsticks | Assessment | |
|---|---|---|
| Pose | Teaches proper initial finger placement | ✅ |
| Grip | Teaches proper gripping of chopsticks | ✅ |
| Roll | Allows rolling of the top chopstick | ✅ |
| Open | Supports proper open posture | ❌ |
| Reach | Allows extended reach for bottom chopstick | ❌ |
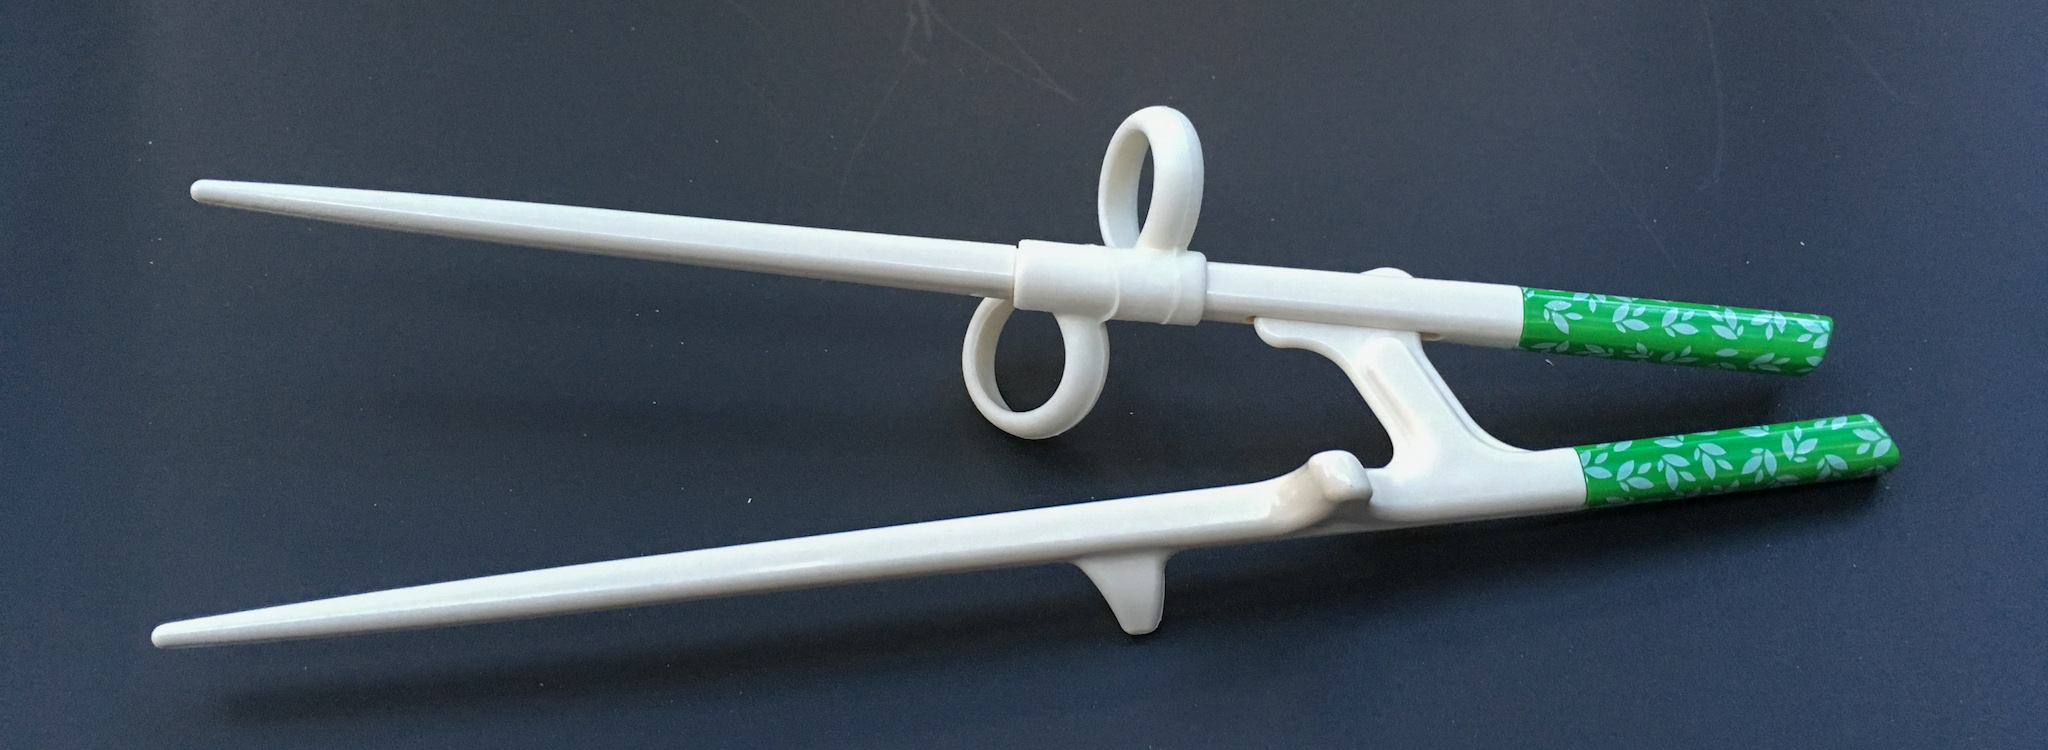
Ergonomic marcosticks
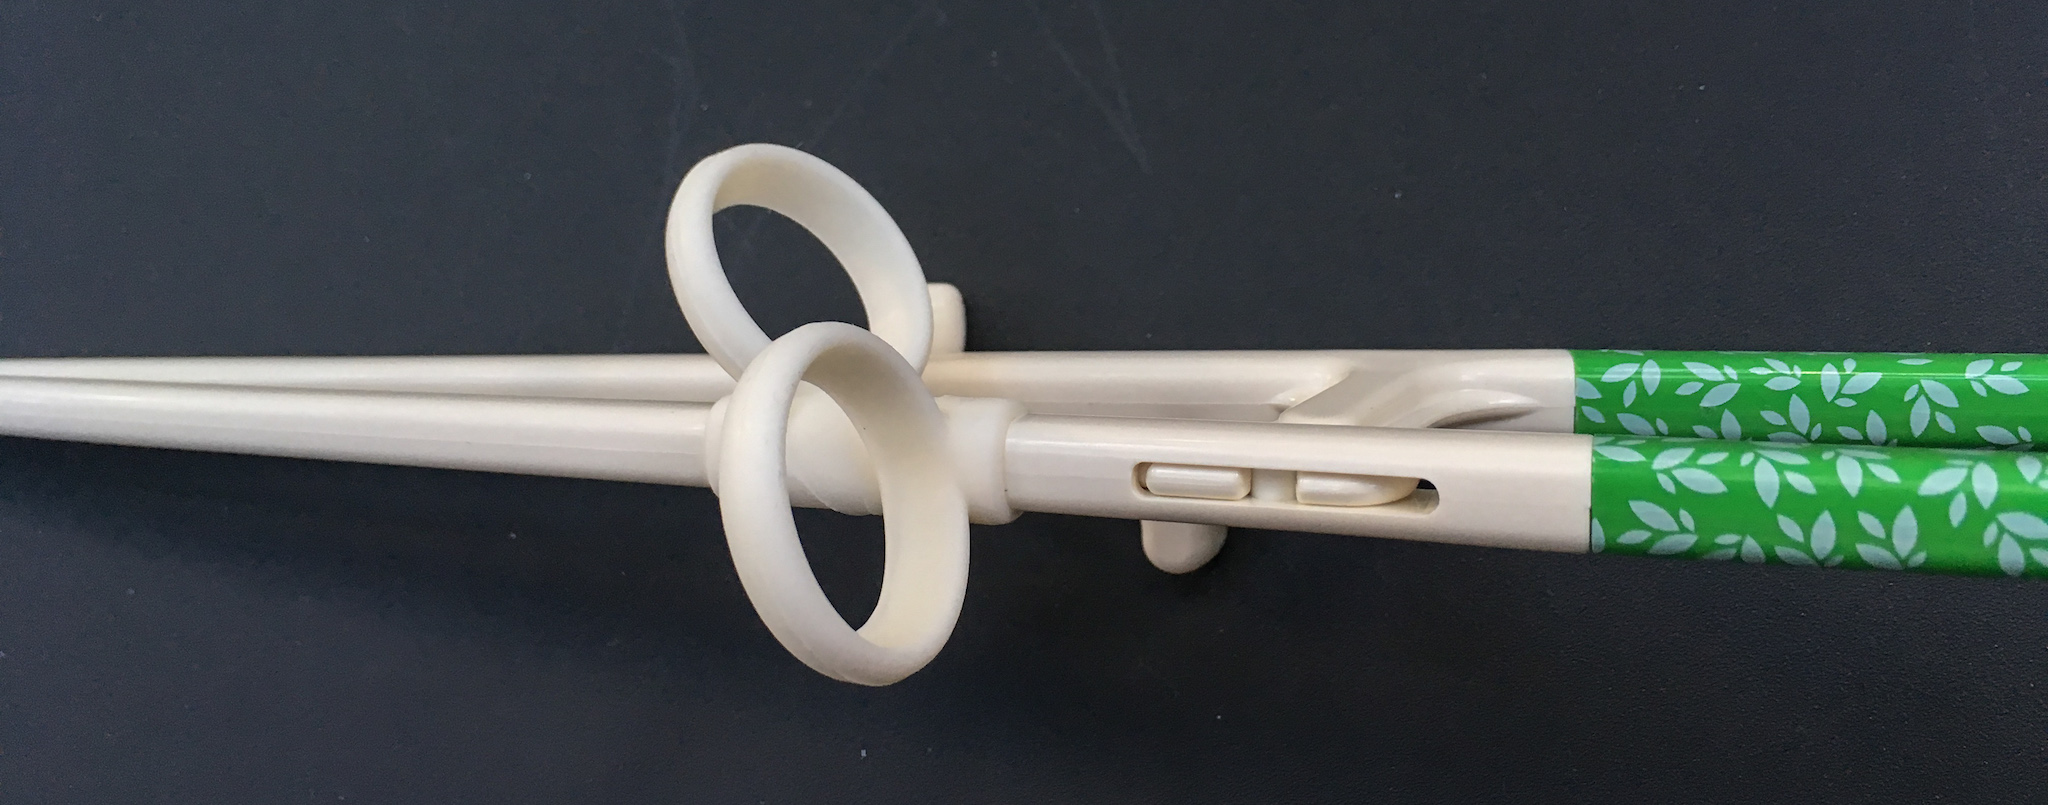
Ergonomic Marcosticks are a result of our attempt to enhance finger placement marcosticks. There is a dedicated article about them at Model E Ergonomic Marcosticks.
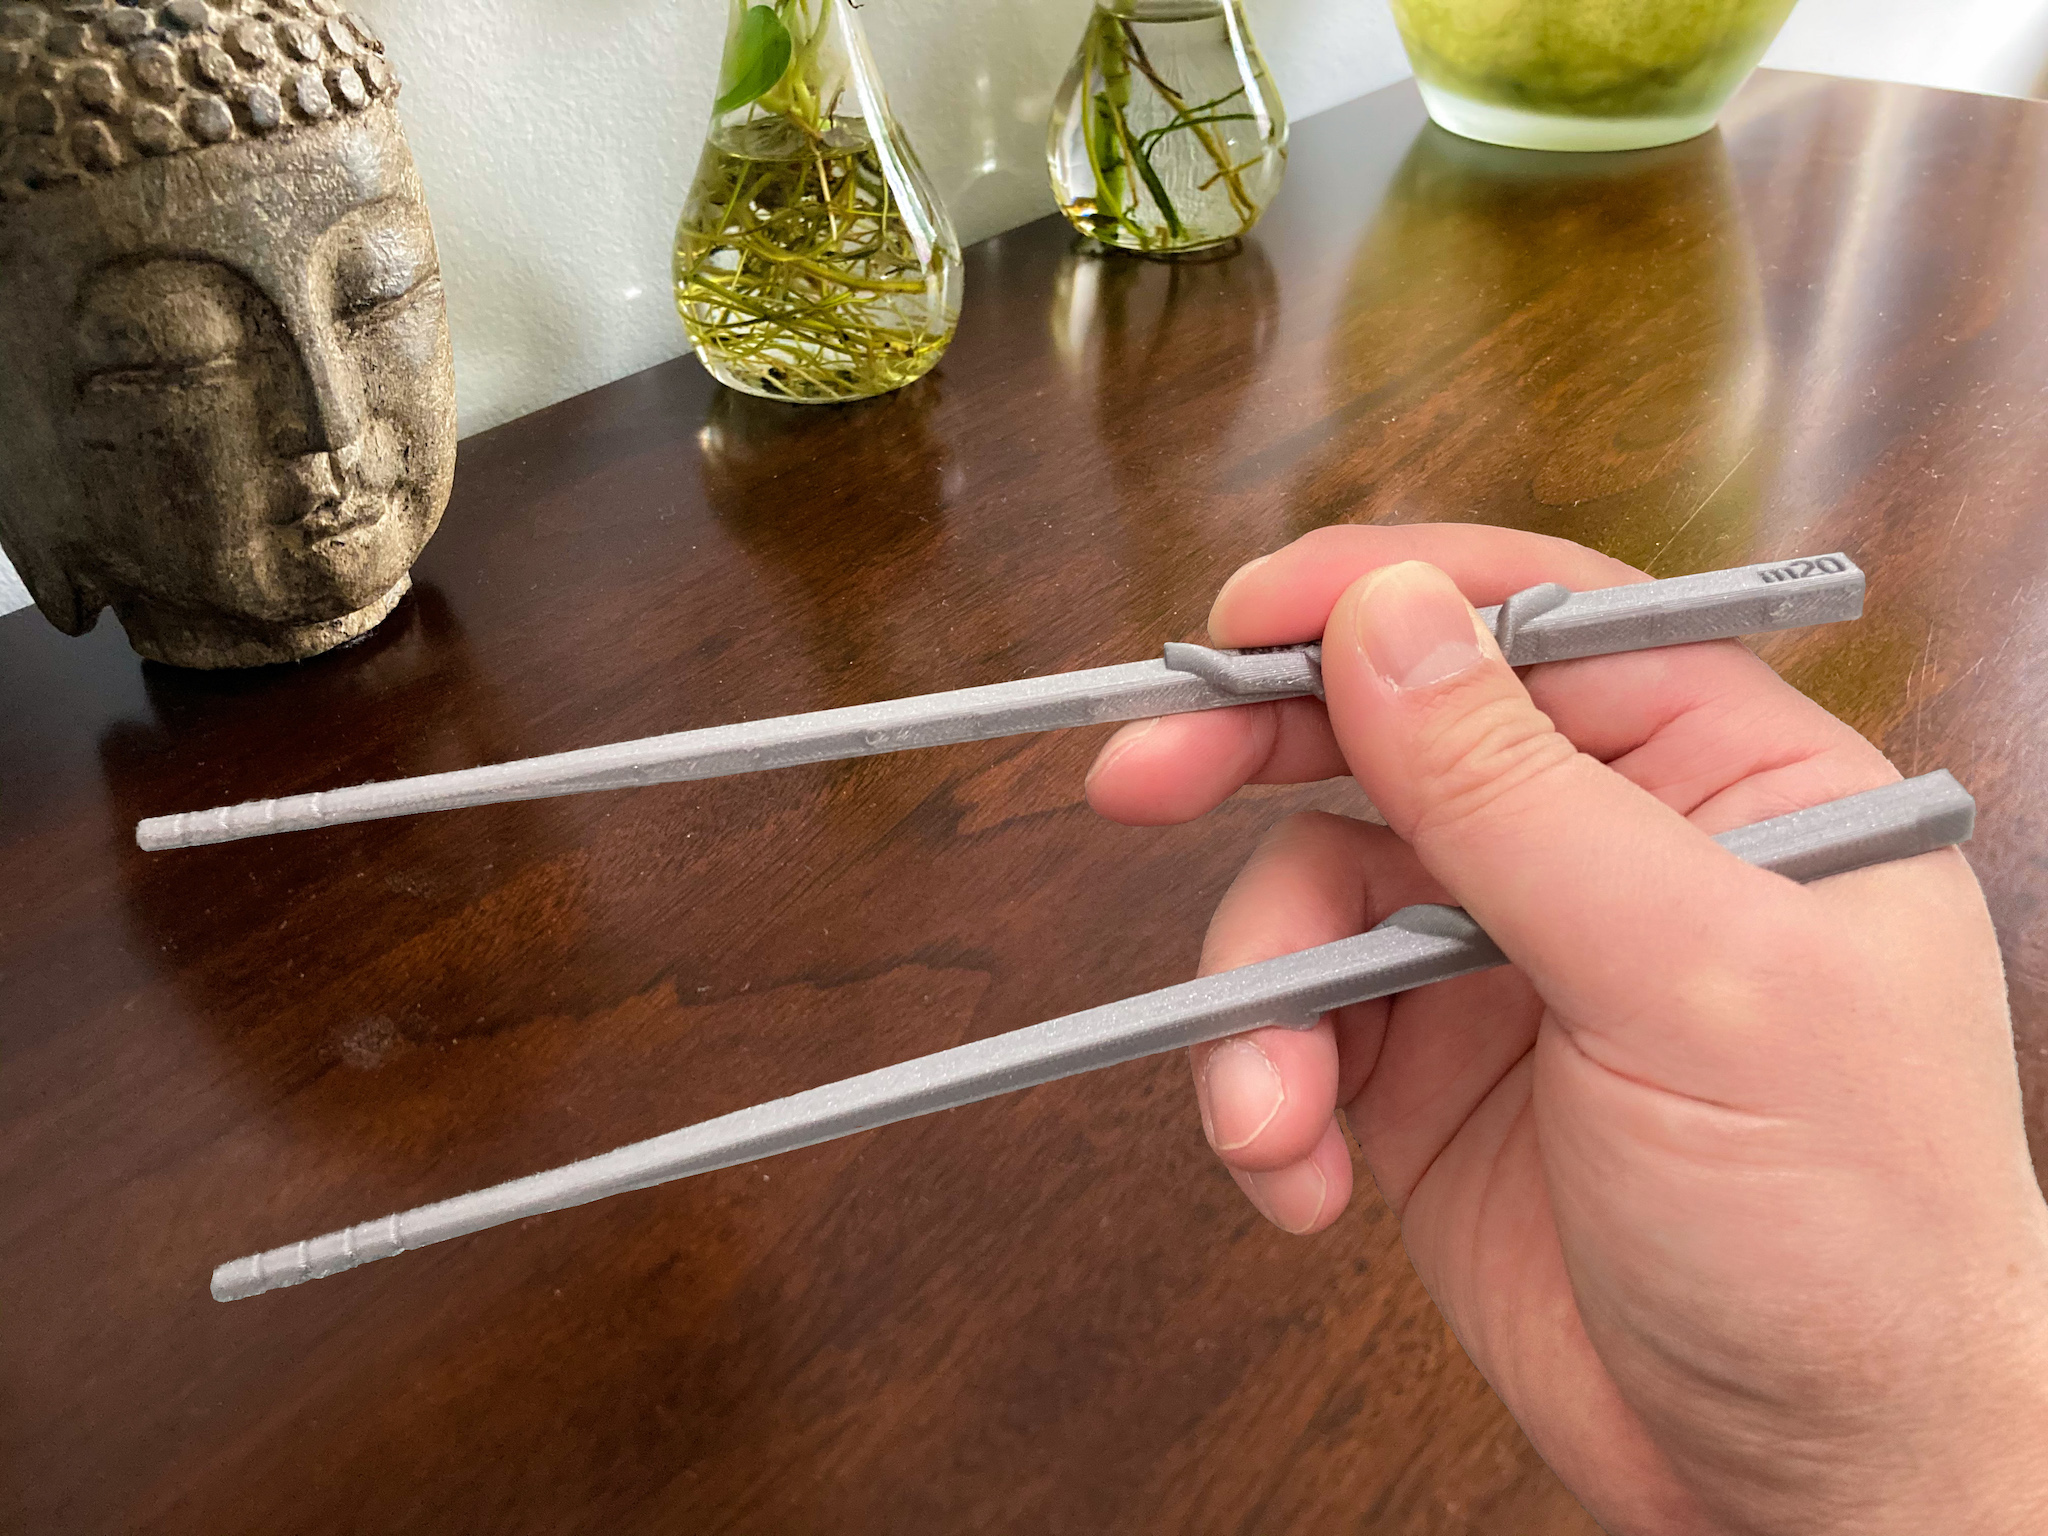
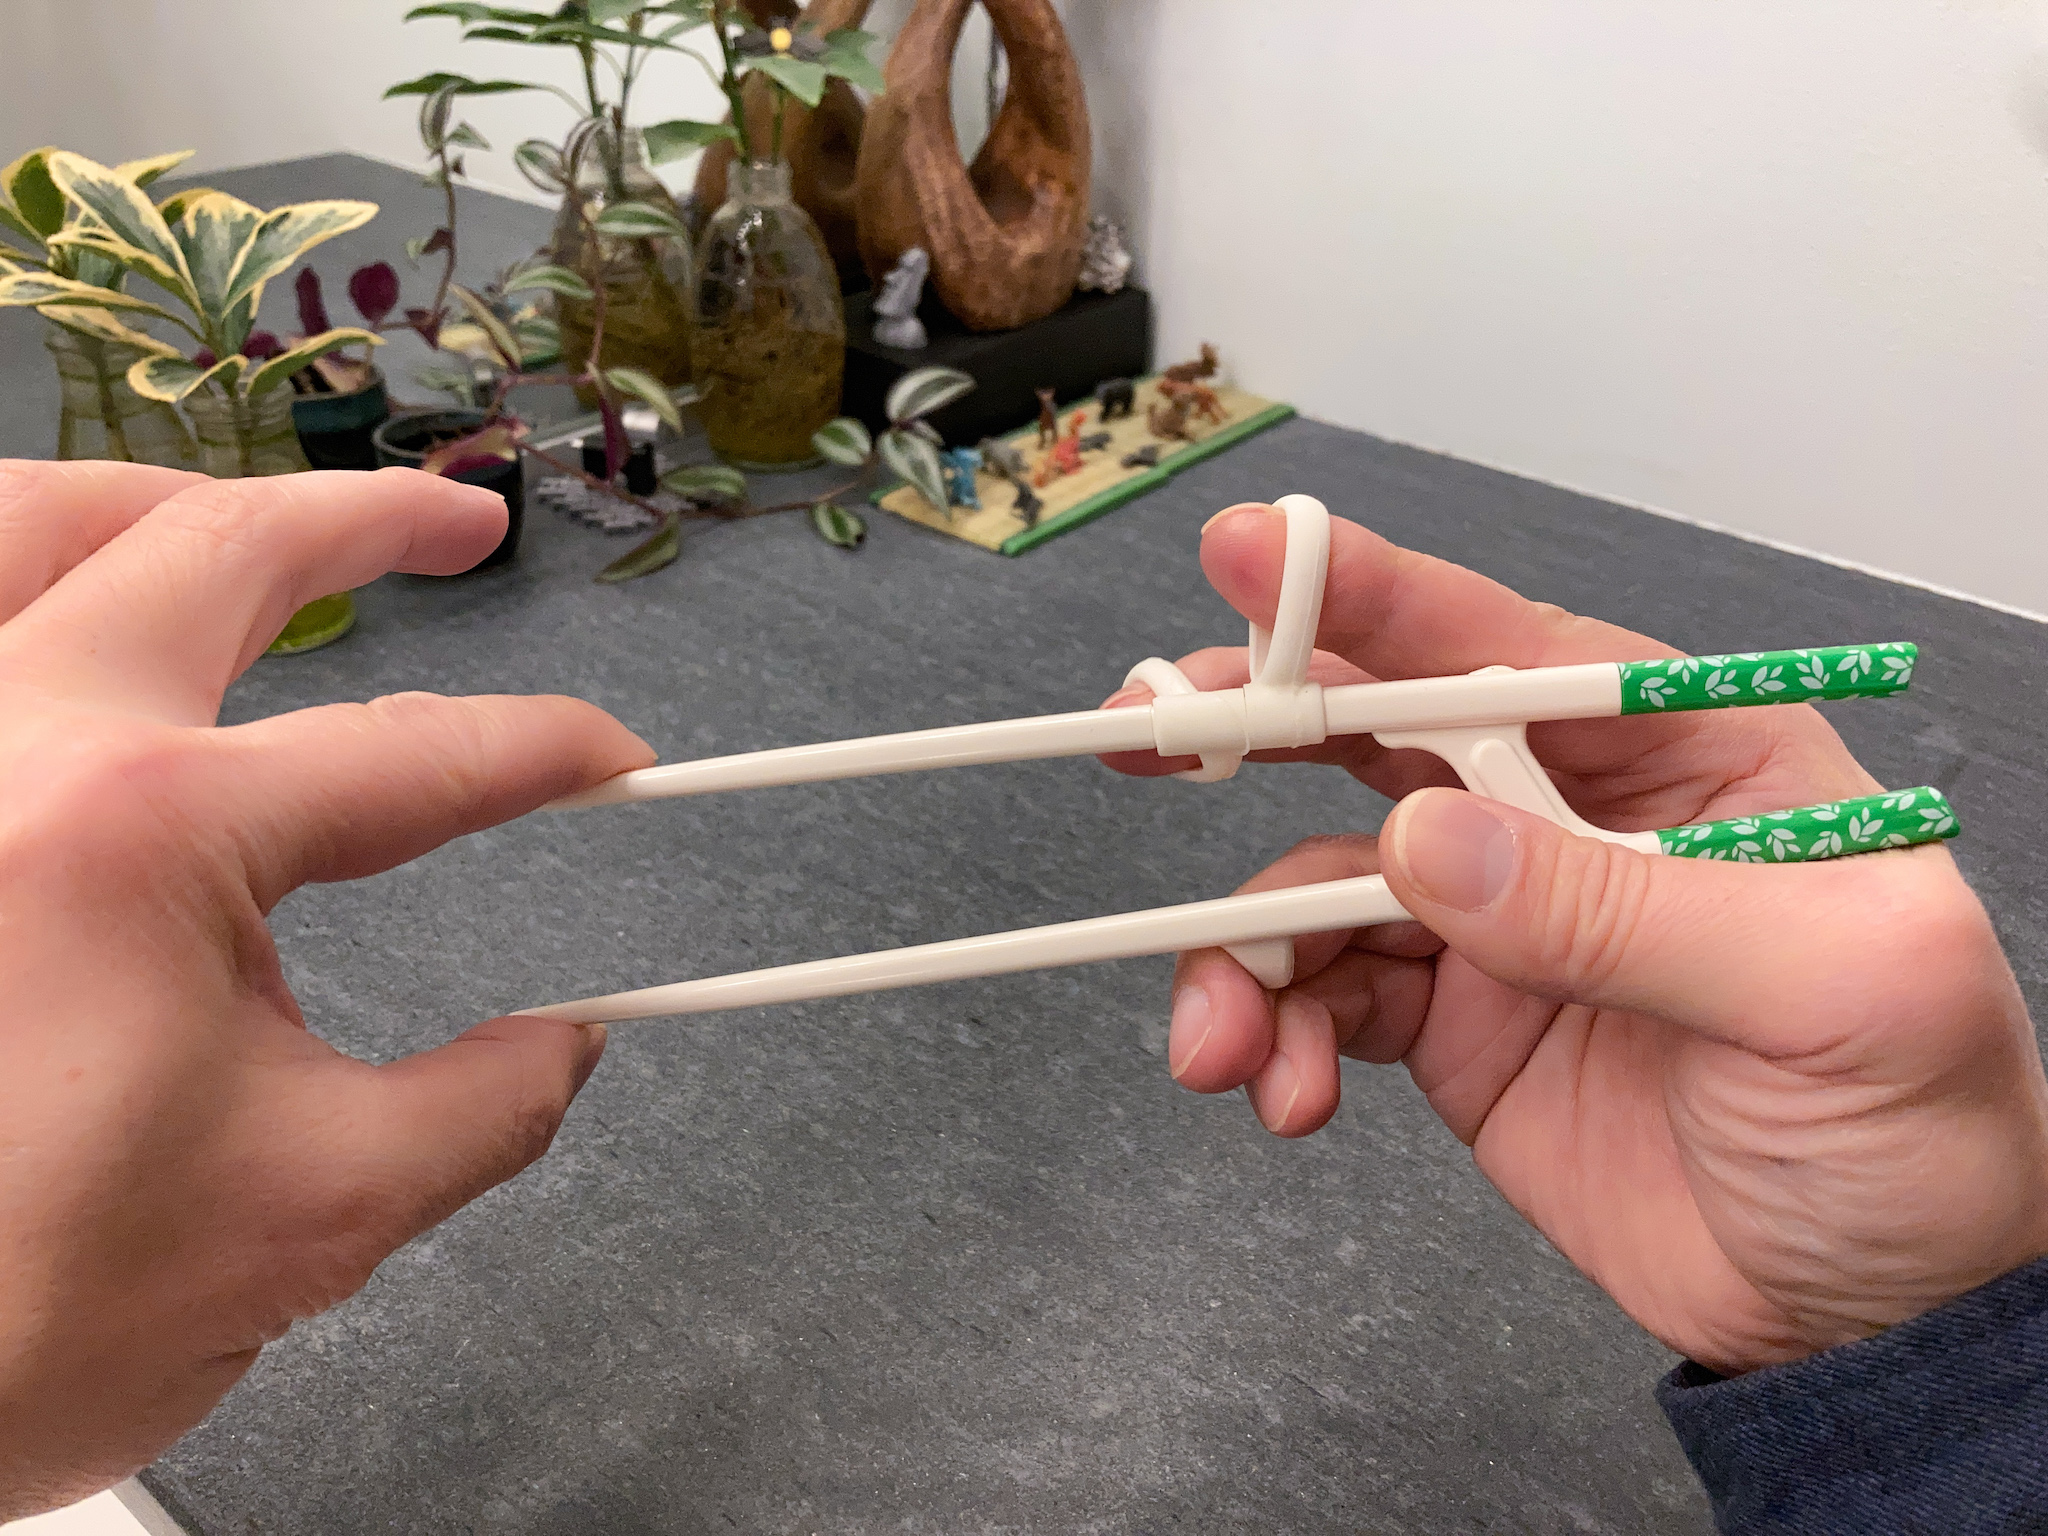
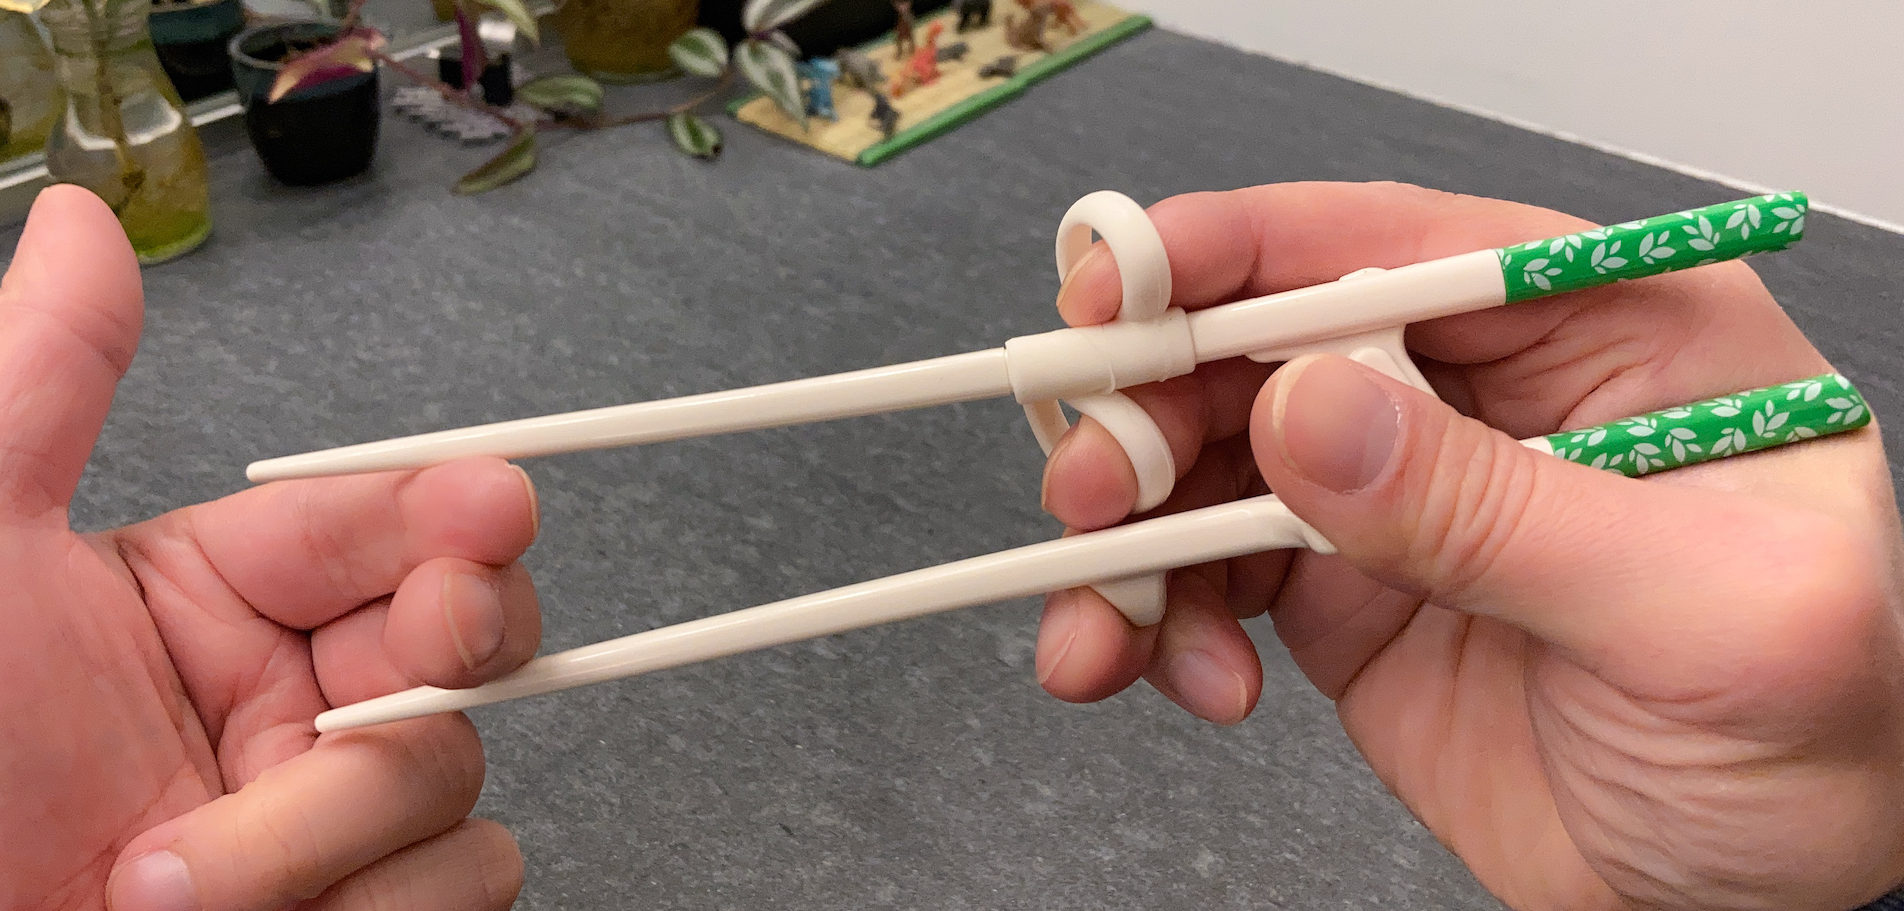
These specifically address the “Open” and “Reach” issues in finger placement chopsticks. Instead of carving grooves into sticks, ergonomic marcosticks leave all contact areas between skin and sticks untouched. Low-profile, ergonomic nuggets instead surround these areas to provide both placement guidance, as well as limit signals, at both the closed posture and the open posture. The following video clip demonstrates its use.
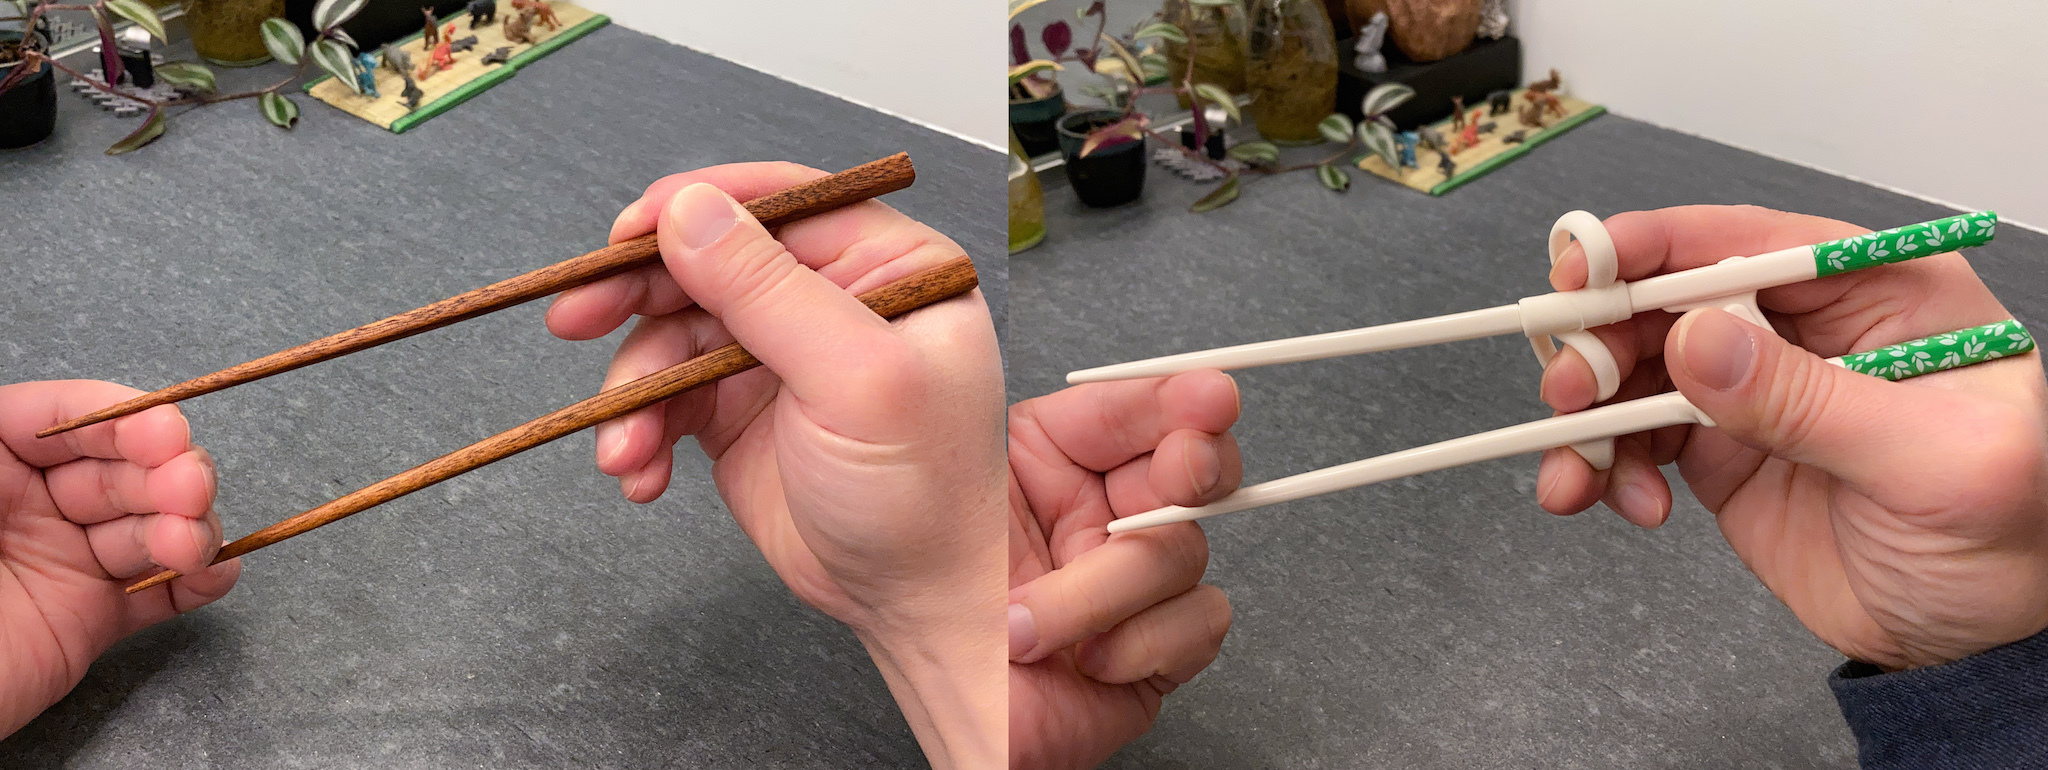
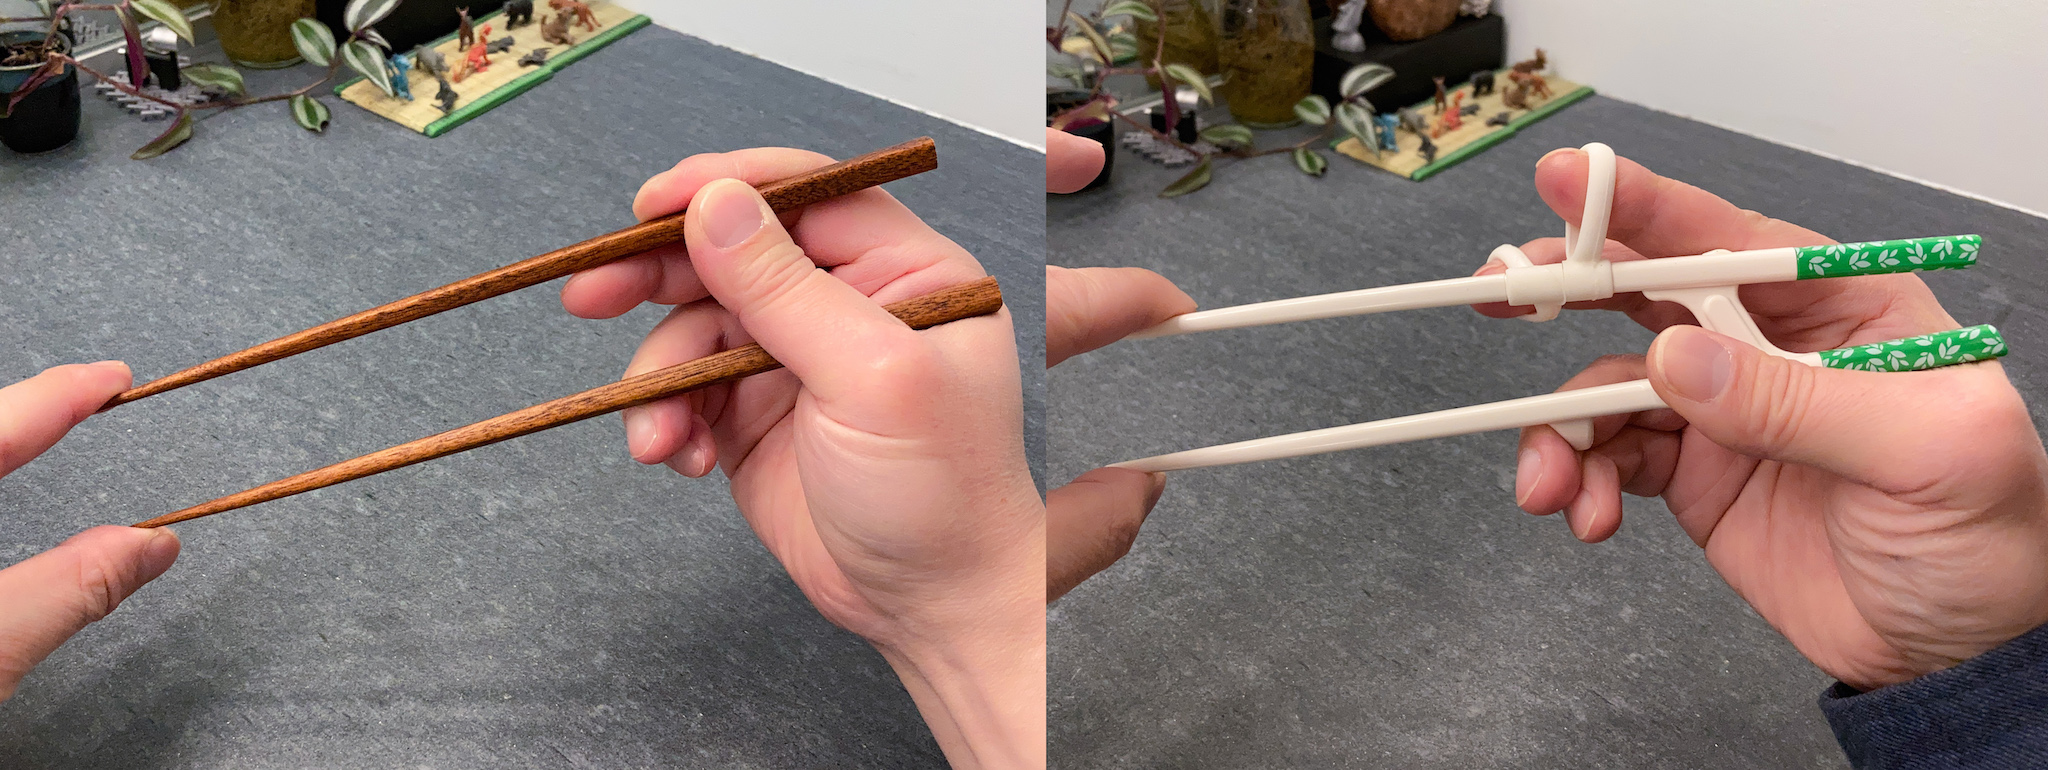
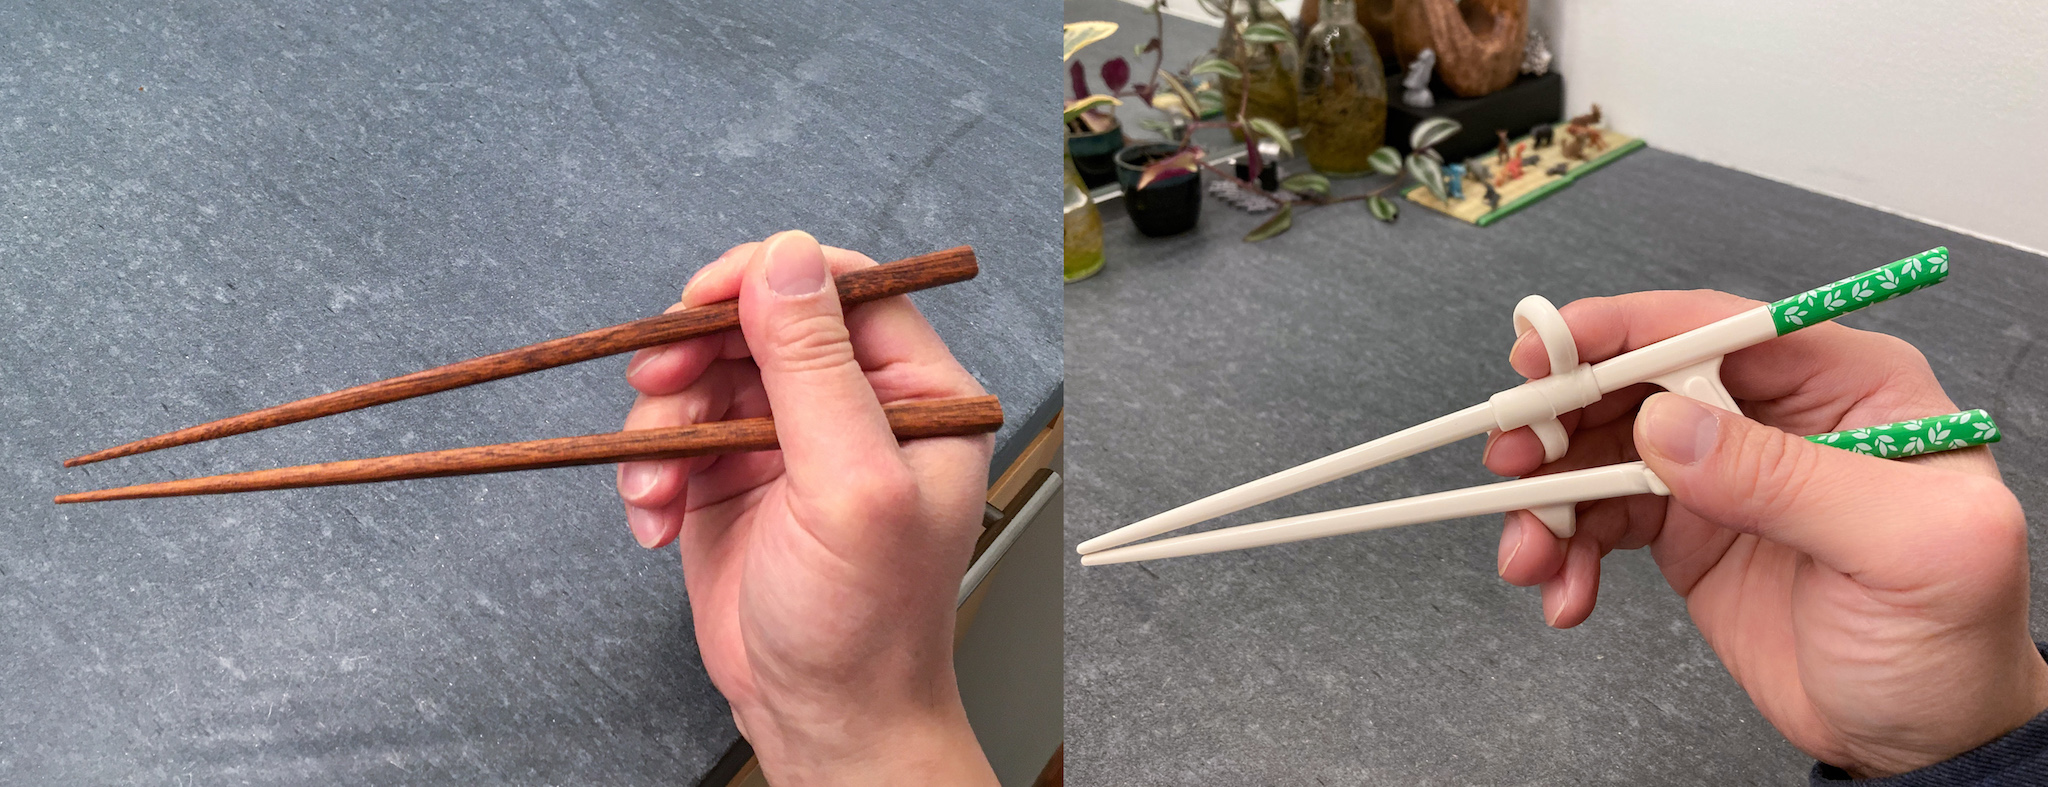
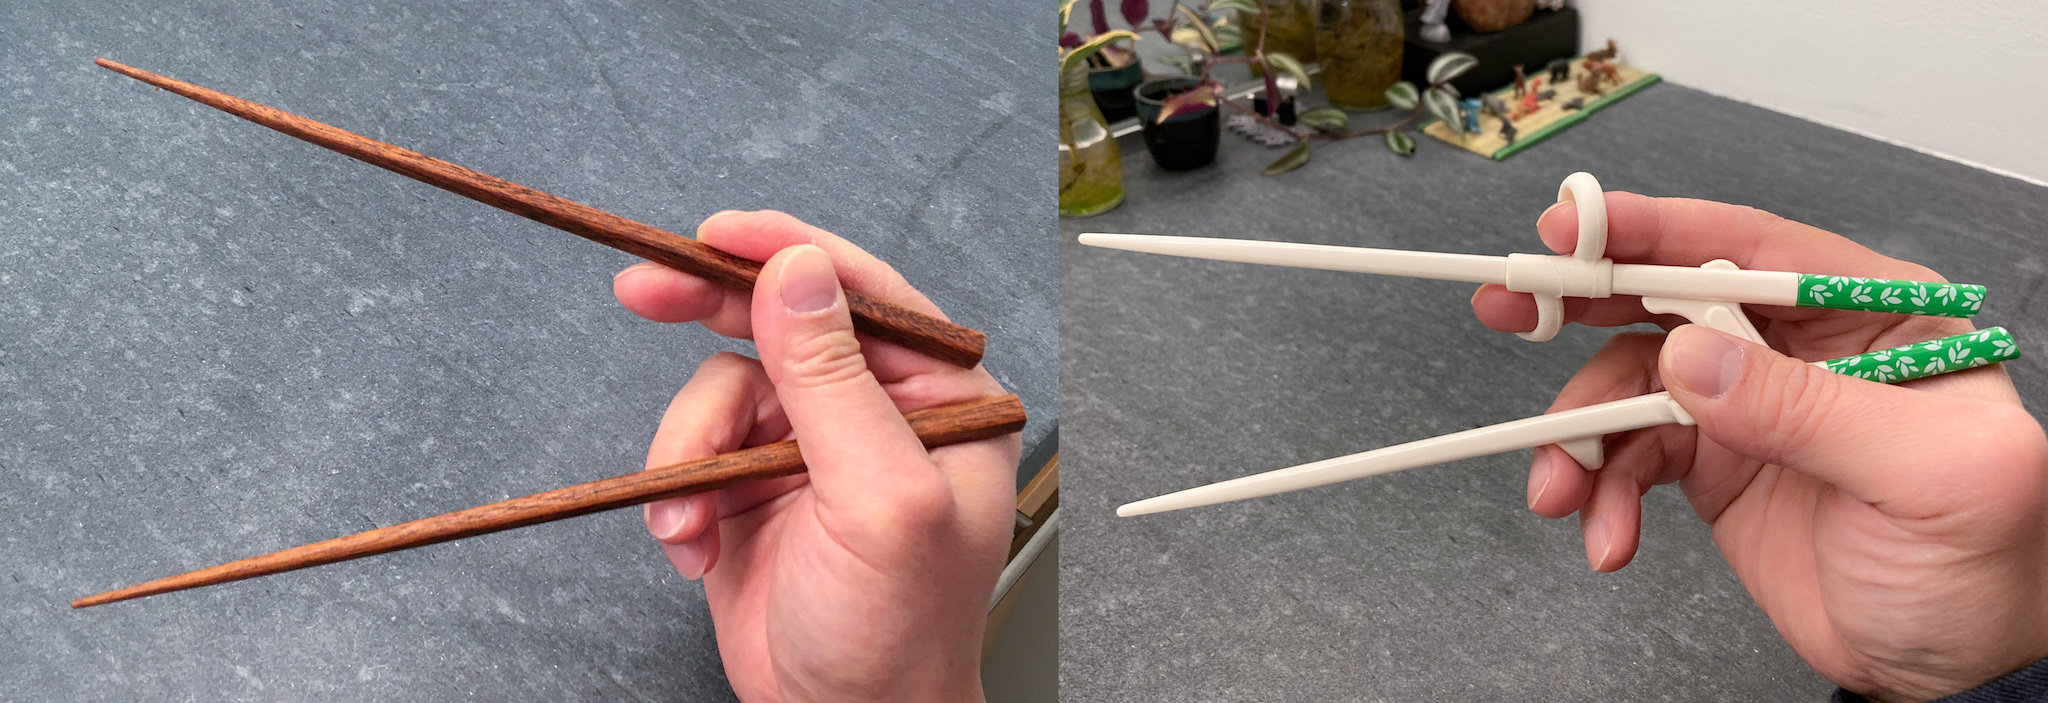
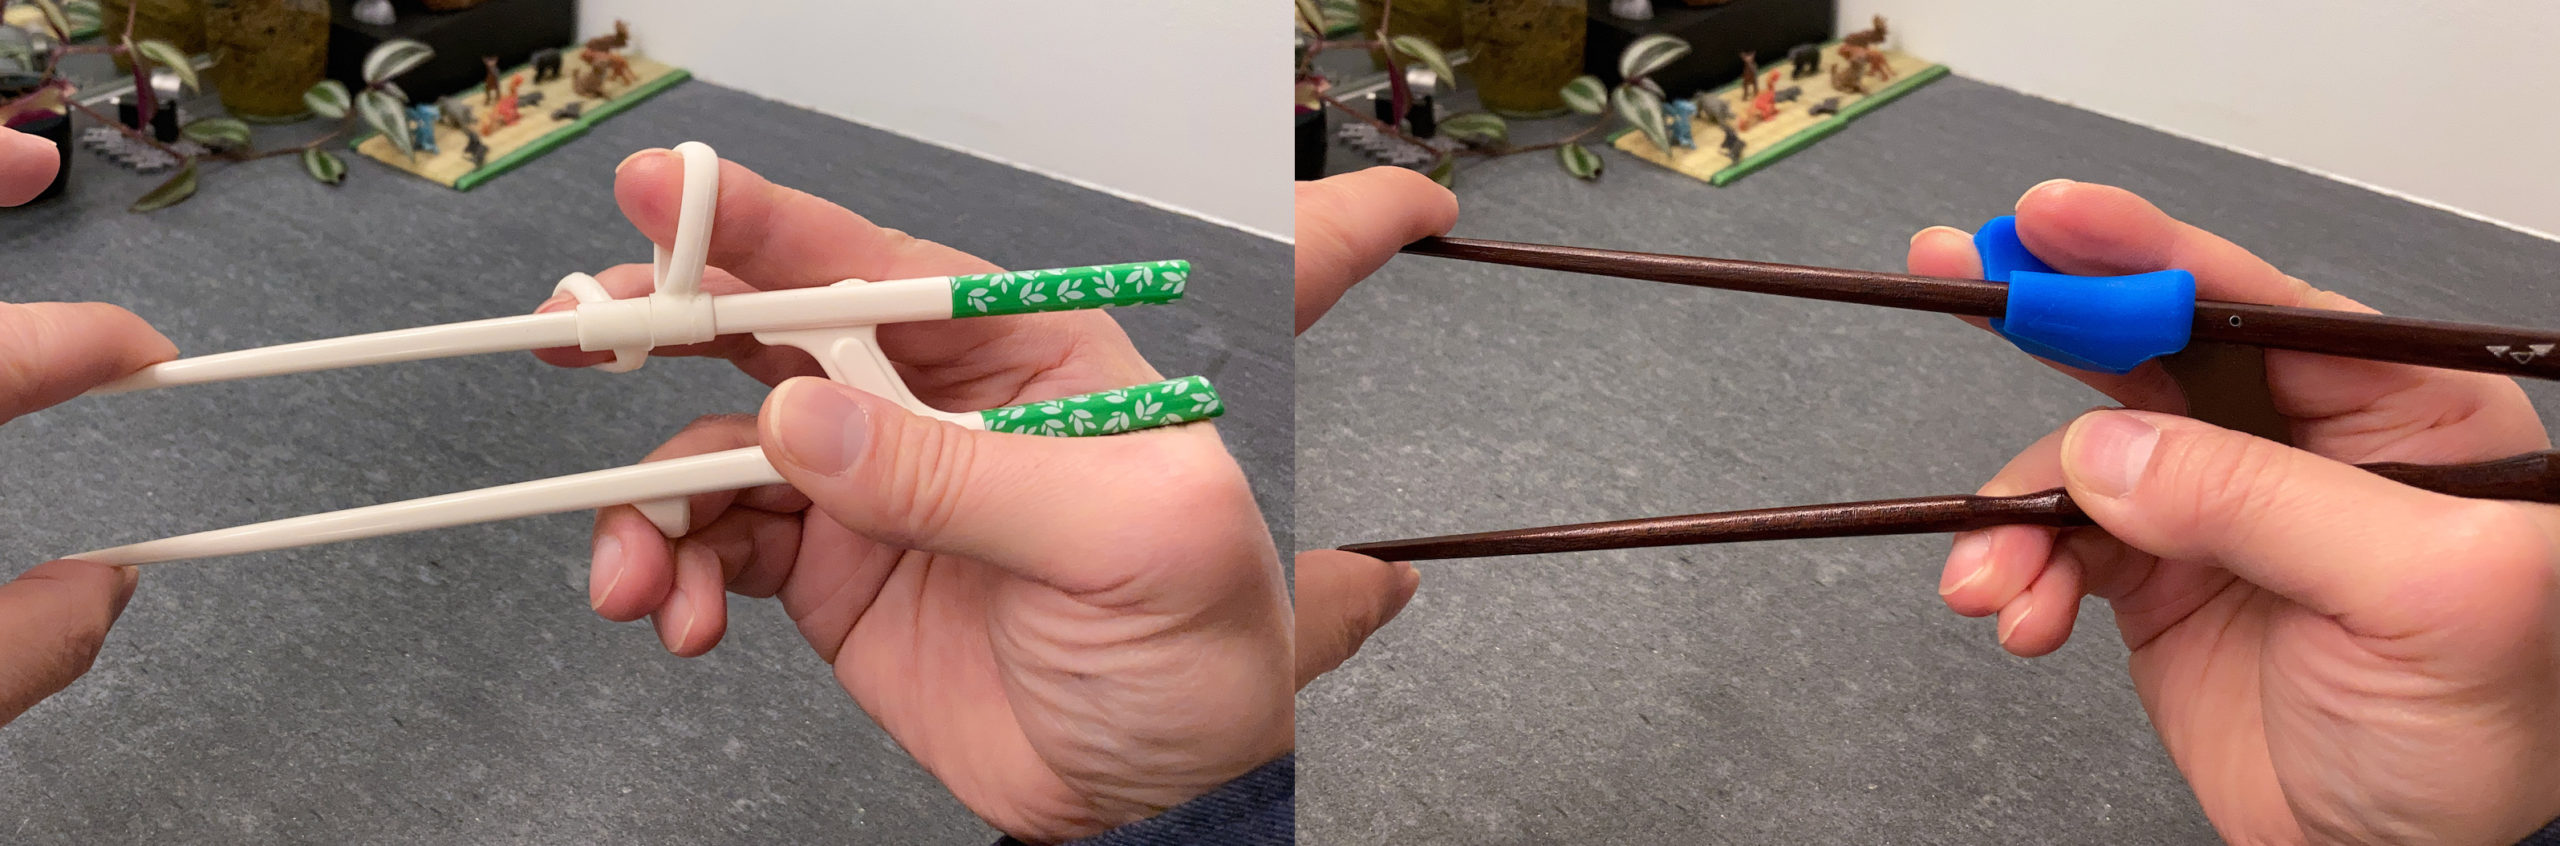
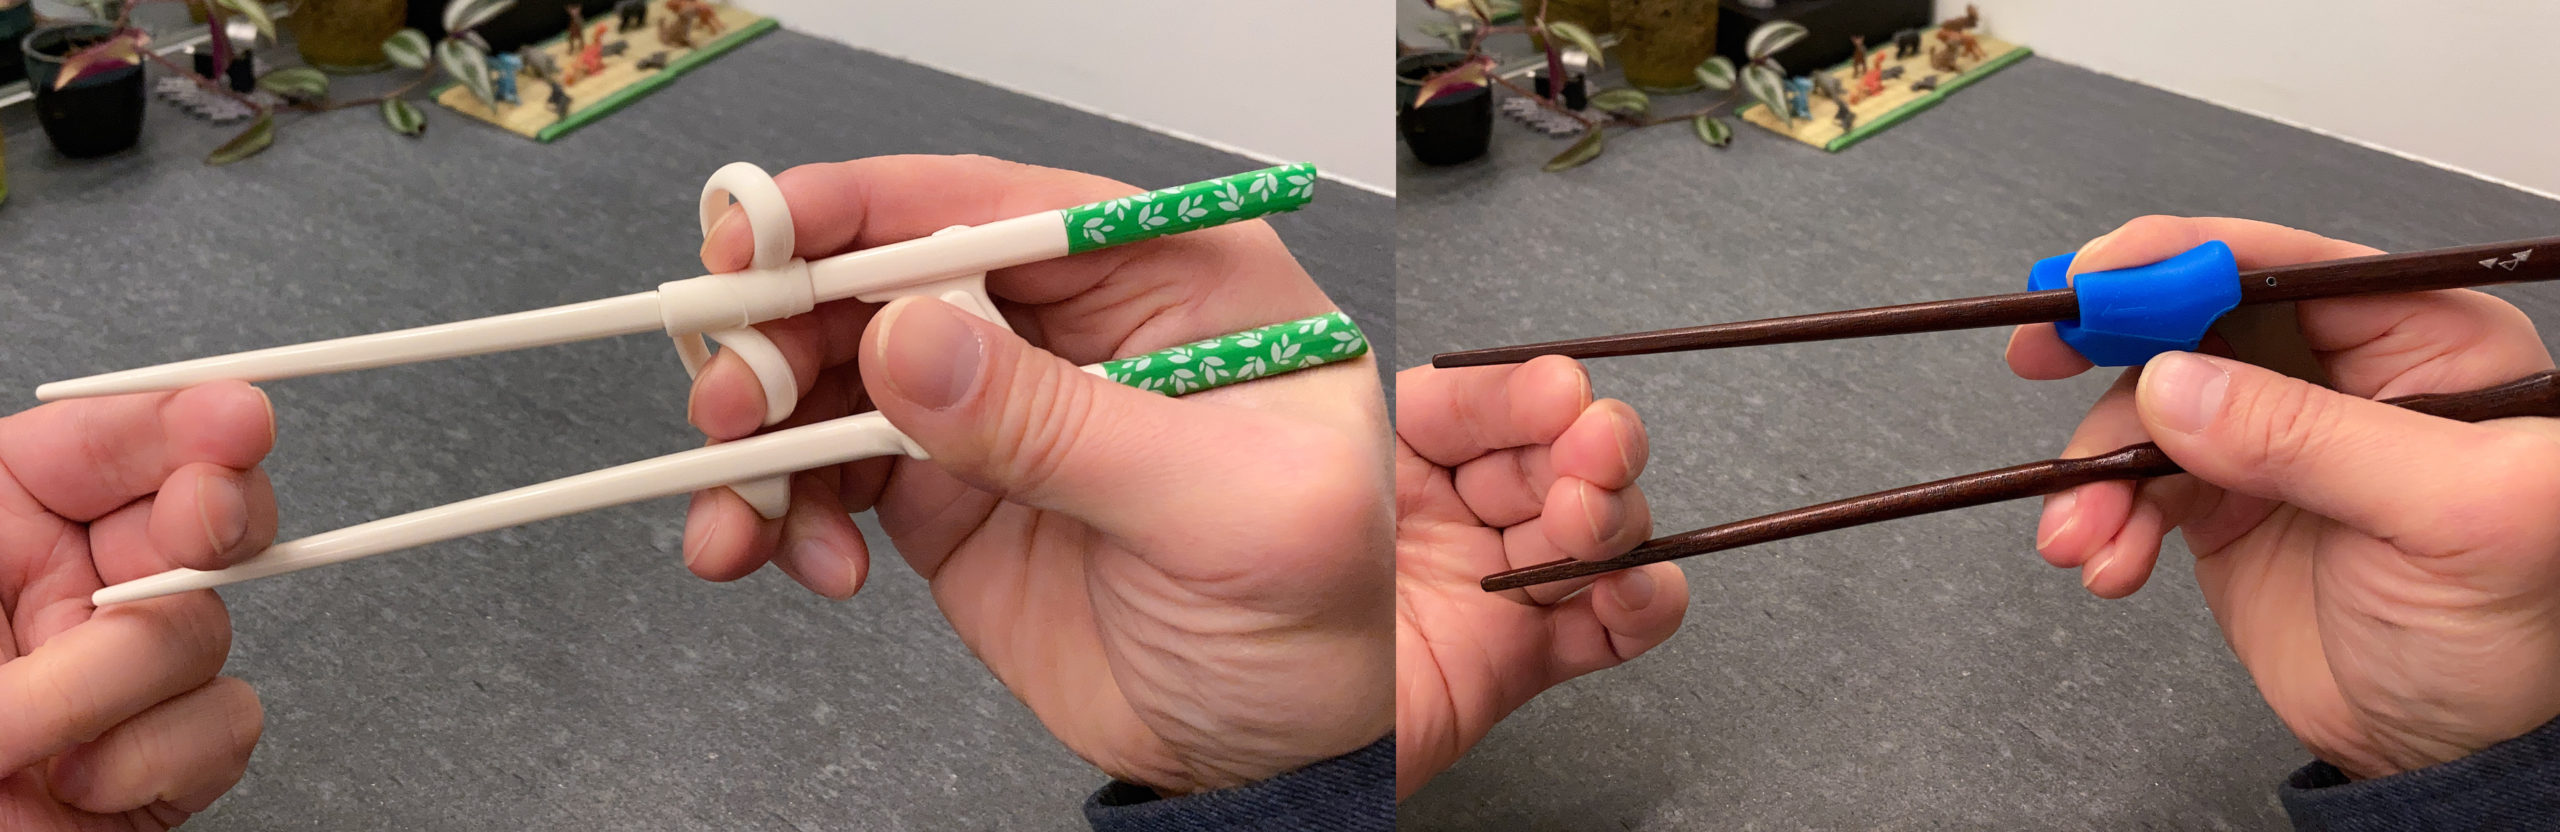
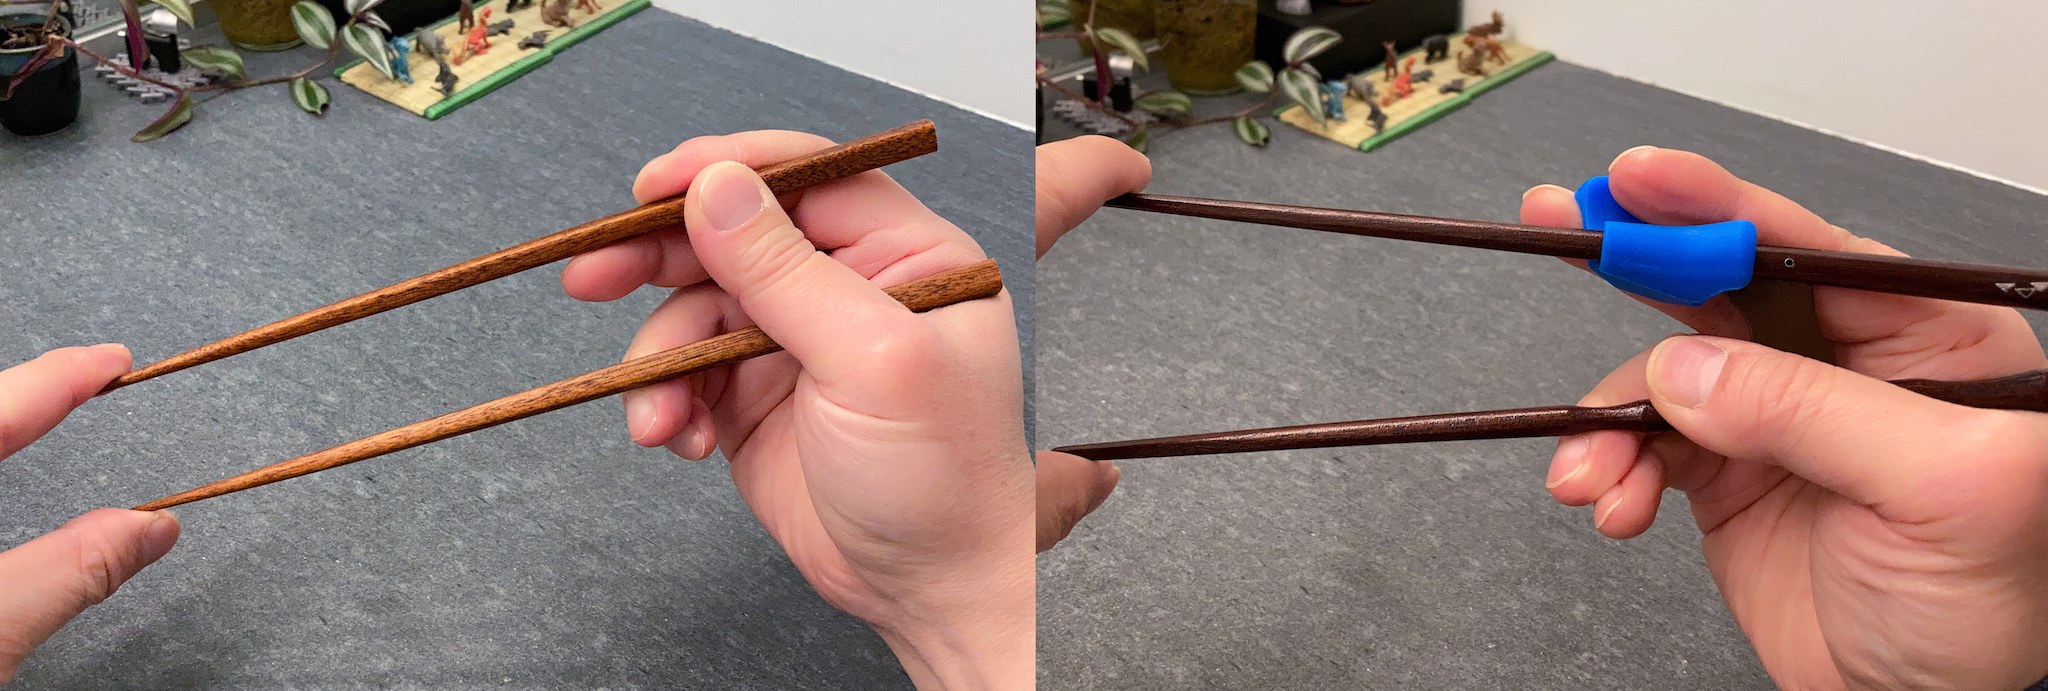
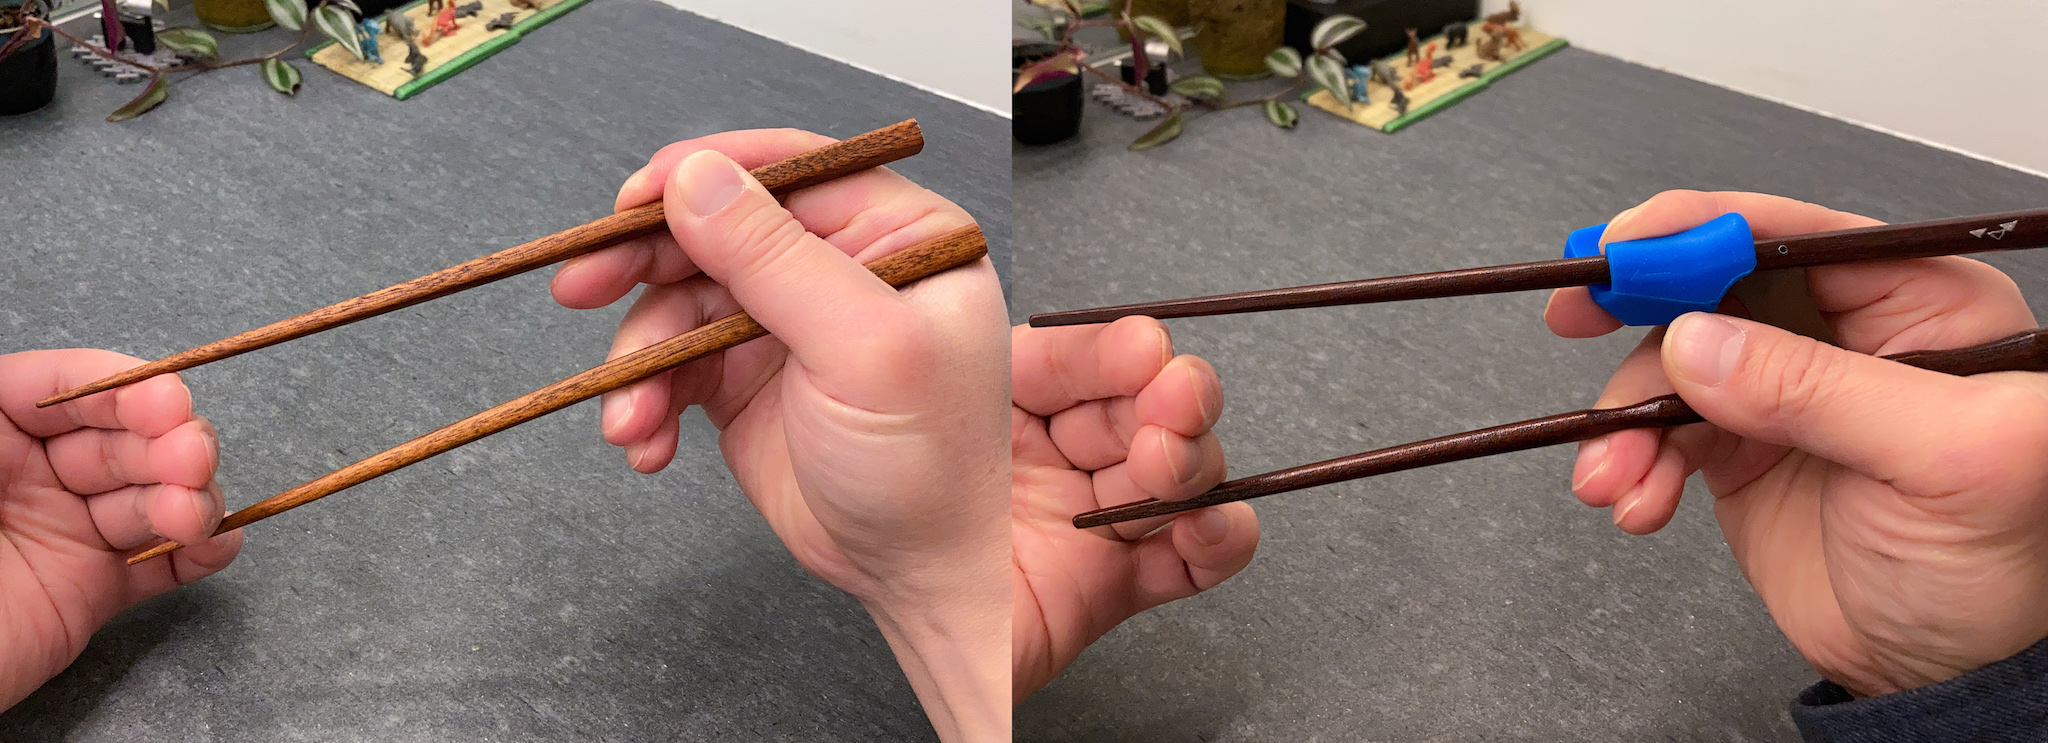
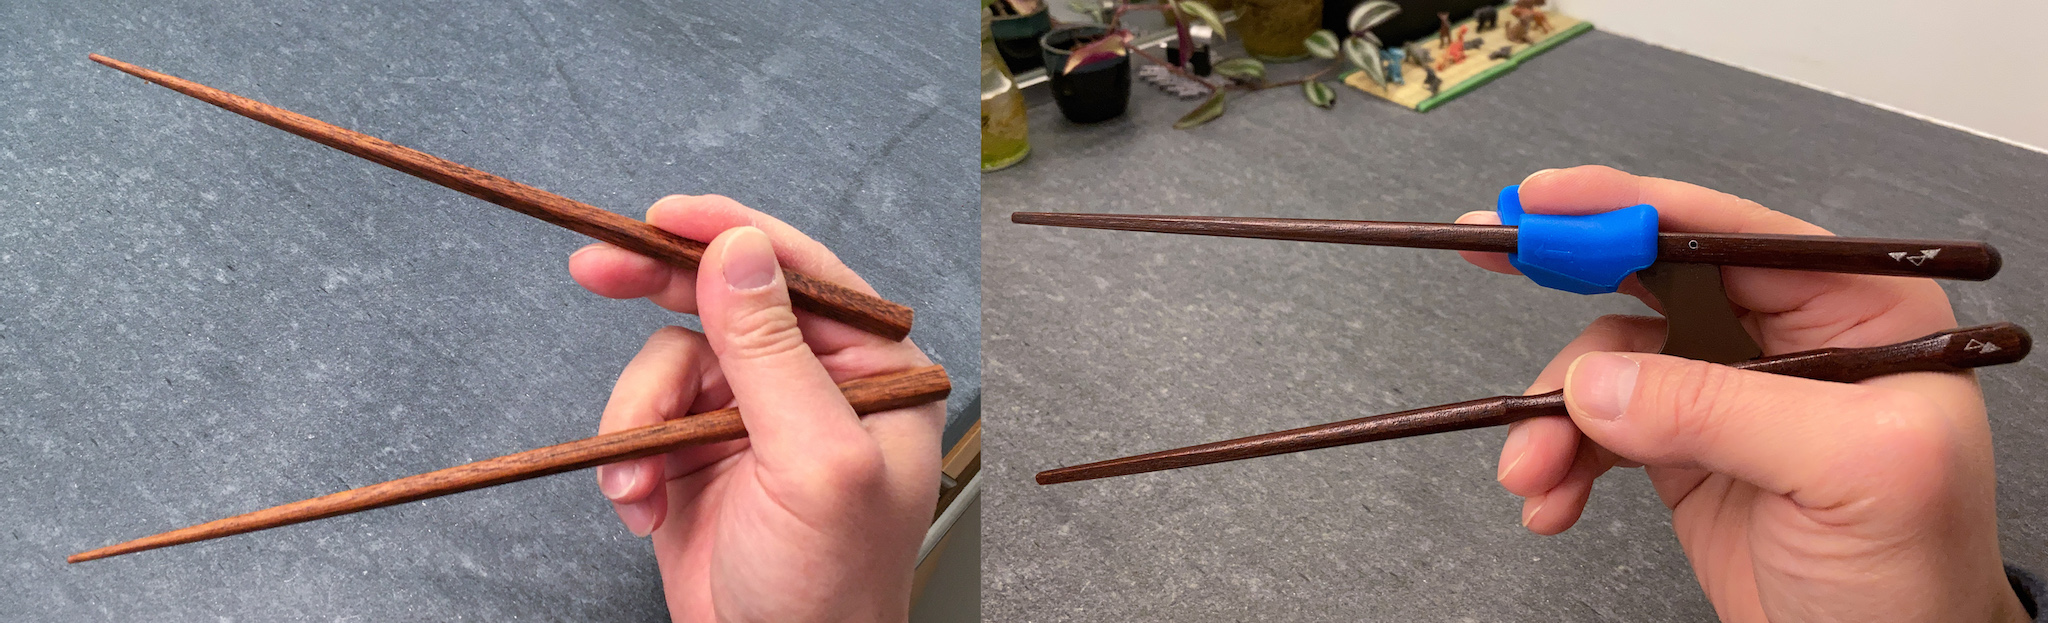
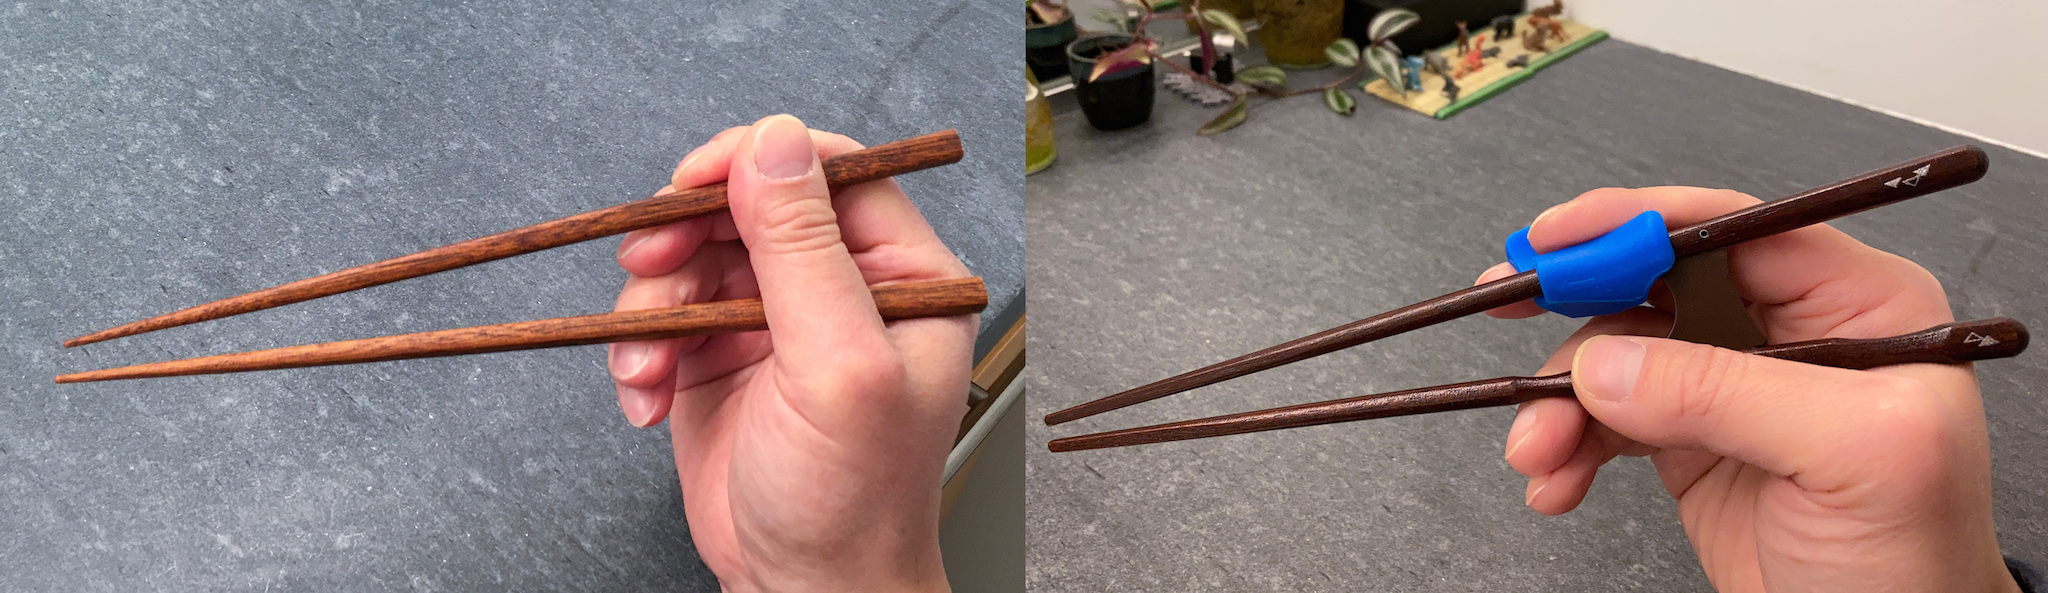
Following two images contrast Ergonomic Marcosticks (right) against plain chopsticks (left). You can visually confirm that ergonomic nuggets enhances tactile feedback, without interfering in the twirling of chopsticks.

Refer to Model E Ergonomic Marcosticks for more information, pictures, and videos on ergonomic marcosticks.
Our overall assessment for ergonomic marcosticks:
| Ergonomic marcosticks | Assessment | |
|---|---|---|
| Pose | Teaches proper initial finger placement | ✅ |
| Grip | Teaches proper gripping of chopsticks | ✅ |
| Roll | Allows rolling of the top chopstick | ✅ |
| Open | Supports proper open posture | ✅ |
| Reach | Allows extended reach for bottom chopstick | ✅ |
Exoskeleton chopsticks
Exoskeleton chopsticks differ from finger placement ones, in that they attempt to bind fingers to both sticks, turning these sticks into extensions of the hand. Like the following.
Shown below is a pair of Edison chopsticks. The two sticks are connected by a bridge, with a hinge allowing the top chopstick to tilt. The bridge turns the two sticks into one articulated body.
Edison chopsticks are shown below. A hand animates them, as if wearing an exoskeleton armor. Fingers of the hand act as muscles pulling the two chopsticks apart, to extend tips away from each other. This is our standard extension test.
In this Edison model, the top stick is bound to the index finger and the middle finger via two hoops. In other exoskeletons, these may done with sleeves or tabs. The bottom stick in the Edison model is caged in by the thumb and the ring finger, as if holding a pistol.
The picture below illustrates the opposite test, the compression test.
Exoskeleton learning aids do not teach the right way to grip sticks. This is why in the summary table, exoskeleton does not have the “Grip” column checked. The stark contrast between how a user grip plain chopsticks and exoskeleton chopsticks is shown below.
Most exoskeleton learning aids couple both sticks together with a bridge and a hinge. Here is a closer look at the hinge. The hinge serves to ease the learning process. It allows a beginner to eschew having to simultaneous secure both the top stick and the bottom stick, using the same thumb. This double duty of the thumb is detailed in the Learn to Use Chopsticks article.
As we have described in the same twirling chopsticks article, the secret to the power of Standard Grip lies on the rolling of the top stick by the tripod hold, comprising the thumb, the index finger, and the middle finger. The hinge in exoskeleton chopsticks, unfortunately, makes it impossible for the top stick to roll.
Following illustrations highlight the lack of rolling in Edison exoskeleton, compared to plain chopsticks. The tip of the thumb no longer has any role to play with respect to the top stick of Edison skeleton, neither in gripping, or rolling. This is why exoskeletons do not have the “Roll” column checked, in the summary table.
Our overall assessment for exoskeleton chopsticks:
| Exoskeleton chopsticks | Assessment | |
|---|---|---|
| Pose | Teaches proper initial finger placement | ✅ |
| Grip | Teaches proper gripping of chopsticks | ❌ |
| Roll | Allows rolling of the top chopstick | ❌ |
| Open | Supports proper open posture | ❌ |
| Reach | Allows extended reach for bottom chopstick | ❌ |
Exo-placement chopsticks
Exo-placement is just a classification bucket to capture combination of exoskeleton and finger placement features. Usually there is a bridge connecting the two sticks, a common feature in almost all exoskeleton chopsticks. Then each of the two sticks may be shaped as either exoskeleton or finger placement aid.
Shown below are exo-placement chopsticks sold by Ishida under the model name “Proper”, for helping users to learn the proper way. These Proper chopsticks adopt an exoskeleton (rubber) tab for the top stick, and circumferential finger placement grooves for the bottom stick.
We marked the “Grip” column in the summary table as both check and unchecked. This is because finger placement grooves teach the right grip, but exoskeleton devices do not. In the case of Ishida Proper chopsticks, only the bottom stick teaches the right grip.
Exo-placement chopsticks does not allow rolling of the top stick. That is a result of the bridge fixing the rotational plane to only one single axis. Thus we have unchecked the “Roll” column in the summary table.
Compared to exoskeleton Edison model, the Ishida Proper model is more efficient at both the extension test and the extension test. This is illustrated below, with Edison on the left, and Proper on the right. The blue exoskeleton tab in Proper is more ergonomic than the Edison hoops.
Some users who used both Edison and Proper chopsticks started by having the thumb tip in the right tripod hold position, joining with the index finger and the middle finger. However, all of these users invariably moved their thumb off the top stick, to rest instead on the bottom stick, as shown in above pictures.
There are two reasons for this behavior. The first was already mentioned in the exoskeleton section – the tip of the thumb no longer has a role to play with respect to the top stick. The second reason is more clearly illustrated with the Proper model, thus it is discussed now.
Pictures below show both the open posture (left) and the closed posture (right). In these two pictures, the user attempts to use the tripod hold to secure the top stick using the thumb, the index finger and the middle finger.
Here are close-up versions of the above. Observe how the skin of the thumb rubs against the rubber body of the blue exoskeleton tab, as the top stick rotates from the open posture to the closed posture. This is a result of the top stick not being able to roll. Soon the thumb tip feels irritated, and the user naturally retracts the thumb down to the bottom stick.
Following pictures compare exo-placement learning aids to plain chopsticks. These explain why we unchecked the columns “Open” and “Reach” for exo-placement in the summary table. Exo-placement does not support proper open posture, nor allow extended reach for bottom chopstick.
Our overall assessment for exo-placement chopsticks:
| Exo-placement chopsticks | Assessment | |
|---|---|---|
| Pose | Teaches proper initial finger placement | ✅ |
| Grip | Teaches proper gripping of chopsticks | ✅ ❌ |
| Roll | Allows rolling of the top chopstick | ❌ |
| Open | Supports proper open posture | ❌ |
| Reach | Allows extended reach for bottom chopstick | ❌ |
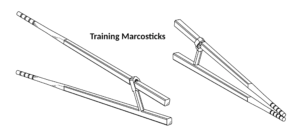
Training marcosticks
Model T Training Marcosticks are our answer to issues we identified in exoskeletons and exo-placements. There is a dedicated article about them at Model T Training Marcosticks.
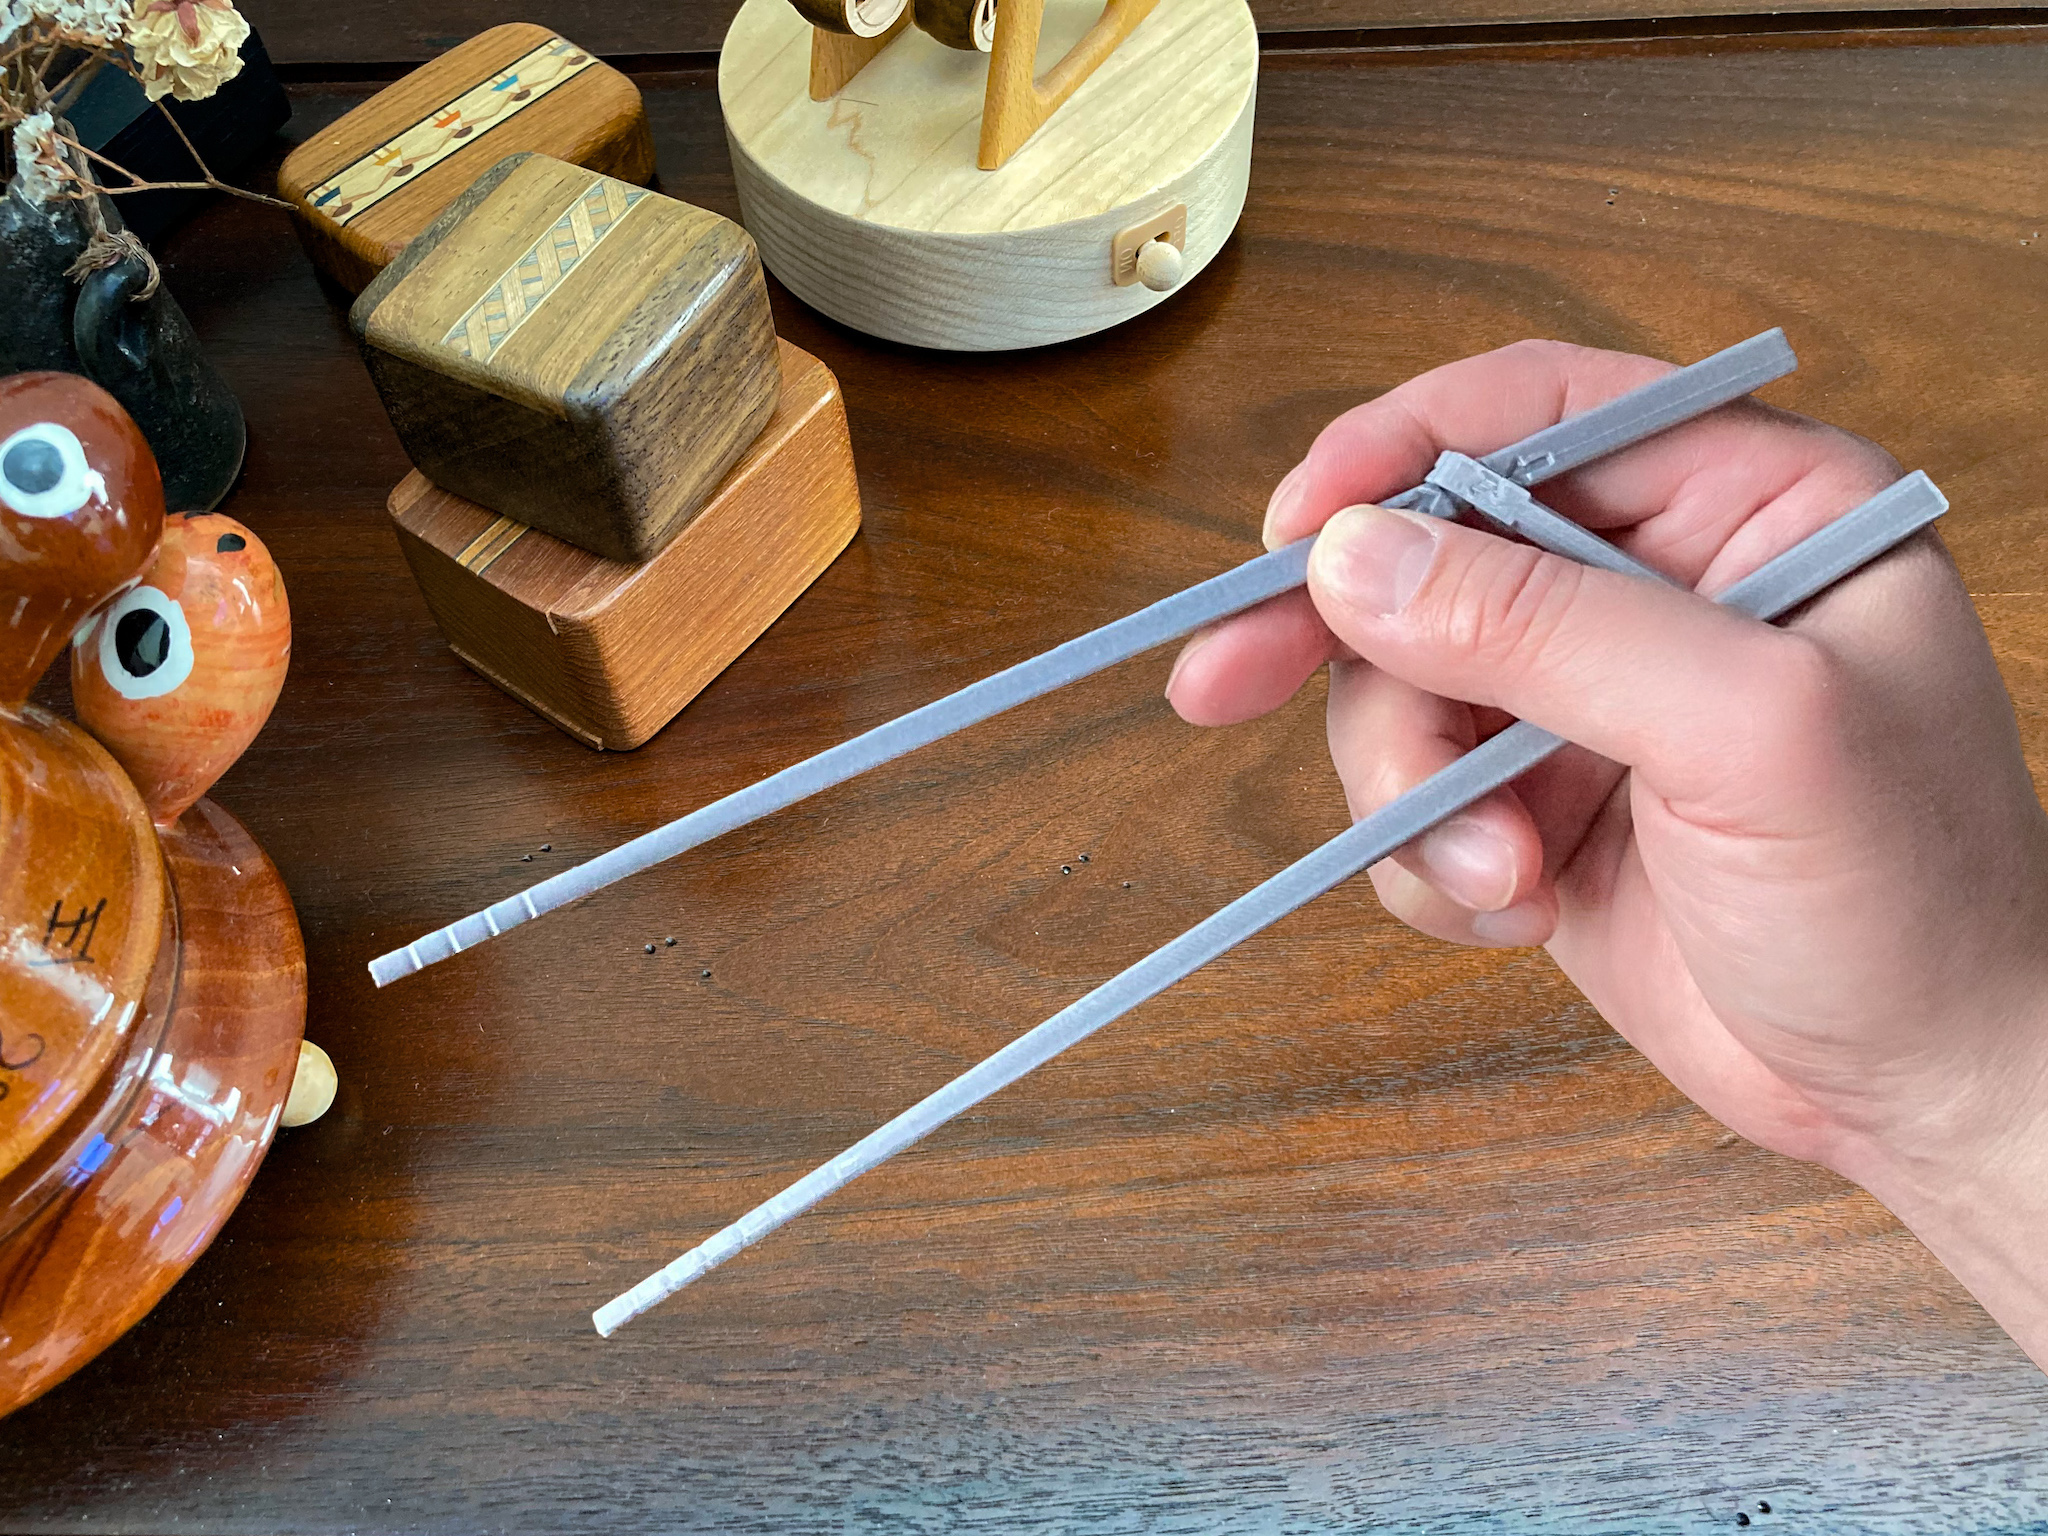
These specifically address the “Grip”, “Roll” and “Open” issues in exoskeletons. Instead of adding exoskeleton devices, model T has a newly-designed hinge not imagined by past generations of inventors. Its hinge is oriented to primarily enable the top stick to roll around its own longitudinal axis, instead of preventing such rolls.

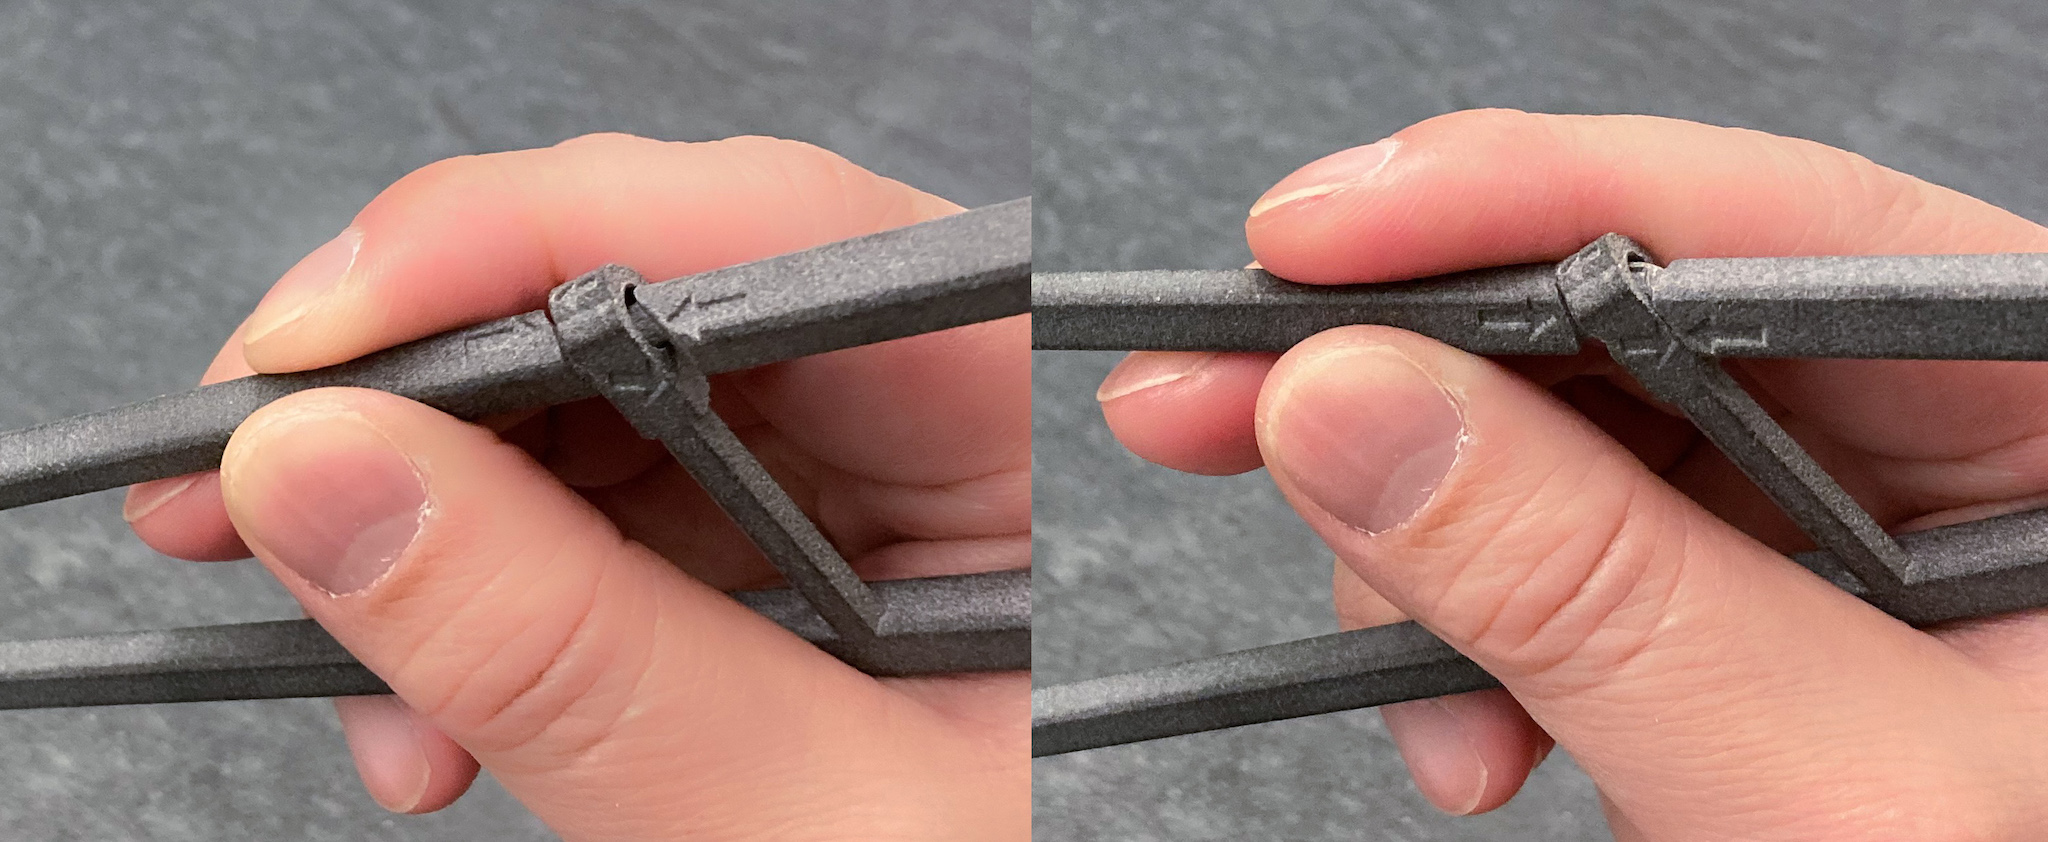
Model T explicitly allows the top stick to move in a combined motion incorporating both rotation and tilting, following exactly the path prescribed by Standard Grip. This allows fingers to twirl the top stick using the planetary gear train principle.
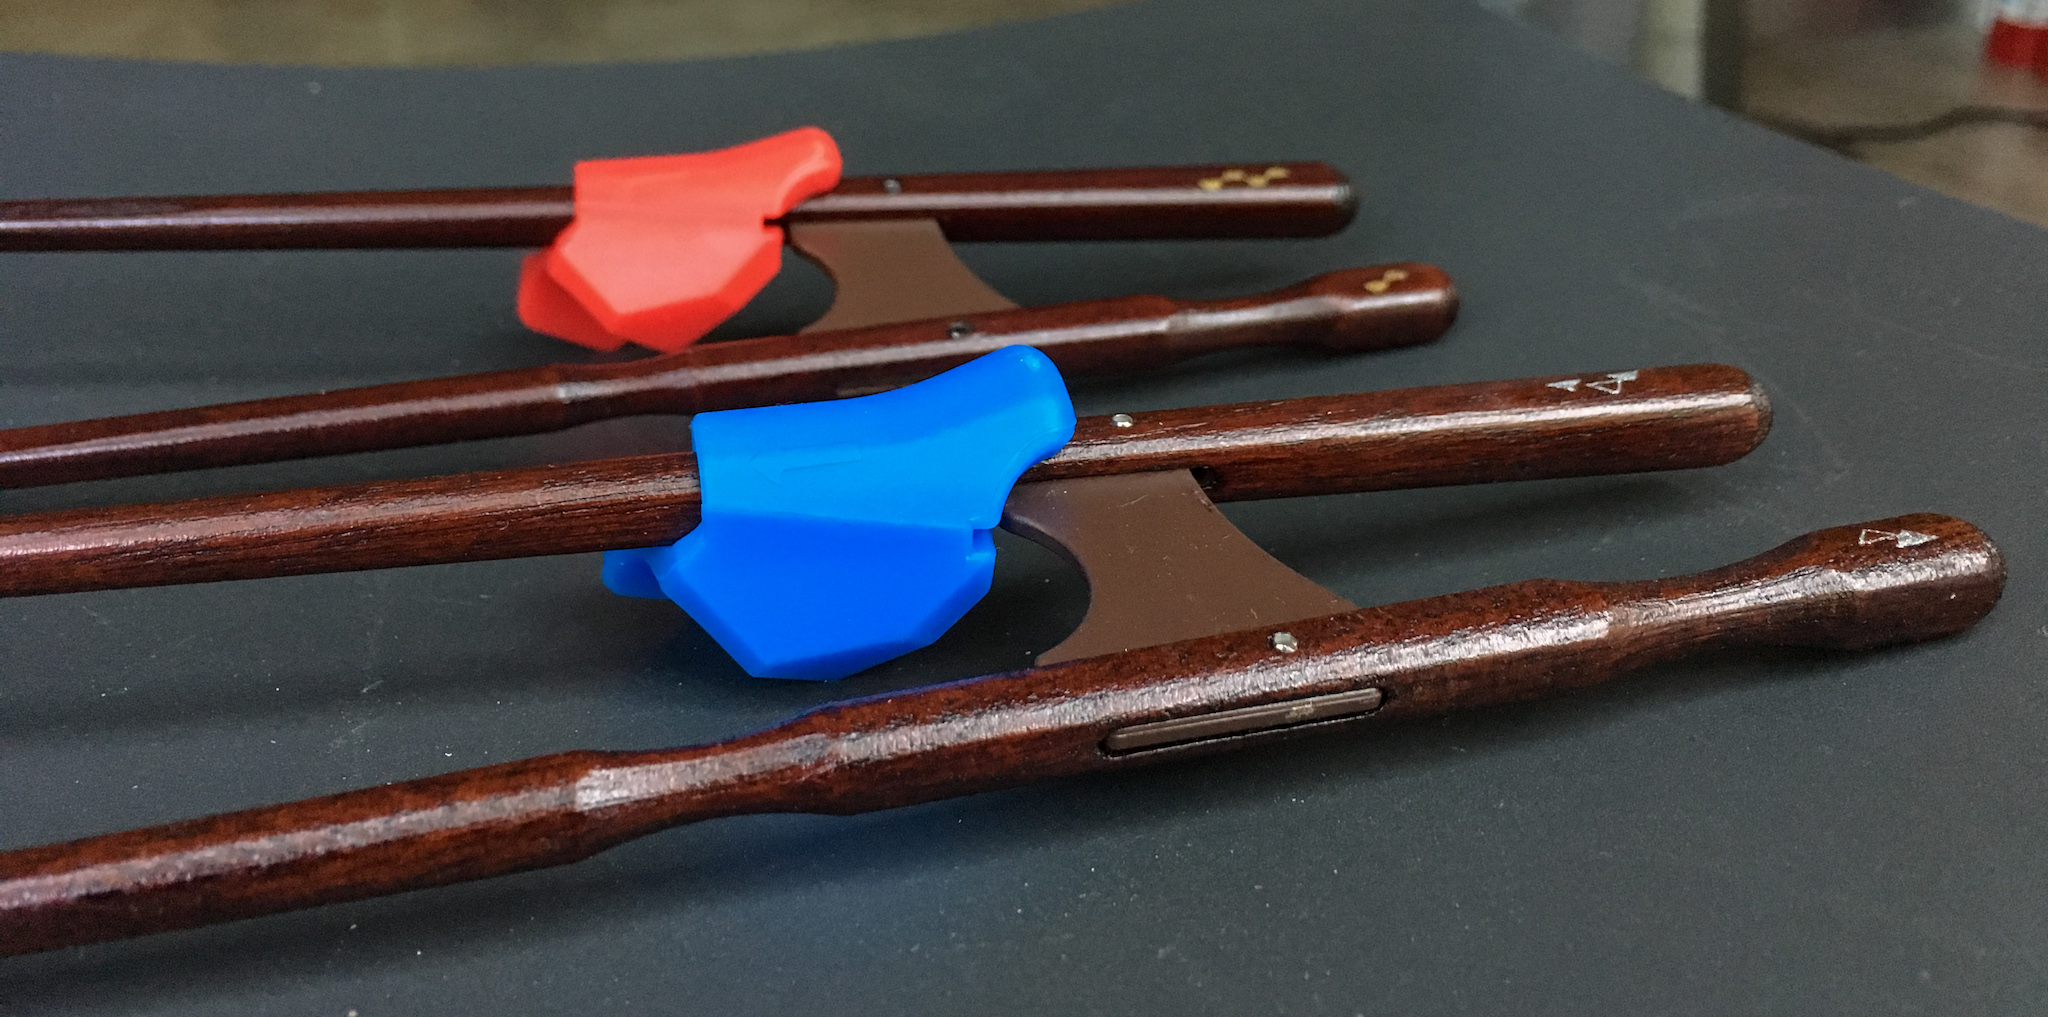
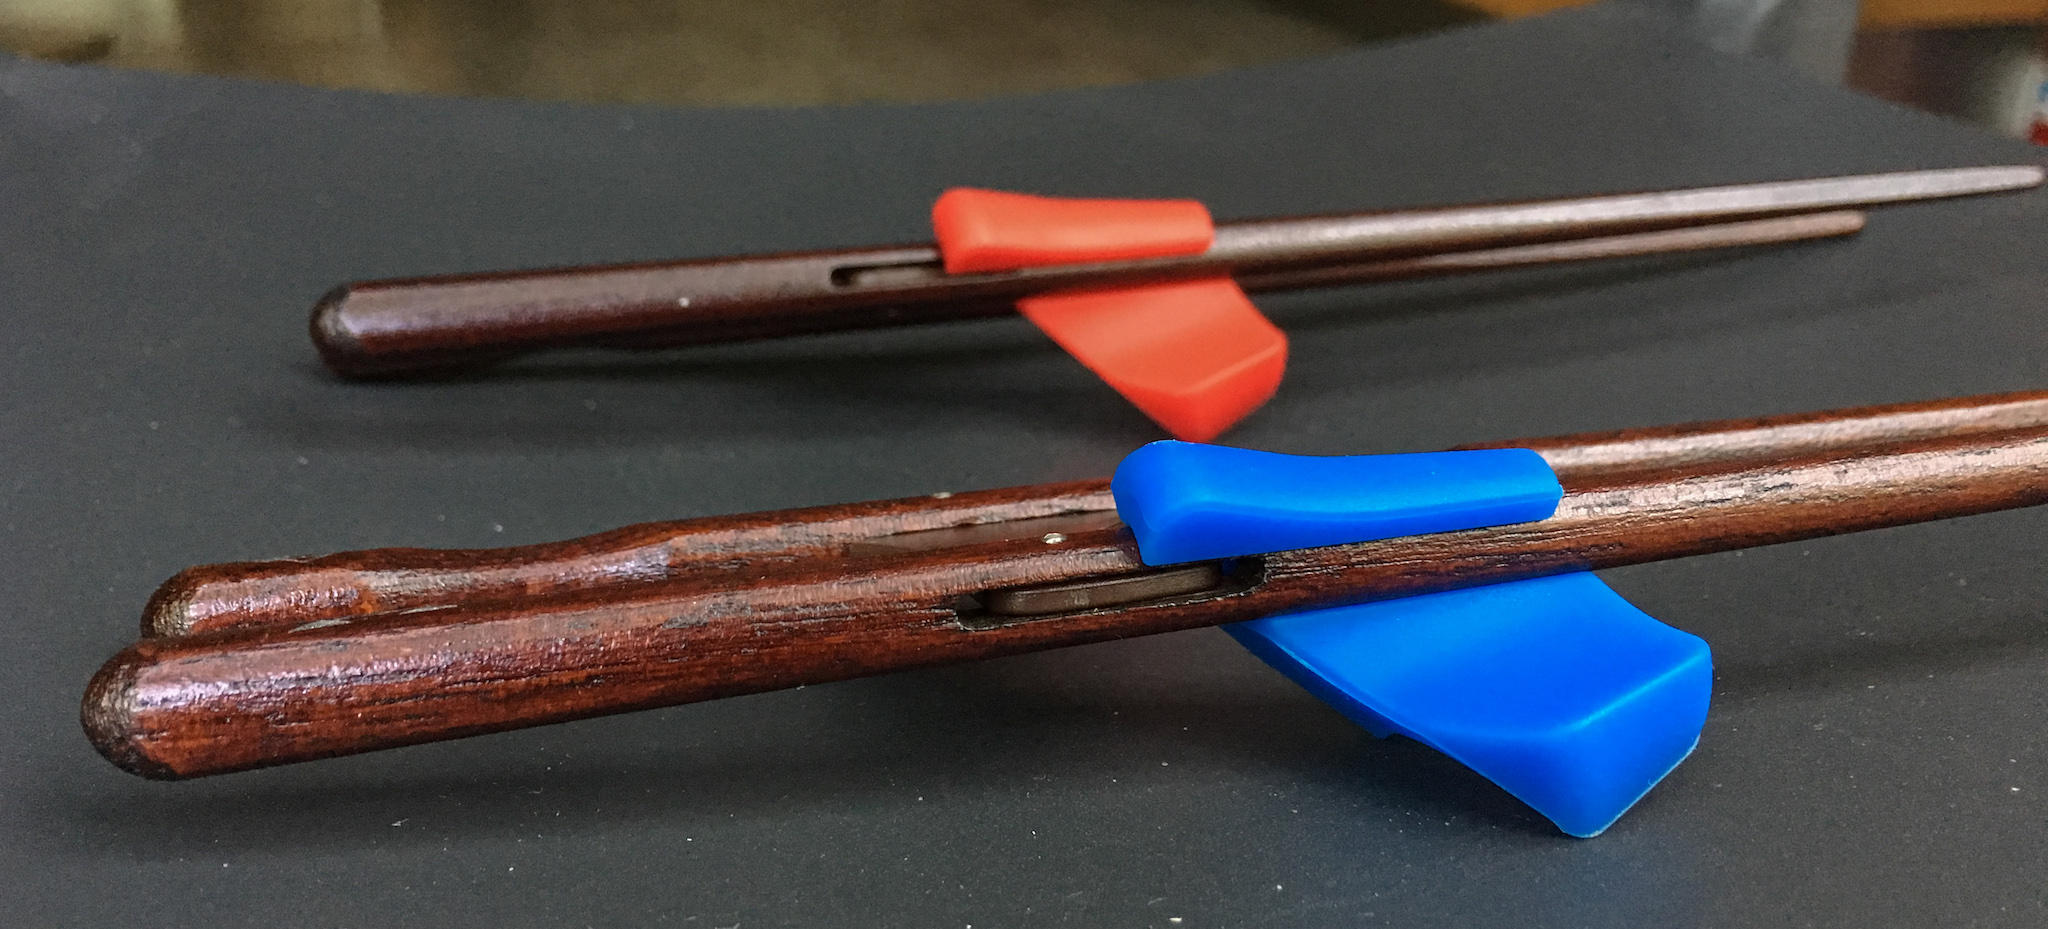
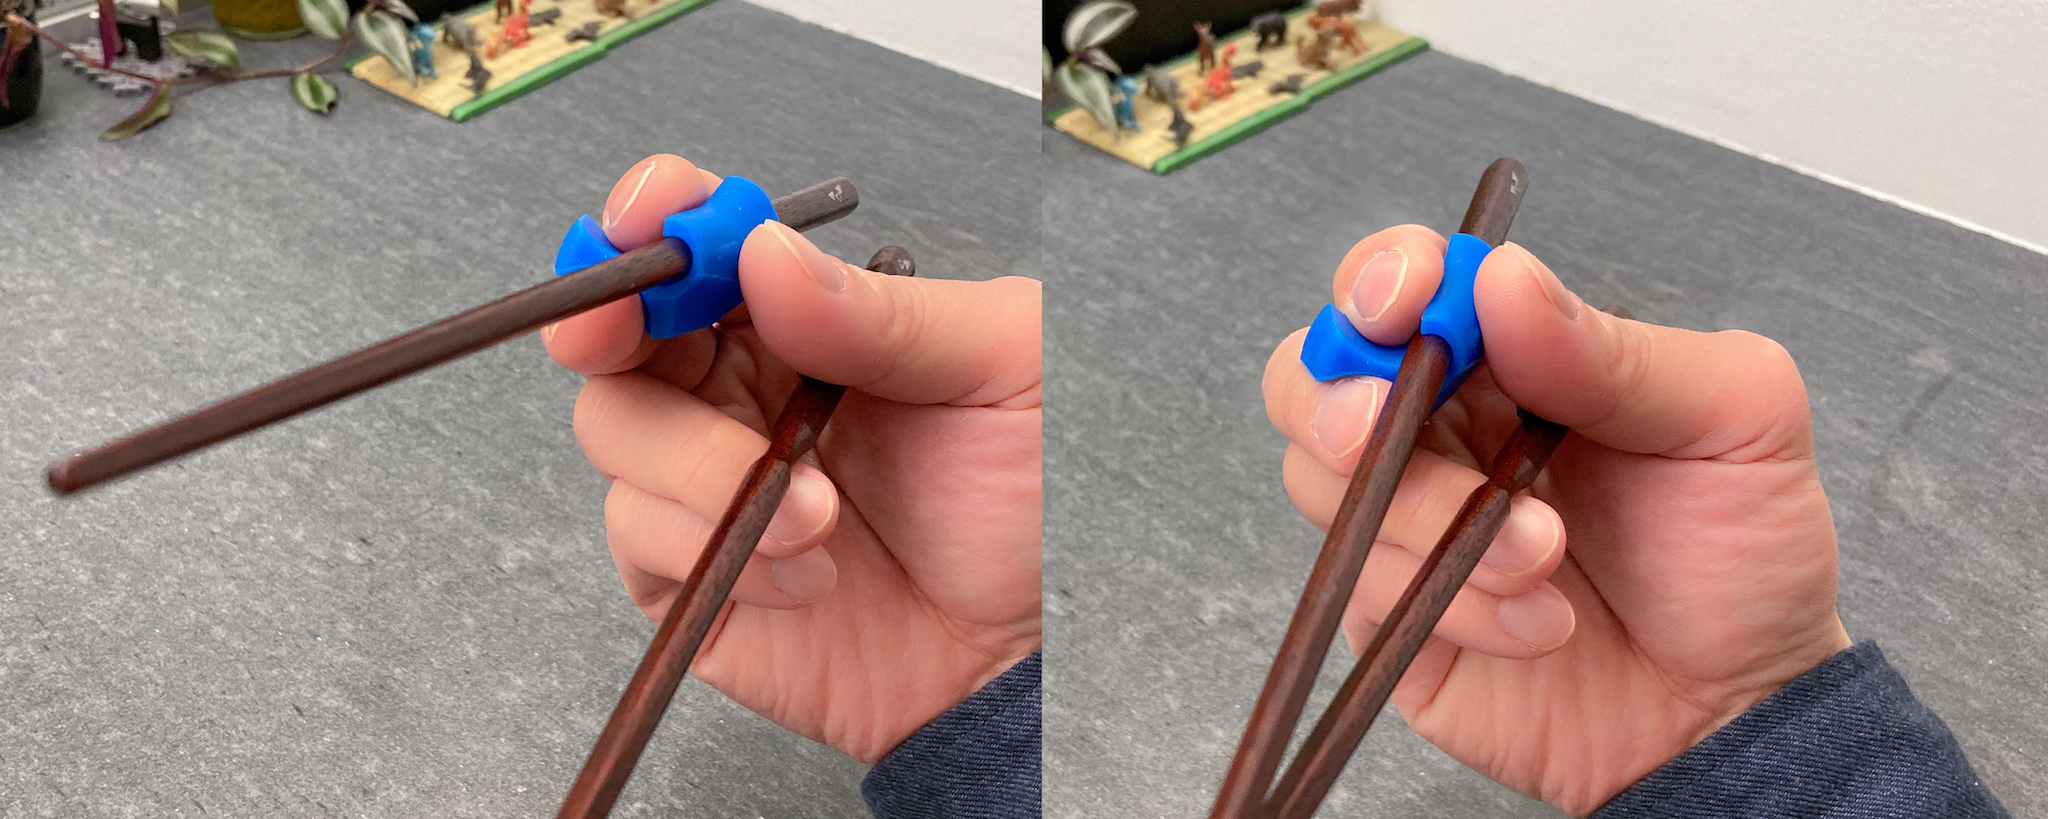
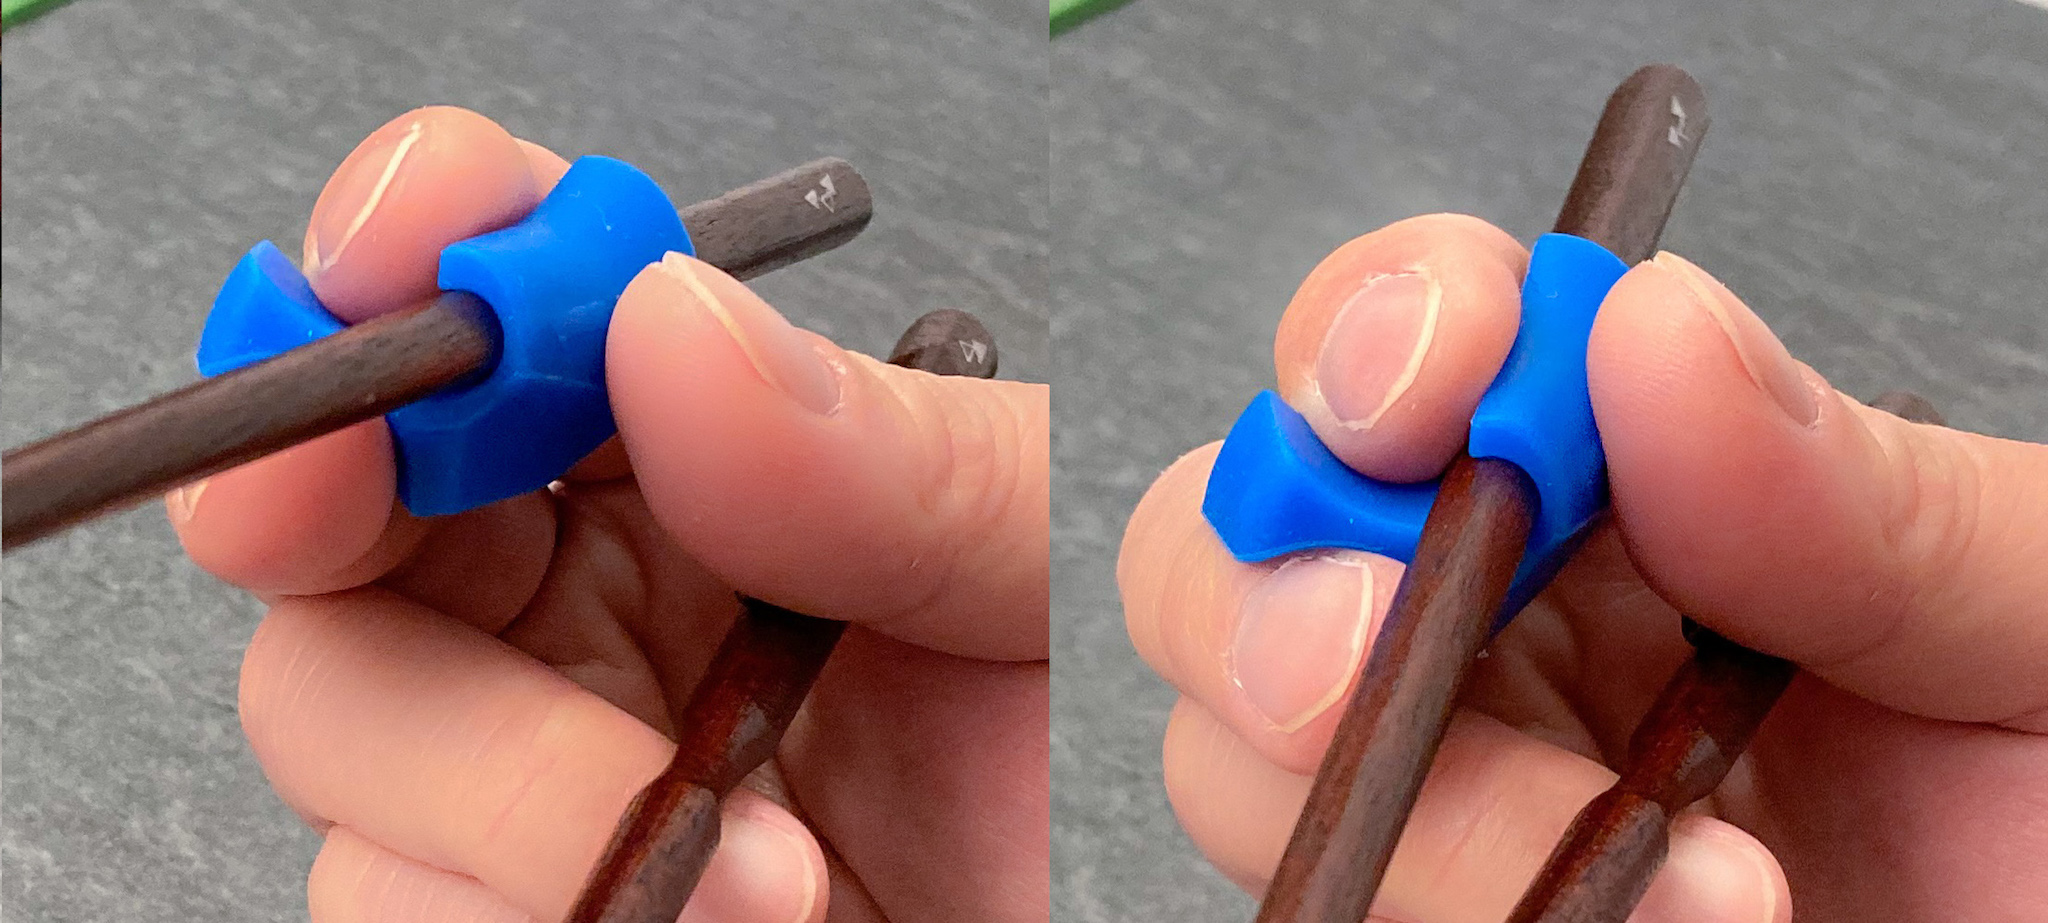
More importantly, the ball joint is designed to teach and force fingers to follow the Standard Grip grip and motion. The groove carved into the top chopstick is shaped to allow the stick to rotate for 90° around the longitudinal axis, and only 90°. As the top chopstick rotates, the groove forces it to tilt at the same time. See following pictures.
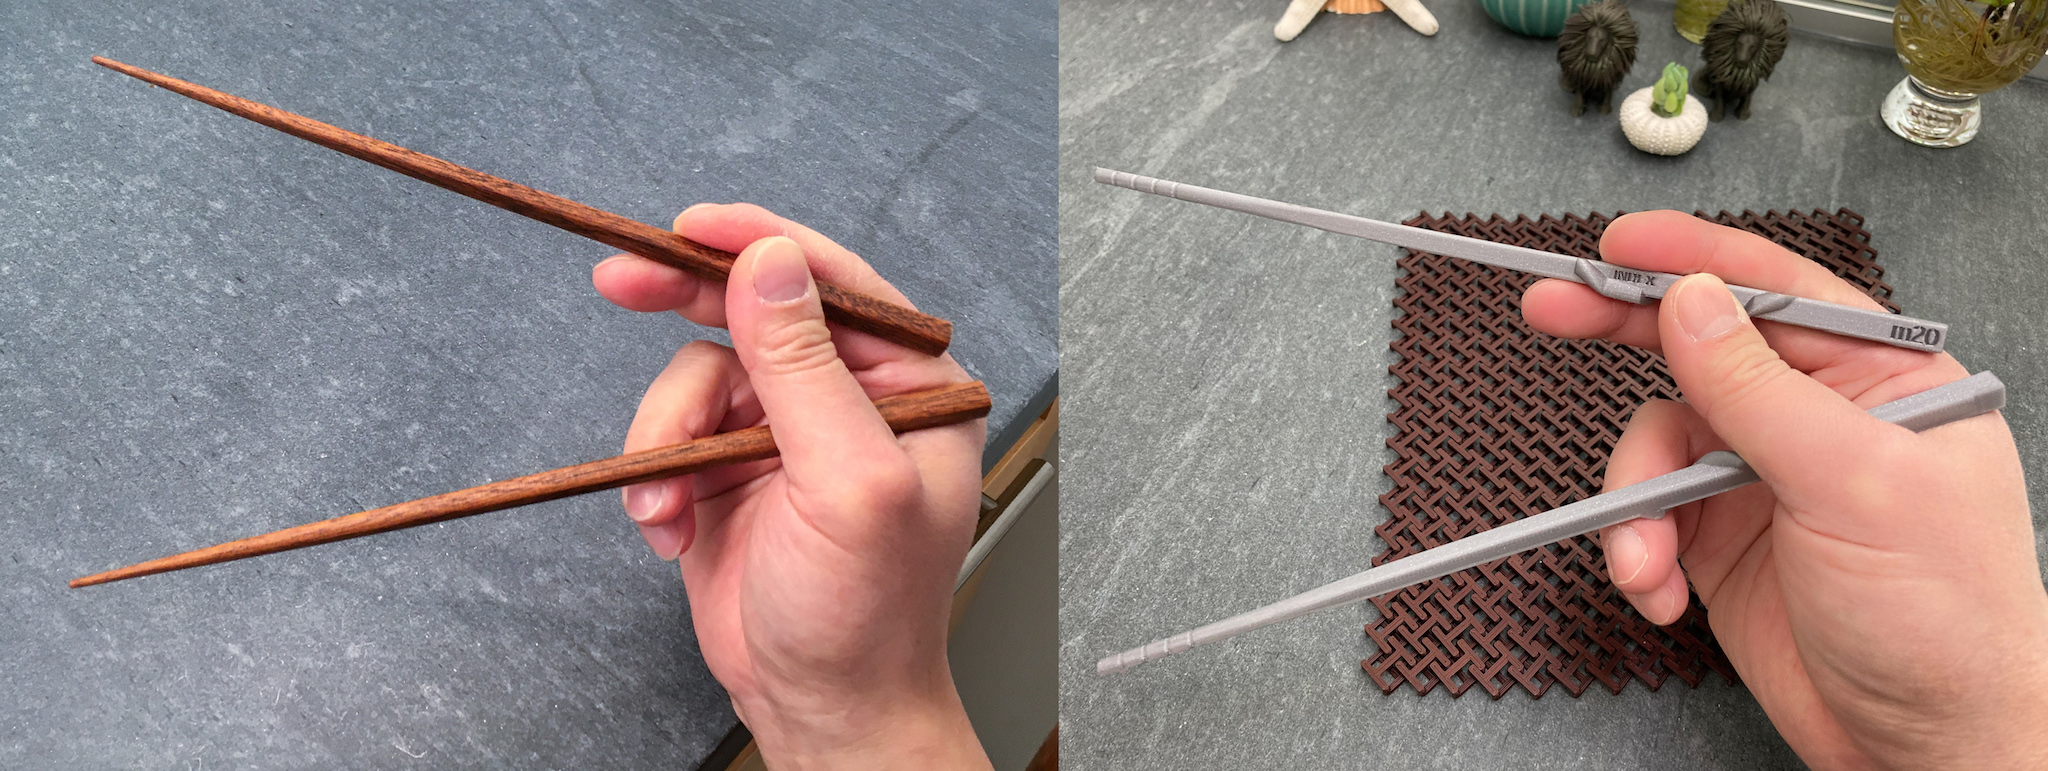
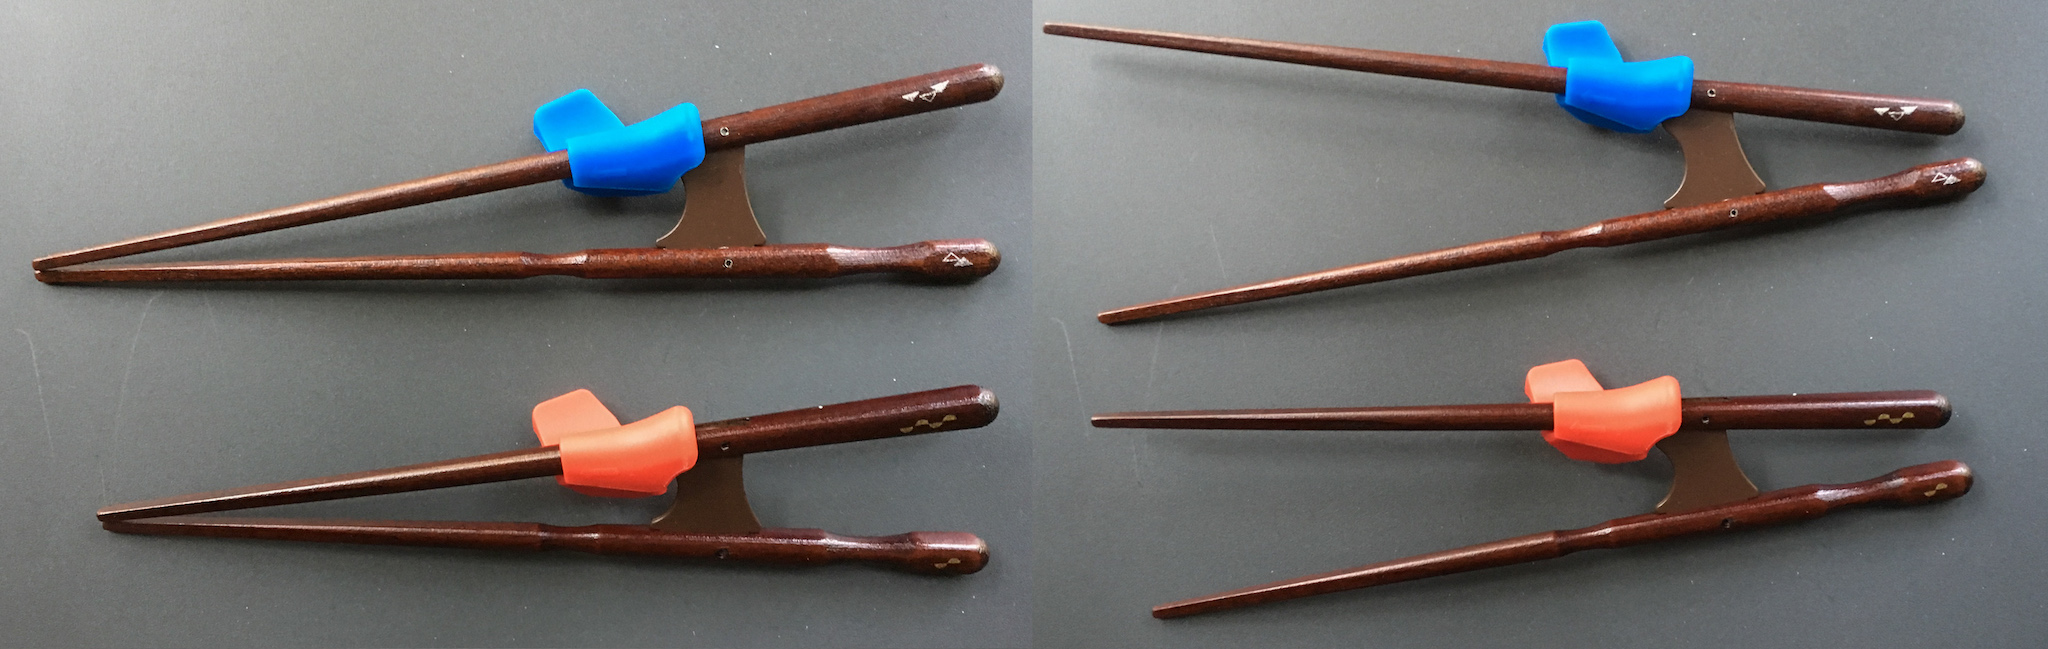
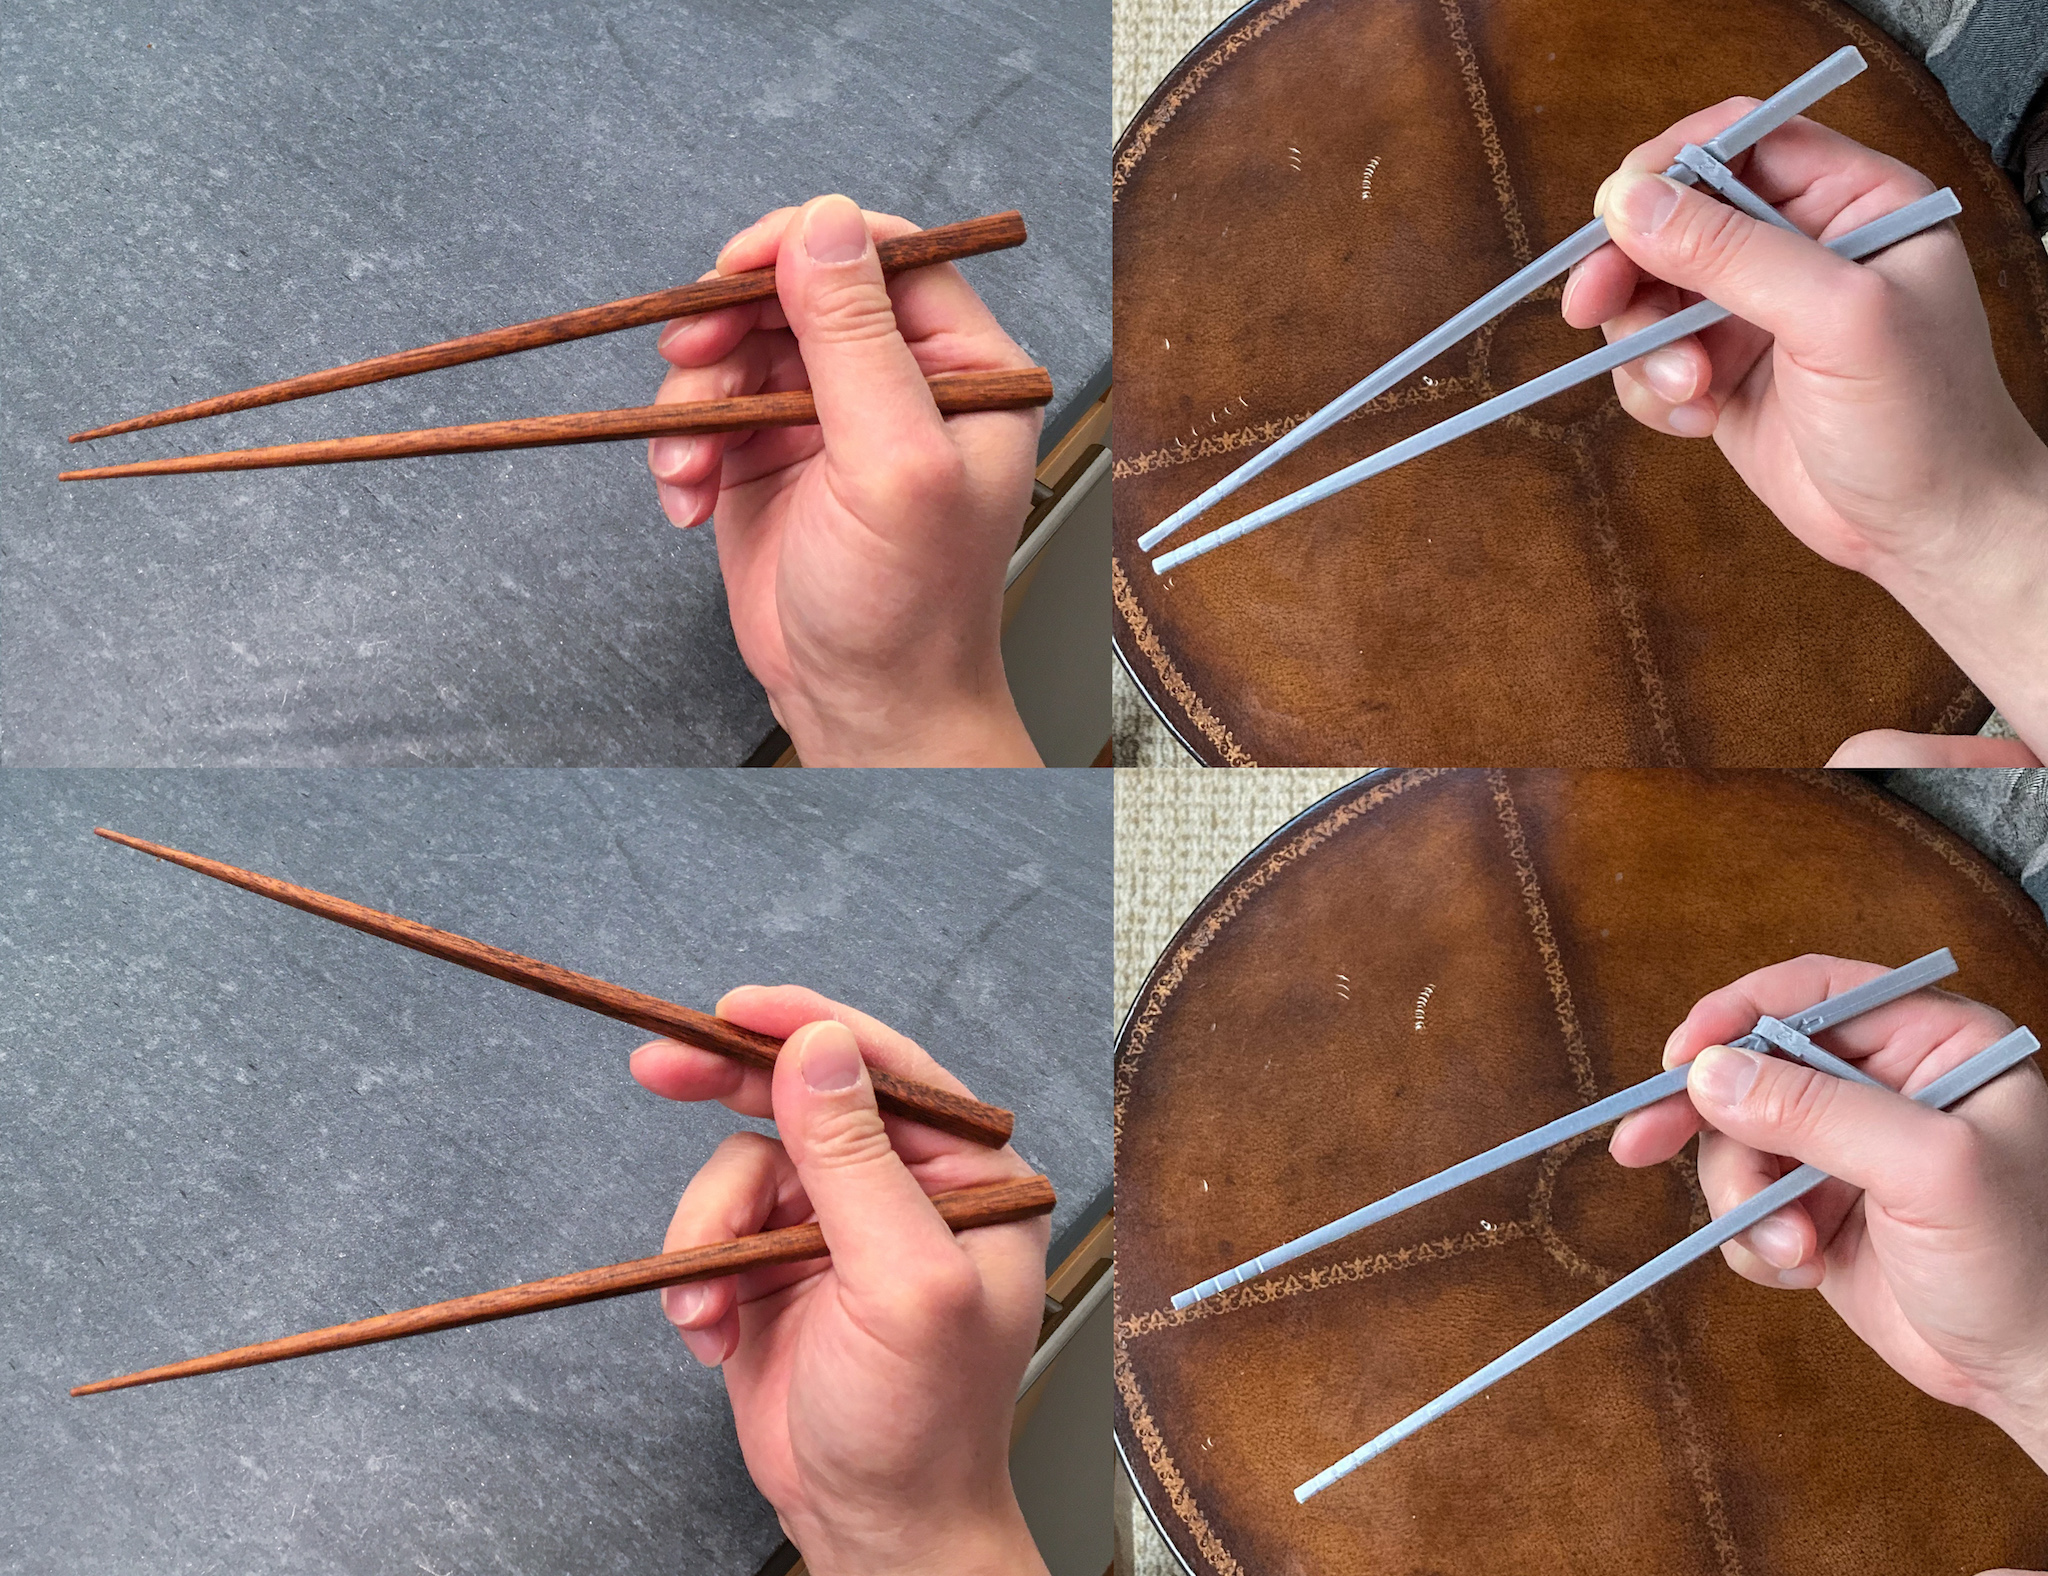
Following two images contrast training marcosticks (right) against plain chopsticks (left). You can visually confirm that training marcosticks teach identical Standard Grip motion as plain chopsticks. The only area in which training marcostick lags behind, is the maximum distance it can spread tips of the two sticks apart.
Refer to Model T Training Marcosticks for more information, pictures, and videos on training marcosticks.
Our overall assessment for model T marcosticks:
| Model T training marcosticks | Assessment | |
|---|---|---|
| Pose | Teaches proper initial finger placement | ✅ |
| Grip | Teaches proper gripping of chopsticks | ✅ |
| Roll | Allows rolling of the top chopstick | ✅ |
| Open | Supports proper open posture | ✅ |
| Reach | Allows extended reach for bottom chopstick | ❌ |