Last Updated on January 30, 2022 by Staff
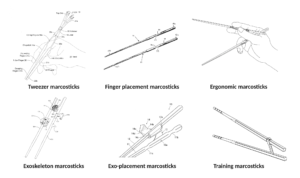
Clever folks have been inventing learner chopsticks to help teach their use, since the dawn of chopsticks. As shown in History of Chopstick Inventions (COMING SOON), none has managed to teach the Standard Grip. Most of these teach artificial finger movements that do not translate to manipulation of real chopsticks.
The main reason behind this phenomenon was the lack of vigor in two thousand years of chopstick research. No one had ever published research findings that came close to uncovering the true finger dynamics behind the use of chopsticks – the planetary gear train principles. Without a proper understanding of the Standard Grip finger dynamics, inventors came up with learner chopsticks that did not work. Issues present in previous learning chopsticks are discussed in Best Learning Chopsticks.
We at marcosticks.org are happy to announce the end of this era of confusion. Here we present a few training marcosticks that work. You can print them out yourself, if you have a 3D printer. Or you can order them from our partners.
Table of Contents
Mark-and-Go Licensing
These training marcosticks result from several years of research and prototyping effort. We started modeling them and printing them on 3D printers in early 2020. Despite a brief distraction to 3D-print face shields for healthcare workers battling COVID 19, we managed to finalize the first few models of training marcosticks, by the end of 2020.
Utility patent applications for these training marcosticks have been filed. The ergonomic chopsticks and training chopsticks have been granted patents. A few specific models were also granted as design patents. But we are making all models free for everyone to print on their own, as long as you follow the Mark-and-Go license (MAG). You may even make them in bulk, and sell them at profit, without paying marcosticks.org any royalty fees. Again, make sure you follow the Mark-and-go license, for commercial deployment. See MAG FAQs.
We filed these patents for two reasons. One, to forestall anyone who may try to prevent us from granting everyone free use; these issued patents and pending patent applications serve as published prior art. The second reason is to further our mission, aka #utensilequality; We require that you mark your printed chopsticks with the label “Marcosticks”. If you are interesting in partnering with us, drop us an email on the contact page.

The rest of this article summarizes training marcosticks that we have made available under the Mark-and-Go license. Entries are listed starting with beginner models. Intermediate models follow. The list then ends with the original, advanced marcosticks that came bundled in Marco’s lost sequel.
Chopstick Buddies
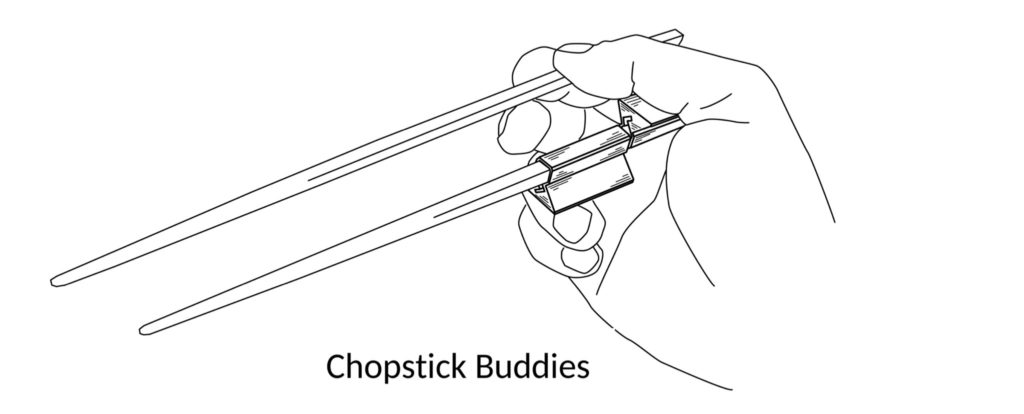
Chopstick Buddies are attachments to a plain chopstick. They are designed for beginners, and for a sizable population who cannot hold unaided the Caswellian thumb pose required by the Standard Grip.
While looking simple, Chopstick Buddies are a culmination of years of research on chopsticks that resulted first in Ergonomic Marcosticks, then Training Marcosticks and Finger Helpers, which will be described in later sections here. Finger Helpers, in particular, directly led to Chopstick Buddies.
Chopstick Buddies fixes Standard Grip in the same way Finger Helpers do, with one difference. Chopstick Buddies do not require model T training marcosticks. They can be used with any plain chopsticks you fancy.
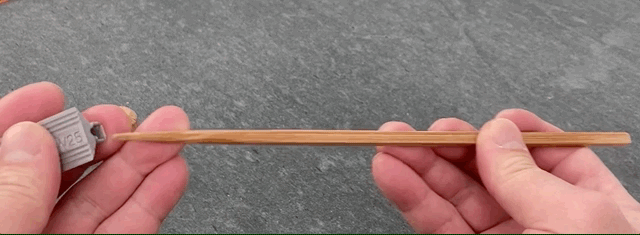
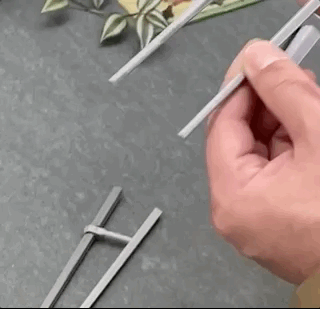
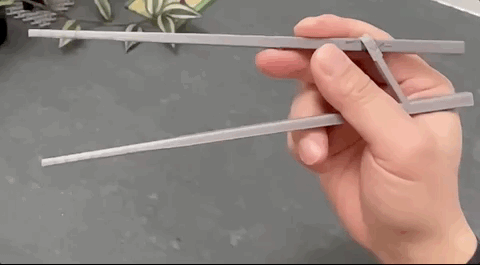
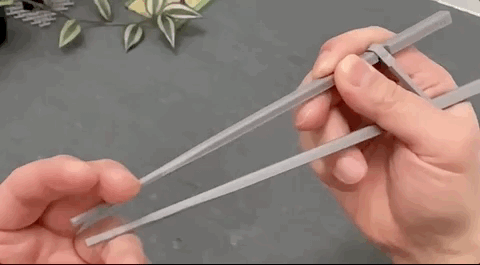
The following video shows how to attach two chopstick buddies to a chopstick. The buddie with a wider support surface props up the base of the thumb. The buddie with a narrower support surface abuts the knuckle of the ring finger.
The next video shows how these two chopstick buddies help a learner avoid the unnatural thumb pose that Standard Grip otherwise requires. The split screen at the top shows the unnatural thumb pose required by Standard Grip. Notice how close the base of the thumb is to the ring finger, vertically speaking. Observe how the thumb needs to be flattened, while the thumb base is forced very closed to the ring finger.
The split screen on the bottom show the same hand wielding Standard Grip, this time without needing to hold this unnatural thumb pose. This is made possible, because the two buddies allow the thumb base to be far separated from the ring finger. It allows the user to bend the tip segment of the thumb – a much more comfortable pose.
Chopstick Buddies share many similarities with Finger Helpers. They take different approaches to solve the same underlying issue: the Caswellian thumb problem. This problem will presently be described in detail in the next section on Finger Helpers.
Finger Helper Marcosticks
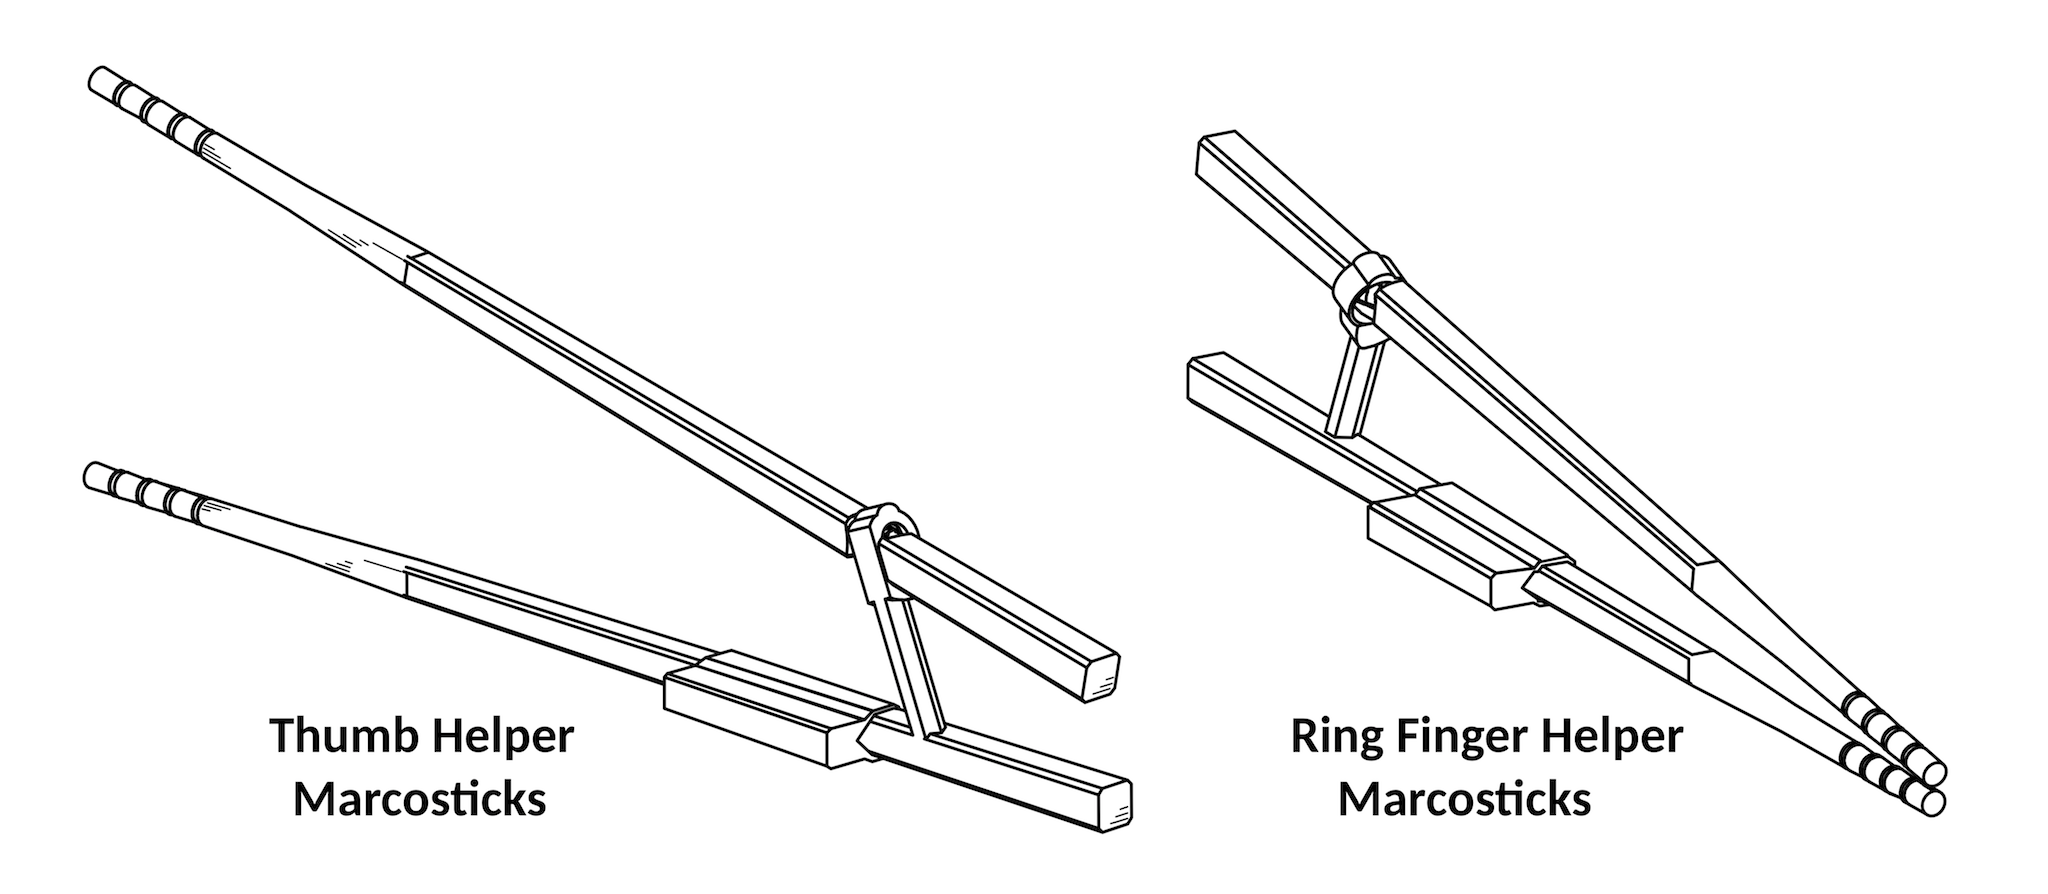
Finger helper bars are designed for beginners, and for a sizable population who cannot enact unaided the Caswellian thumb pose required by the Standard Grip. The latter population are inherently unable to wield the the Standard Grip, due to injuries or anatomical limitations.
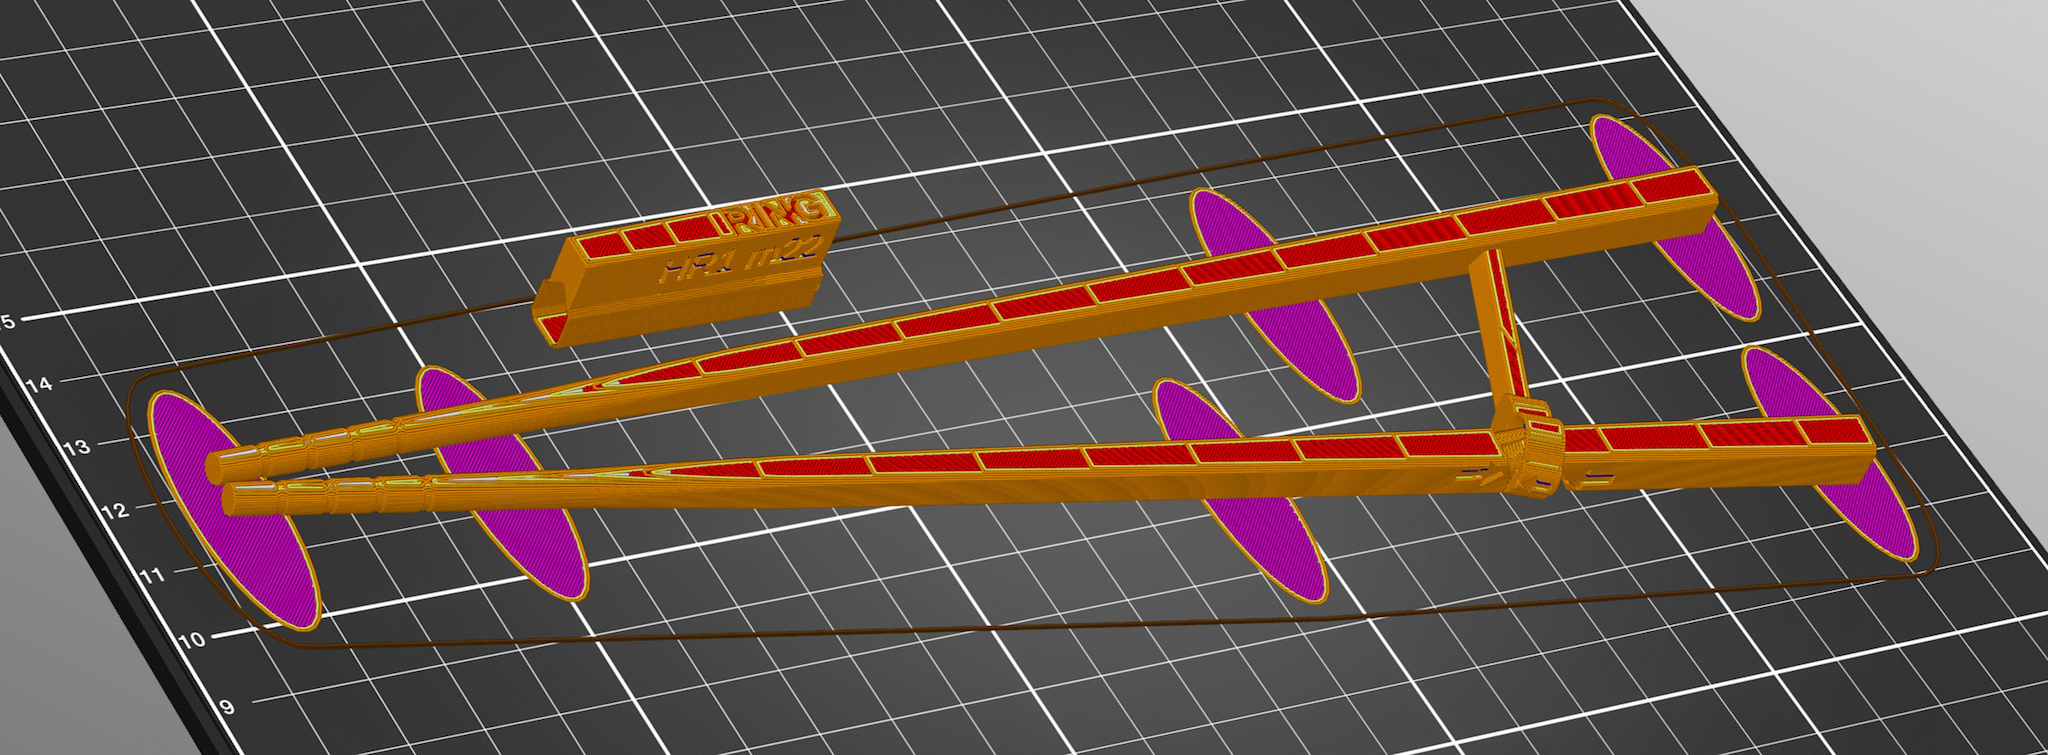
Two flavors of helper bars are available: the Ring Finger Helper (model HR), and the Thumb Helper (model HT). These bars come in a sleeve that slides into a chopstick. They can be used with any flavors of Training Marcosticks (model T).
Following is a video clip of a user who were never able to wield the Standard Grip all his life, until he tried the Ring Finger Helper.
This user could not hold the bottom chopstick using the 1-on-2-support thumb pose, in the past, because of personal anatomical limitations in his finger muscles. With the Ring Finger Helper, he can now secure the bottom chopstick.
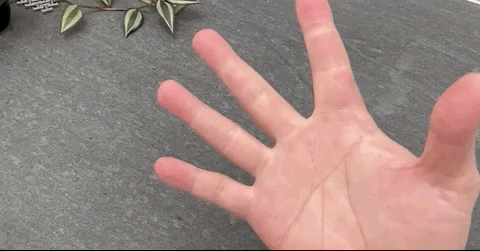
Most people can enact common hand gestures shown in FIG. 4A and FIG. 4B, found below. They show, respectively, the “thumbs-up” gesture, and the “closed-fist” gesture. The two thumb poses in these two gestures come naturally to most people.
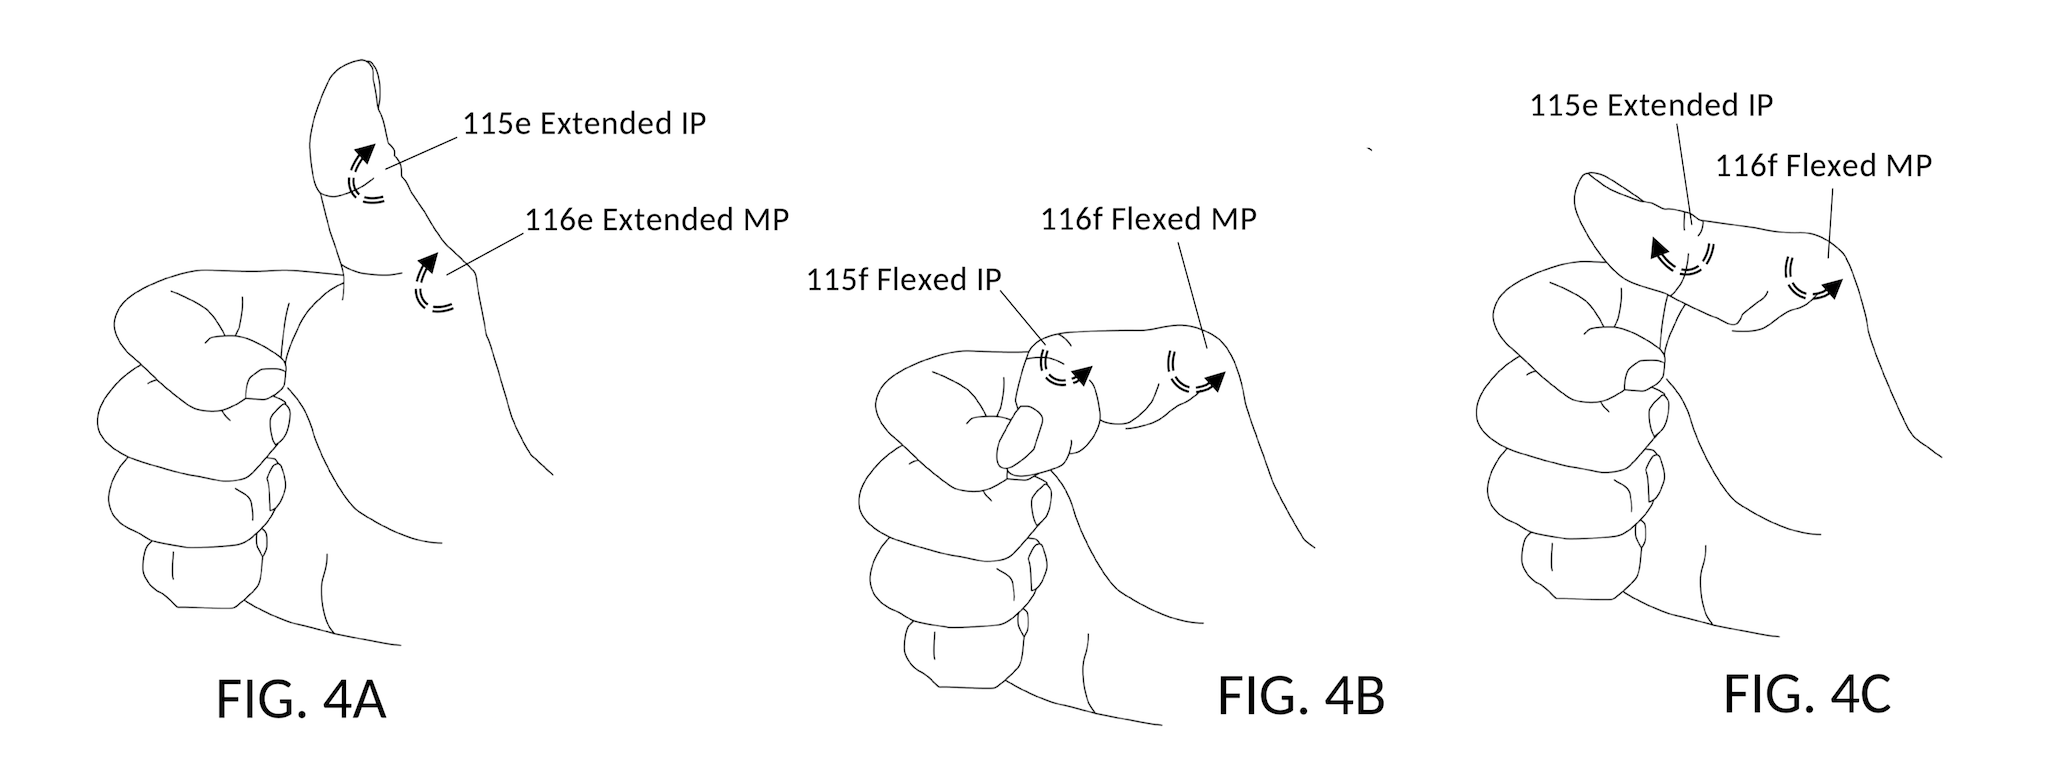
However, a sizable population cannot enact the unnatural thumb pose shown in FIG. 4C. This unnatural thumb pose is, unfortunately, the Caswellian thumb required for a human hand to secure the bottom chopstick, while the same hand manipulates the top chopstick.
Many life-long chopsticks users went to their graves still puzzled over why they could never master the Standard Grip. For some of them, this undiagnosed Caswellian thumb condition might have been the reason. And finger helper bars could have been the answer.
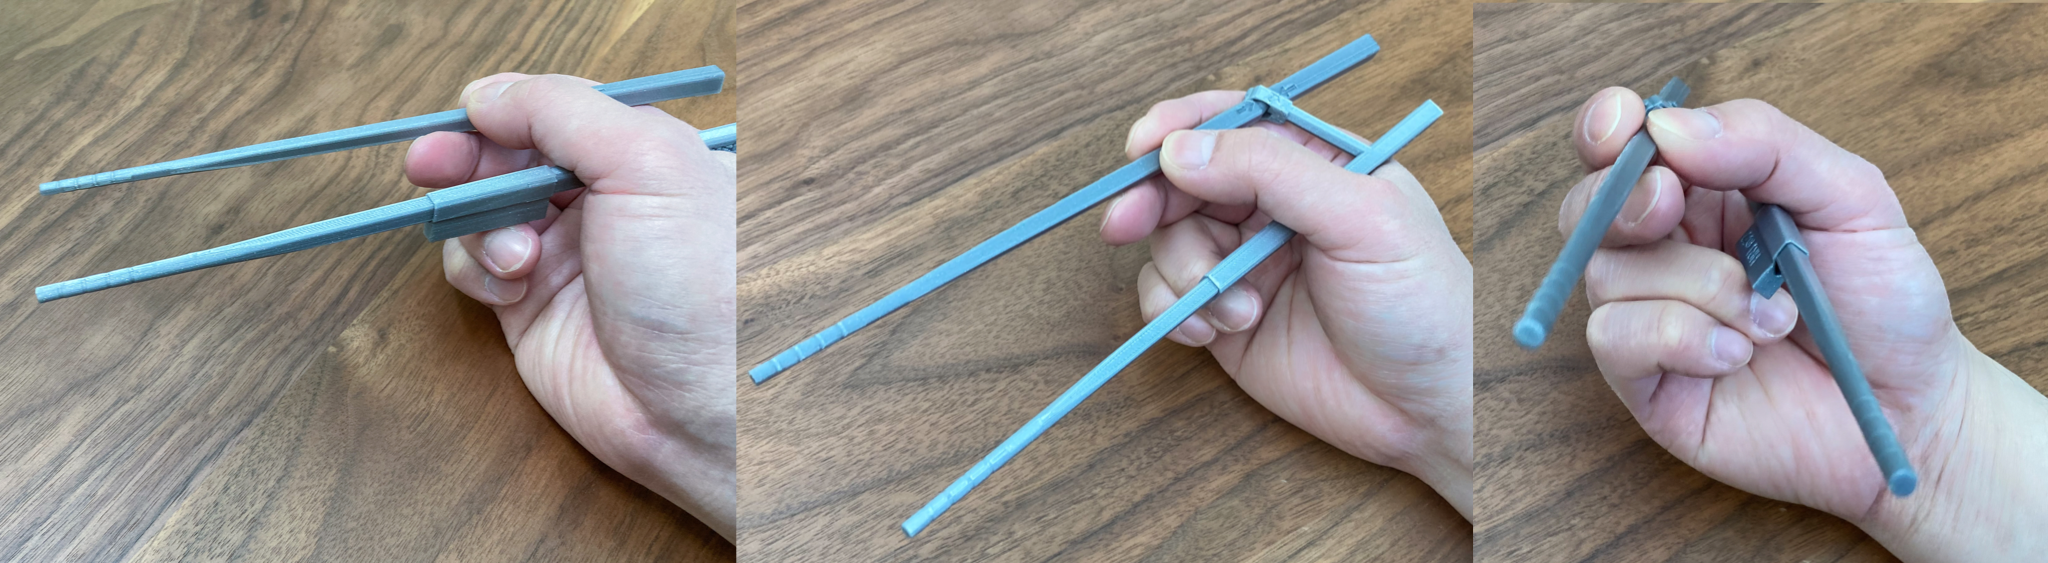
Pictures above illustrate how a helper bar creates distance between the thumb and the ring finger. It allows the thumb to remain in the “closed-fist” pose which most people can manage. With the helper bar, the bent thumb is now able to secure the bottom chopstick using the 1-on-2-support mechanism.
In short, the helper bar allows a learner to stop worrying about securing the bottom chopstick. Thus, the bar is also a useful aid for learners who don’t actually have anatomical limitations. A learner initially leans on the bar as a crutch, to secure the bottom chopstick. The learner can then focus instead, on twirling the top chopstick with the tripod hold.
You can print your own helper bars on your 3D printer. Head to the Finger Helper Marcosticks 3D printing section for 3D models and instructions. For other learner and training tools, consult the catalog at the 3D-printing page. If you don’t have a printer, you can get one from our partners.
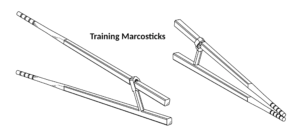
Training Marcosticks

Training Marcosticks (model T) are designed to guide beginners and lifelong users alike to adopt a proper chopstick grip.
They allow learners to focus first on mastering the twirling of the top chopstick, from the closed posture to the open posture, and back. Learners can practice this twirling alone, based on principles of the planetary gear train, without having to simultaneously learn to secure the bottom chopstick using the required Caswellian thumb pose. Such thumb pose can be mastered later as a second step.
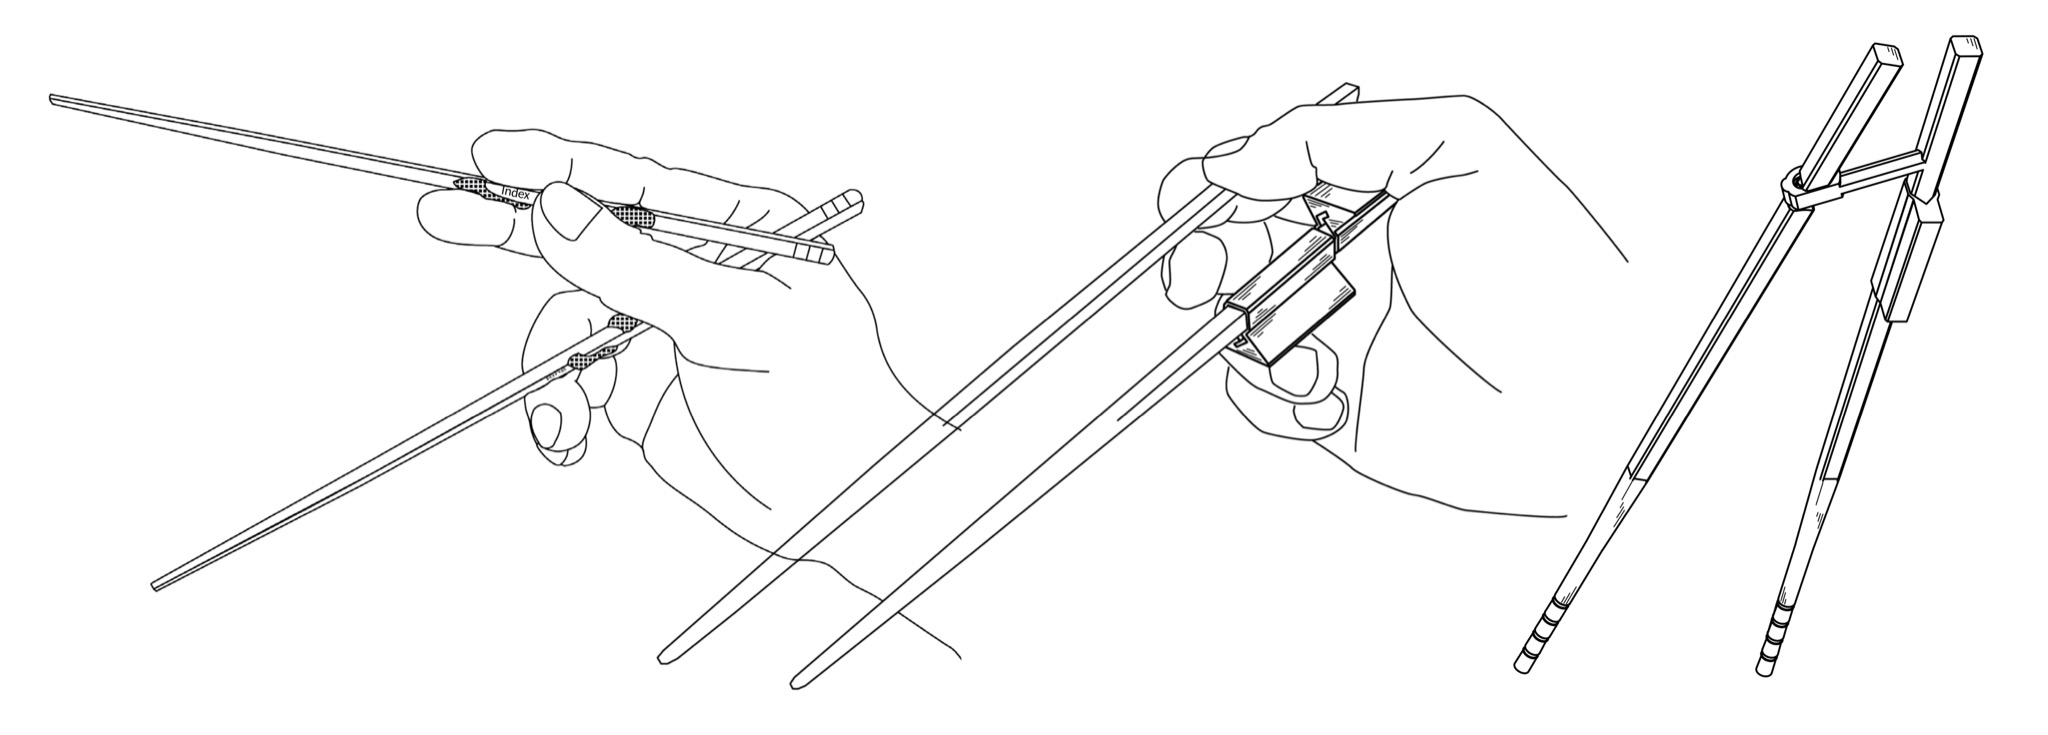
See how easy it is to position and secure both chopsticks in the video that follows. The learner first focuses on grabbing the top chopstick using the tripod hold. The thumb, the index finger and the middle finger securely grip the top chopstick, such that it cannot be pulled away by the left hand. Then the same fingers learn to twirl the same chopstick. After that, the thumb base and the ring knuckle learn to hold the bottom chopstick in place securely. That’s it.
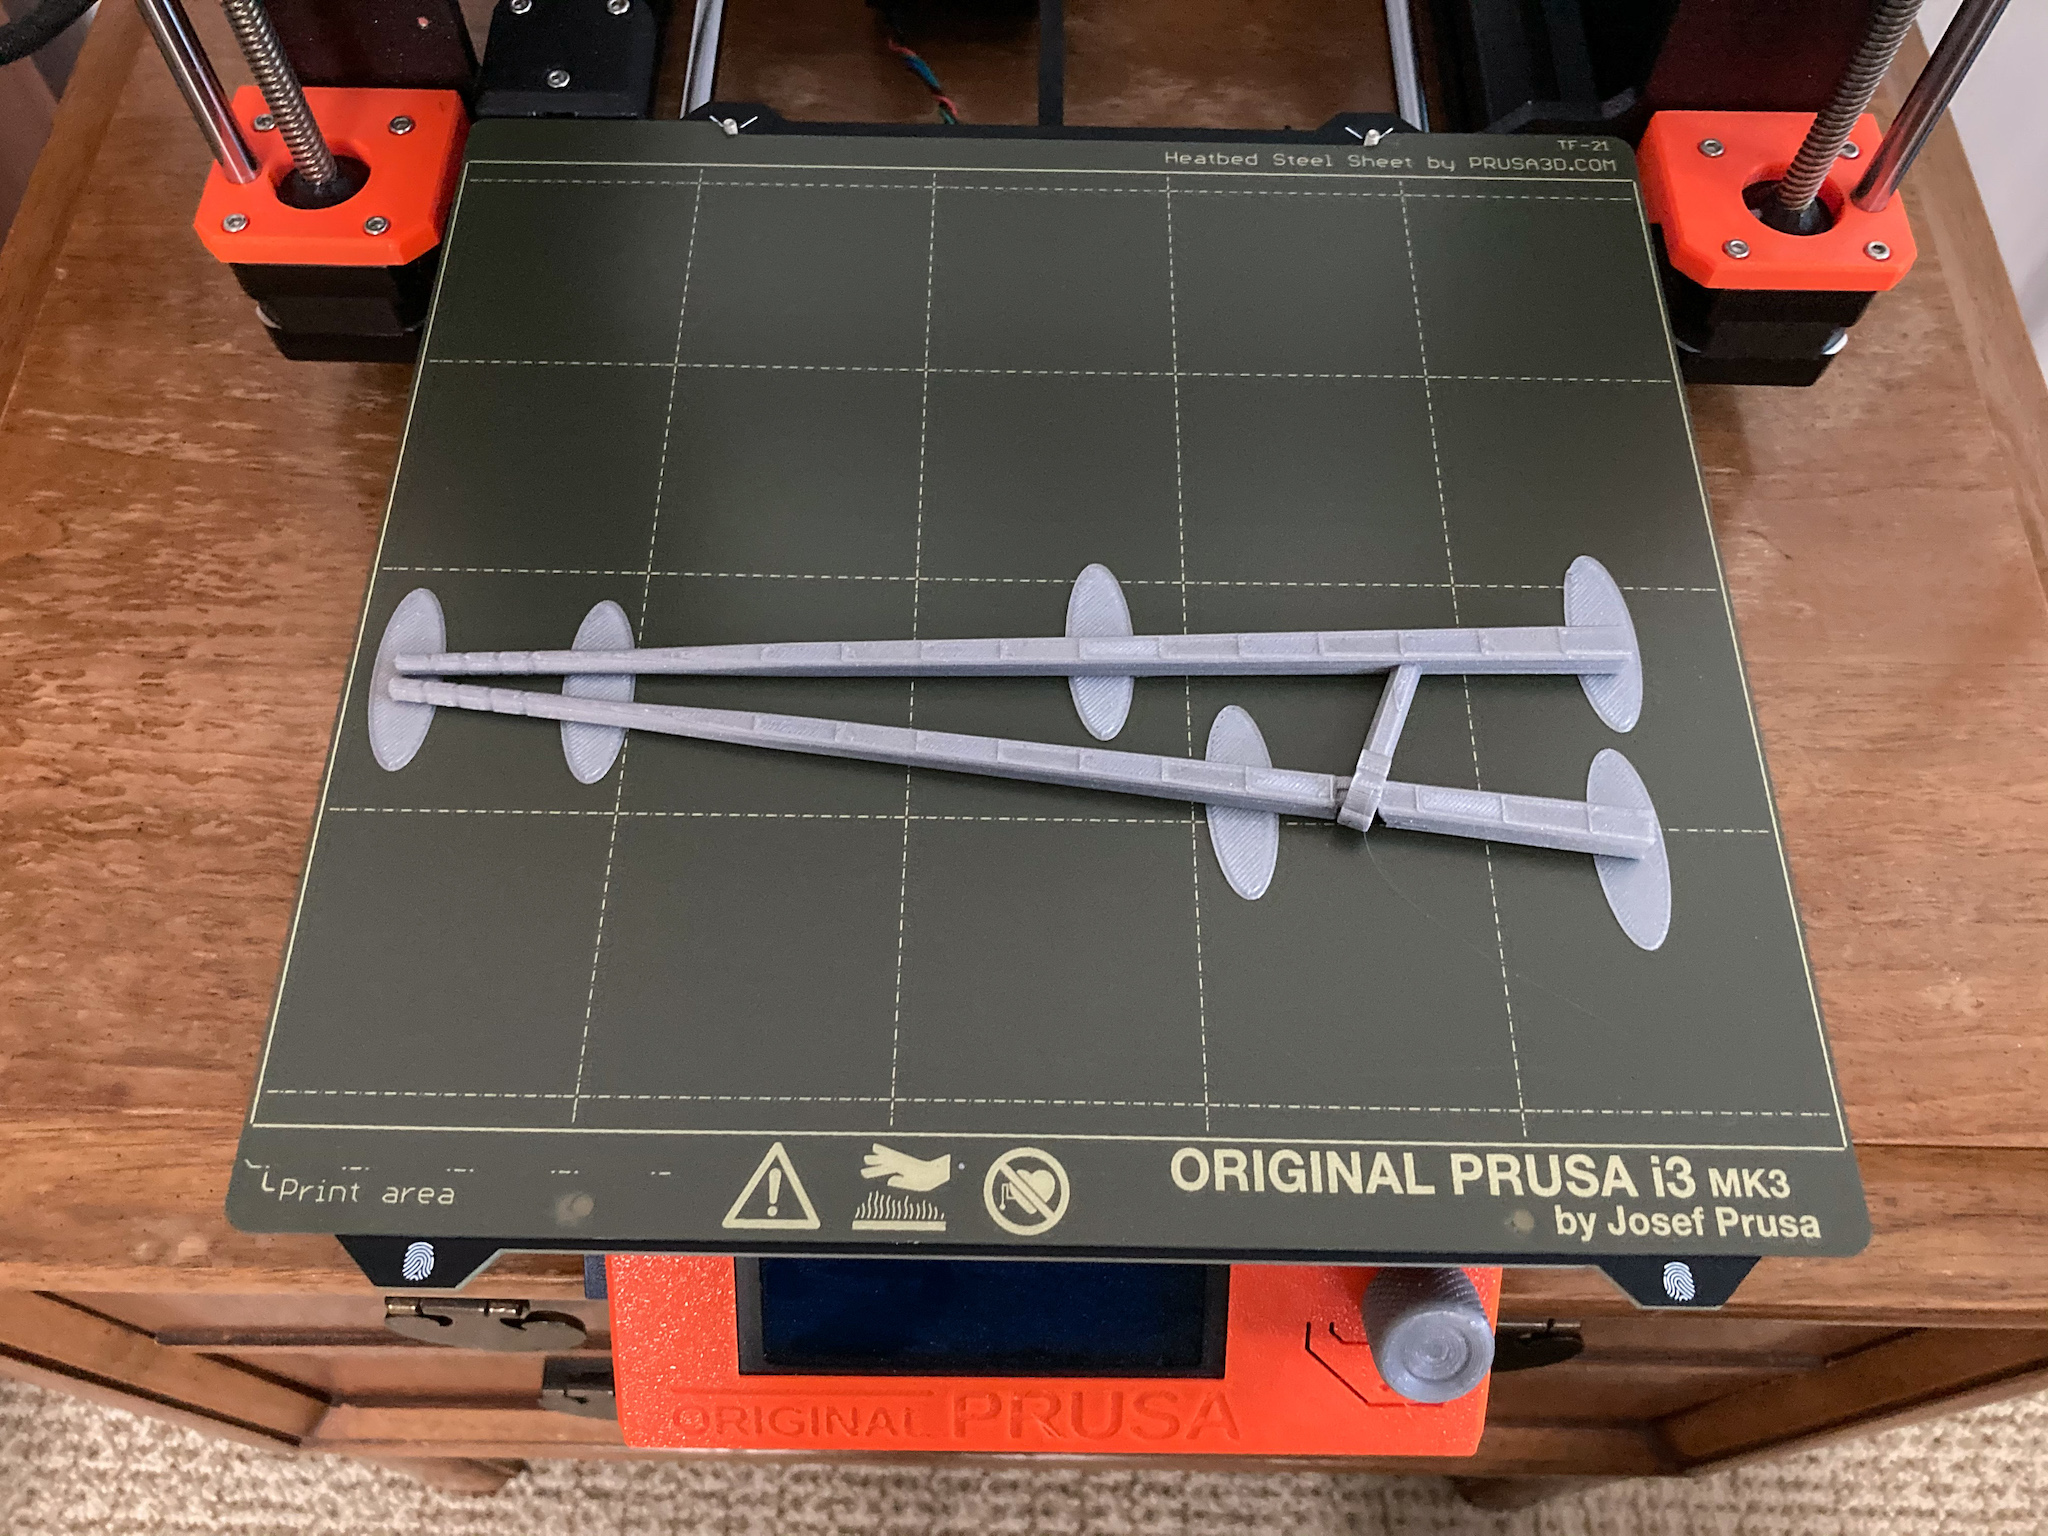
Training Marcosticks come in various sizes. Most users will find the “Standard” size (shown above) adequate for daily uses. The next two video clips demonstrate the “Large” version, where the two chopsticks are separated farther by a longer connecting piece.
The slow-motion video below demonstrates compression capabilities of Training Marcosticks. They offer almost equivalent finger dynamics, dexterity and power, compared to plain chopsticks.
The slow-motion video below demonstrates the extension capabilities of Training Marcosticks.
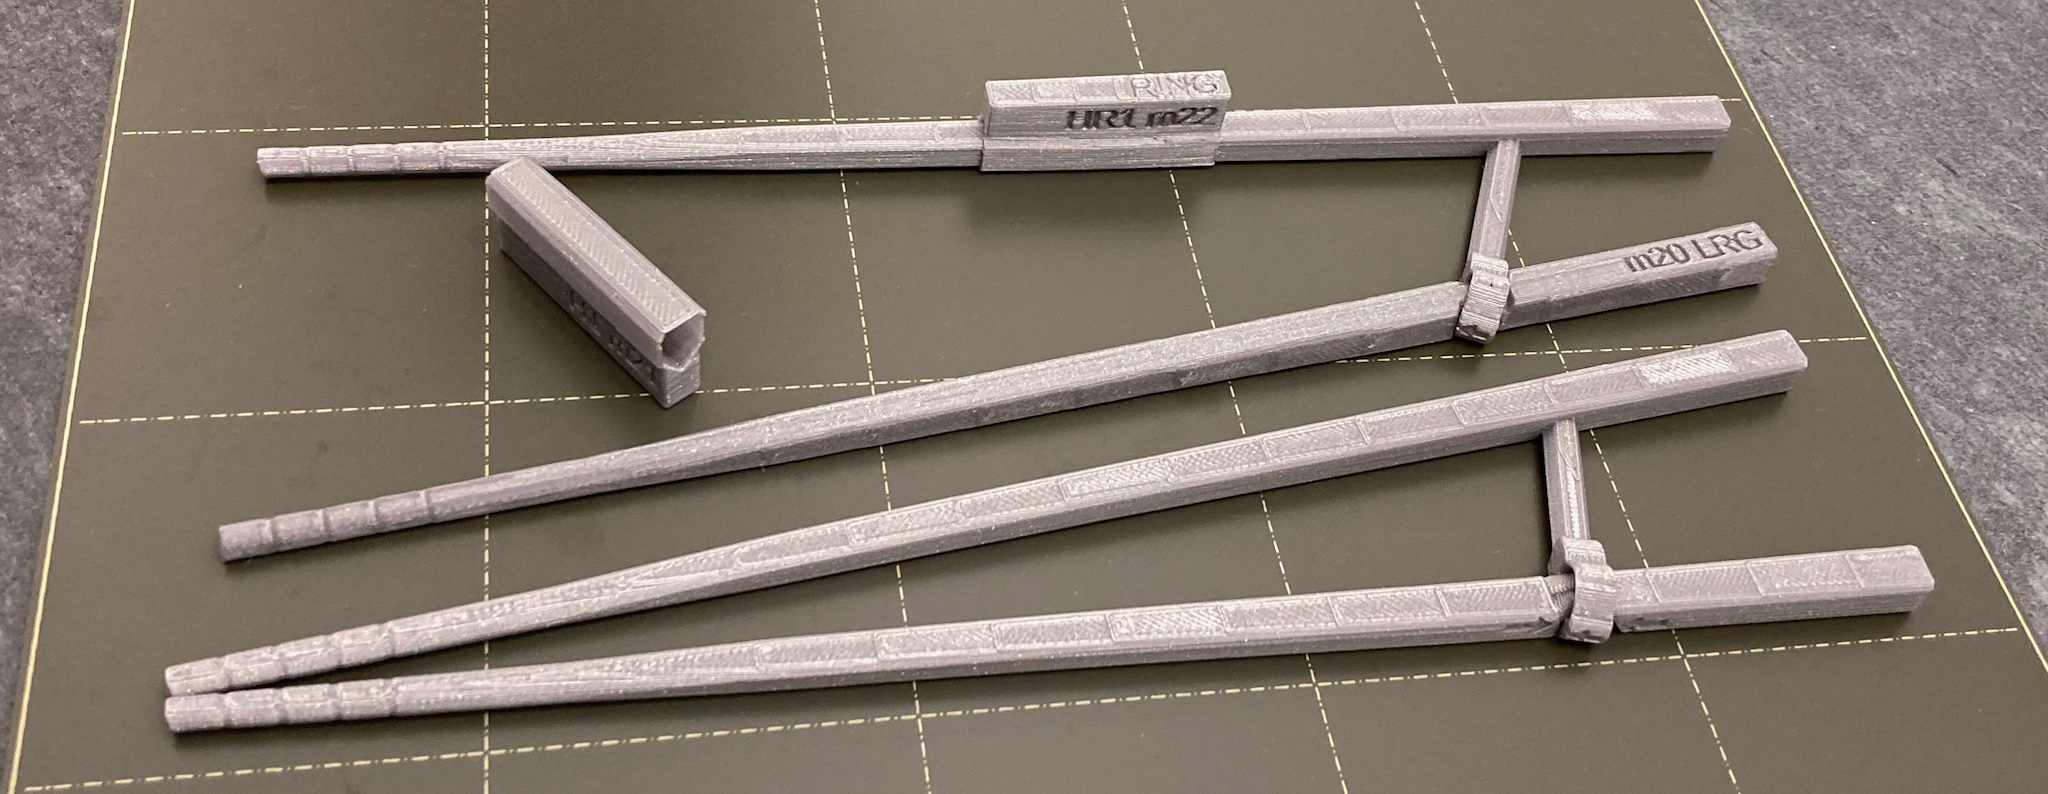
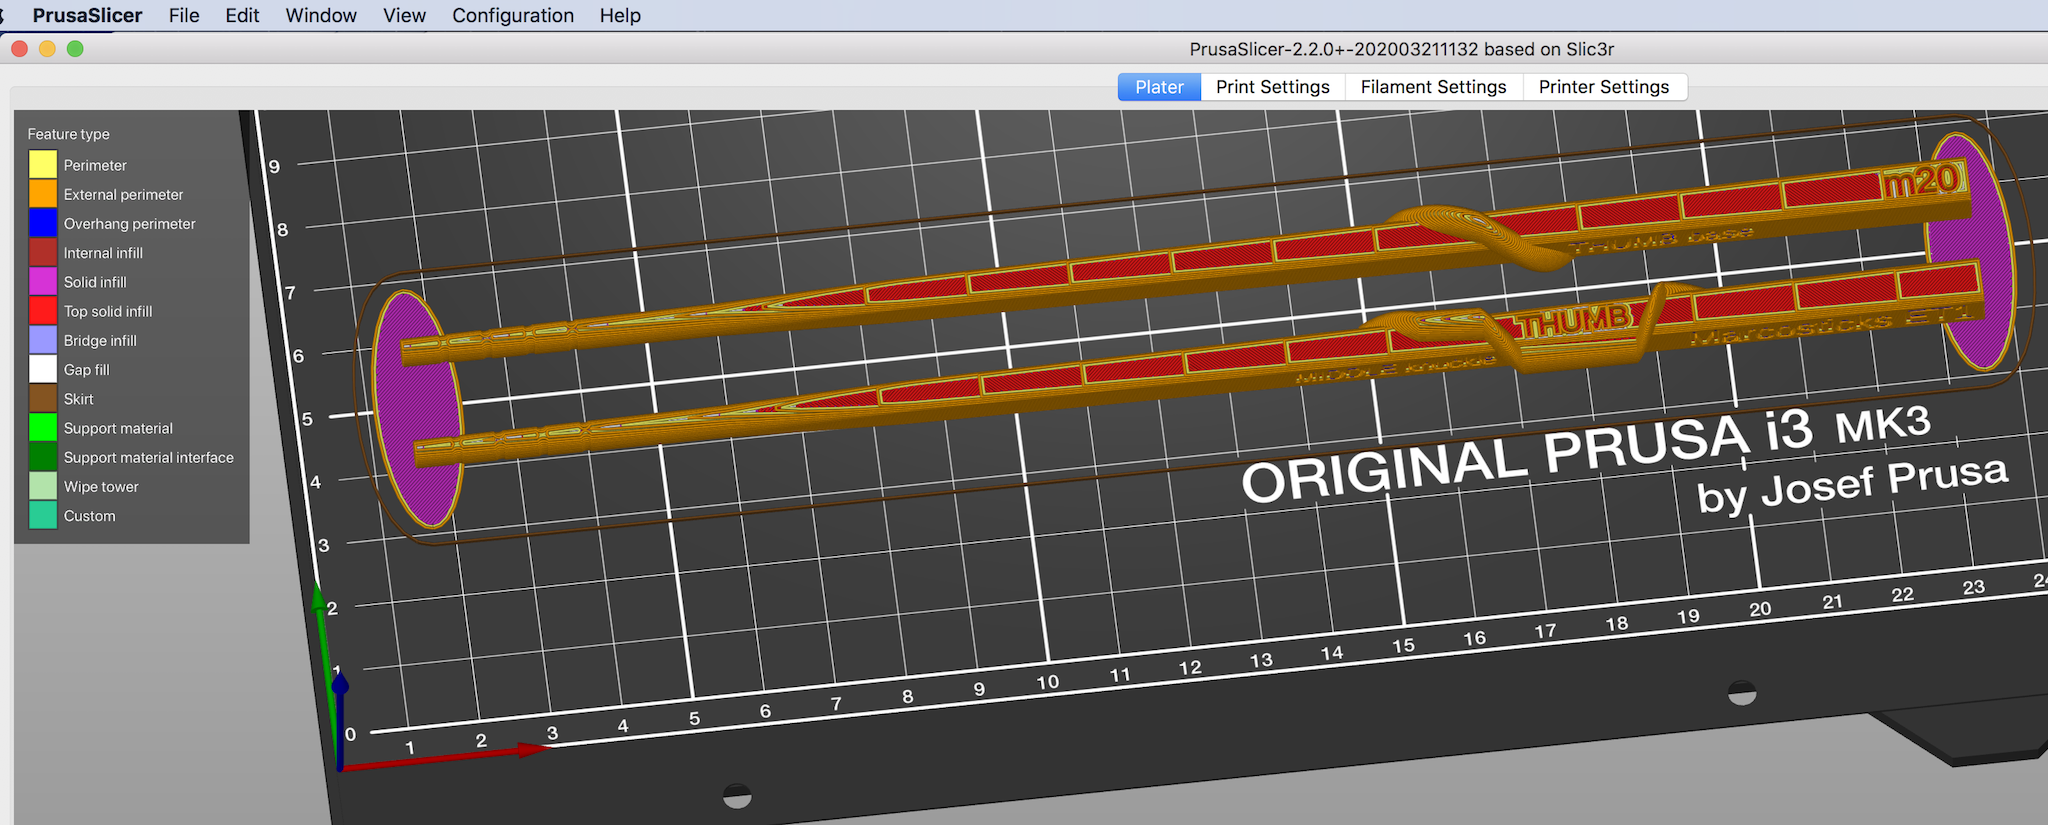
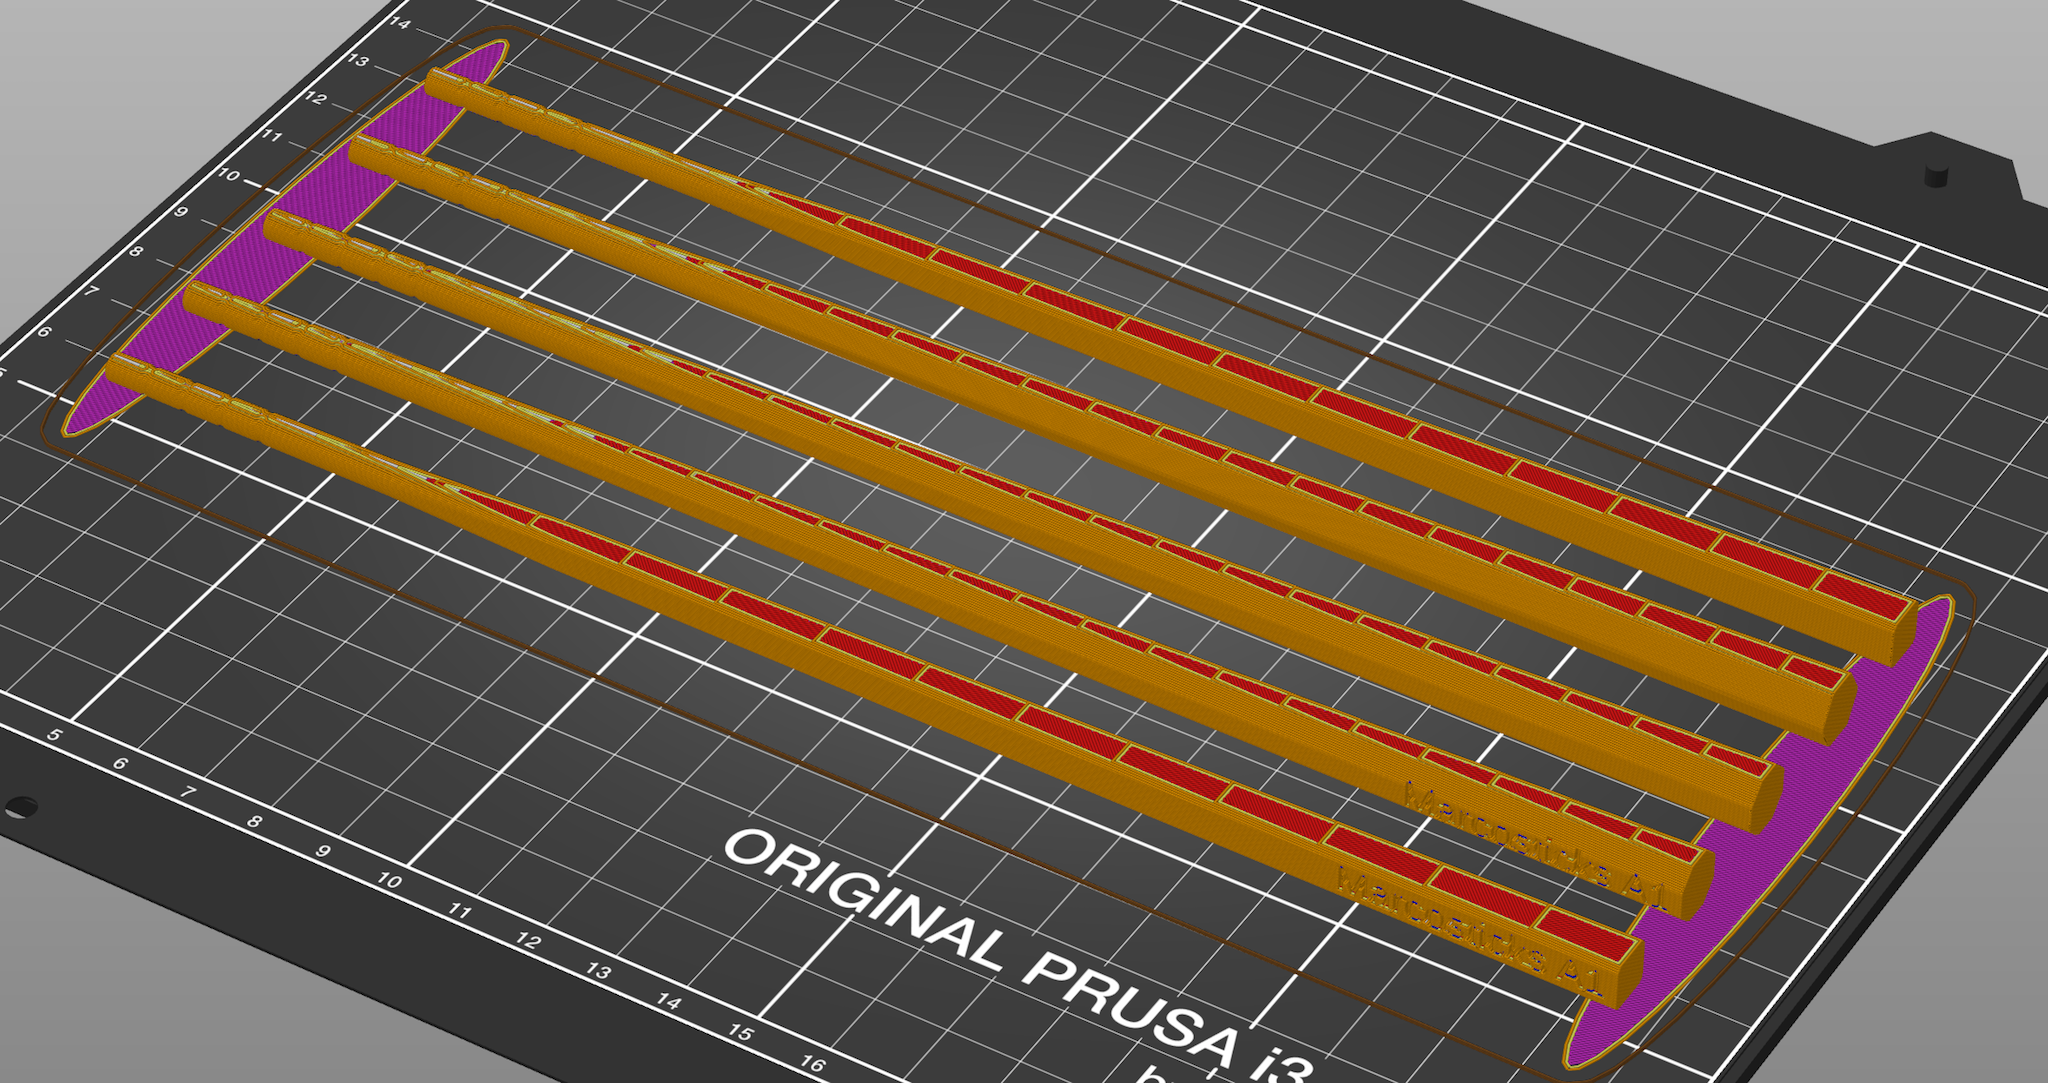
You can print your own training marcosticks on your 3D printer. Head to the Training Marcosticks 3D printing section for 3D models and instructions. You can print these out in PLA in 0.20mm layers. For other learner and training tools, consult the catalog at the 3D-printing page. If you don’t have a printer, you can get one from our partners. You can possibly get one made in materials stiffer than PLA, such as glass-filled nylon.
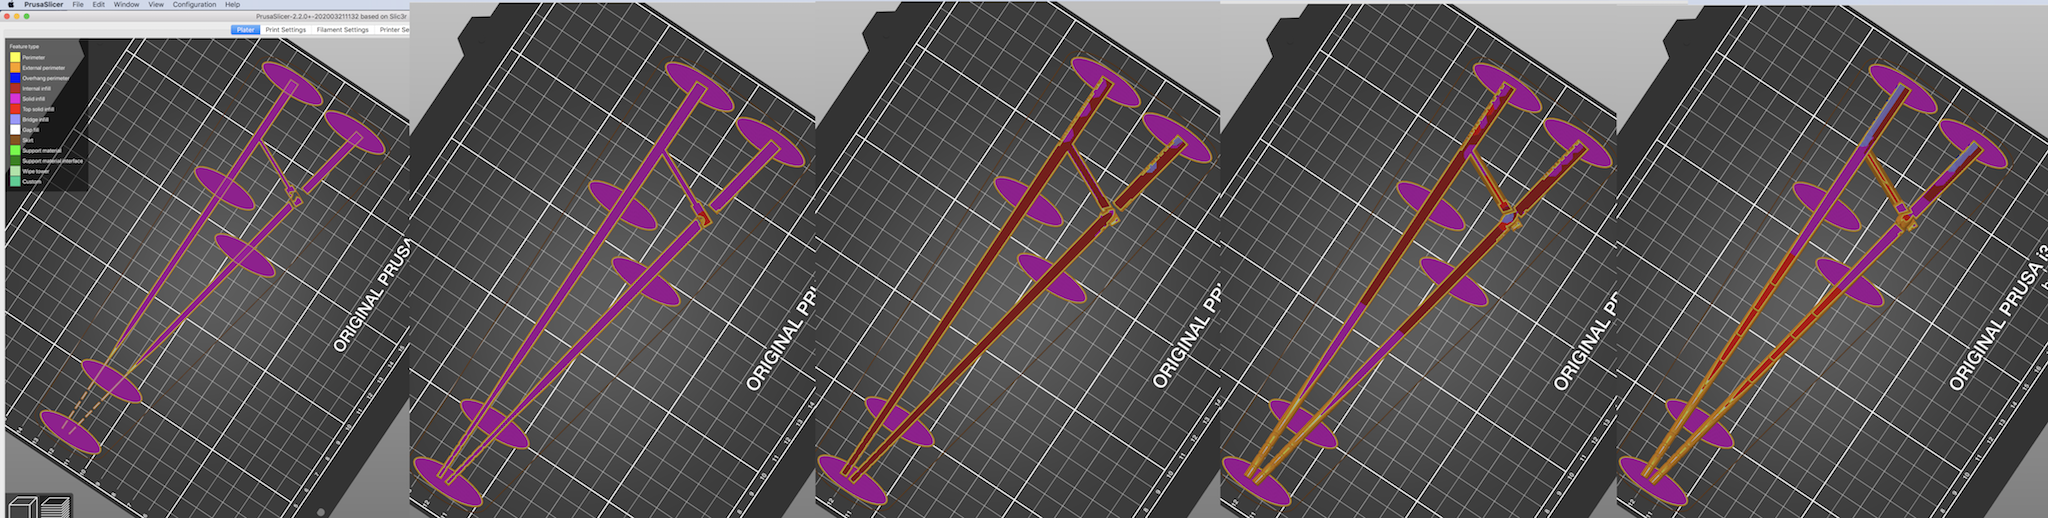
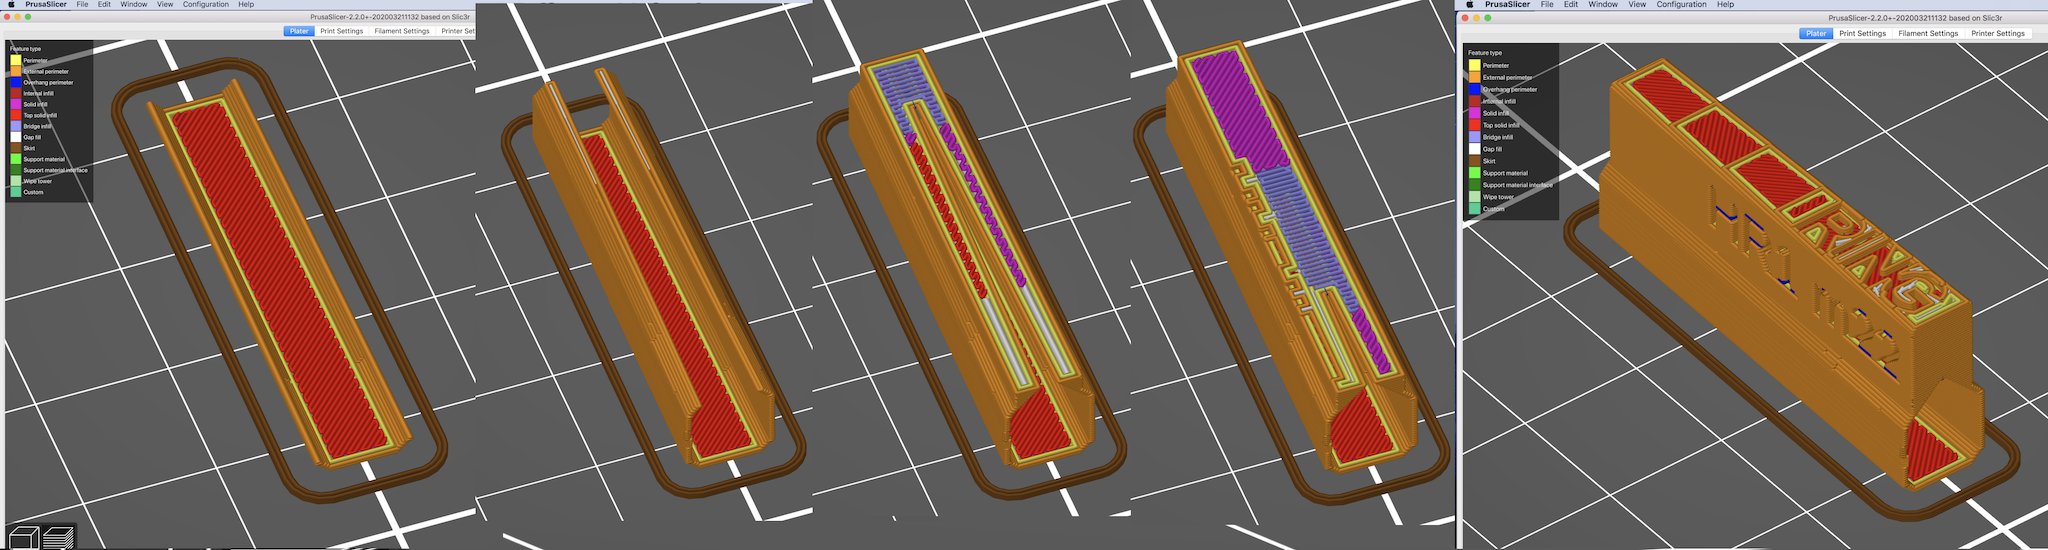
The picture above shows the first layer, the 5th, the 11th, the 22nd, and the 28th layer of the print. The two sticks are printed flat against the print bed, without any support. Oval brims have been added at strategic locations, to ensure that the sticks do not warp off the print bed during printing. Brims can be easily trimmed with scissors, a flush cutter, or a deburring tool.

The C-hook interlocks with the groove in Training Marcosticks, shown above. These two parts have been designed to be printed as articulate parts. They are shaped to force the top chopstick to move in a twirling pattern, with respect to the bottom chopstick, as prescribed by the Standard Grip. The C-hook and the groove serve as a teaching guide, coercing the user to learn the right twirling finger motions.
Ergonomic Marcosticks
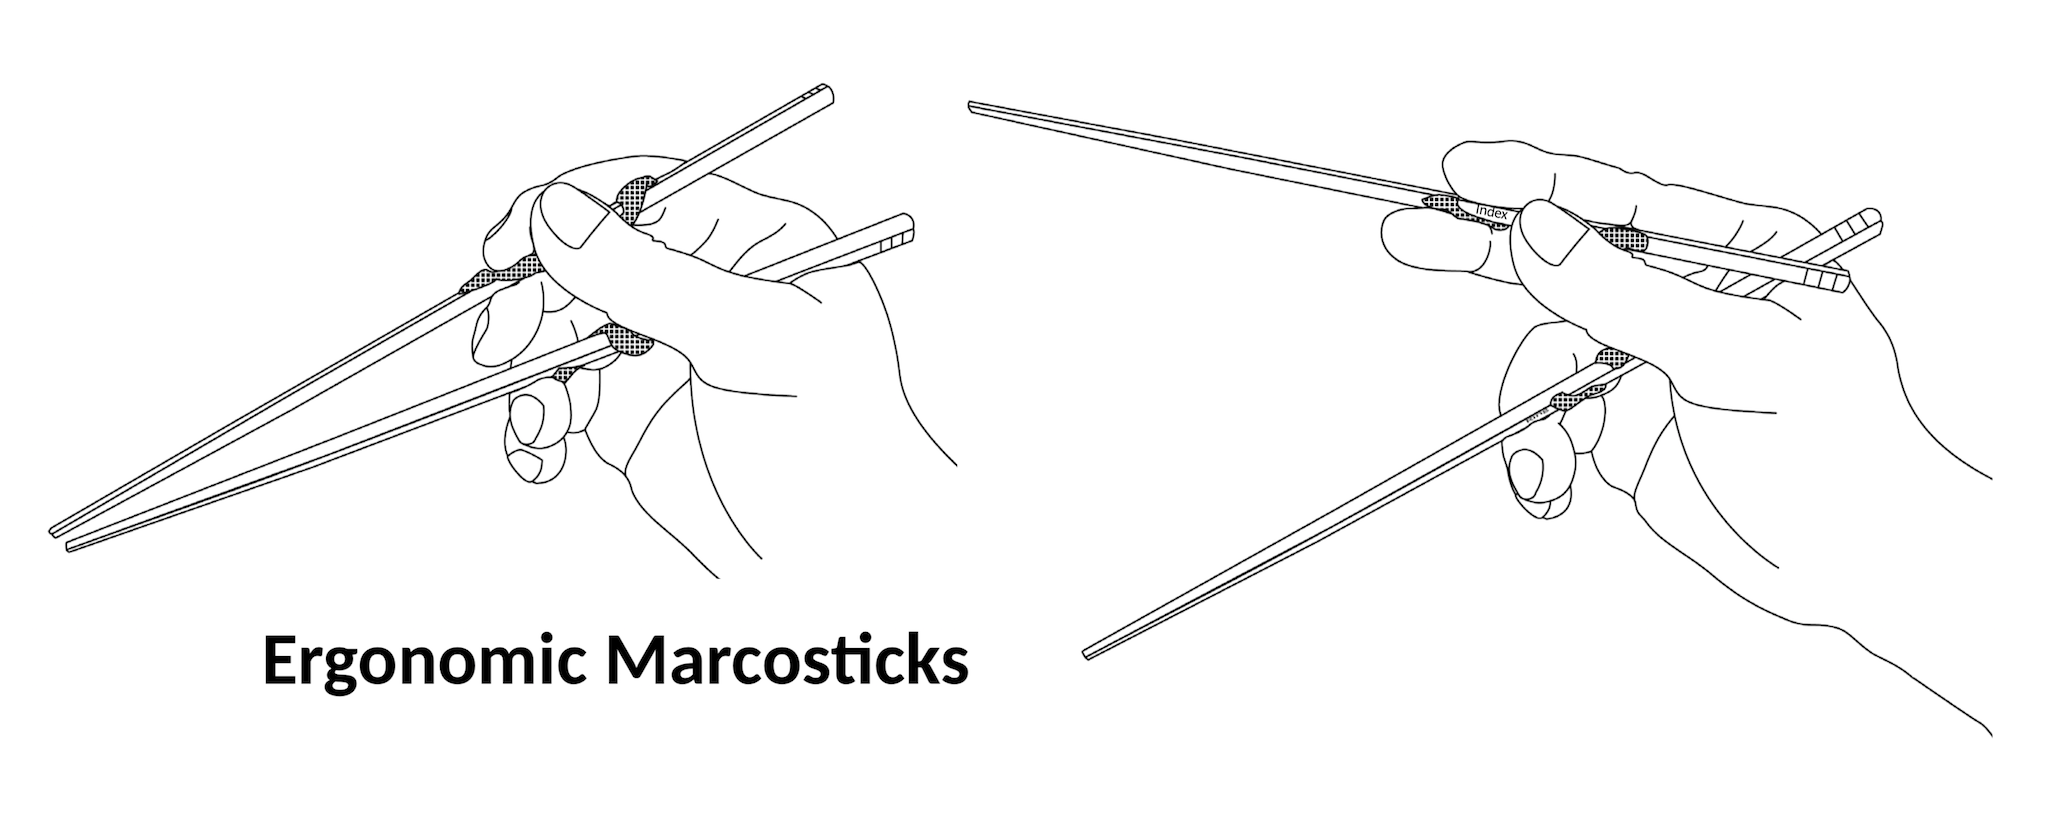
Ergonomic Marcosticks (model E) are favored by intermediate users. They look almost indistinguishable from plain chopsticks, thus do not invite unwanted stares at eating situations. Their low-profile ergonomic nuggets provide guides for fingers with tactile feedback. Yet these ergonomic nuggets do not hinder fingers, nor prevent them from gripping and twirling chopsticks, unlike other learner chopsticks. As a result, ergonomic Marcosticks offers the same dexterity, finesse, reach, speed, and power as plain chopsticks.
The next video demonstrates the compression and extension power achievable with Ergonomic Marcosticks, in slow motion.

The next video demonstrates the expansive reach of Ergonomic Marcosticks, in slow motion.
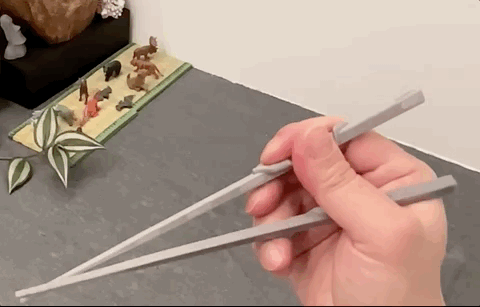
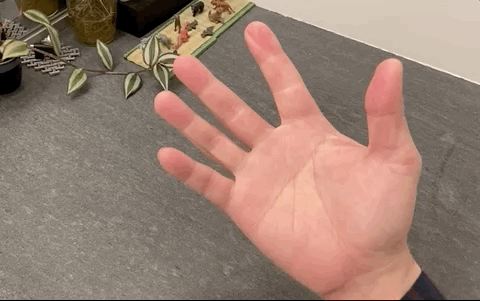
As far as finger skins are concerned, Ergonomic Marcosticks feel exactly the same as plain chopsticks. Recall that in Learn to Use Chopsticks, we stress the importance of finger skins meshing with the surface of both chopsticks, in order to grip them, and to twirl them effectively.
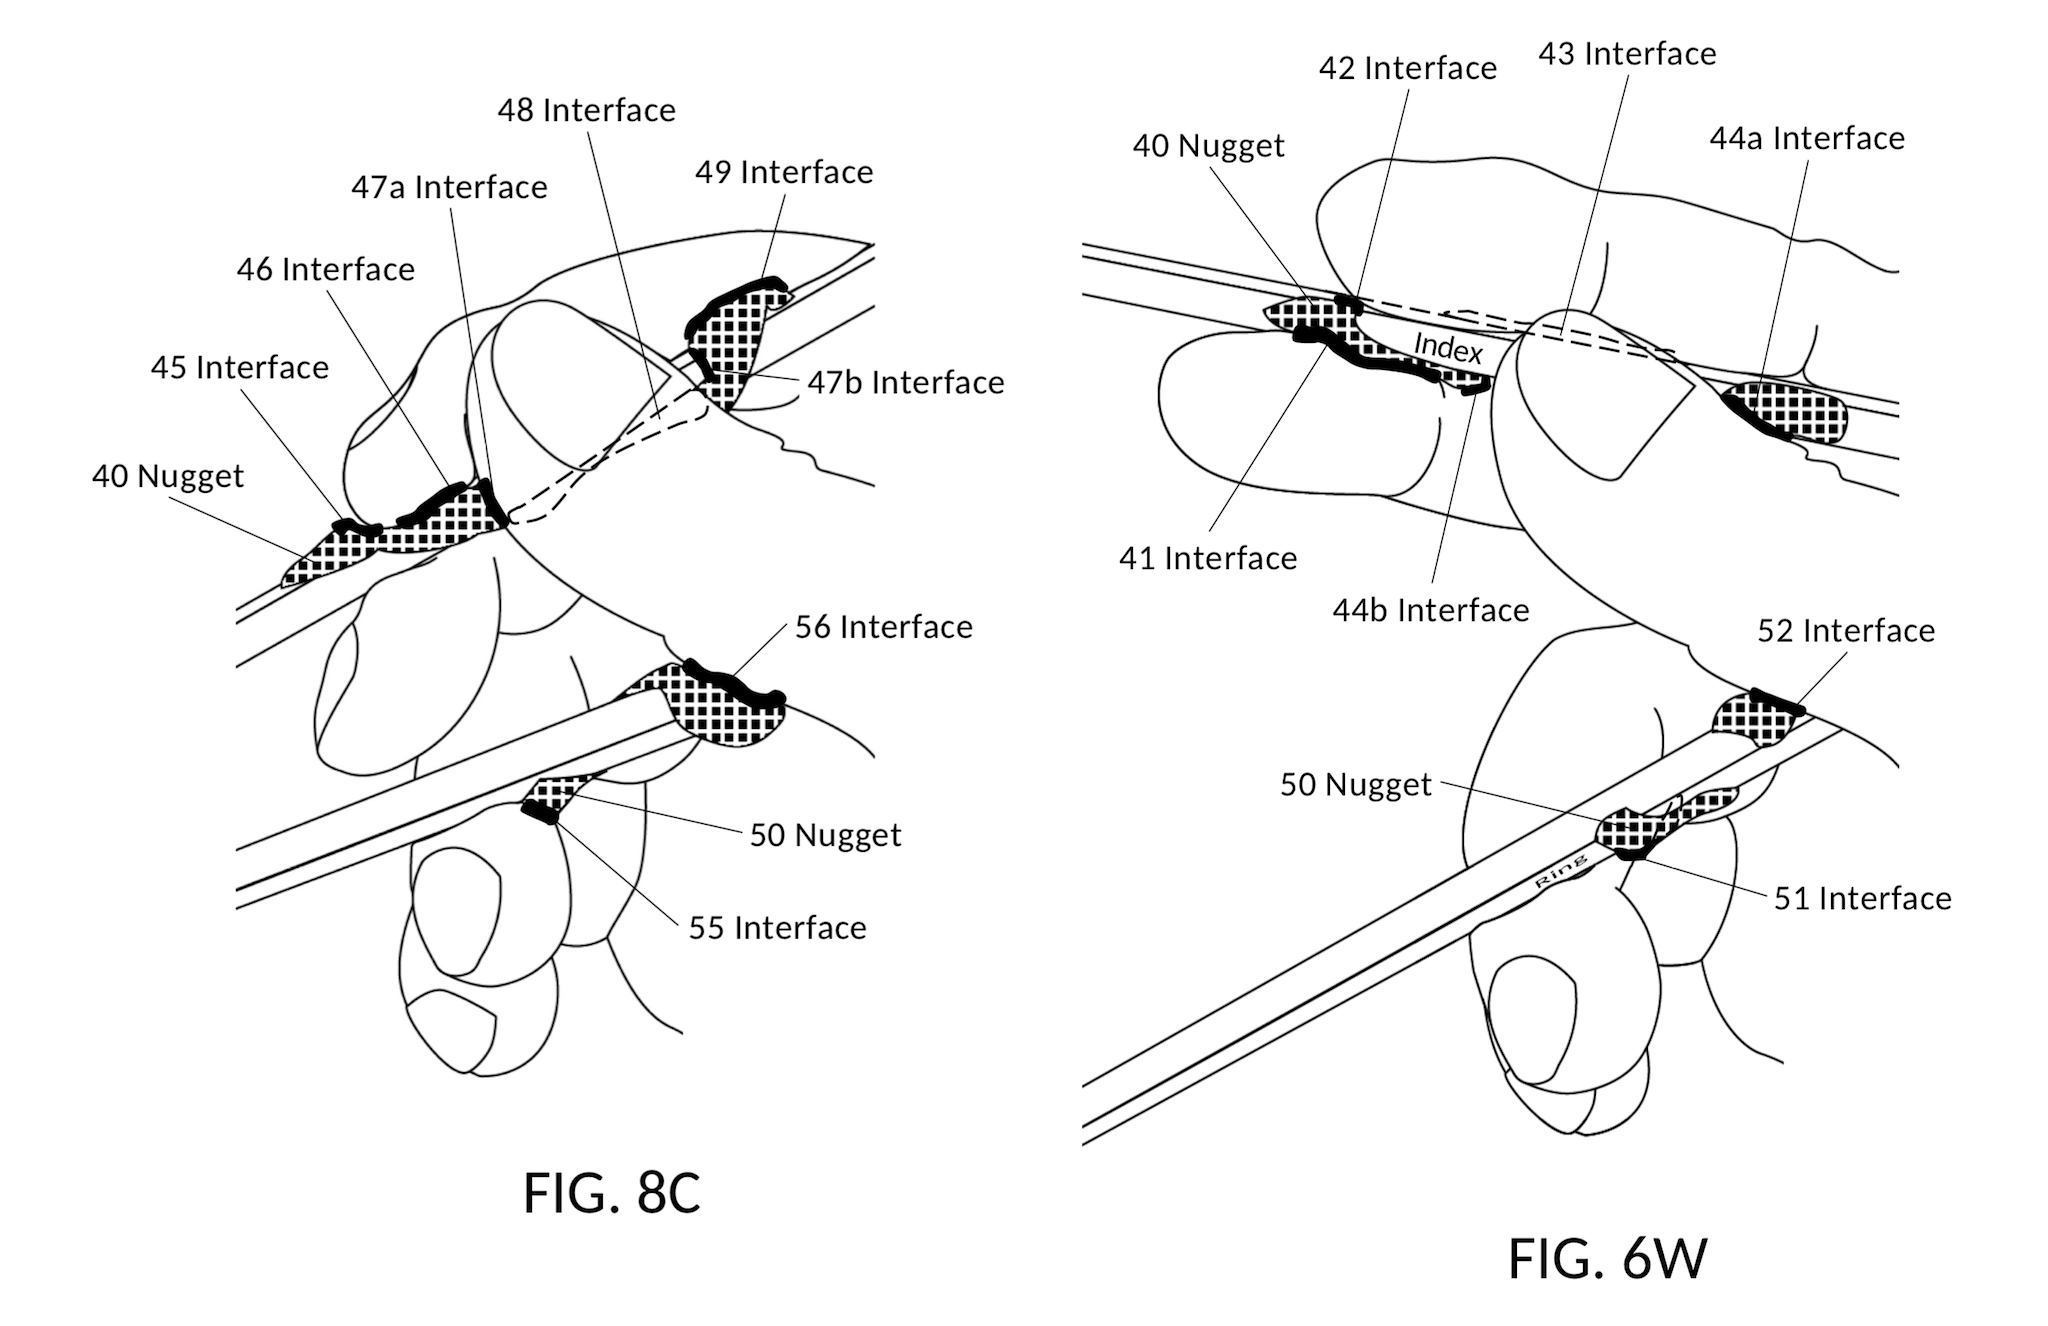
Following pictures illustrate stick marks left by Ergonomic Marcosticks on finger skins. These stick marks are identical to those made by plain chopsticks.
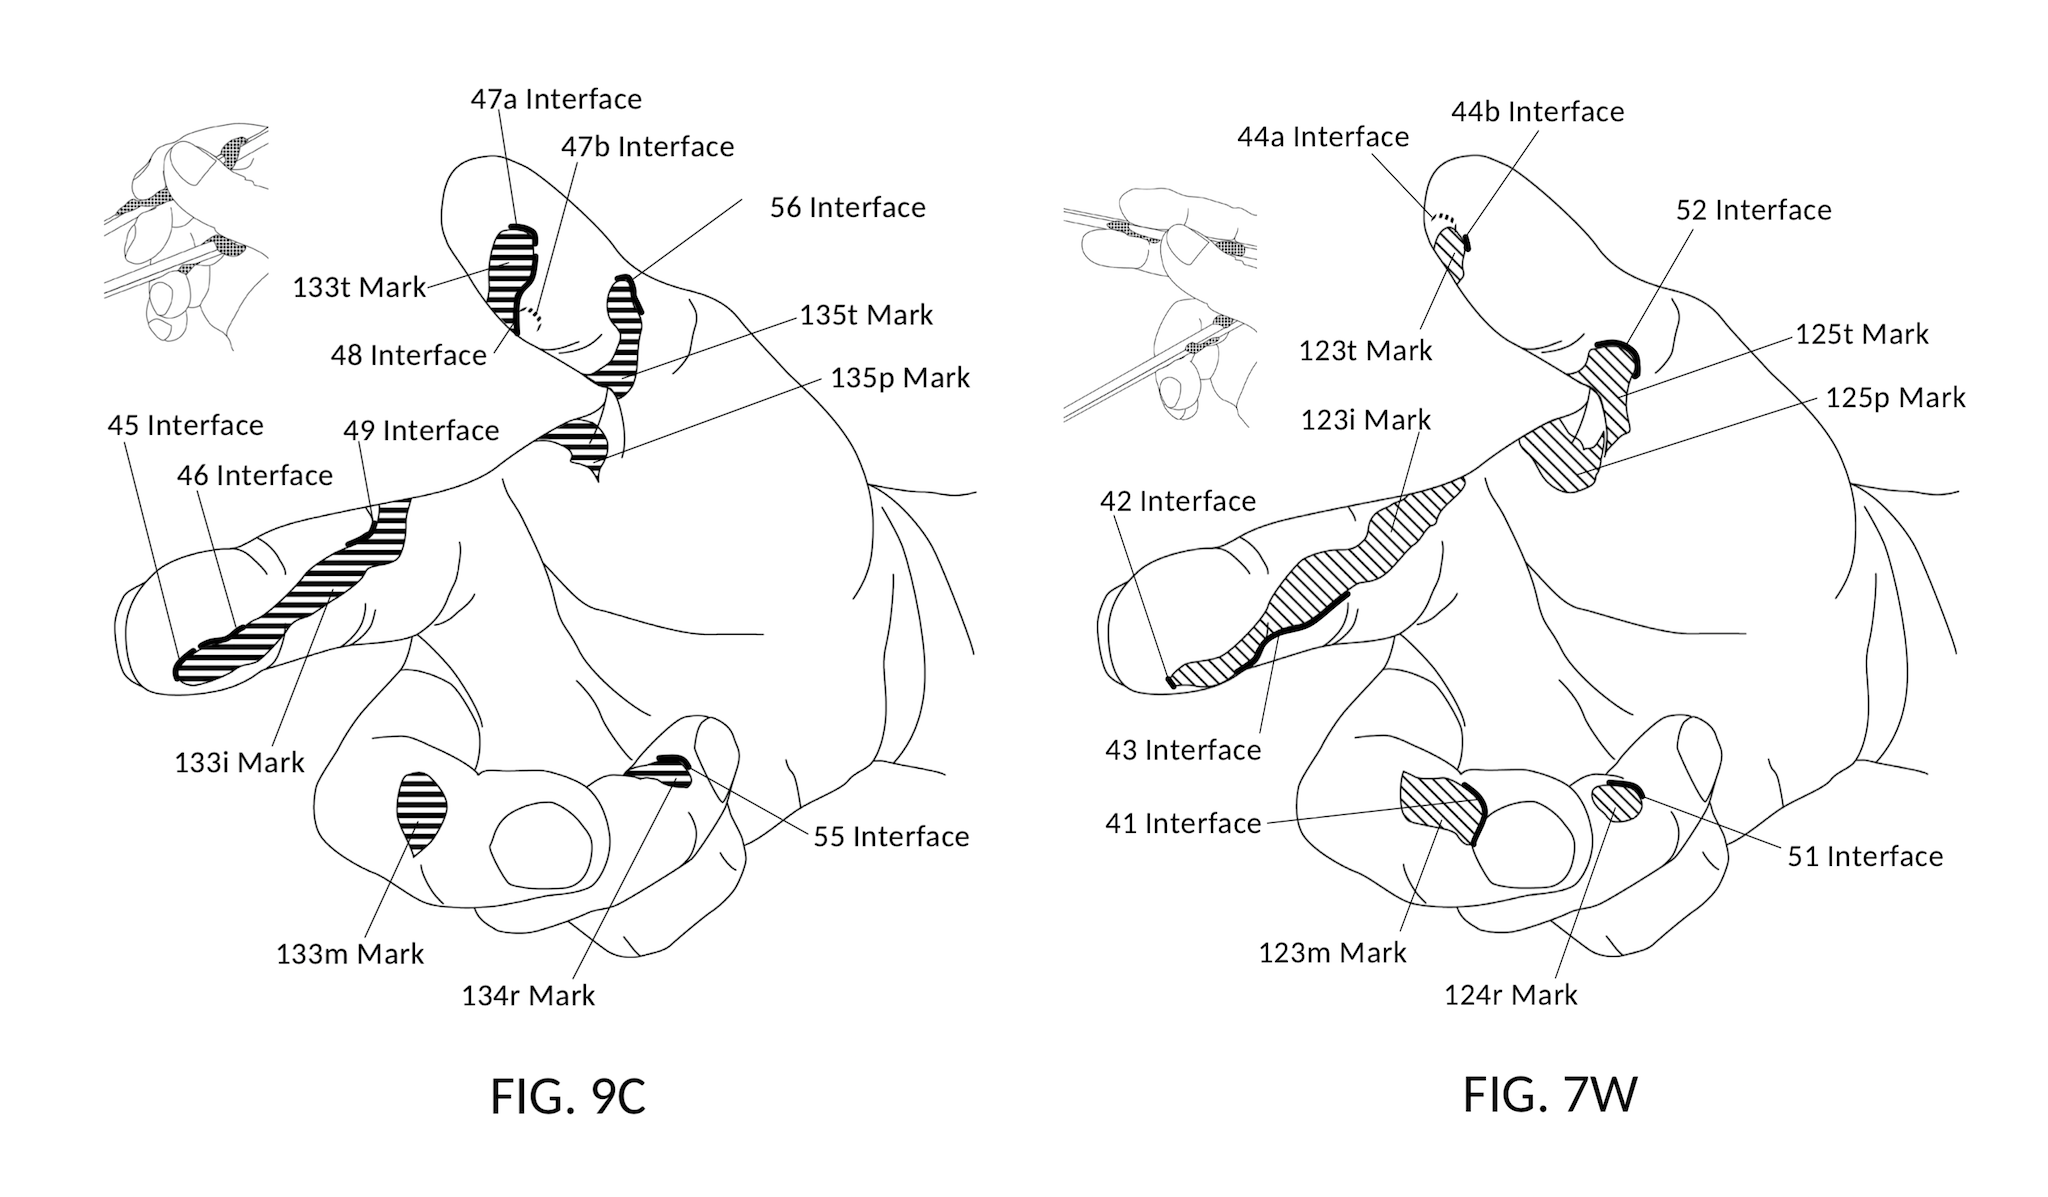
Yet, Ergonomic Marcosticks provide limit and guide interfaces outside of these stick mark areas. Limit interfaces signal both ends of the twirling motion: at the closed posture, and at the open posture. Guide interfaces coerce fingers into the right pose, throughout the twirling motion of fingers.
This entire marcosticks.org website owes its existence to the Ergonomic Marcosticks. You see, the whole thing started when one of us tried to to find the most non-intrusive learner chopsticks. We bought and tried all available products on the market. We built our own learner chopsticks, only to find that they hindered expected finger movements. To understand why nothing on the market worked, we set out to film real people using chopsticks, in slow motion. After watching hours after hours of footage, we discovered the planetary gear train principle behind the Standard Grip.
We invented ergonomic nuggets based on the principle, and the very first prototype worked extremely well for the first learner that tried it. We filed our first patent application to disclose this research finding, and the ergonomic chopsticks that resulted from it. Then this website and everything else followed.

You can print your own ergonomic marcosticks on your 3D printer. Head to the Ergonomic Marcosticks 3D printing section for 3D models and instructions. For other learner and training tools, consult the catalog at the 3D-printing page. You can print these out in PLA in 0.20mm layers. If you don’t have a printer, you can get one from our partners.
Like all our 3D-printable models, no support is required to print these marcosticks. These print flat on the print bed. They only requires two oval brims to prevent warping during printing. Again, these brims can be easily trimmed off.
Advanced Marcosticks
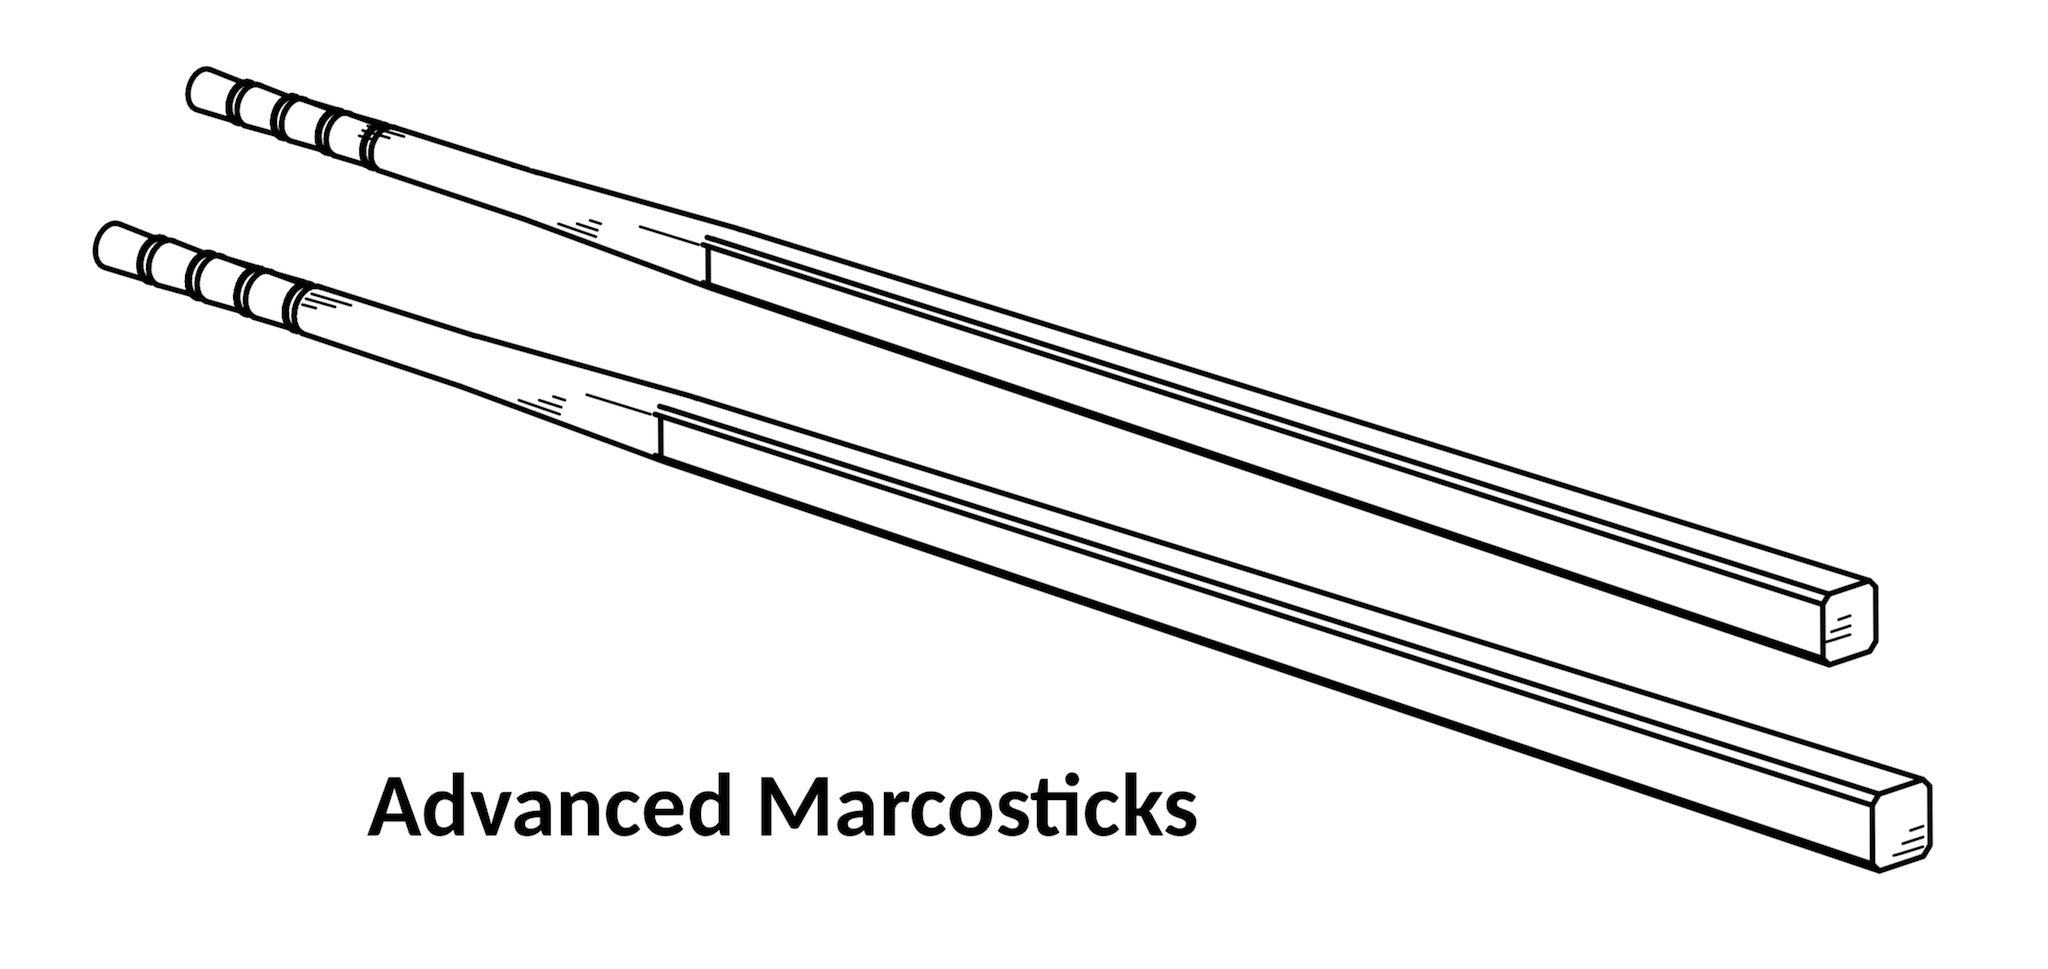
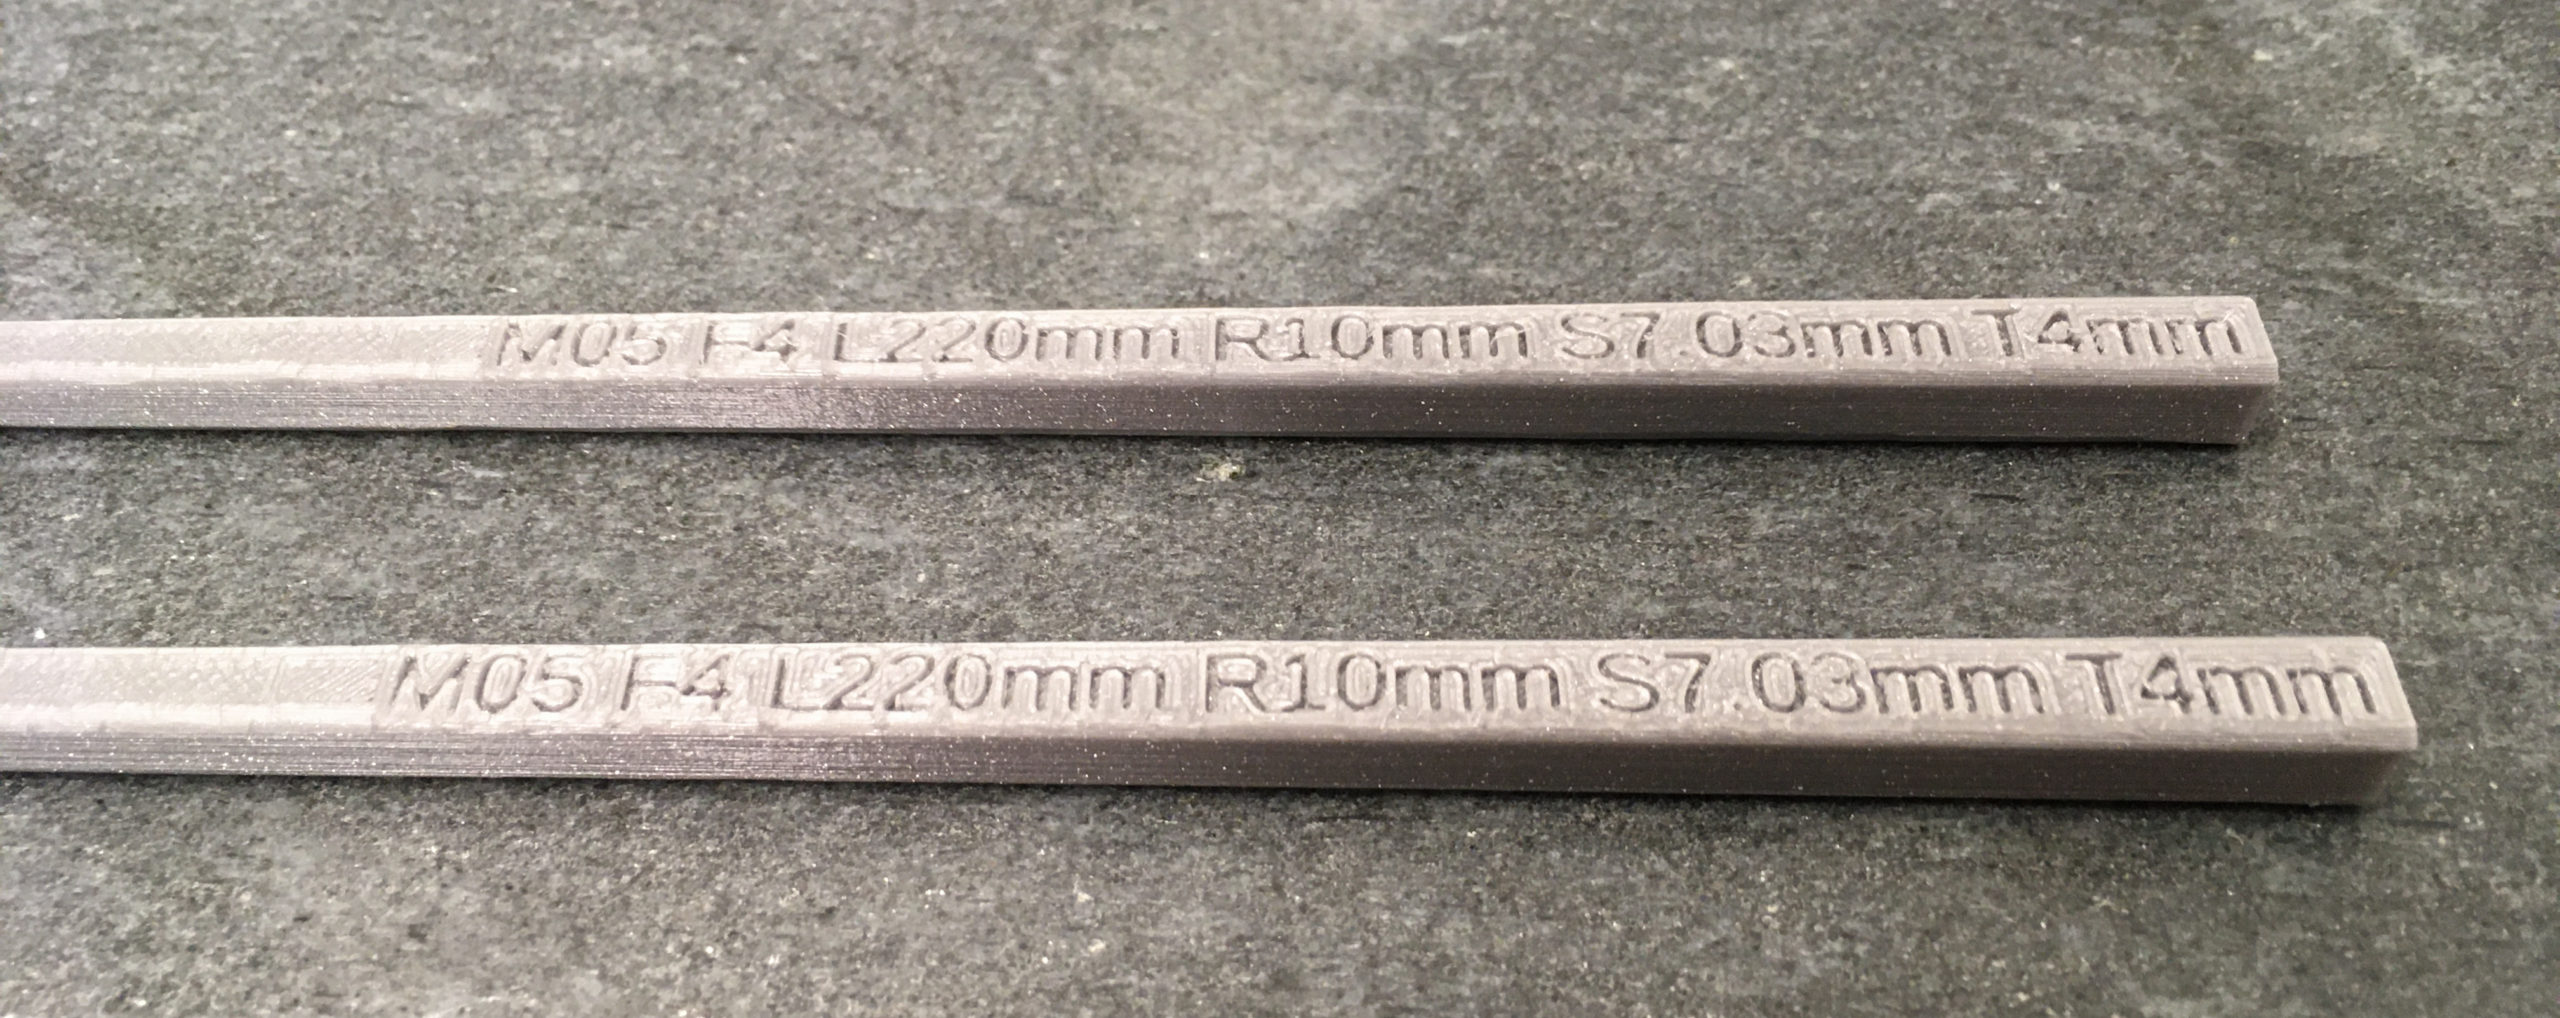
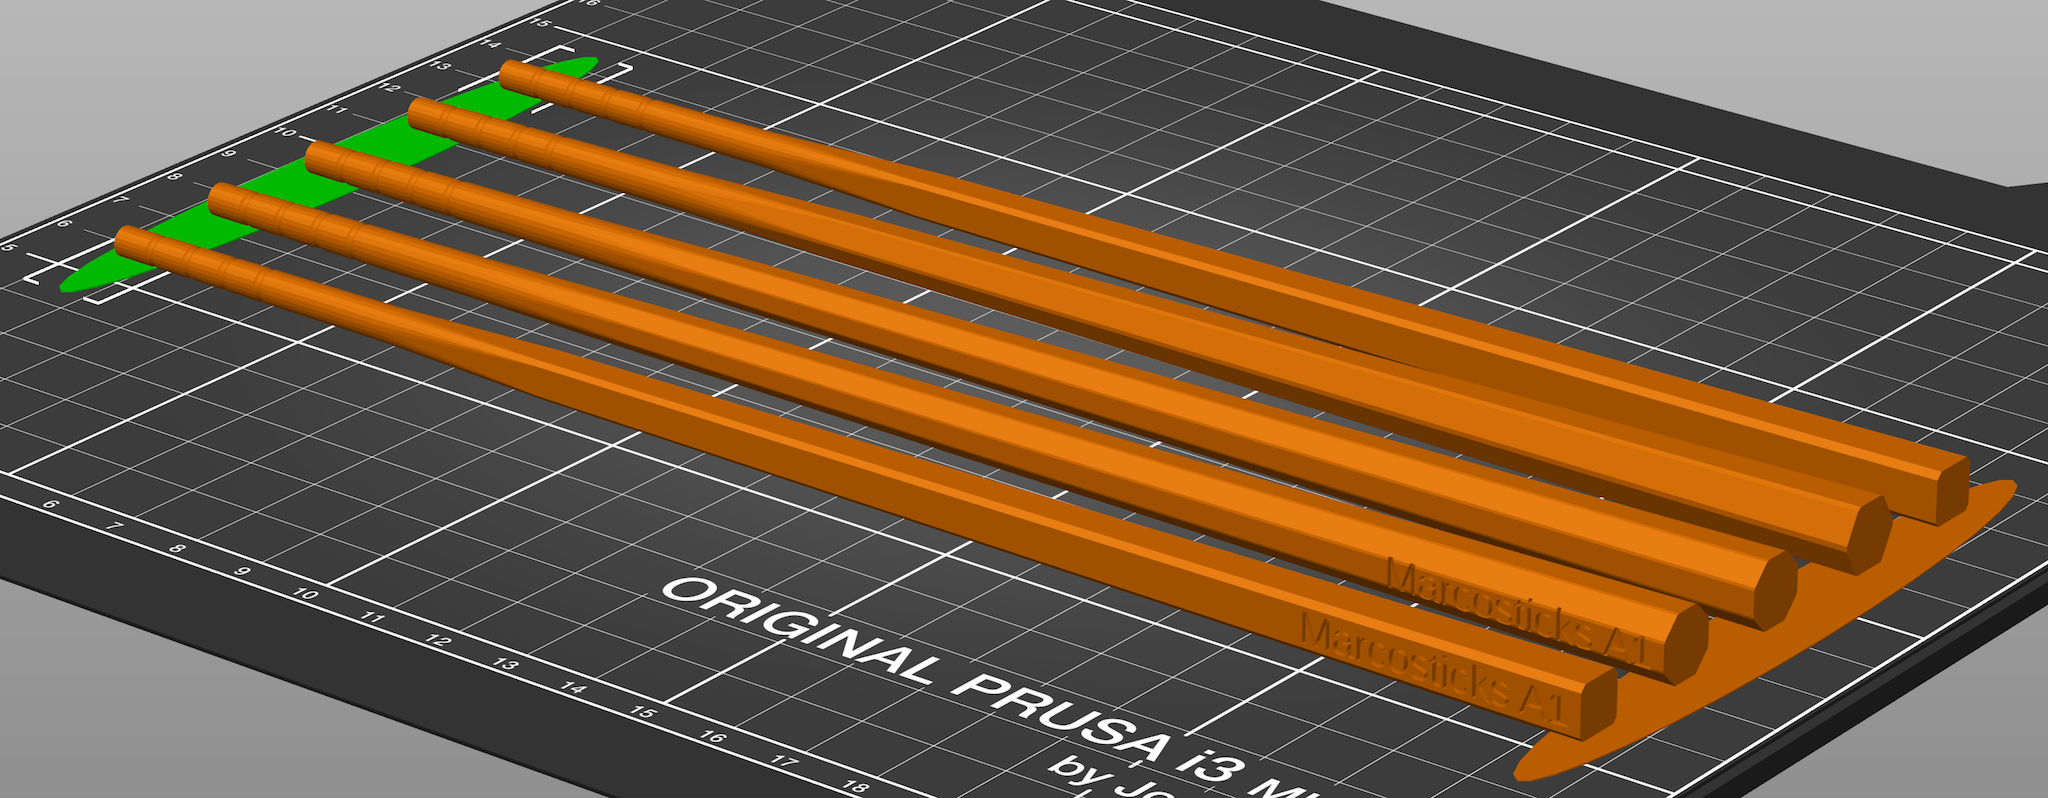
That’s right. Advanced Marcosticks (model A) are plain sticks. Once you graduate from other training marcosticks, you’ll be using the advanced model. You’ll find these aplenty online. We recommend square Japanese chopsticks, because they work best for Standard Grip, as explained here.
But you are welcome to grab our 3D models and print them yourselves on your 3D printers.
In addition to square chopsticks, we also make available models with hexagonal and octagonal cross sections. We don’t find these very useful, because the closer a chopstick approaches a cylinder, the more useless it becomes, with respect to the planetary gear train action. There is a reason why slippery, metallic chopsticks are extremely difficult to use.
Head to the Advanced Marcosticks 3D printing section for 3D models and instructions. For other learner and training tools, consult the catalog at the 3D-printing page.
That’s it, for now. Happy marcosticking.