Last Updated on January 30, 2022 by Staff
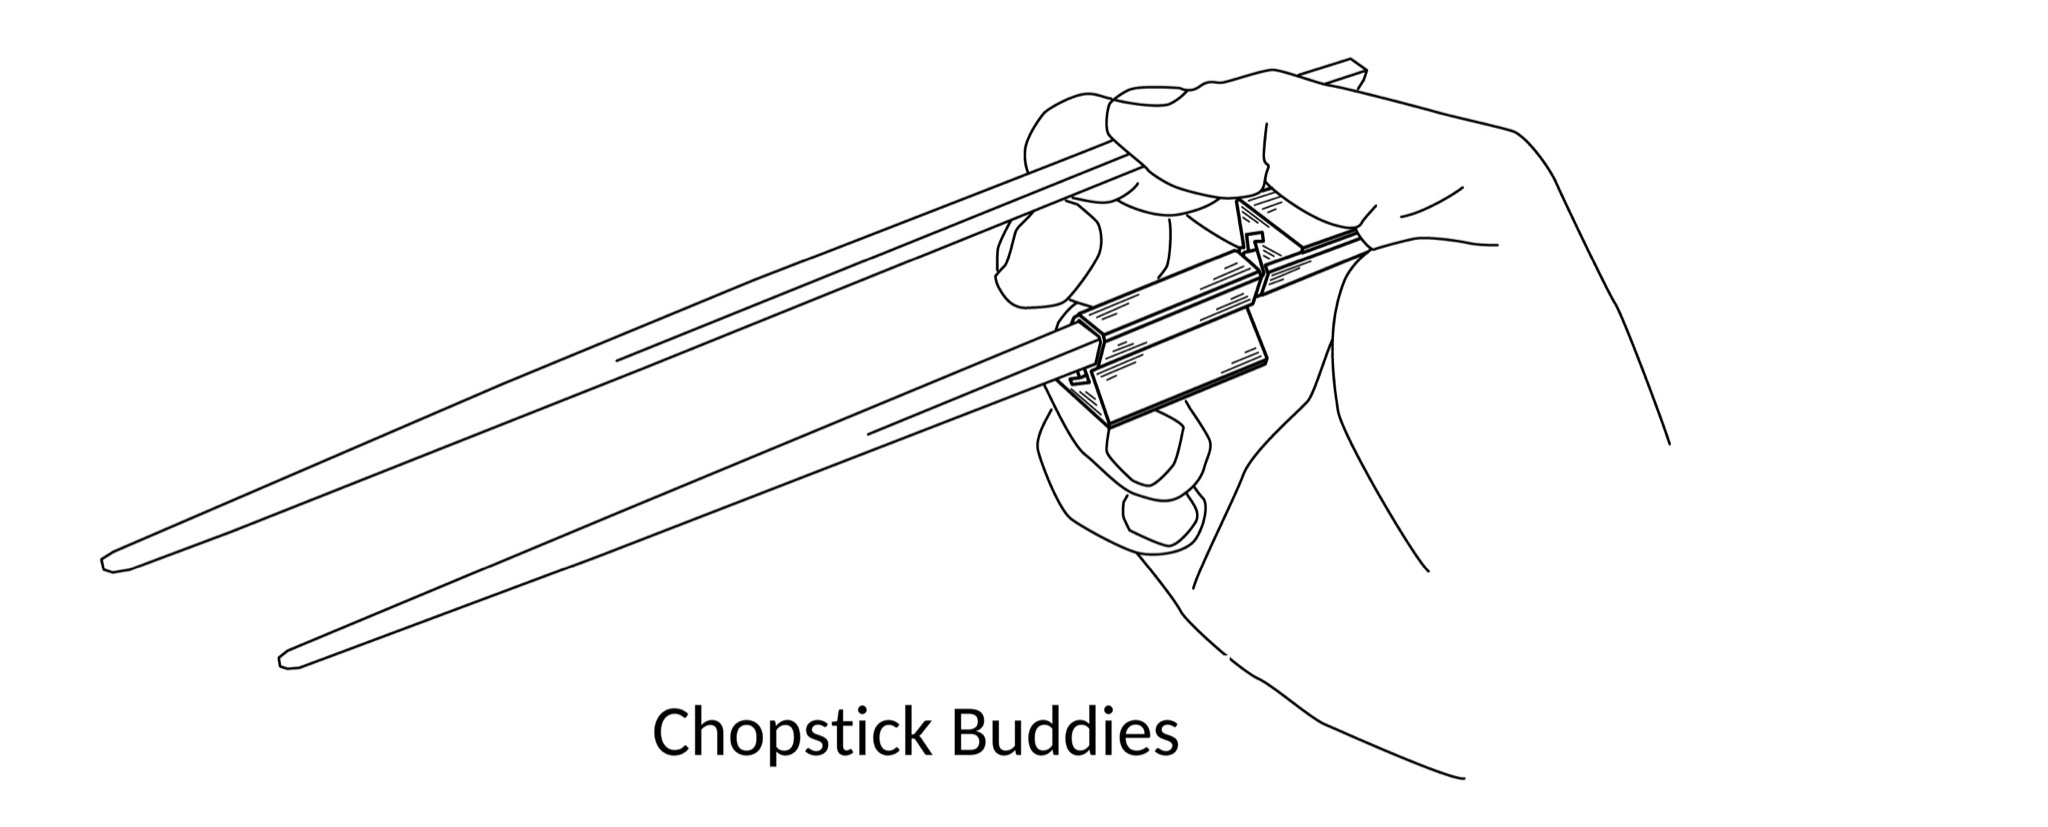
Do you experience chopstick cramp while using chopsticks? Chopstick Buddies address this underreported issue that plagues a large population of users.
Chopstick Buddies are attachments to a plain chopstick. They are designed for beginners, and for a sizable population who cannot hold unaided the Caswellian thumb pose required by the Standard Grip.
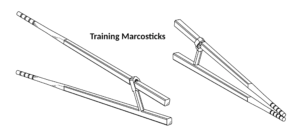
We have previously discussed, at length, our solution to the unnatural Caswellian thumb pose, in Model H: Finger Helpers, the immediate predecessor of Chopstick Buddies. Finger Helpers are attachments to our Model T: Training Marcosticks. These helpers allow any many users to twirl chopsticks using planetary gear motions with their fingers, for the first time. But these helpers only work with model T training marcosticks. They cannot be used on your favorite pair of chopsticks.
Chopstick Buddies fixes Standard Grip in the same way Finger Helpers do, with one difference. Chopstick Buddies do not require model T training marcosticks. They can be used with any plain chopsticks you fancy.
To learn more about various learner and training tools marcosticks.org makes freely available, check out Training Marcosticks That Work. For other learner and training tools, consult the catalog at the 3D-printing page. You may 3d-print them yourself, even though these training tools are covered by issued patents or pending patent applications. The following is a companion video on YouTube.
Table of Contents
How they help you
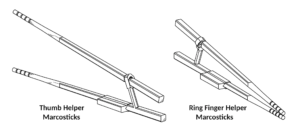
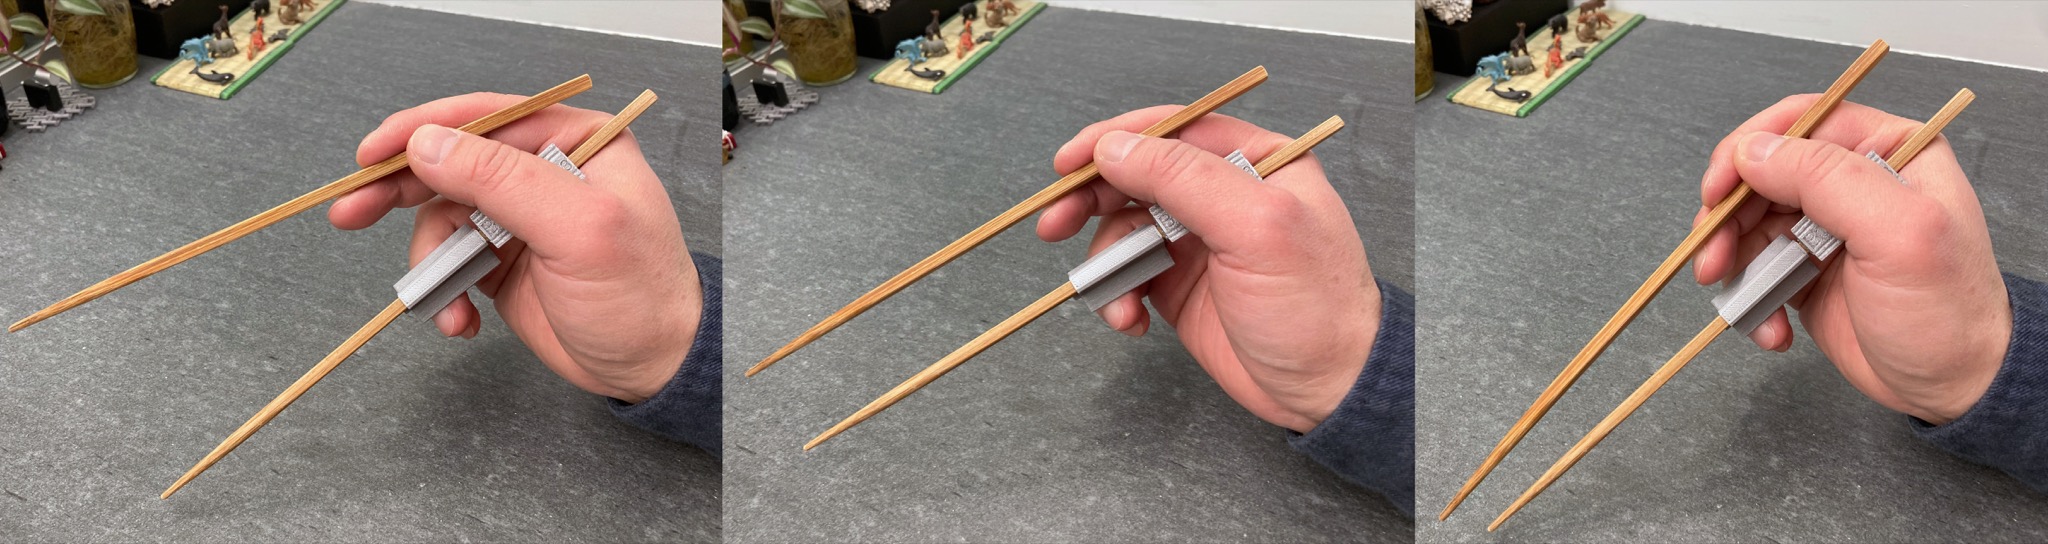
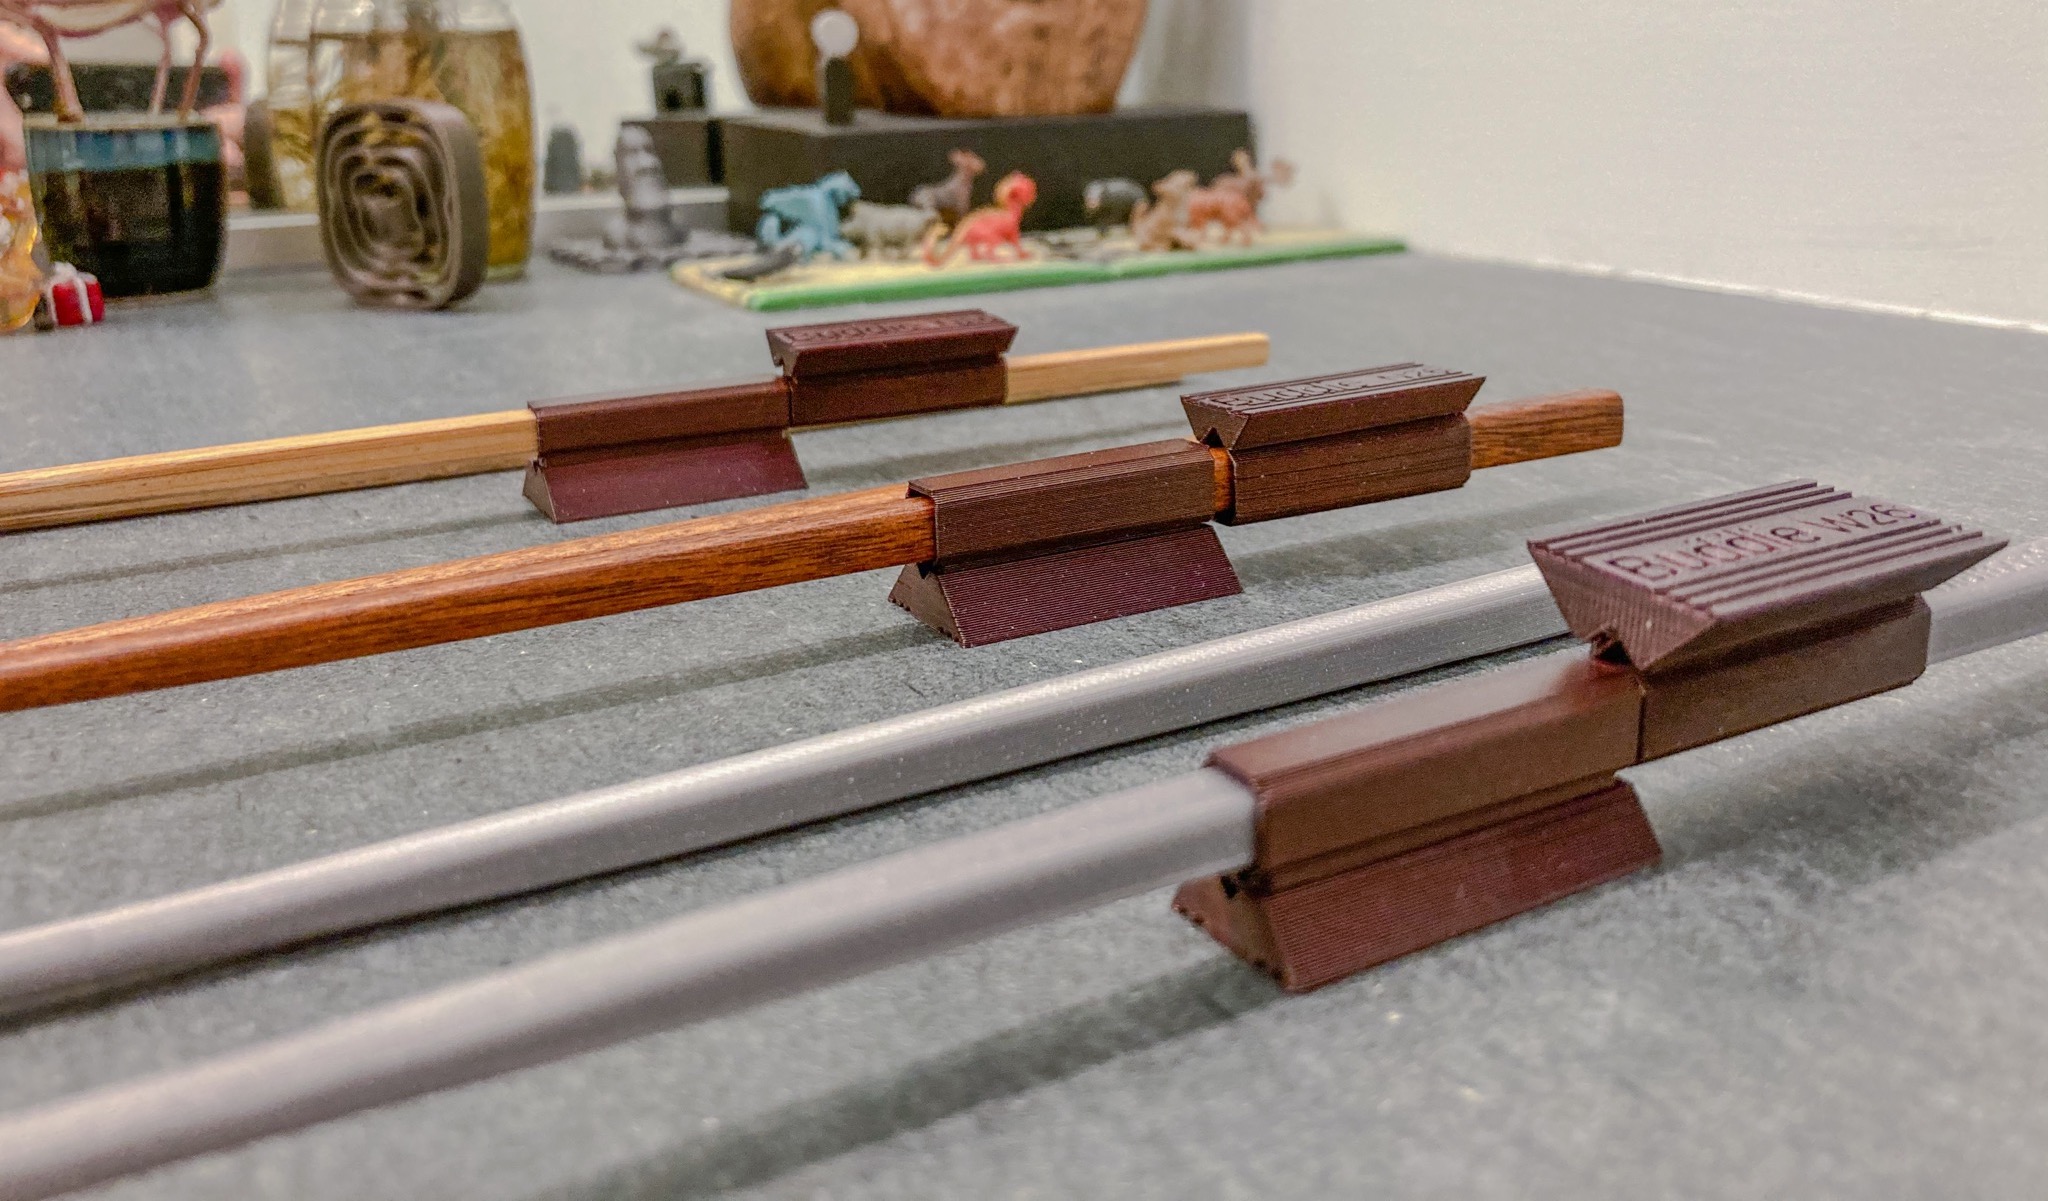
The following video shows how to attach two chopstick buddies to a chopstick. The buddie with a wider support surface props up the base of the thumb. The buddie with a narrower support surface abuts the knuckle of the ring finger.
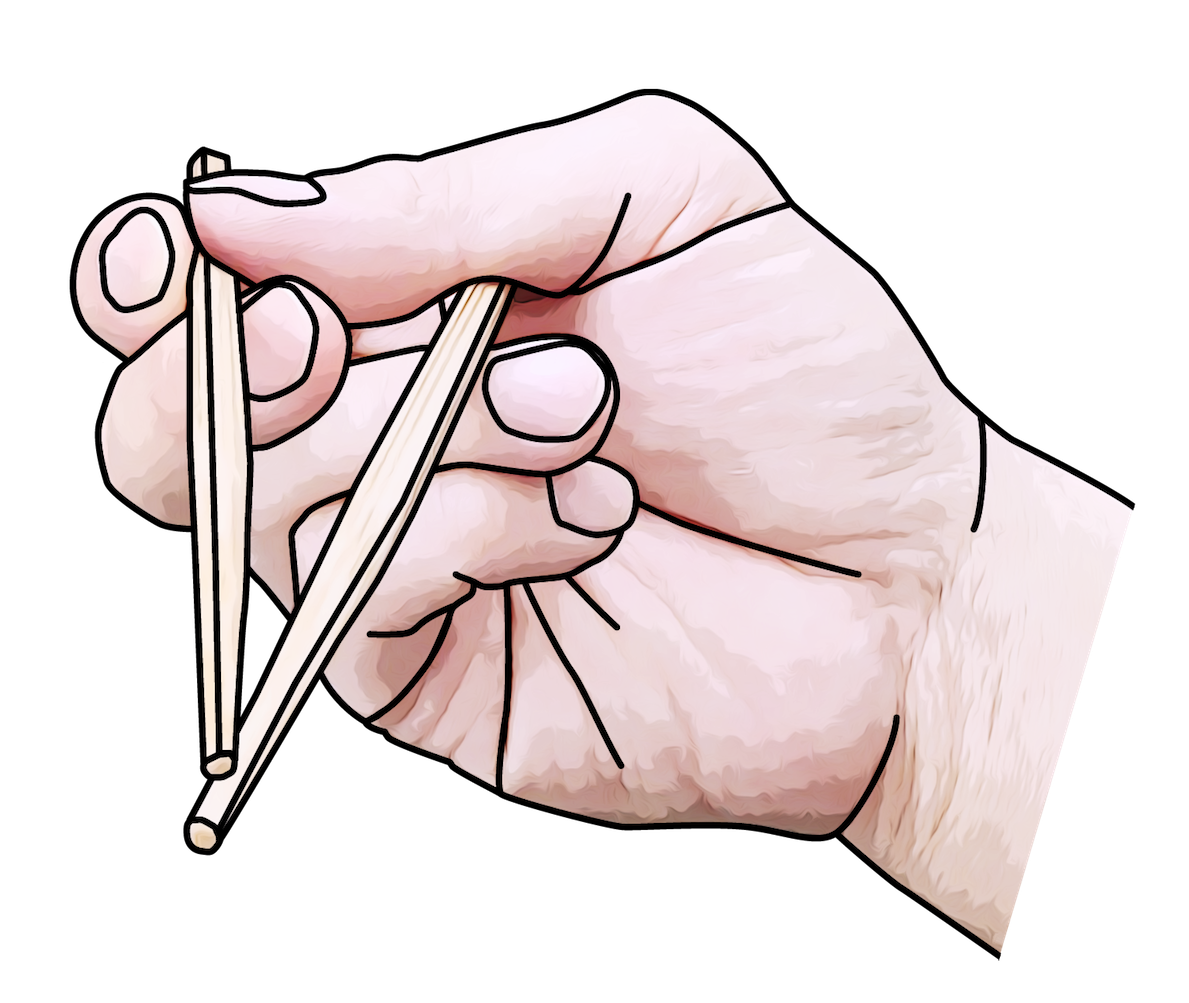
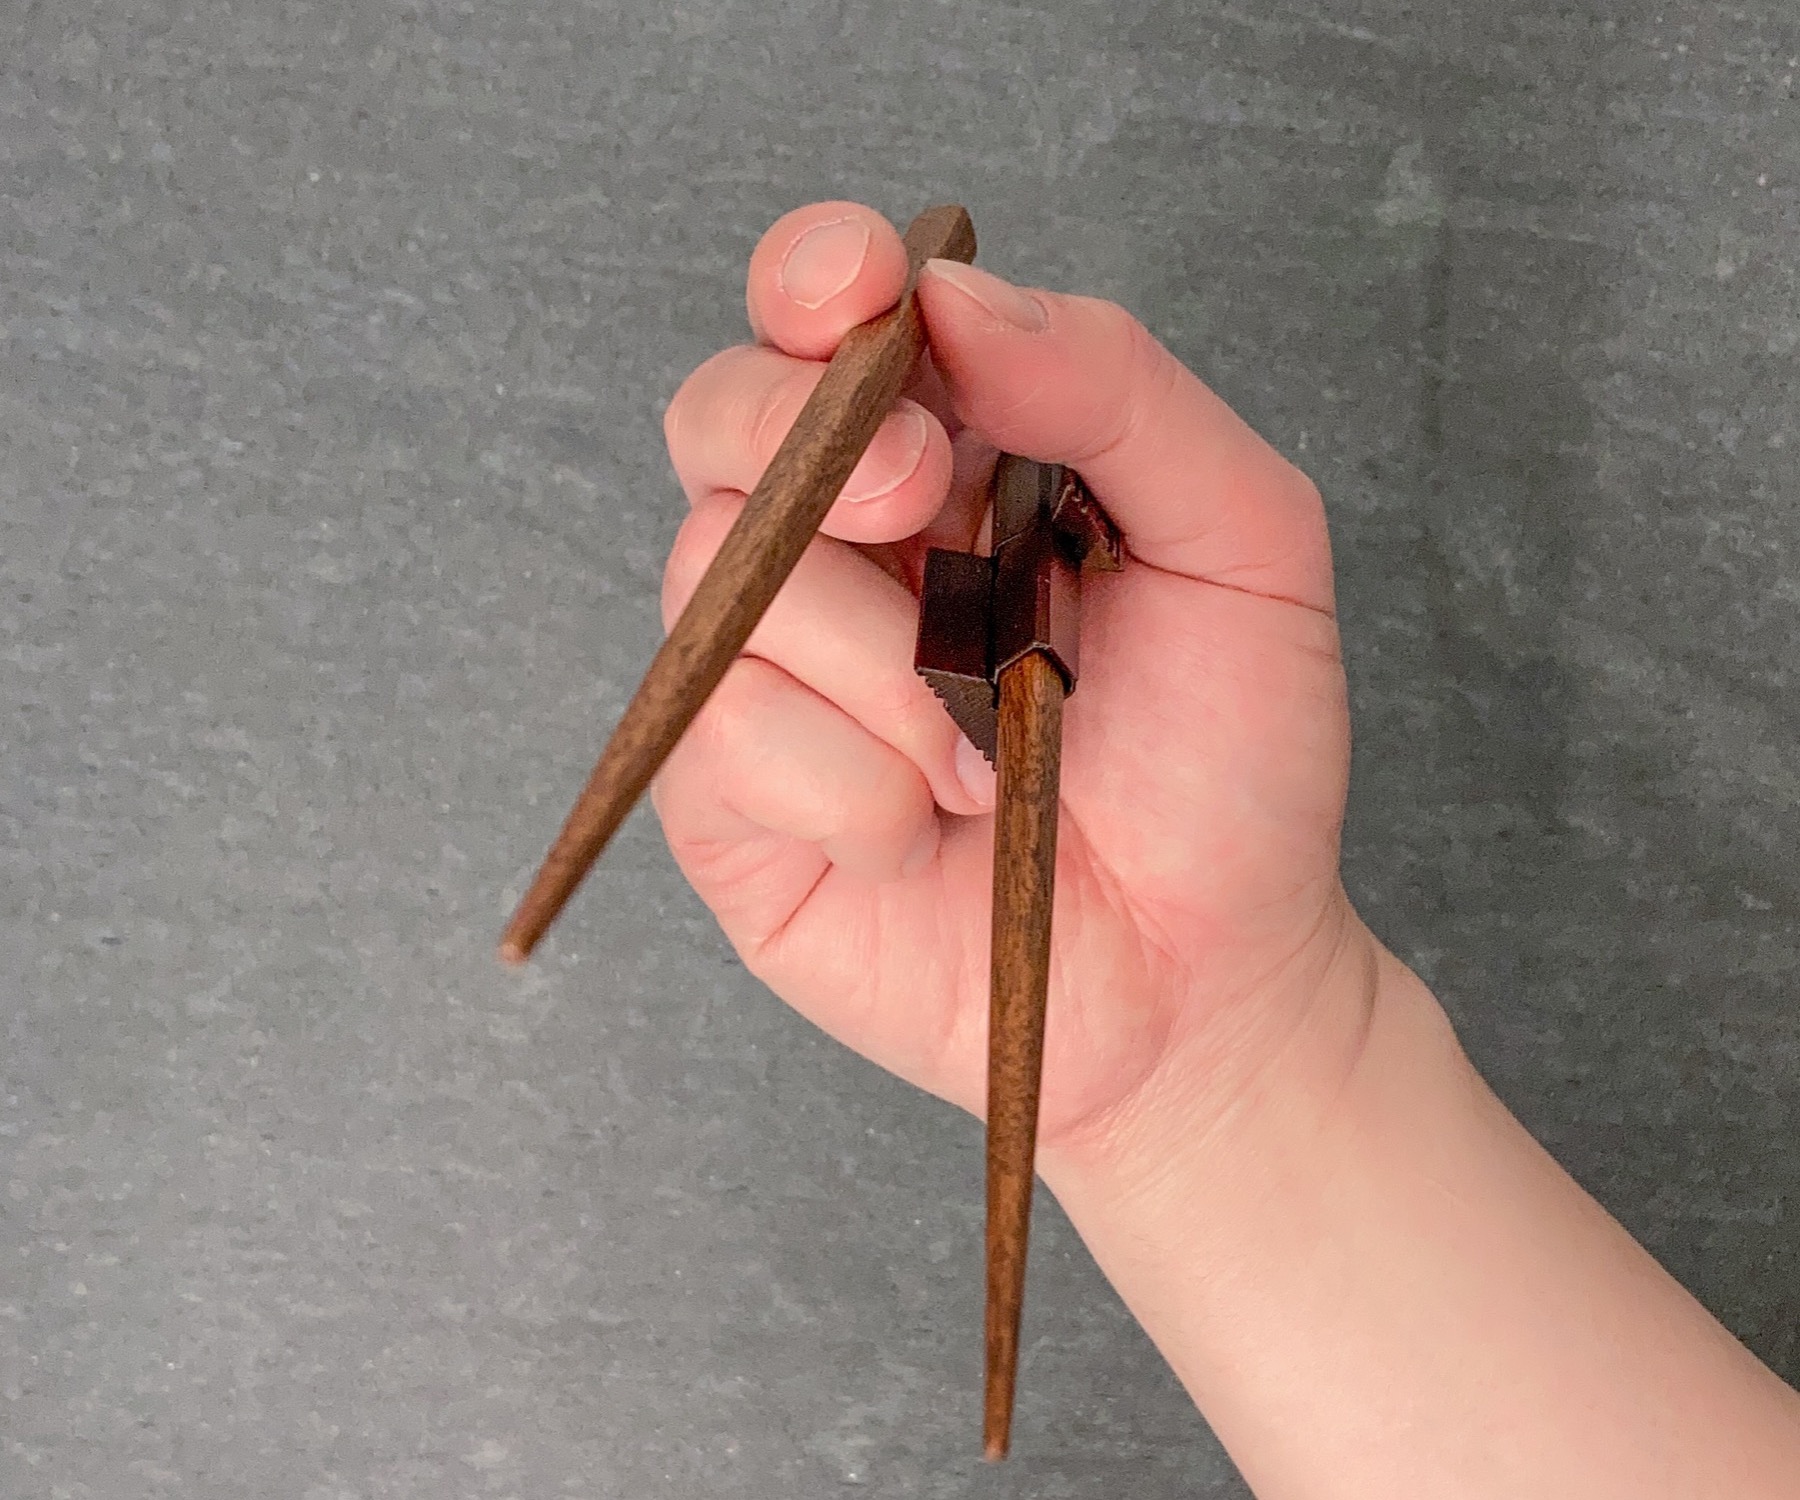
The next video shows how these two chopstick buddies help a learner avoid the unnatural thumb pose that Standard Grip otherwise requires. The split screen shows the unnatural thumb pose required by Standard Grip at the top. Notice how close the base of the thumb is to the ring finger, vertically speaking. Observe how the thumb needs to be flattened, while the thumb base is forced very closed to the ring finger.
The split screen show the same hand wielding Standard Grip, this time without needing to hold this unnatural thumb pose, on the bottom. This is made possible, because the two buddies allow the thumb base to be far separated from the ring finger. It allows the user to bend the tip segment of the thumb – a much more comfortable pose.
Chopstick buddies fix the Standard Grip
Our research shows that the unnatural thumb pose in Standard Grip is one major obstacle preventing a sizable population of users from ever mastering this grip, for some, despite lifelong attempts. In chopstick-using countries, young children are often ridiculed from not being able to use a “proper grip”. Yet, they are forced to use chopsticks to pick up food while very young. Adults do not understand that Standard Grip requires an unnatural thumb pose. They are also unaware that young children lack fully-developed muscles to master Standard Grip, when such a thumb pose is a key ingredient in making Standard Grip work. As a result, many young children find alternative grips that feel more comfortable, and never venture out of this early adoption.
Chopstick buddies fixes this inherent hurdle in Standard Grip. It removes the unnatural thumb pose from the equation. Suddenly young children and adult learners alike can use chopsticks with comfort and ease. Unlike other learning aids which alter finger dynamics, chopstick buddies teach exactly the same Standard Grip finger dynamics, including the signature twirling of the top chopstick by planetary gear actions… with the one exception – that unnatural thumb pose. It is no longer required.
Chopstick buddies are like all our training marcosticks in this crucial aspect – they all teach Standard Grip. Young children and adult learners can “graduate” out of these aids, and eventually use Standard Grip with plain chopsticks.
Model B1: single-piece chopstick buddie
Chopstick buddies come in two flavors. We make available 3D models for both of them. If you have a 3D printer, you can download these models and print them yourself. The first flavor is shown below. We call this a single-piece buddie. This picture shows two chopstick buddies attached to a chopstick. The “single-piece” refers to the fact that the trapezoid cap and the tubular sleeve of a chopstick buddie are built as one single piece.
These are modeled in OpenSCAD. Various combinations of cap sizes and sleeve sizes are available for download.

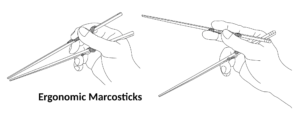
Recall that chopstick buddies derive from model H finger helpers that are used with model T training marcosticks. Following pictures show a finger finger helper being used.
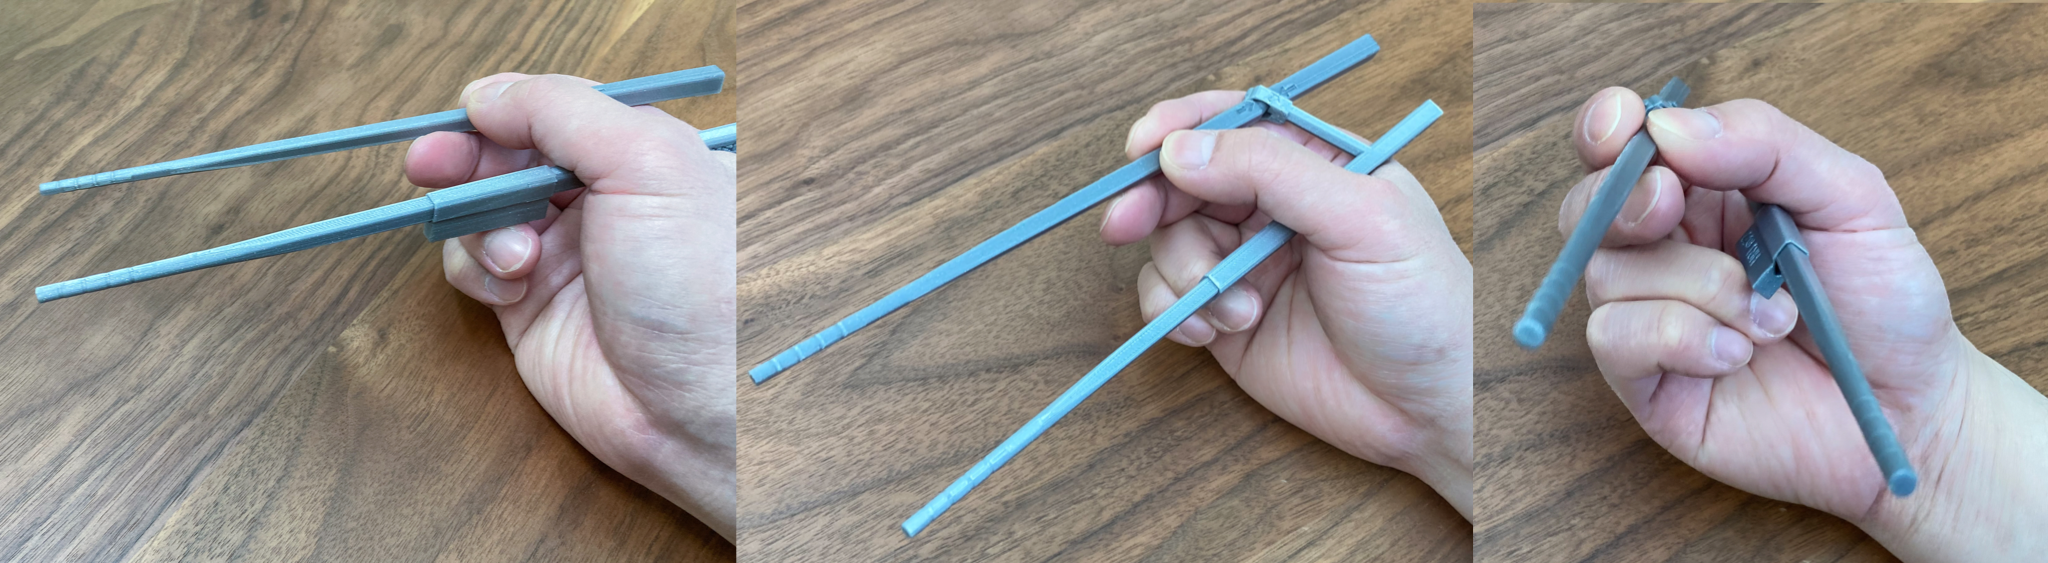
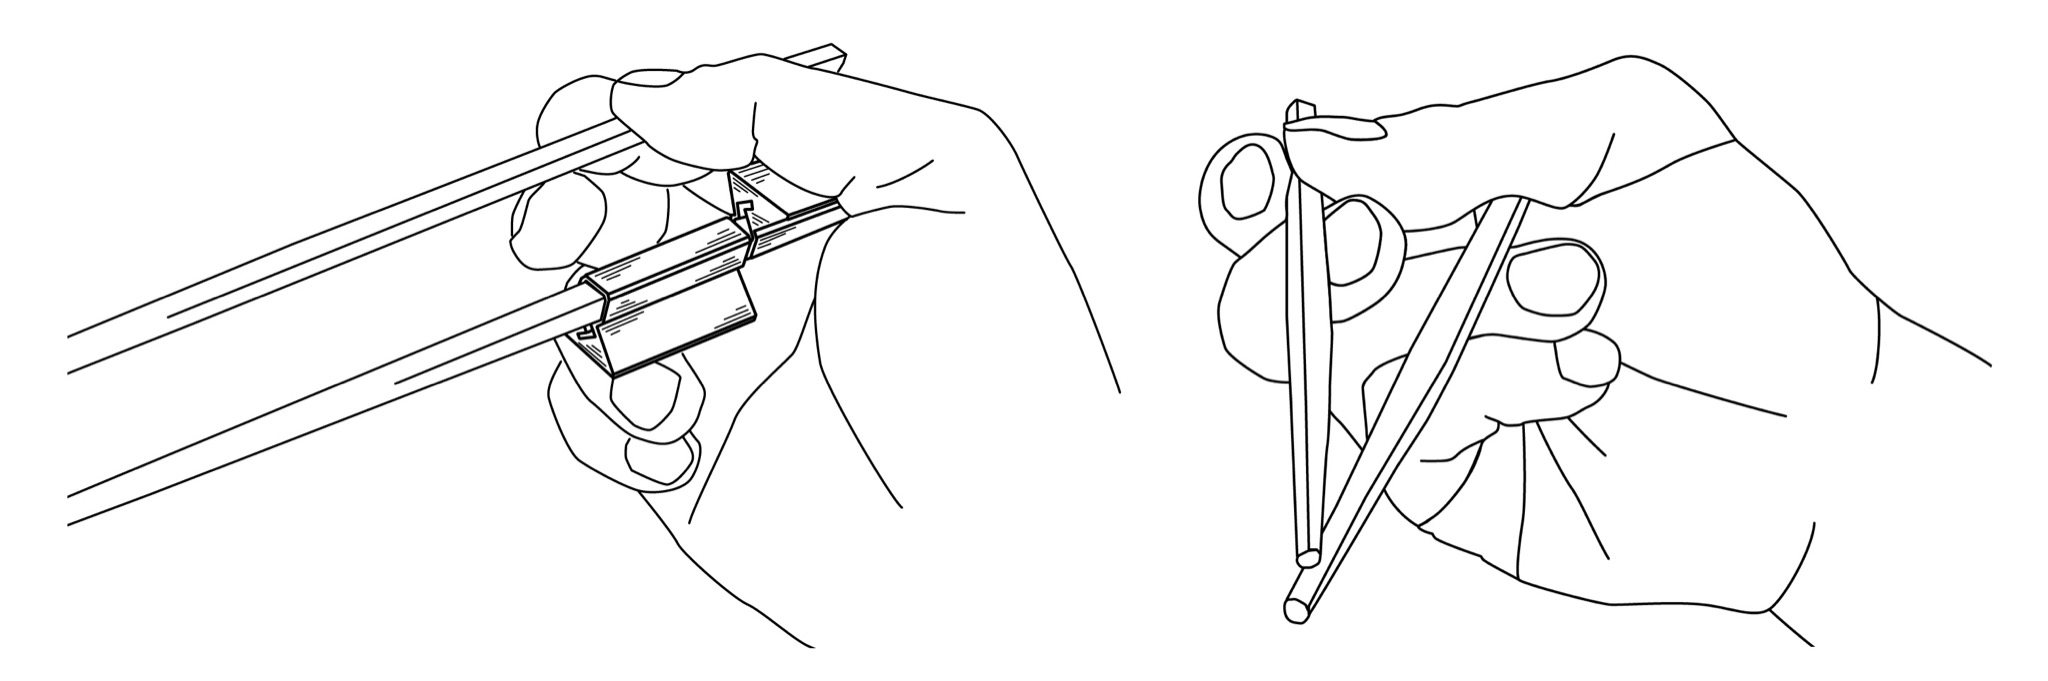
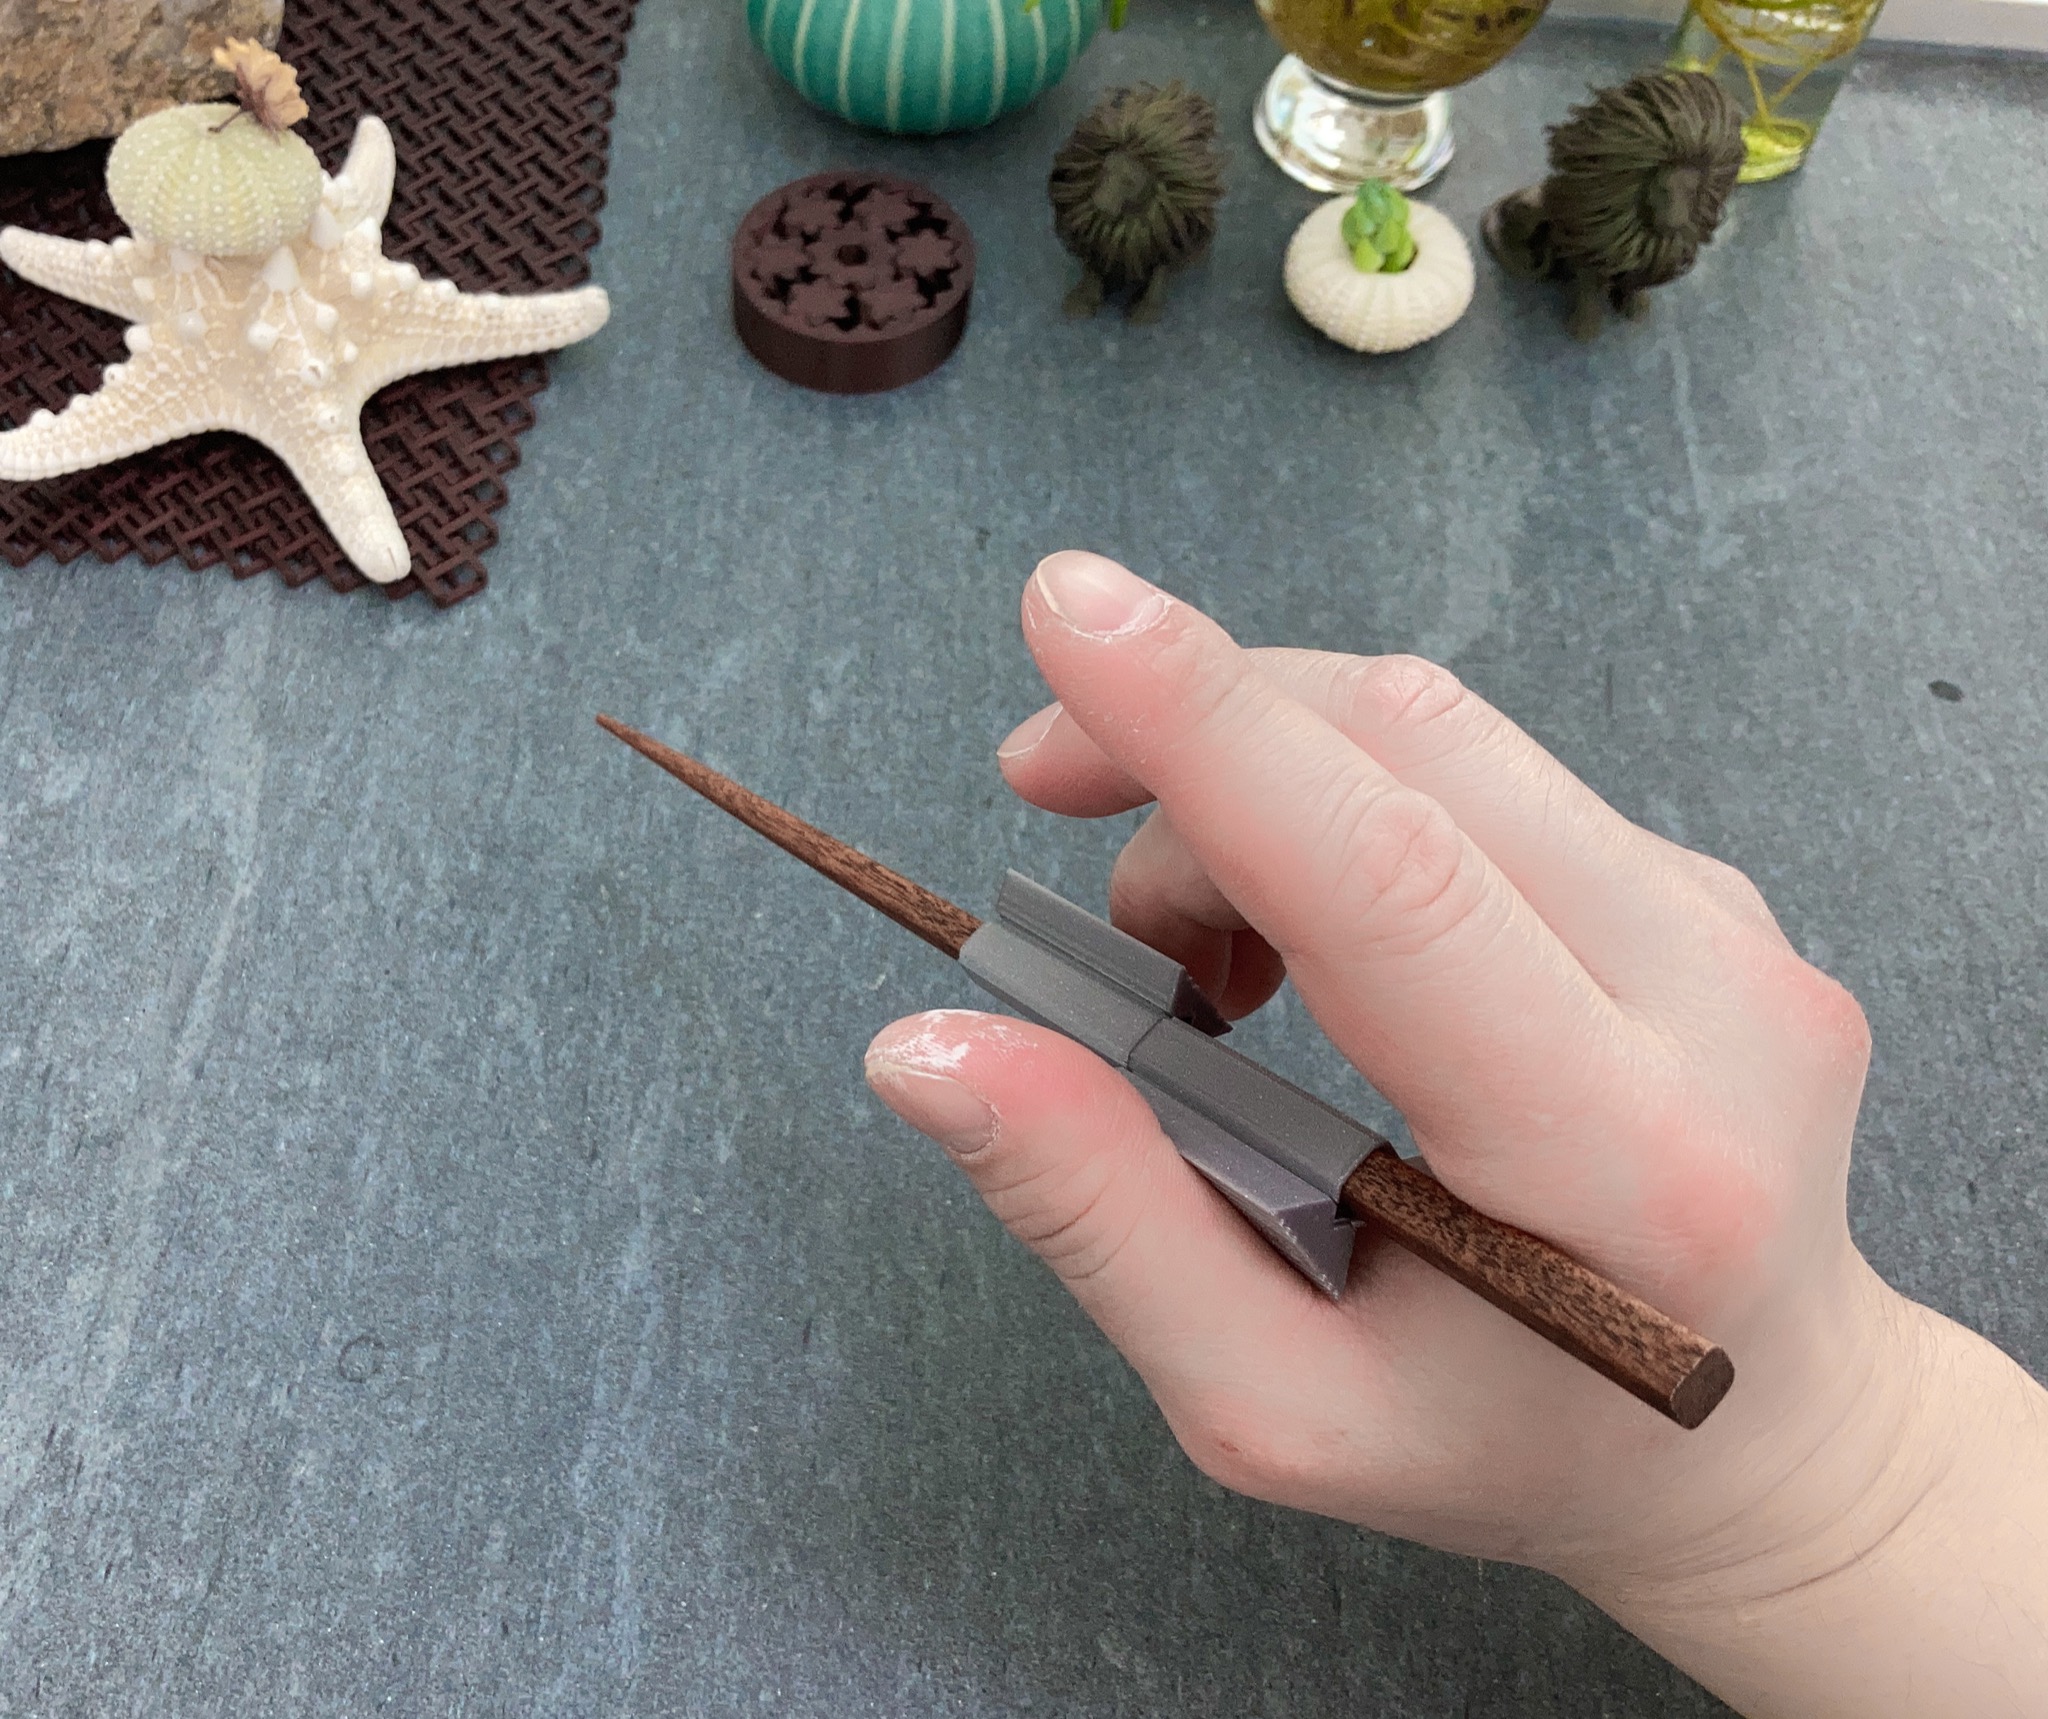
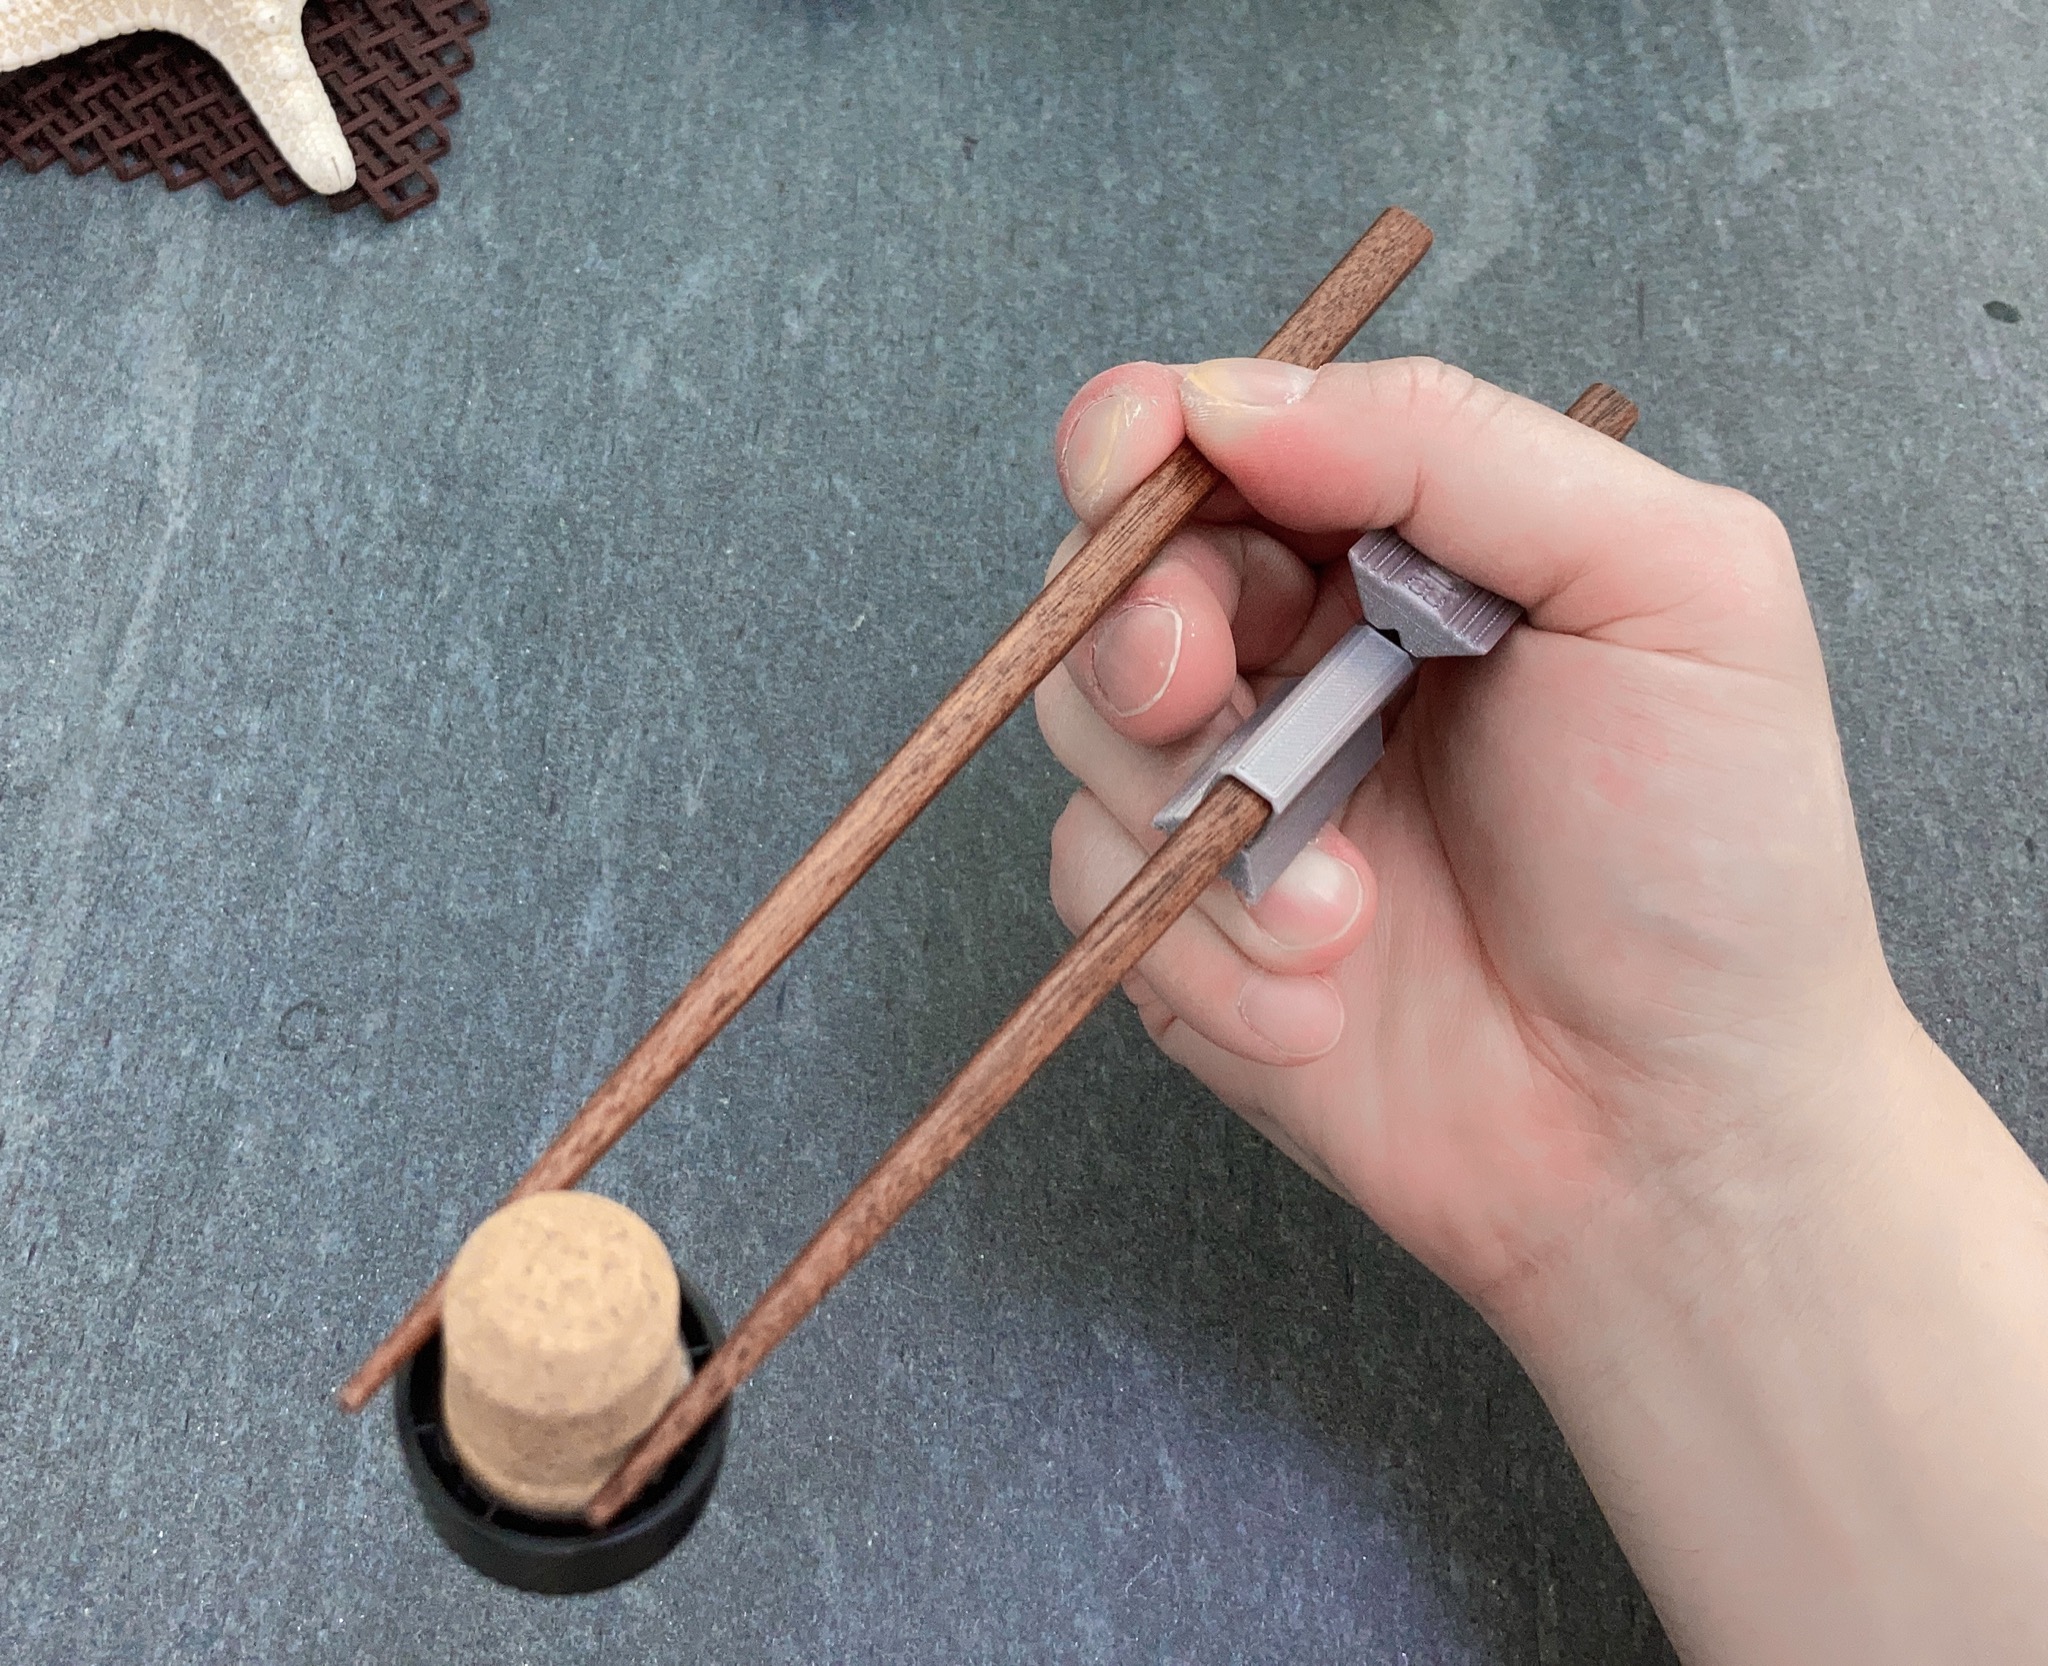
Following pictures show the equivalent of these, when chopstick buddies are used instead. The key difference is that model T training chopsticks are no longer needed. But there is one more difference. Note how the middle picture shows the user extending tips of chopsticks wide apart. This is only possible with chopstick buddies. Training marcosticks compromise on the range of chopstick movements, in order to keep the two chopsticks linked at all times.

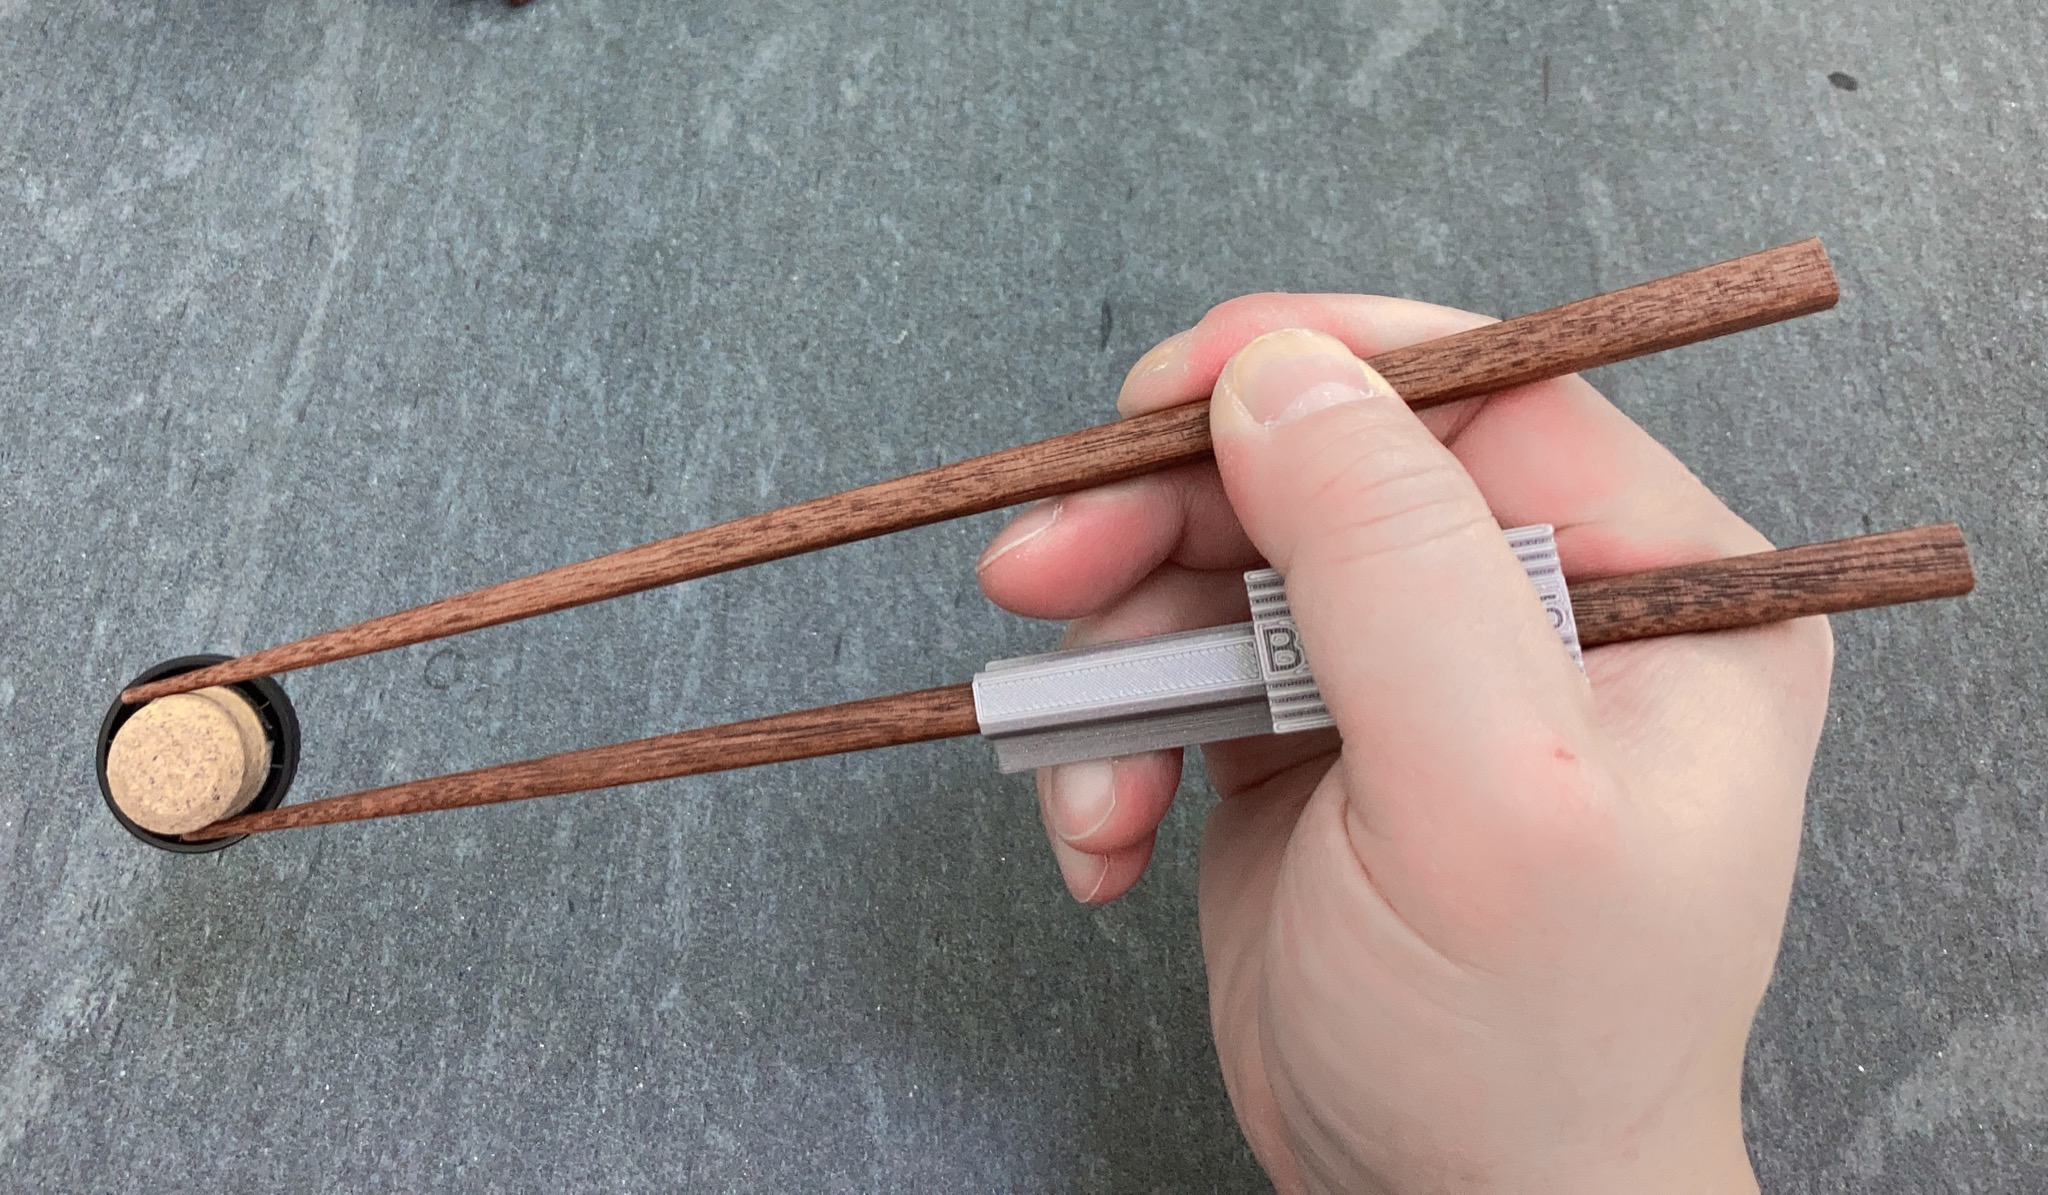
Following show these open, mid and closed postures from a different angle.
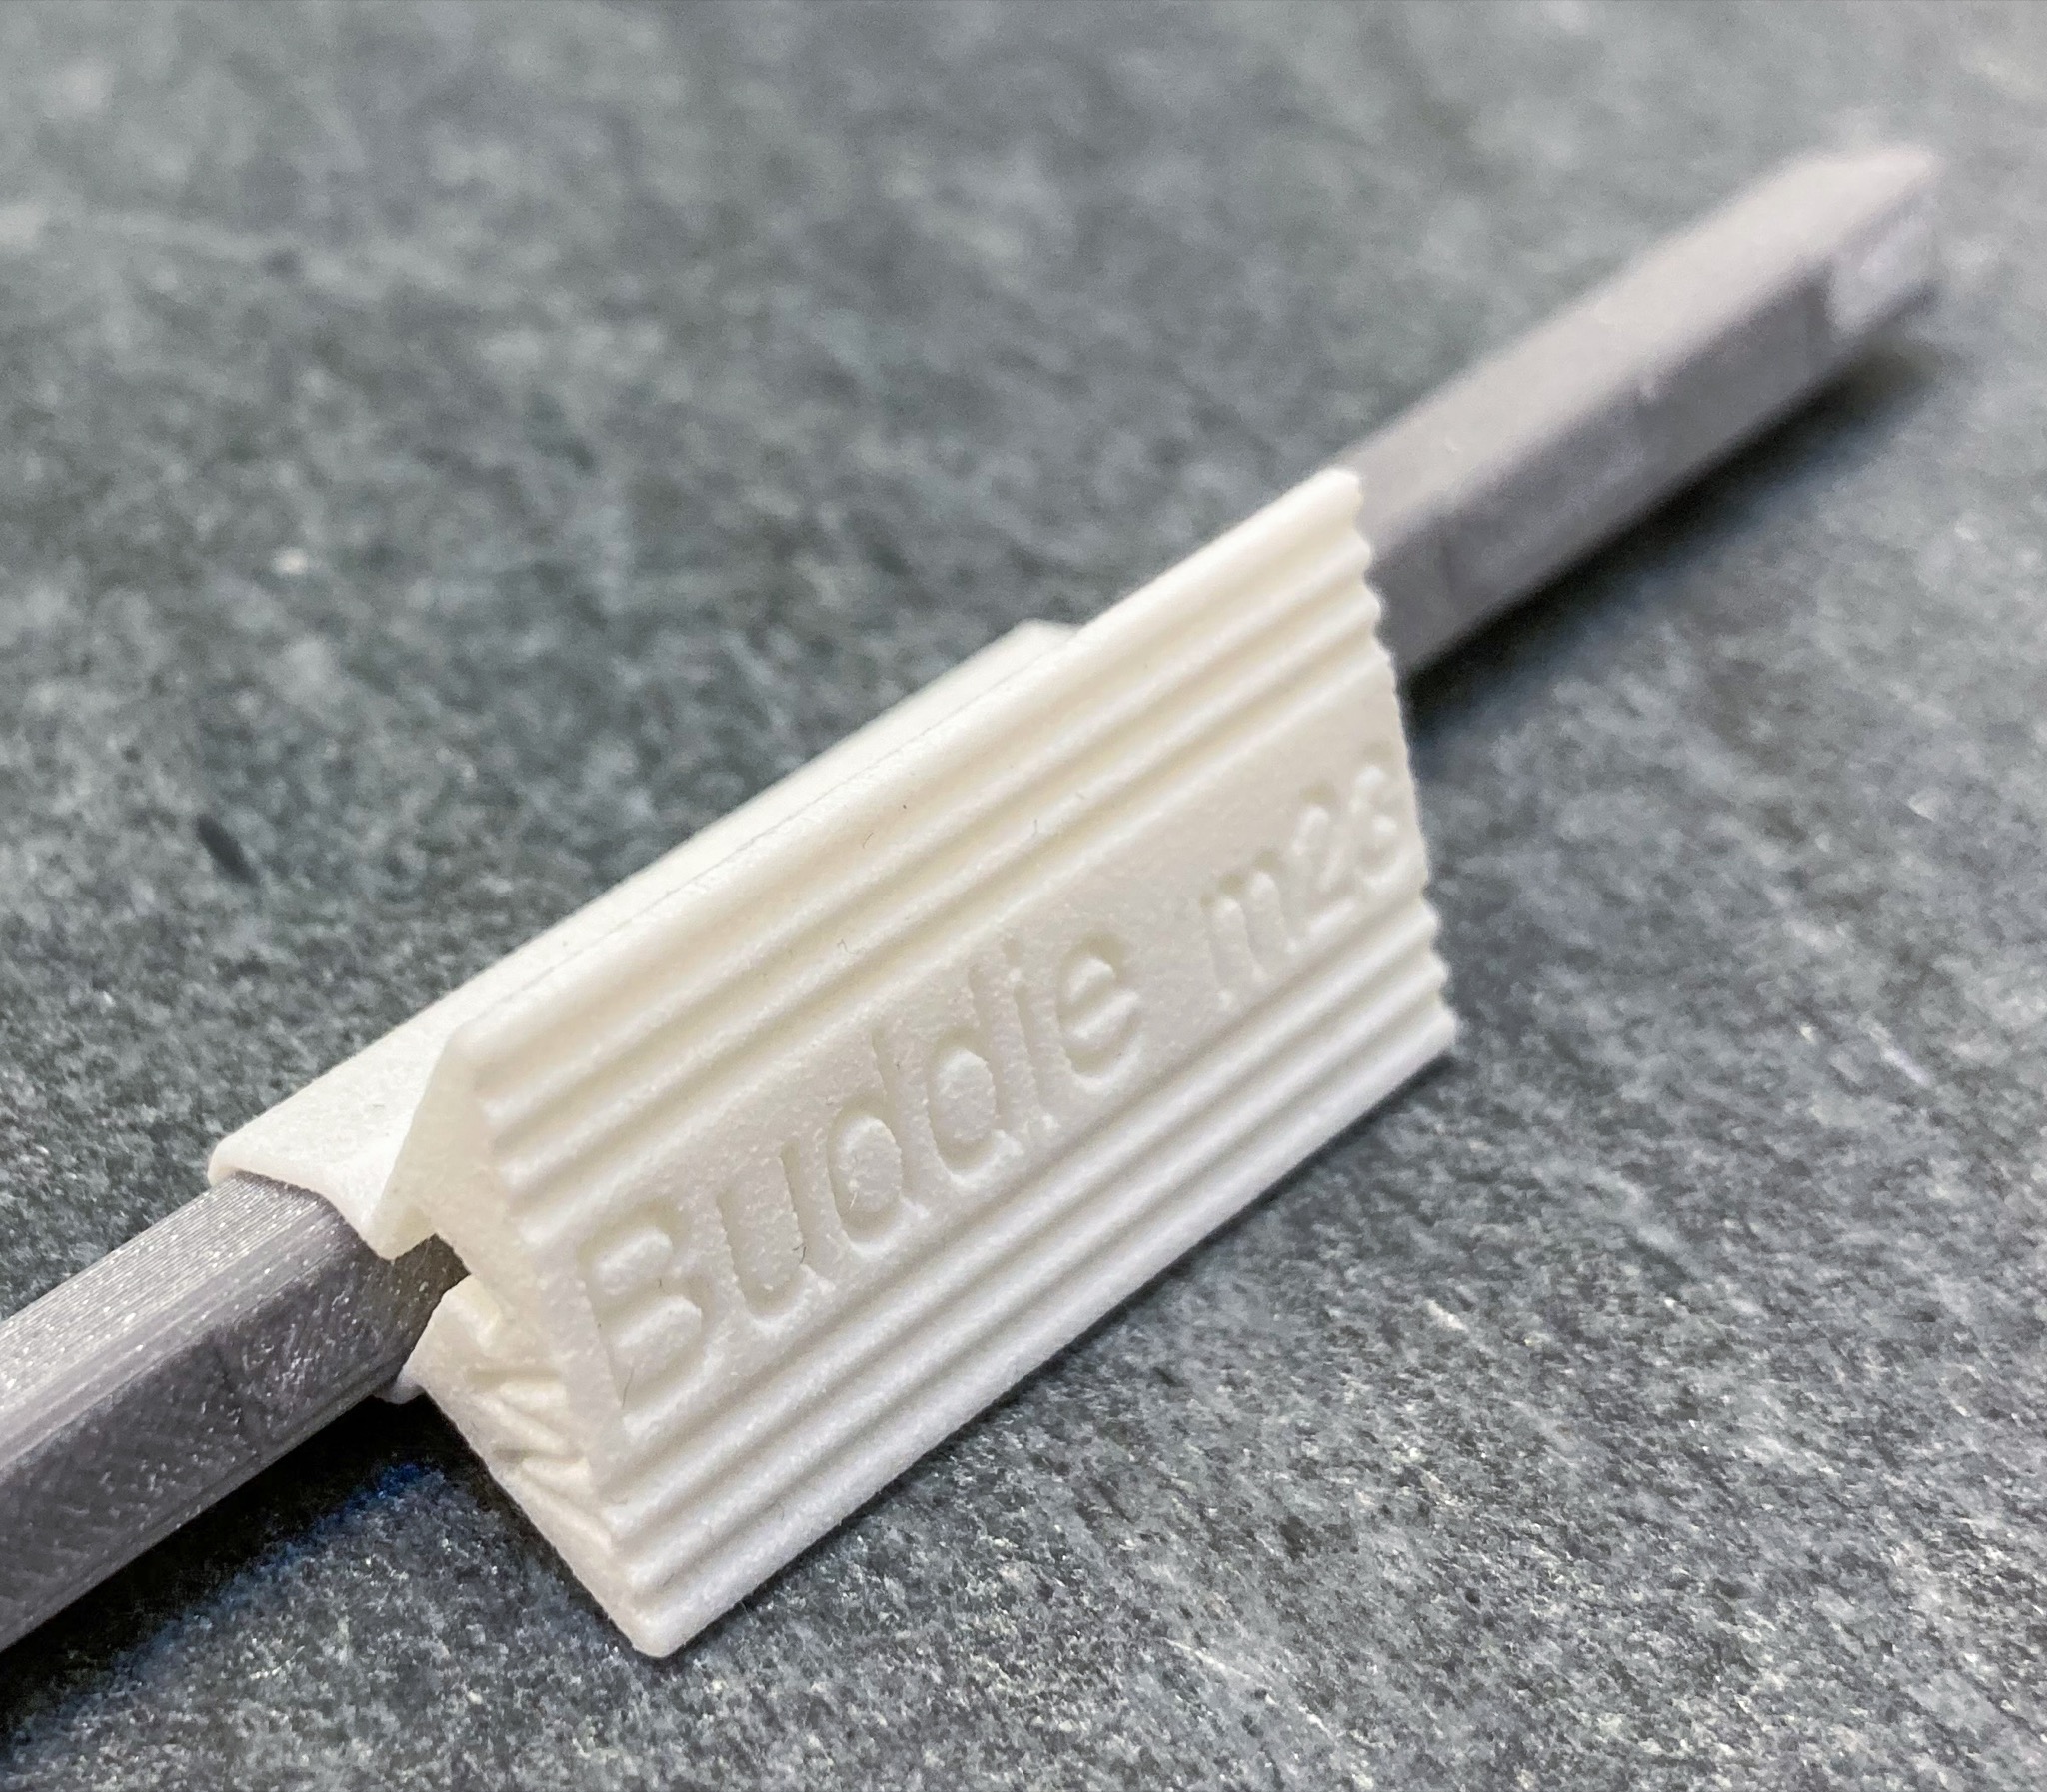
While several sizes of sleeves are available to support a wide variety of chopstick styles, friction fitting based on the sleeve alone may not allow you to fasten a chopstick buddie at the exact placement you need. You can use an optional adjustment strip as a wedge to fixate a buddie at the right location, as shown below.
In our patent application, we went into depth on why chopstick buddies take the shape they take – a trapezoid prism cap on a chopstick sleeve comprising a thin shell. In this short article, we’ll just summarize it as thus: this is the most parsimonious shape that still delivers the most stable chopstick holding experience for the hand. The large finger supporting area of the trapezoid prism prevents a connected chopstick from toppling over. The trapezoid prism shape fits the space between the purlicue and the thumb base perfectly. The tapering shape of the trapezoid and the thin sleeve shell ensure that a chopstick buddie never comes into contact with moving fingers and parts of the hand, during the use of chopsticks.
Model B2: two-piece chopstick buddie
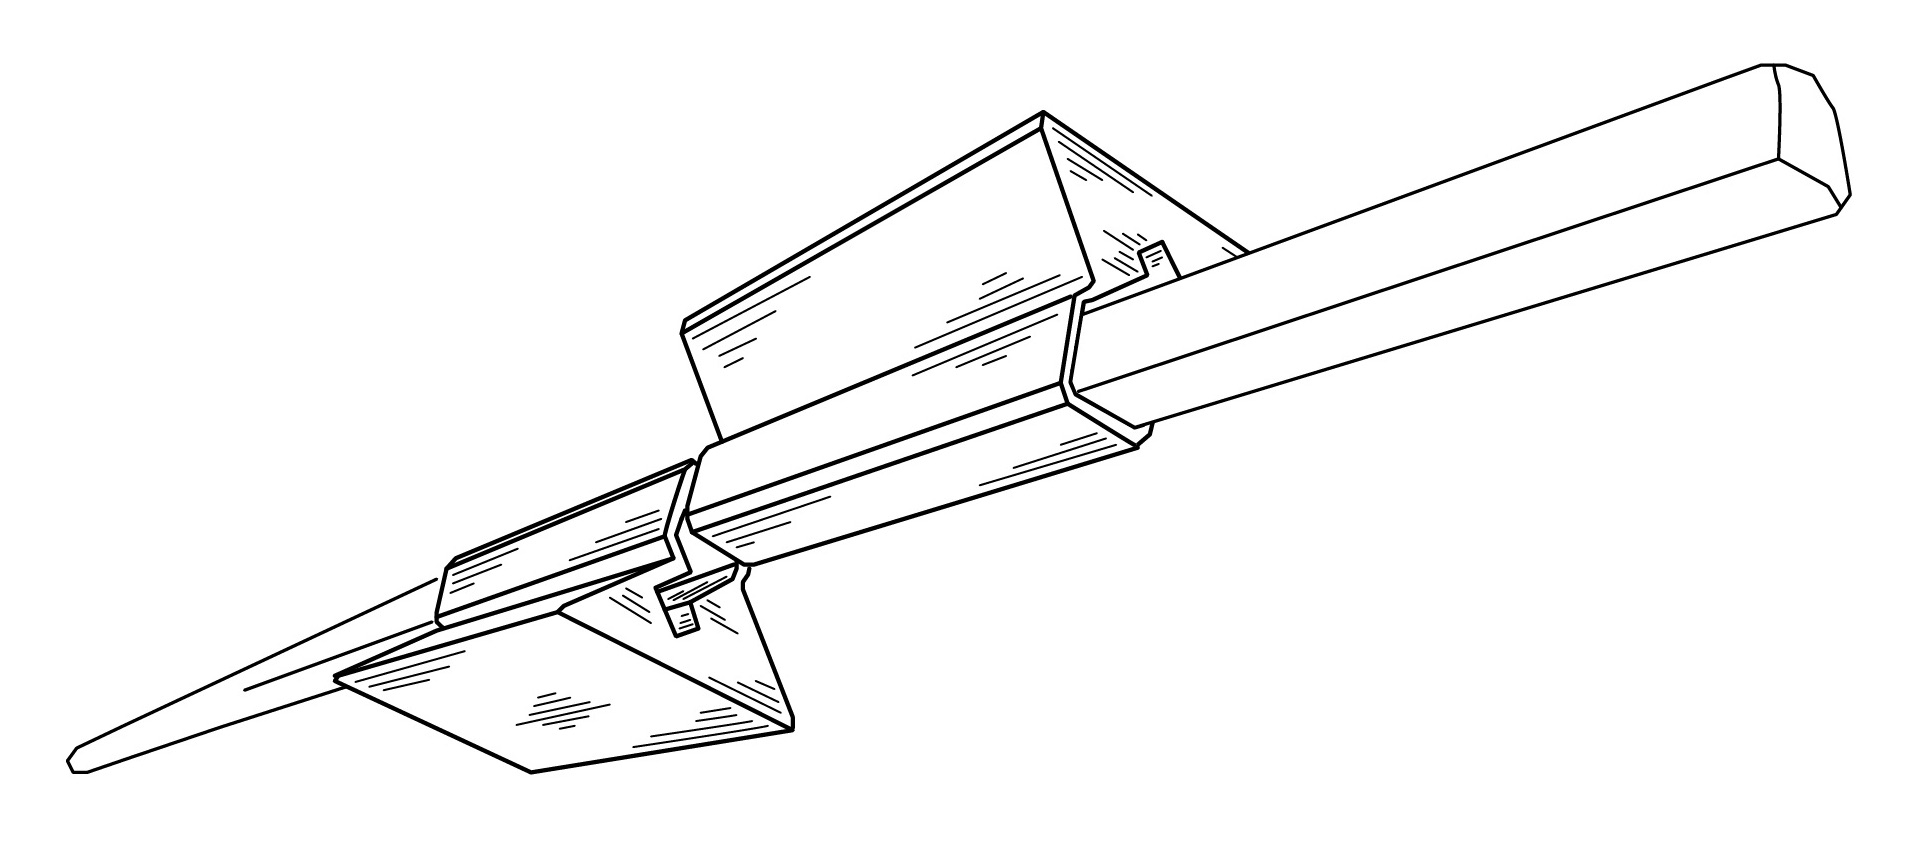
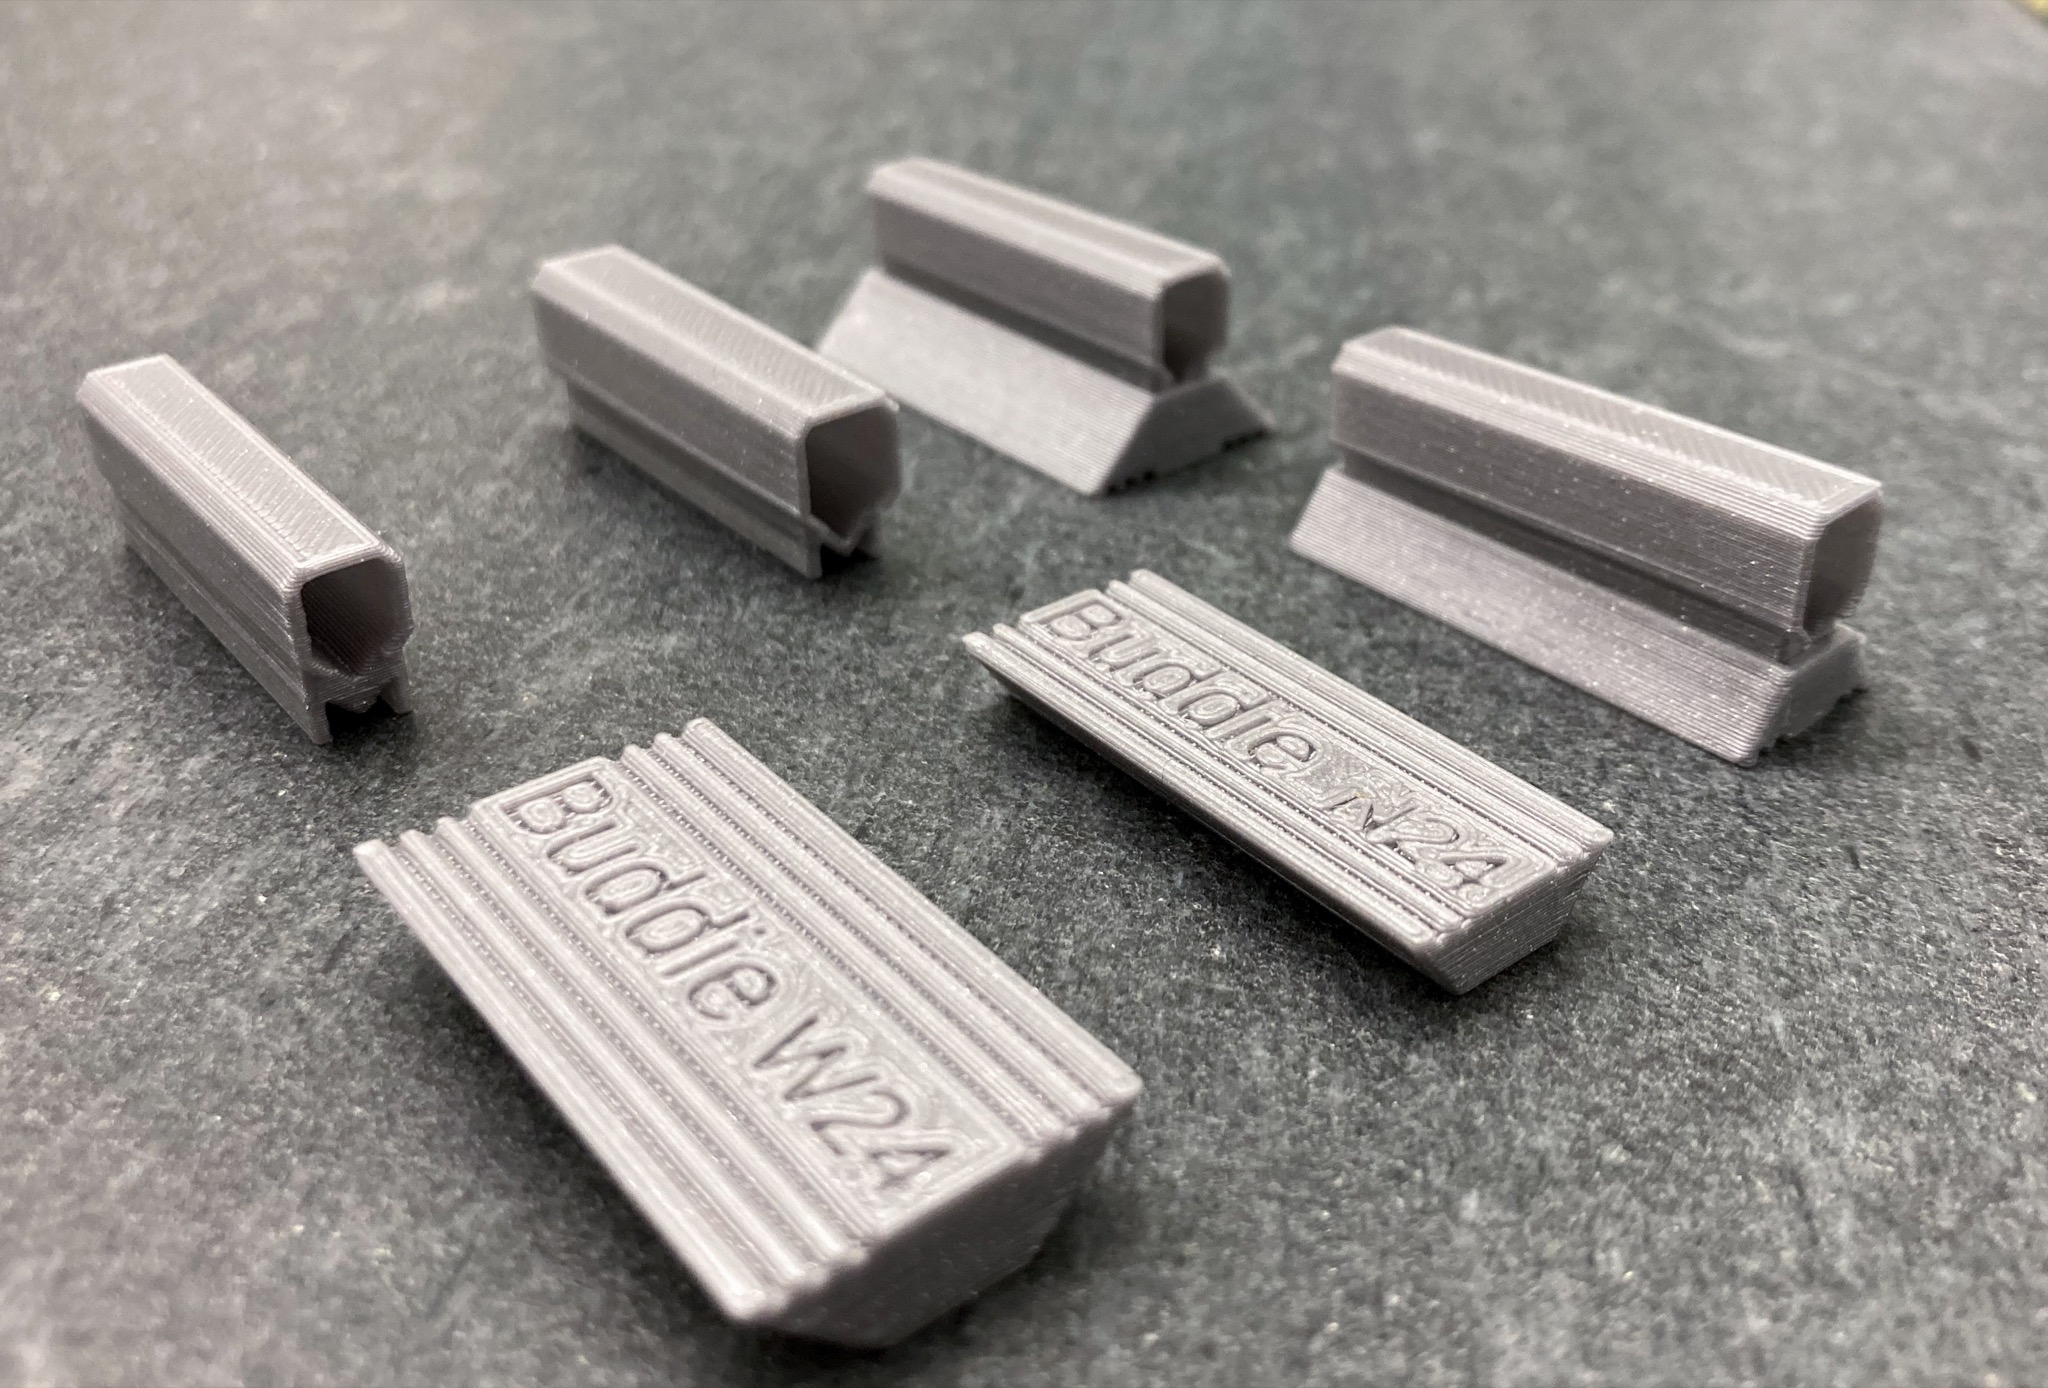
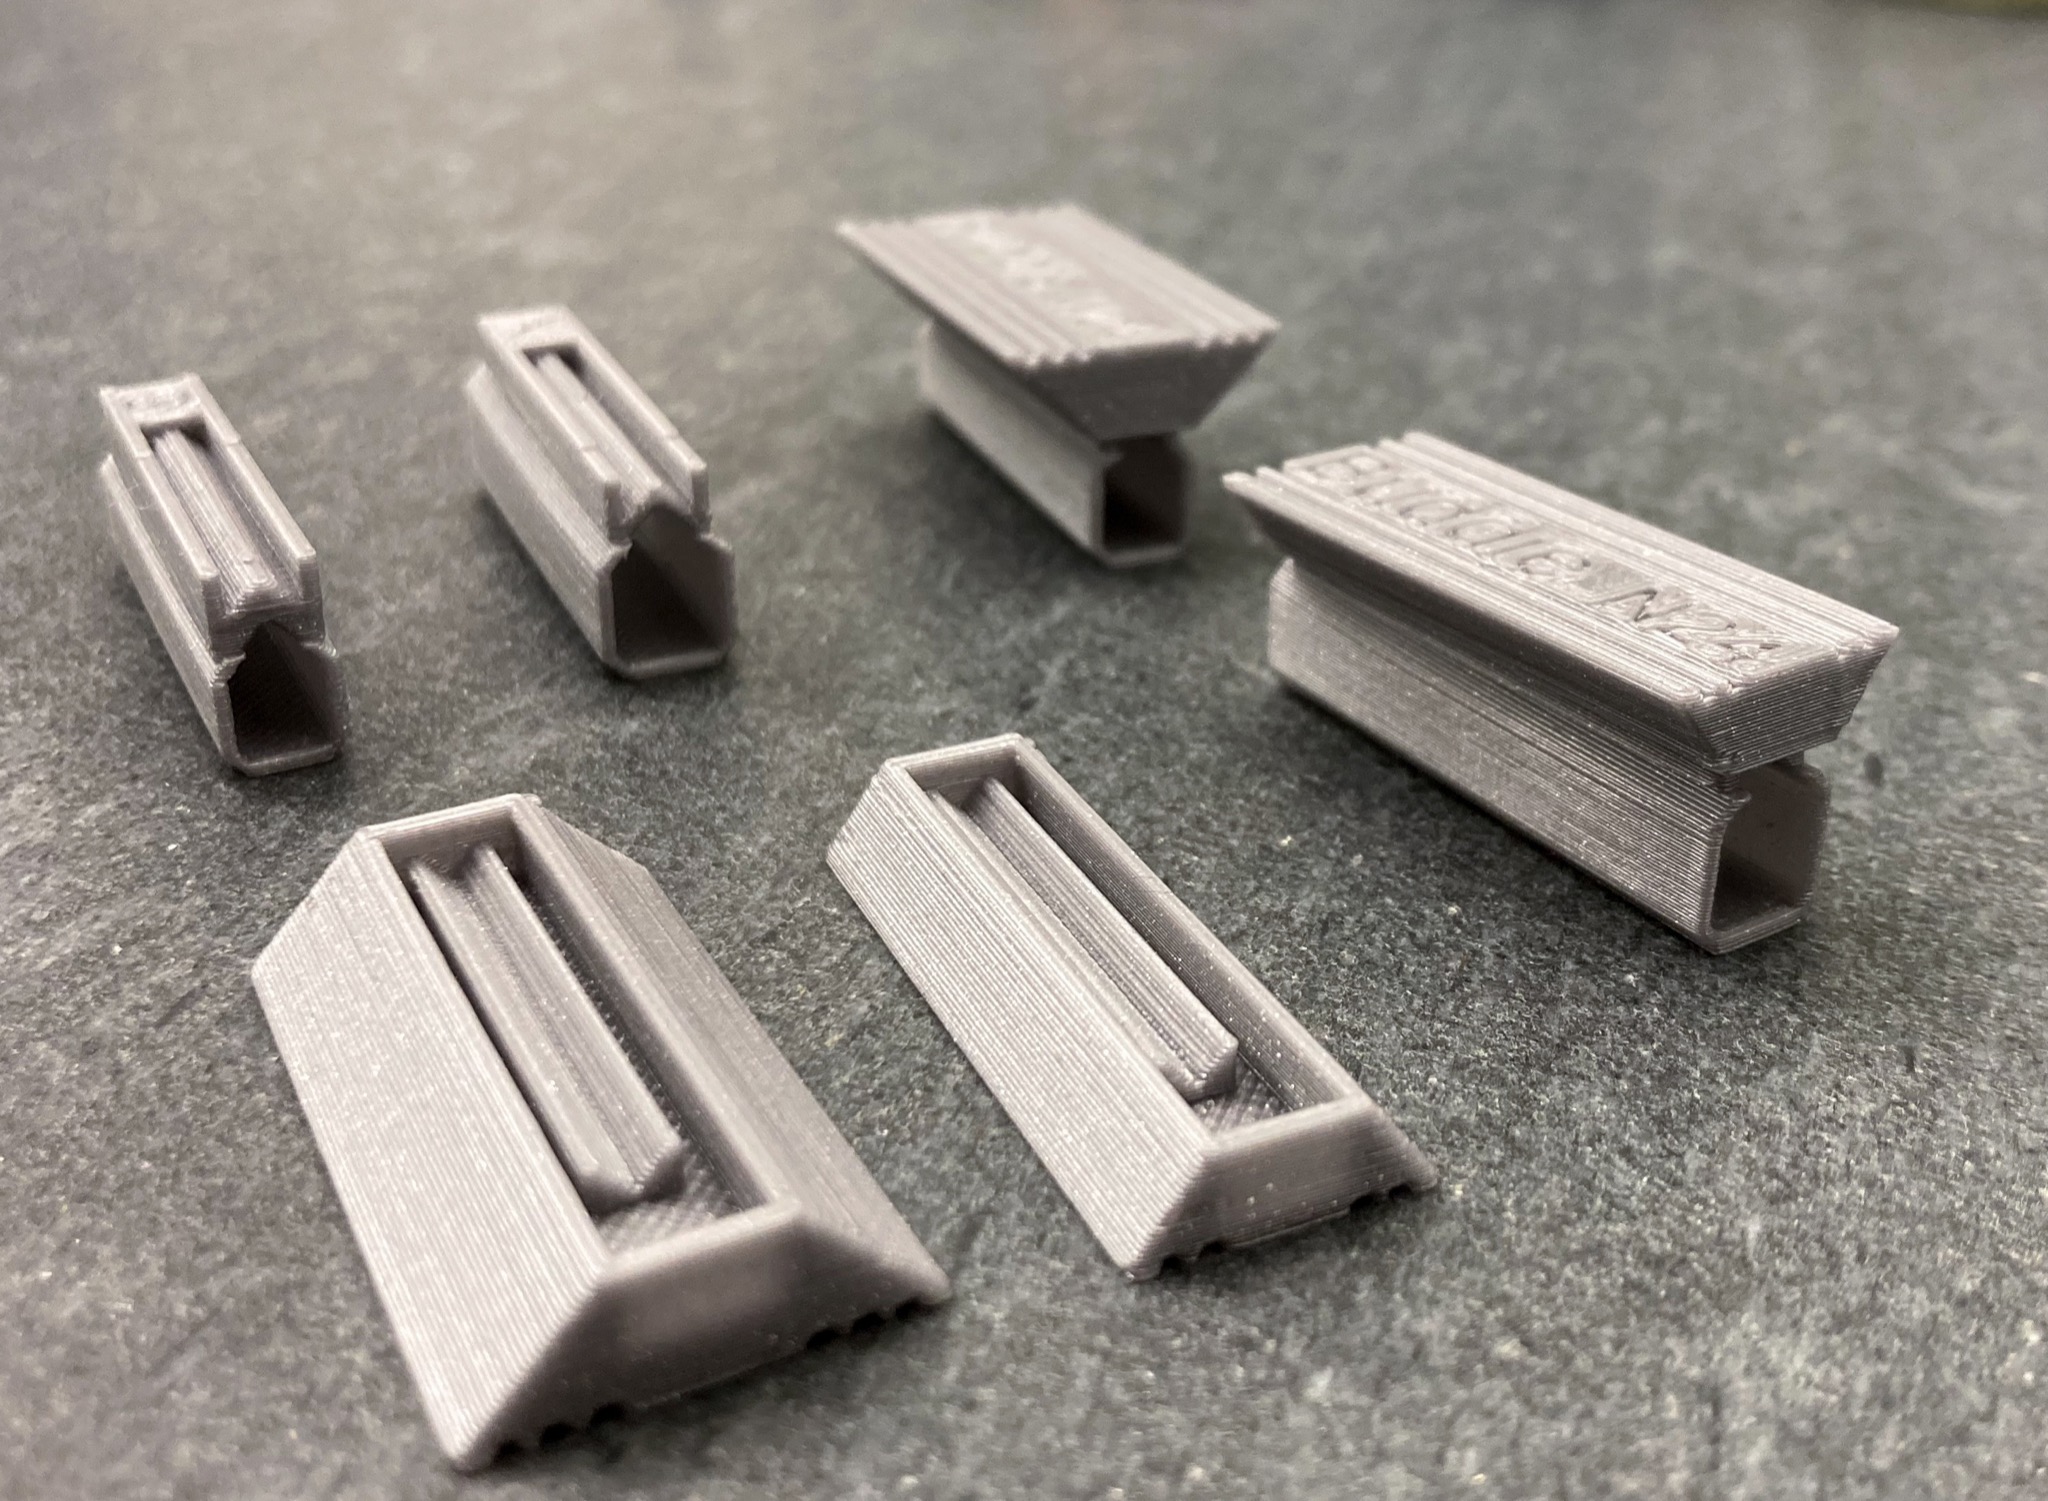
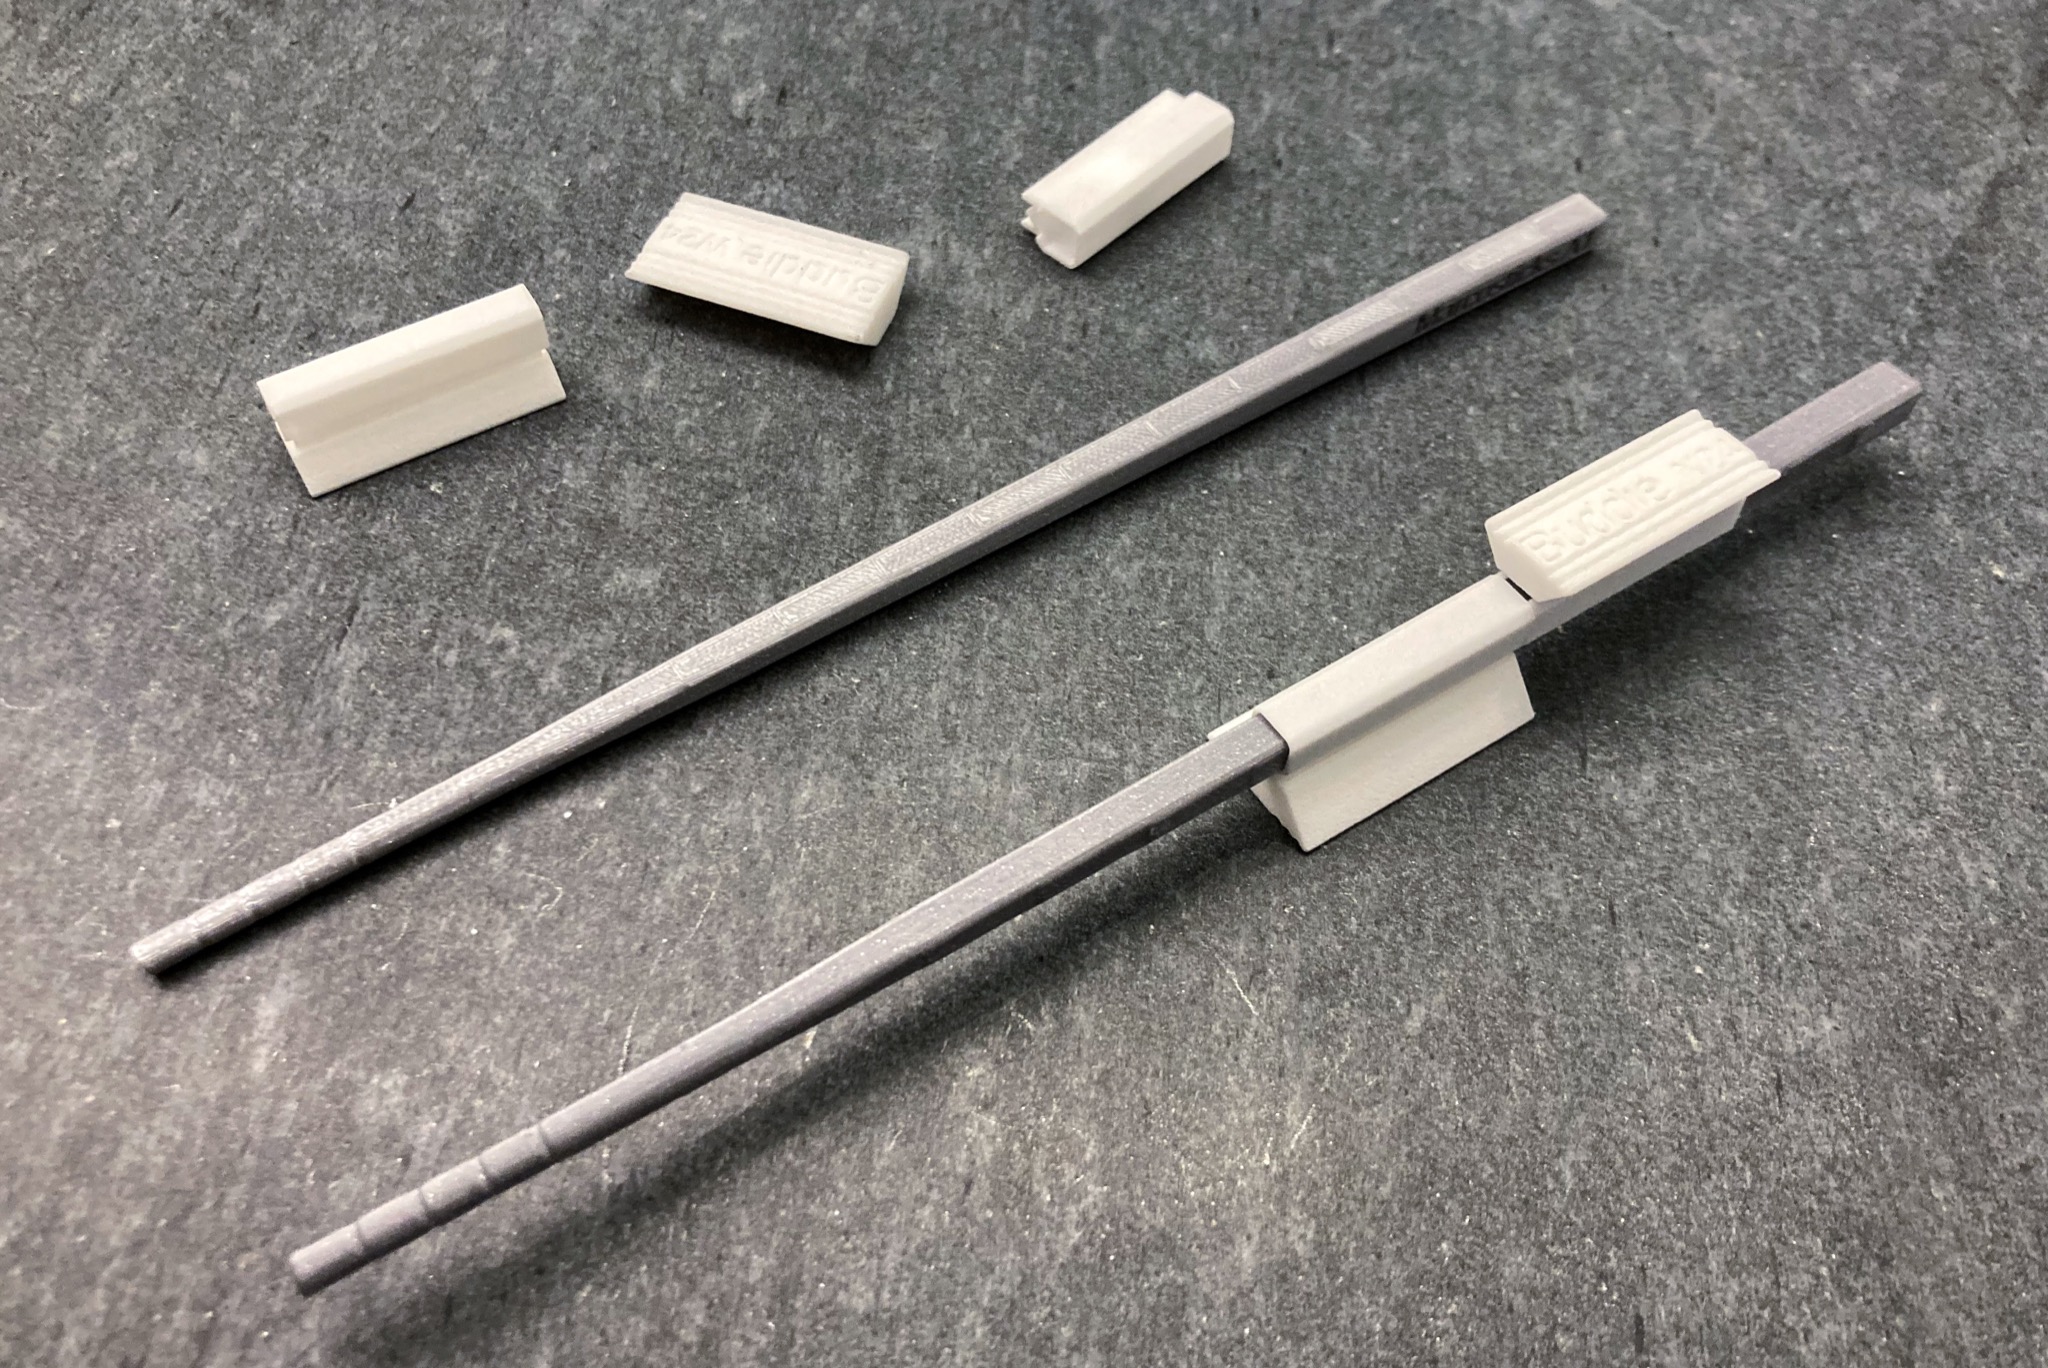
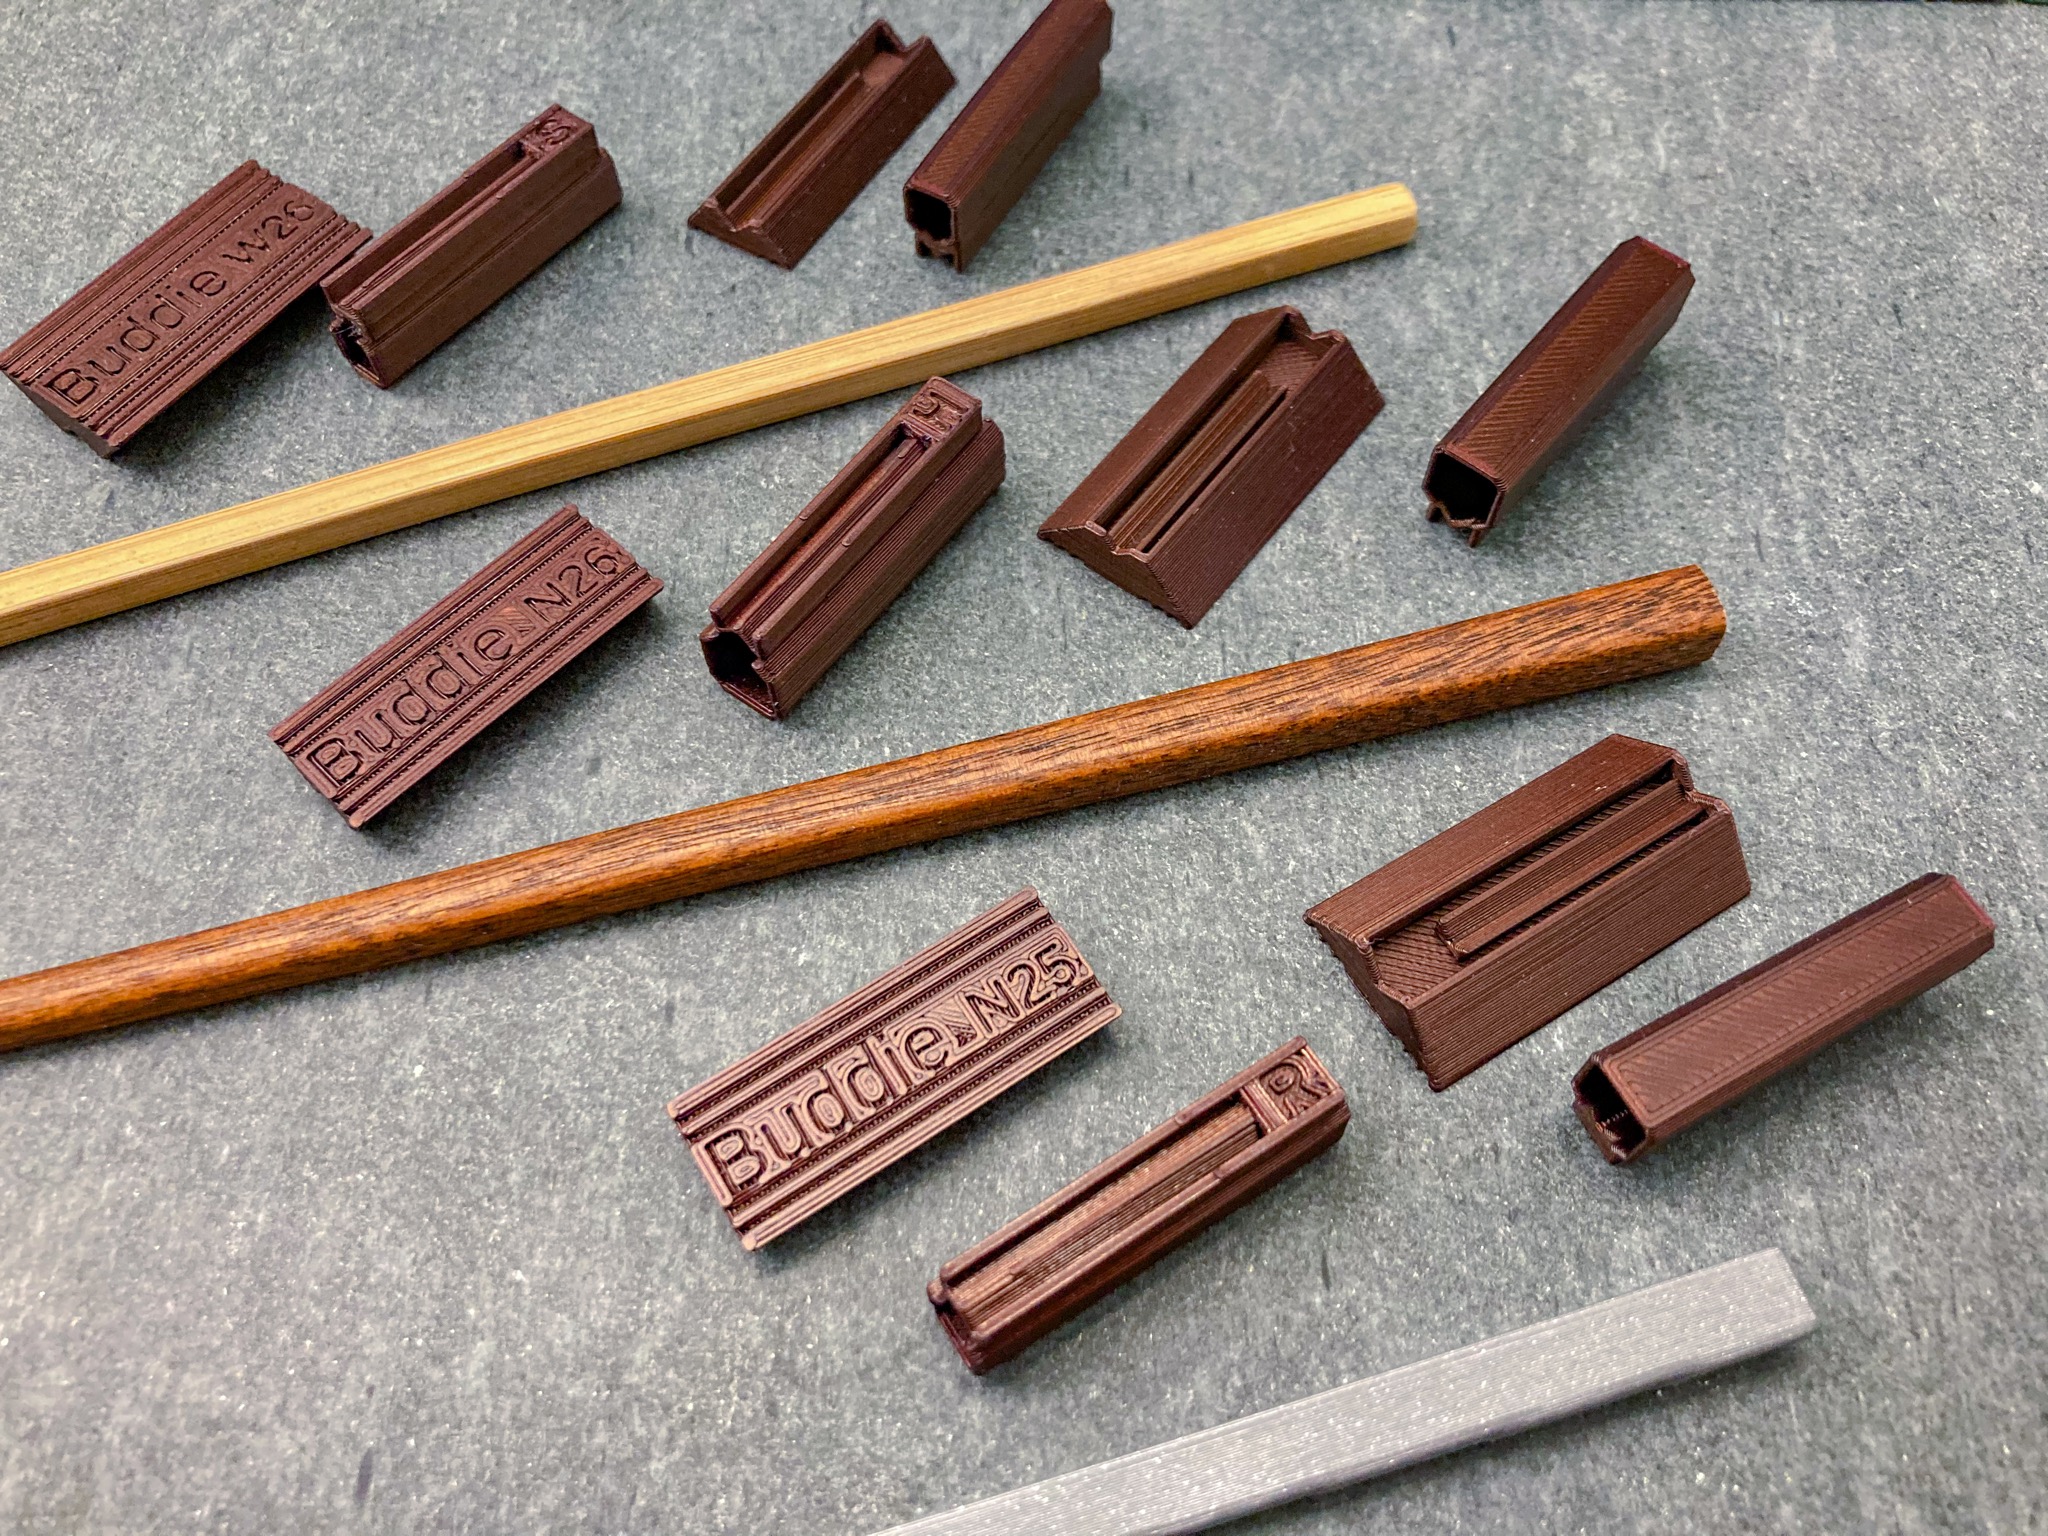
The second flavor of chopstick buddie comes in two pieces. The cap with a large support surface is printed separately from the sleeve. This allows each of them to be made in different size and shape independently, to support different hand sizes and different chopstick styles, respectively.

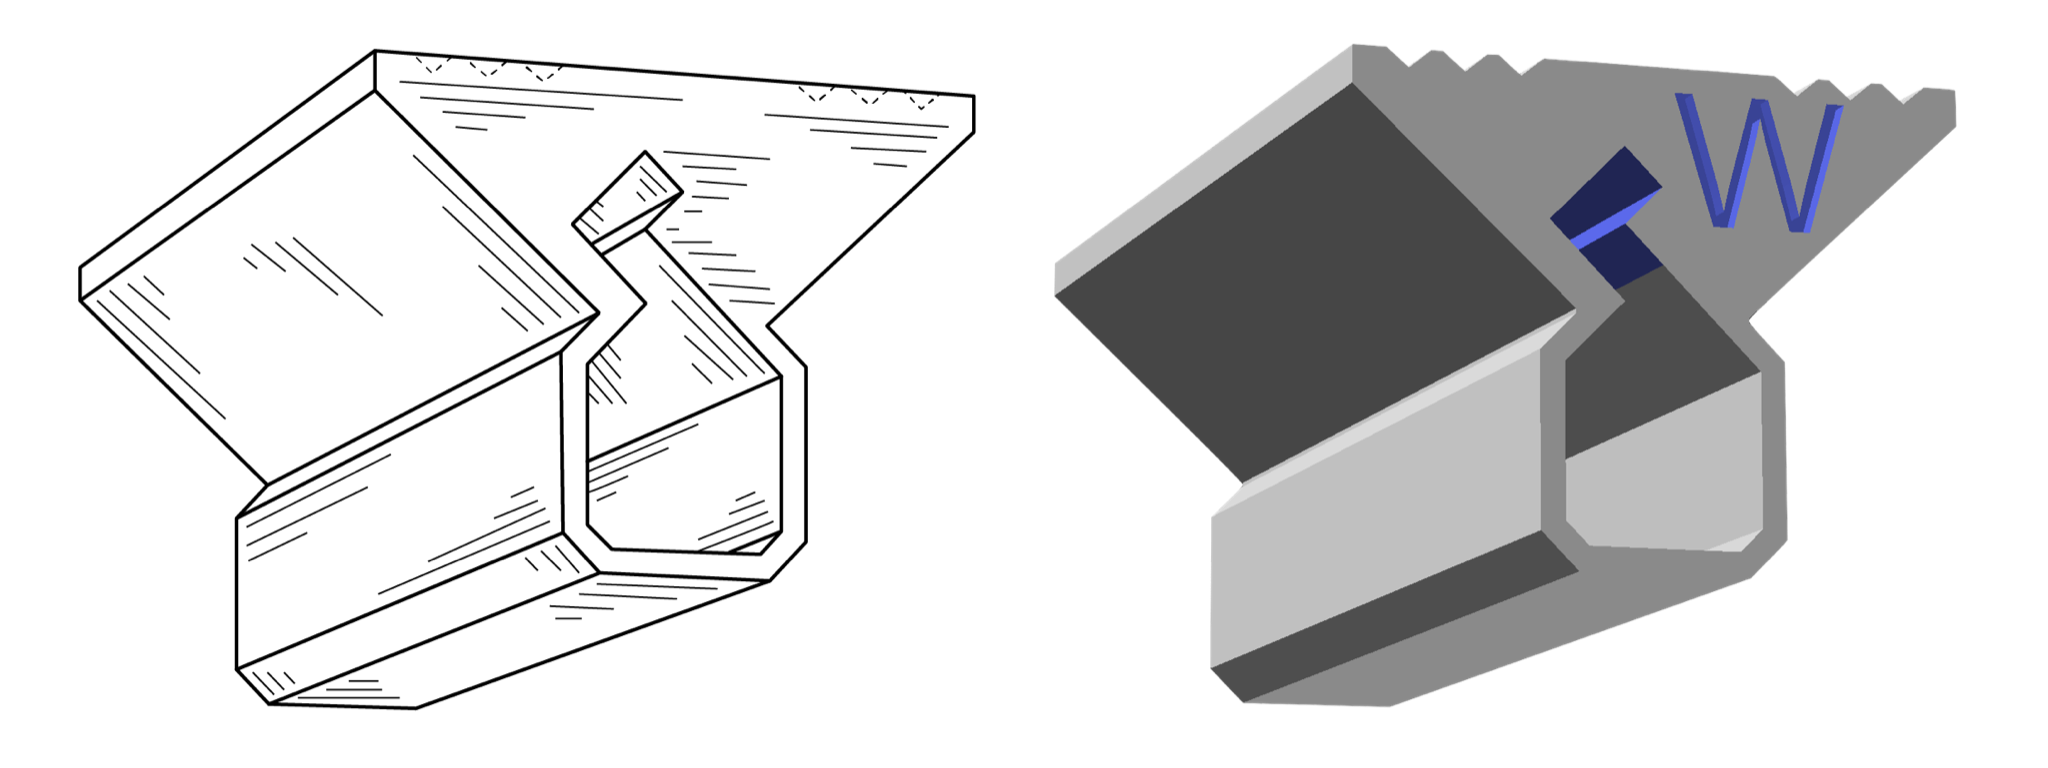
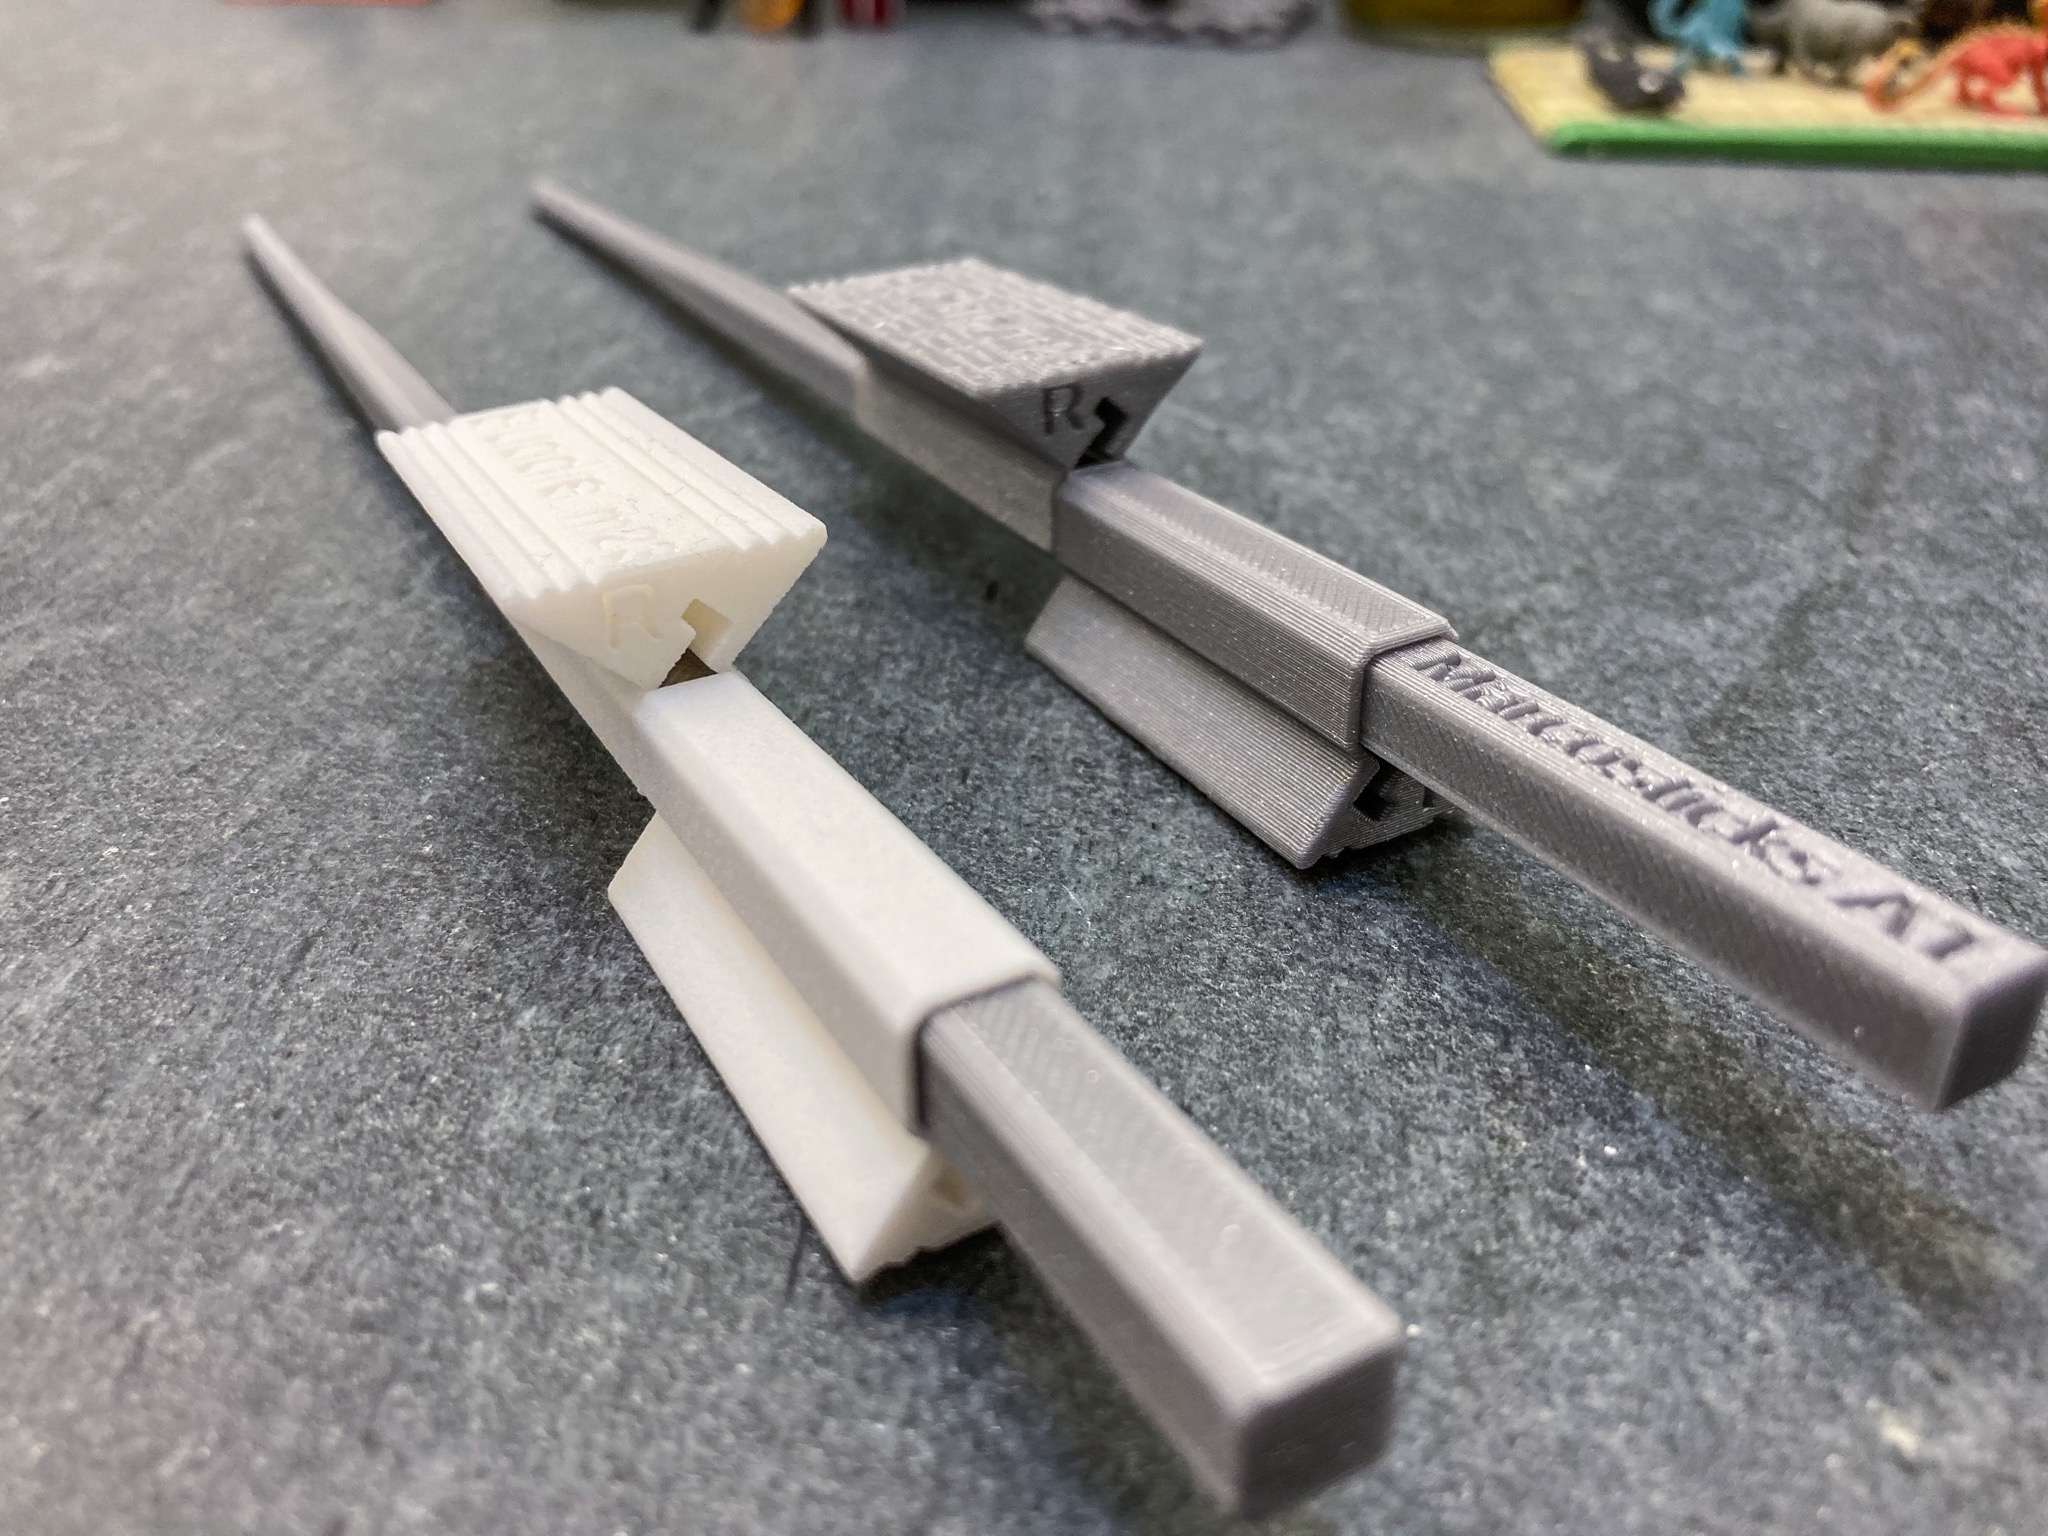
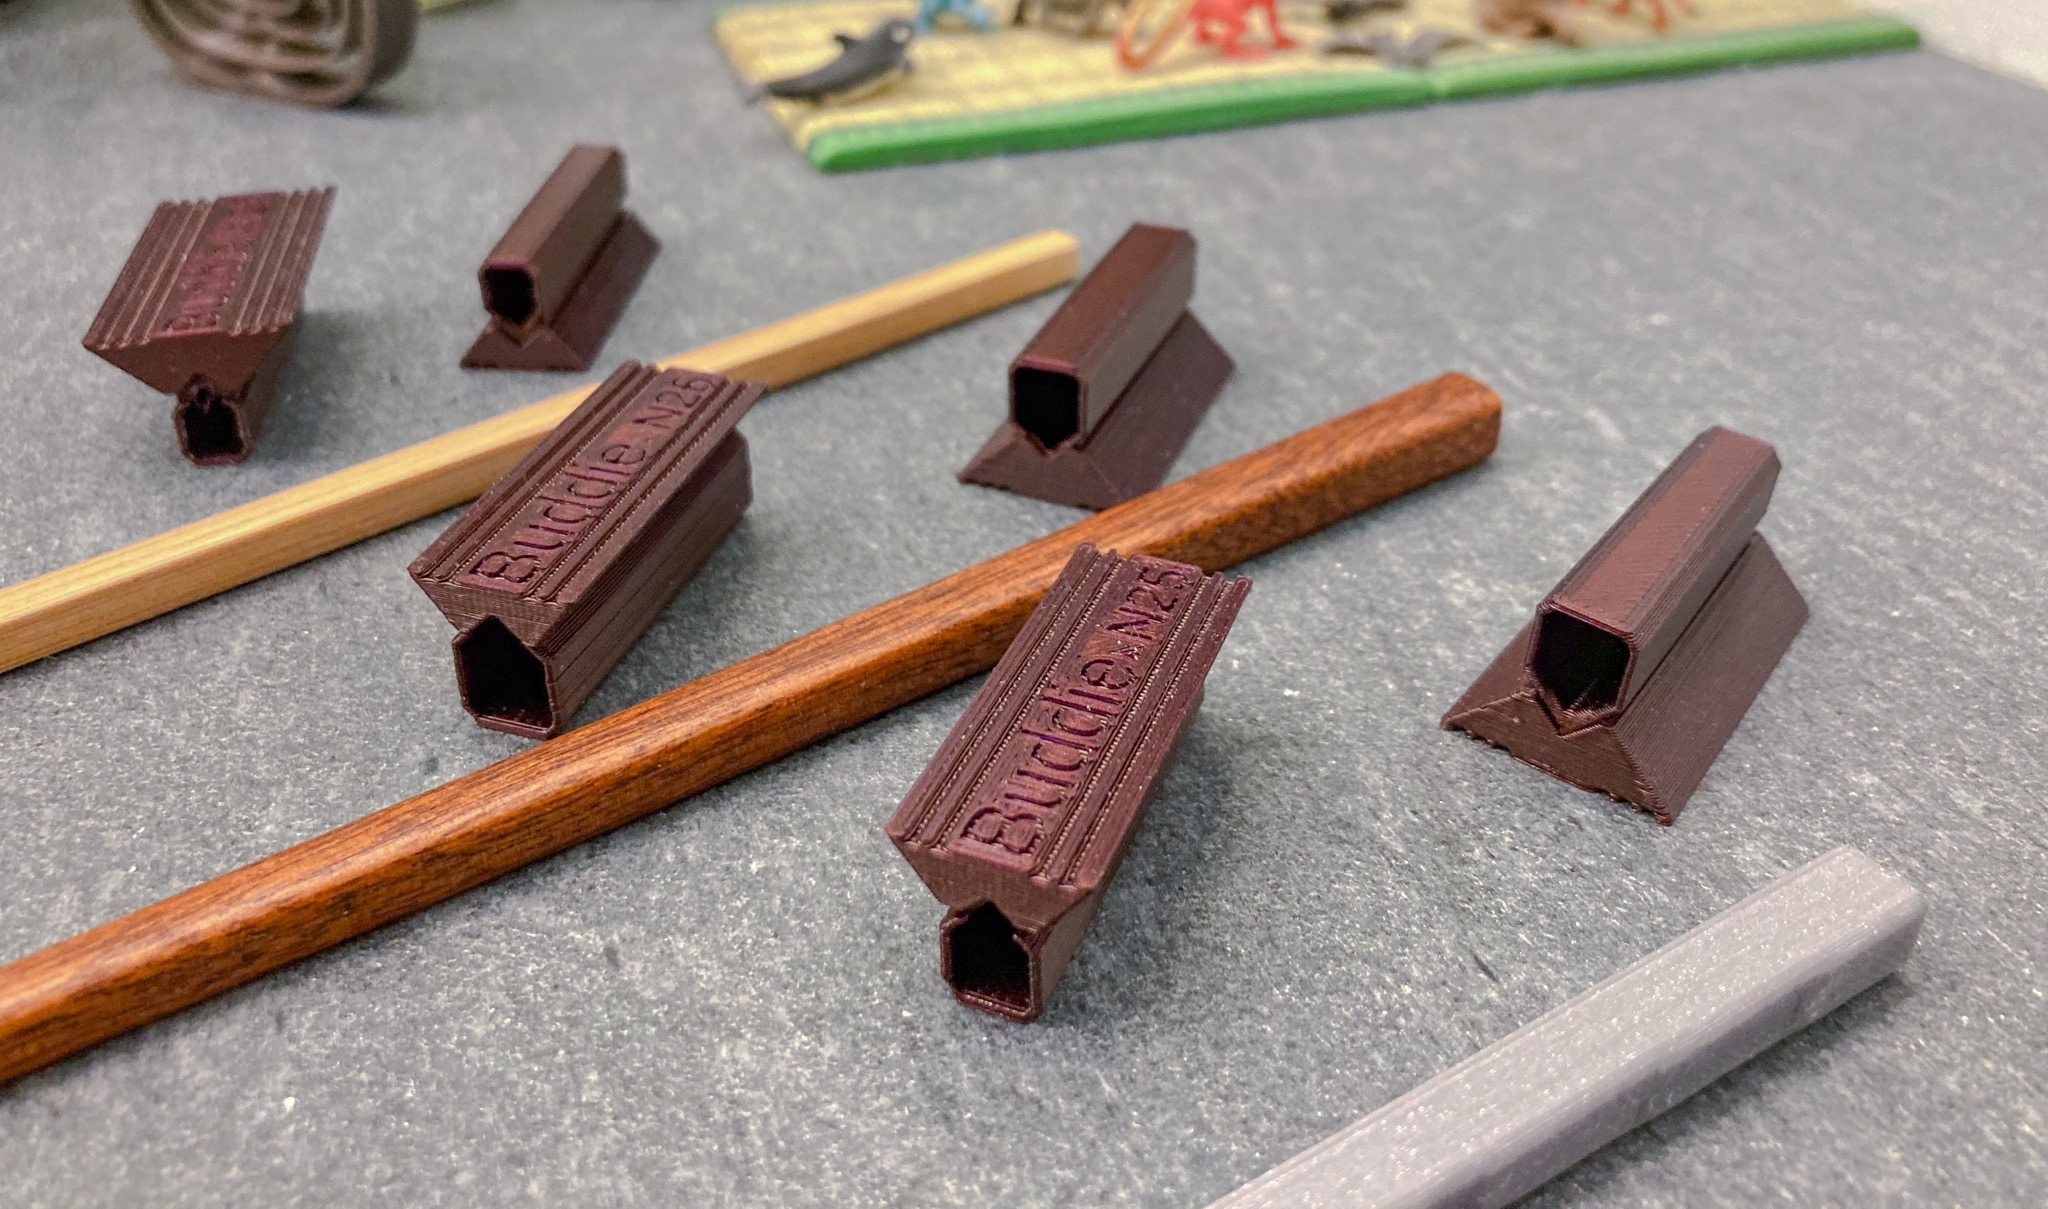
The cap and the sleeve are flipped upside down, shown below. A mortise-and-tenon joint is used to connect these two pieces, as can be clearly seen below.

The following video clip shows the assembly of the cap to the sleeve, after the sleeve is positioned at the right location on a chopstick.

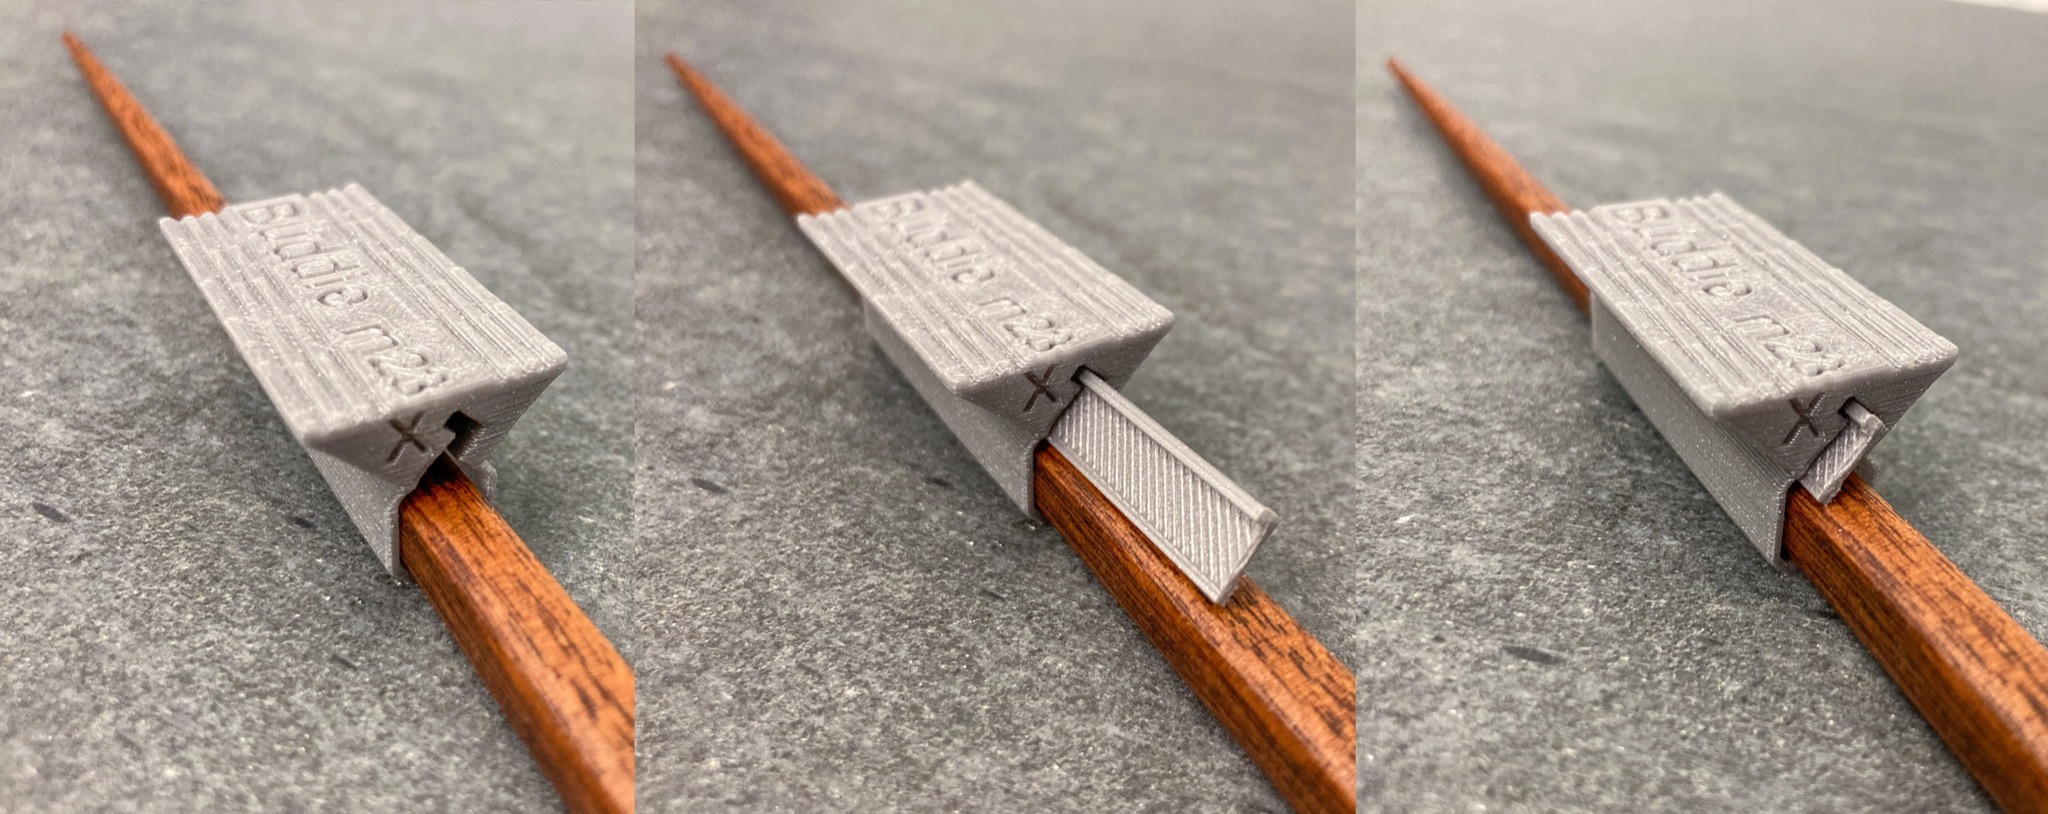
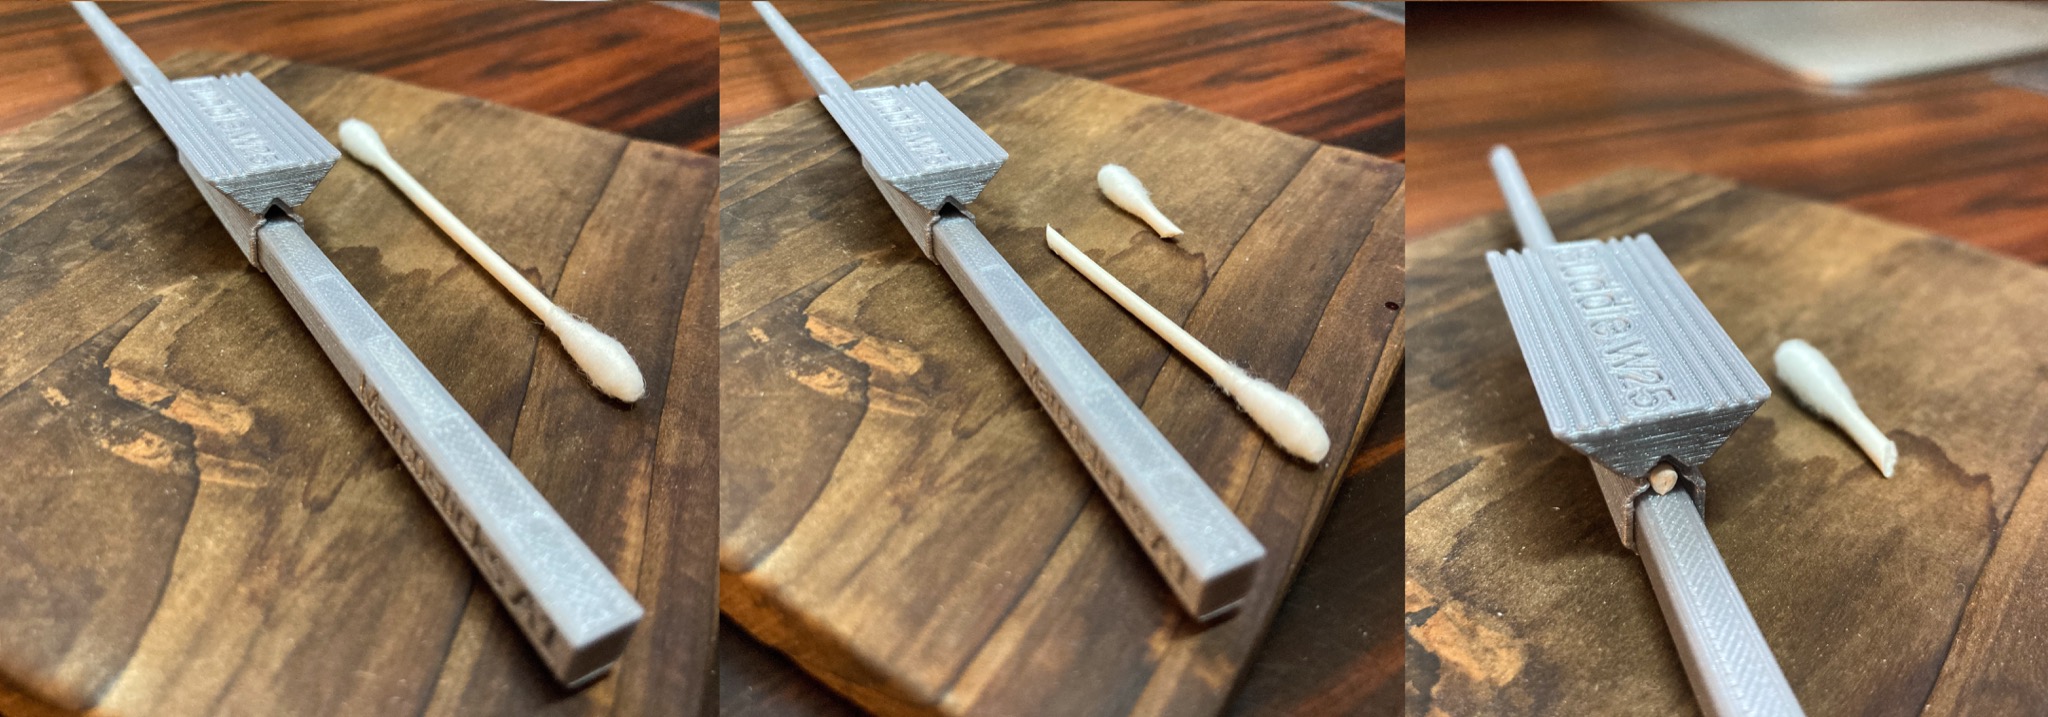
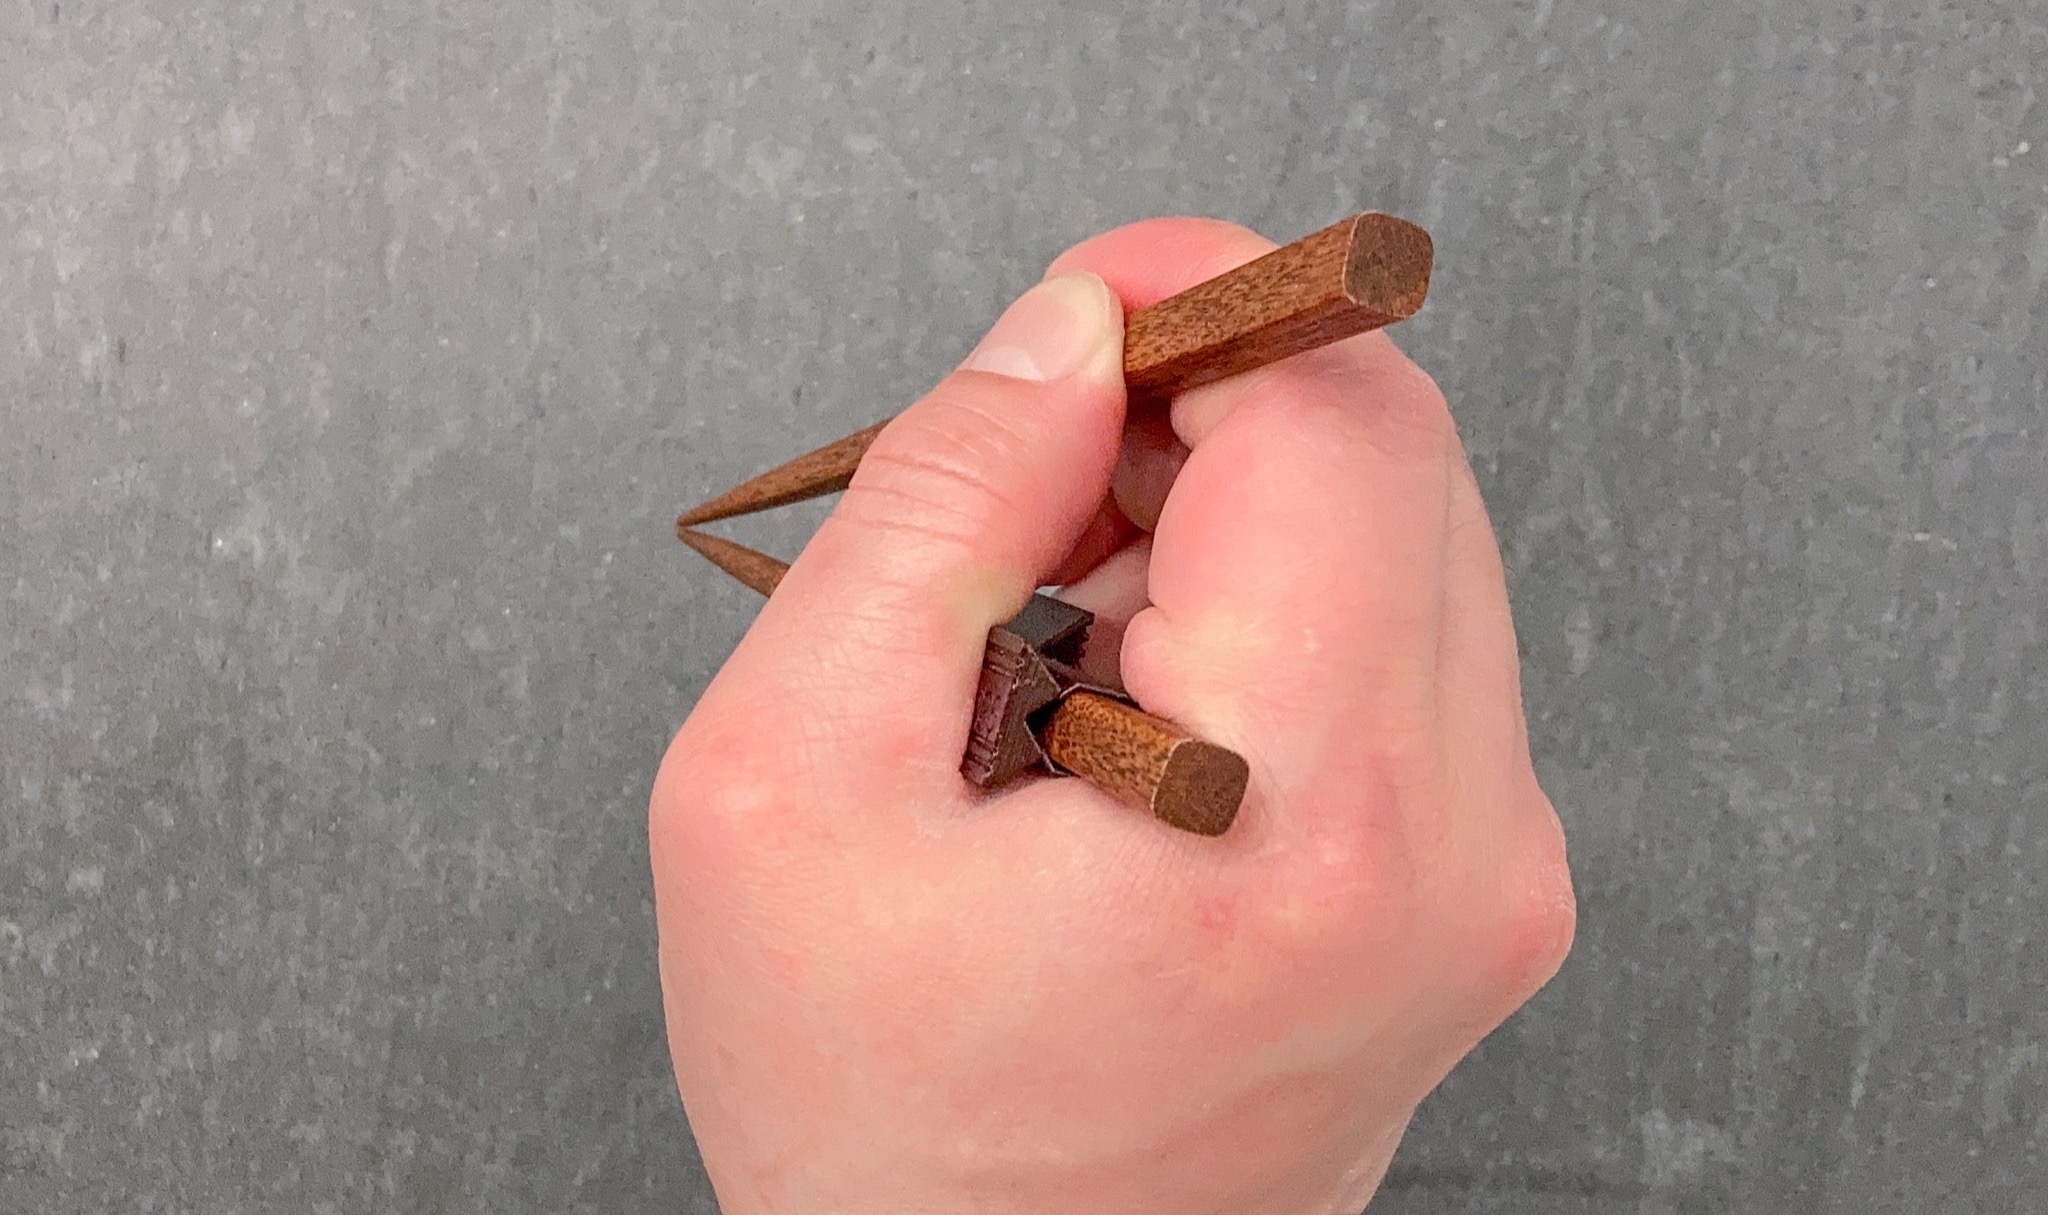
The two-piece chopstick buddie has almost the same assembled shape and profile, as the single-piece buddie. They are used in exactly the same way. But the adjustment mechanism is different. The two-piece buddie has a triangular channel dedicated to placement adjustment. Many household items can be used as a wedge to fasten the buddie to a chopstick. Following pictures show a section of the handle of a cotton swab being used for this purpose.
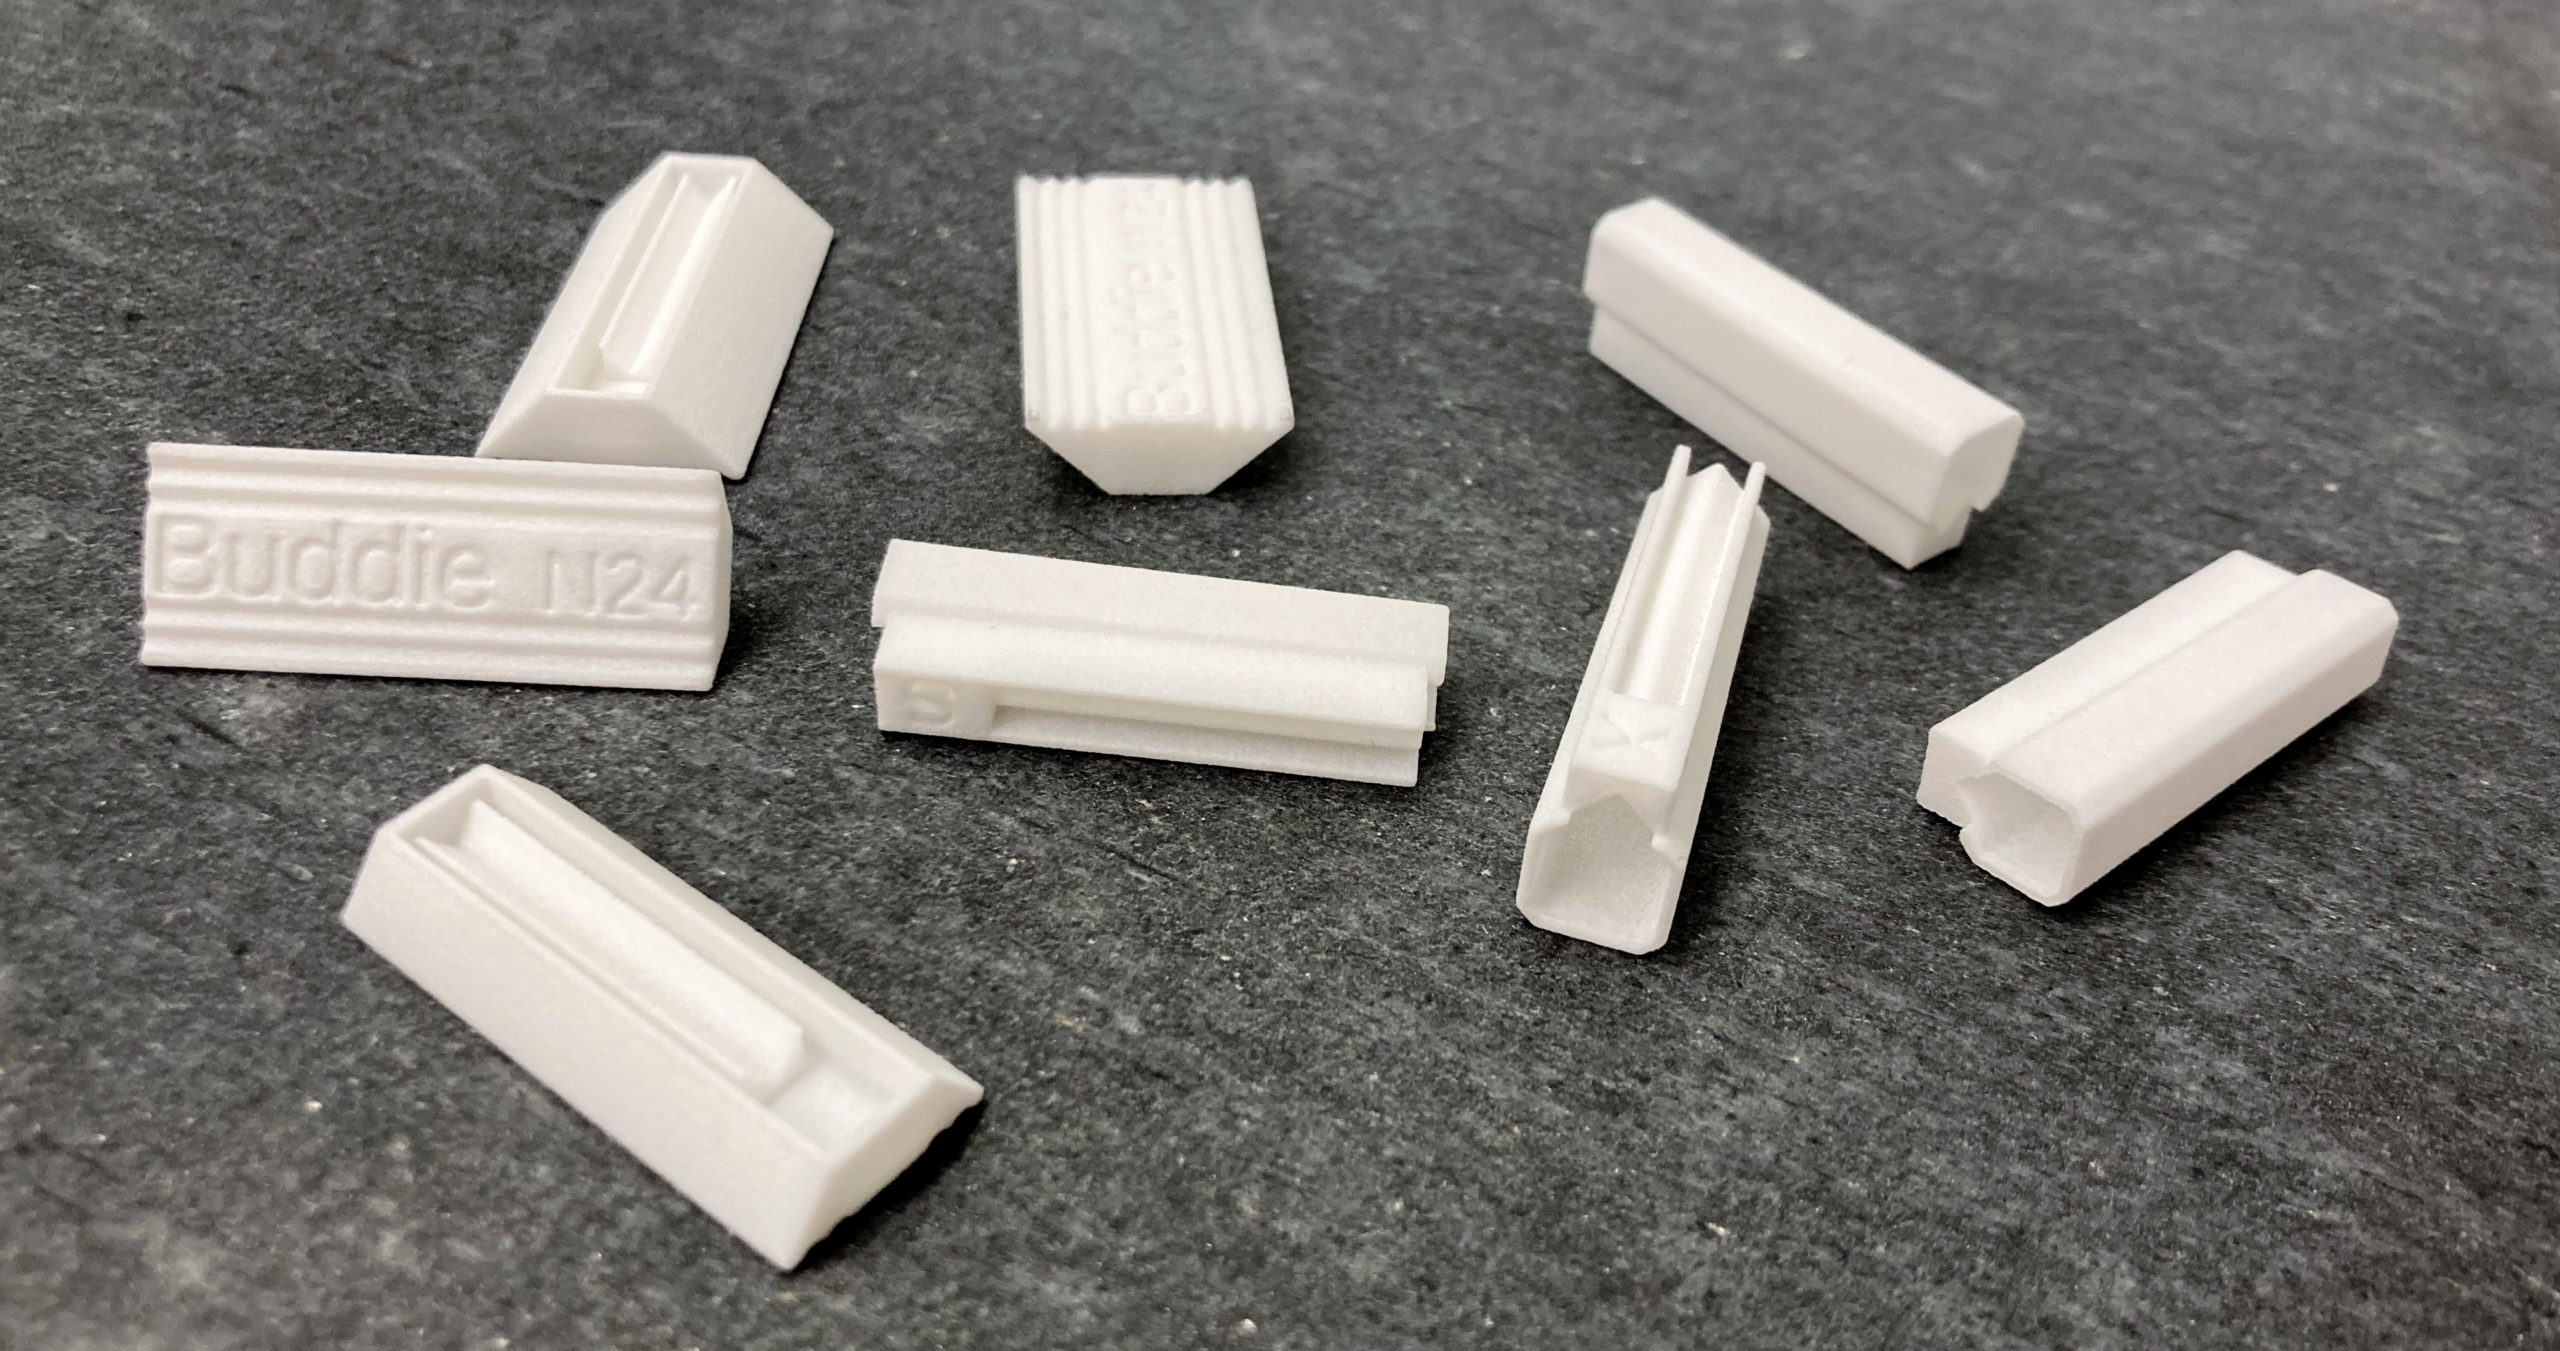
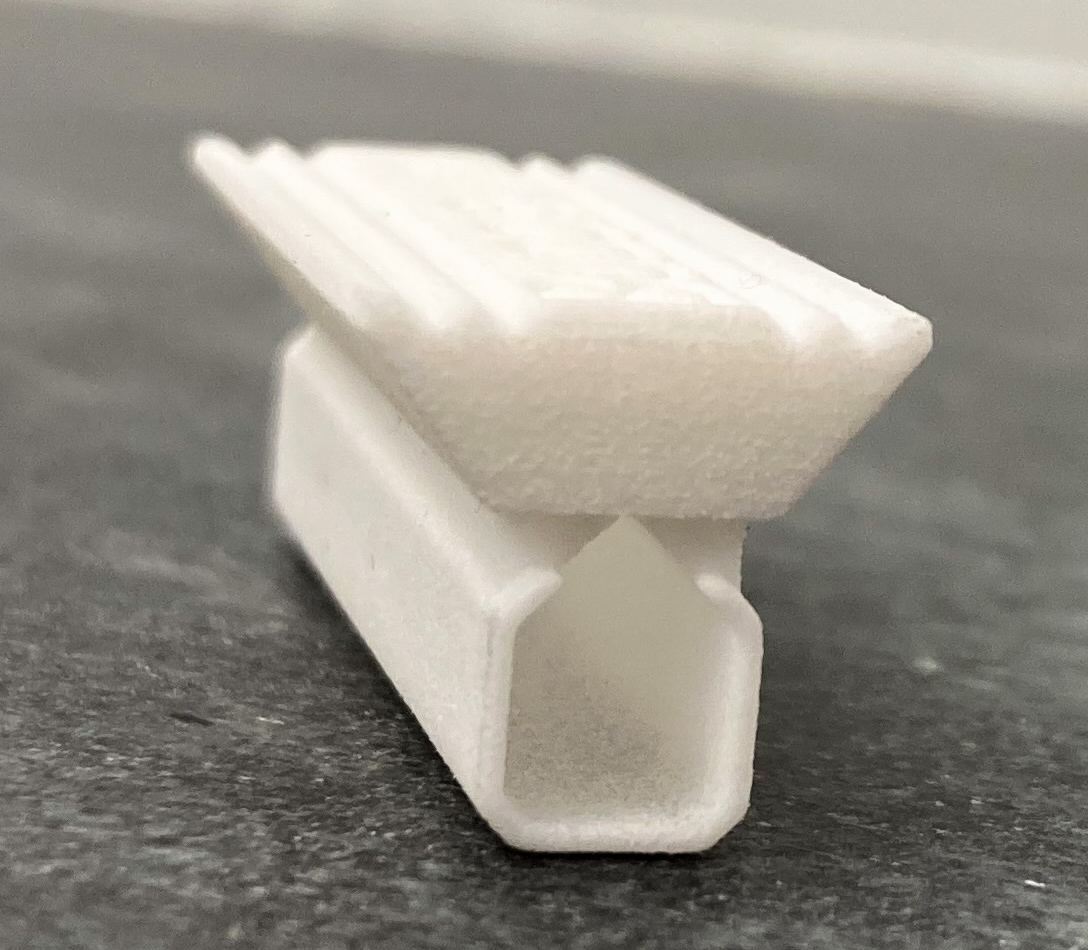
Both flavors of chopstick buddies have been successfully printed not only on household 3D printer in FDM, but also by third-party vendors with SLS in versatile plastic PA 2200. Following are some samples printed in SLS.
Pictures of model B1
A chopstick buddie can be used alone, to support either the thumb base, or the knuckle of the ring finger. Different people will find their own ways of using chopstick buddies. Some people may prefer to use a chopstick buddie for the ring finger. Following picture shows the use of a single chopstick buddie. This buddie is attached to our model A advanced marcostick which you can also print yourself.
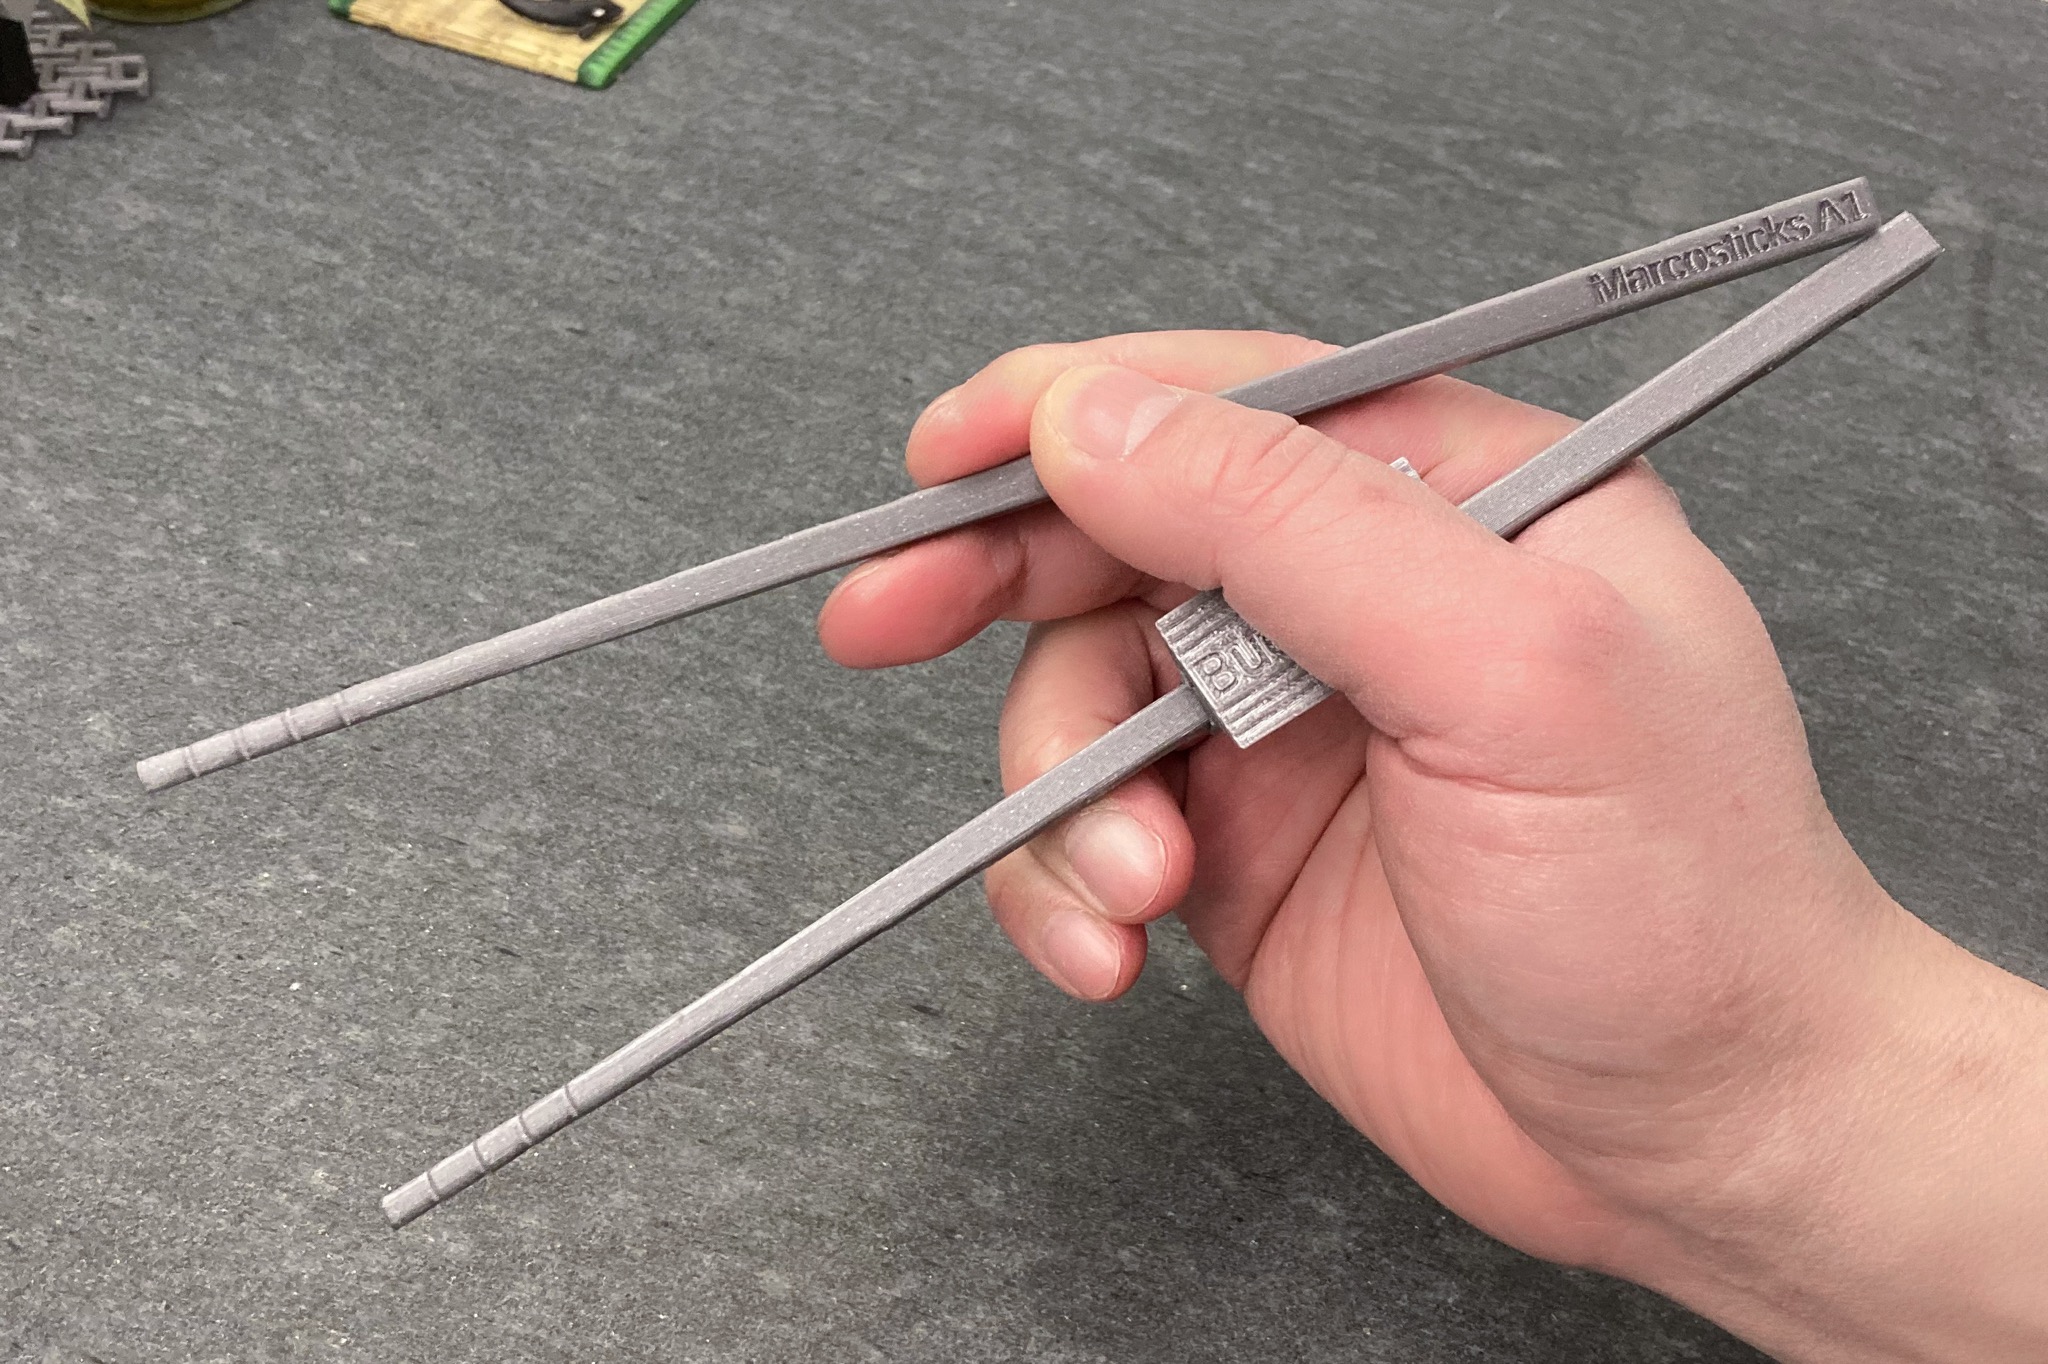
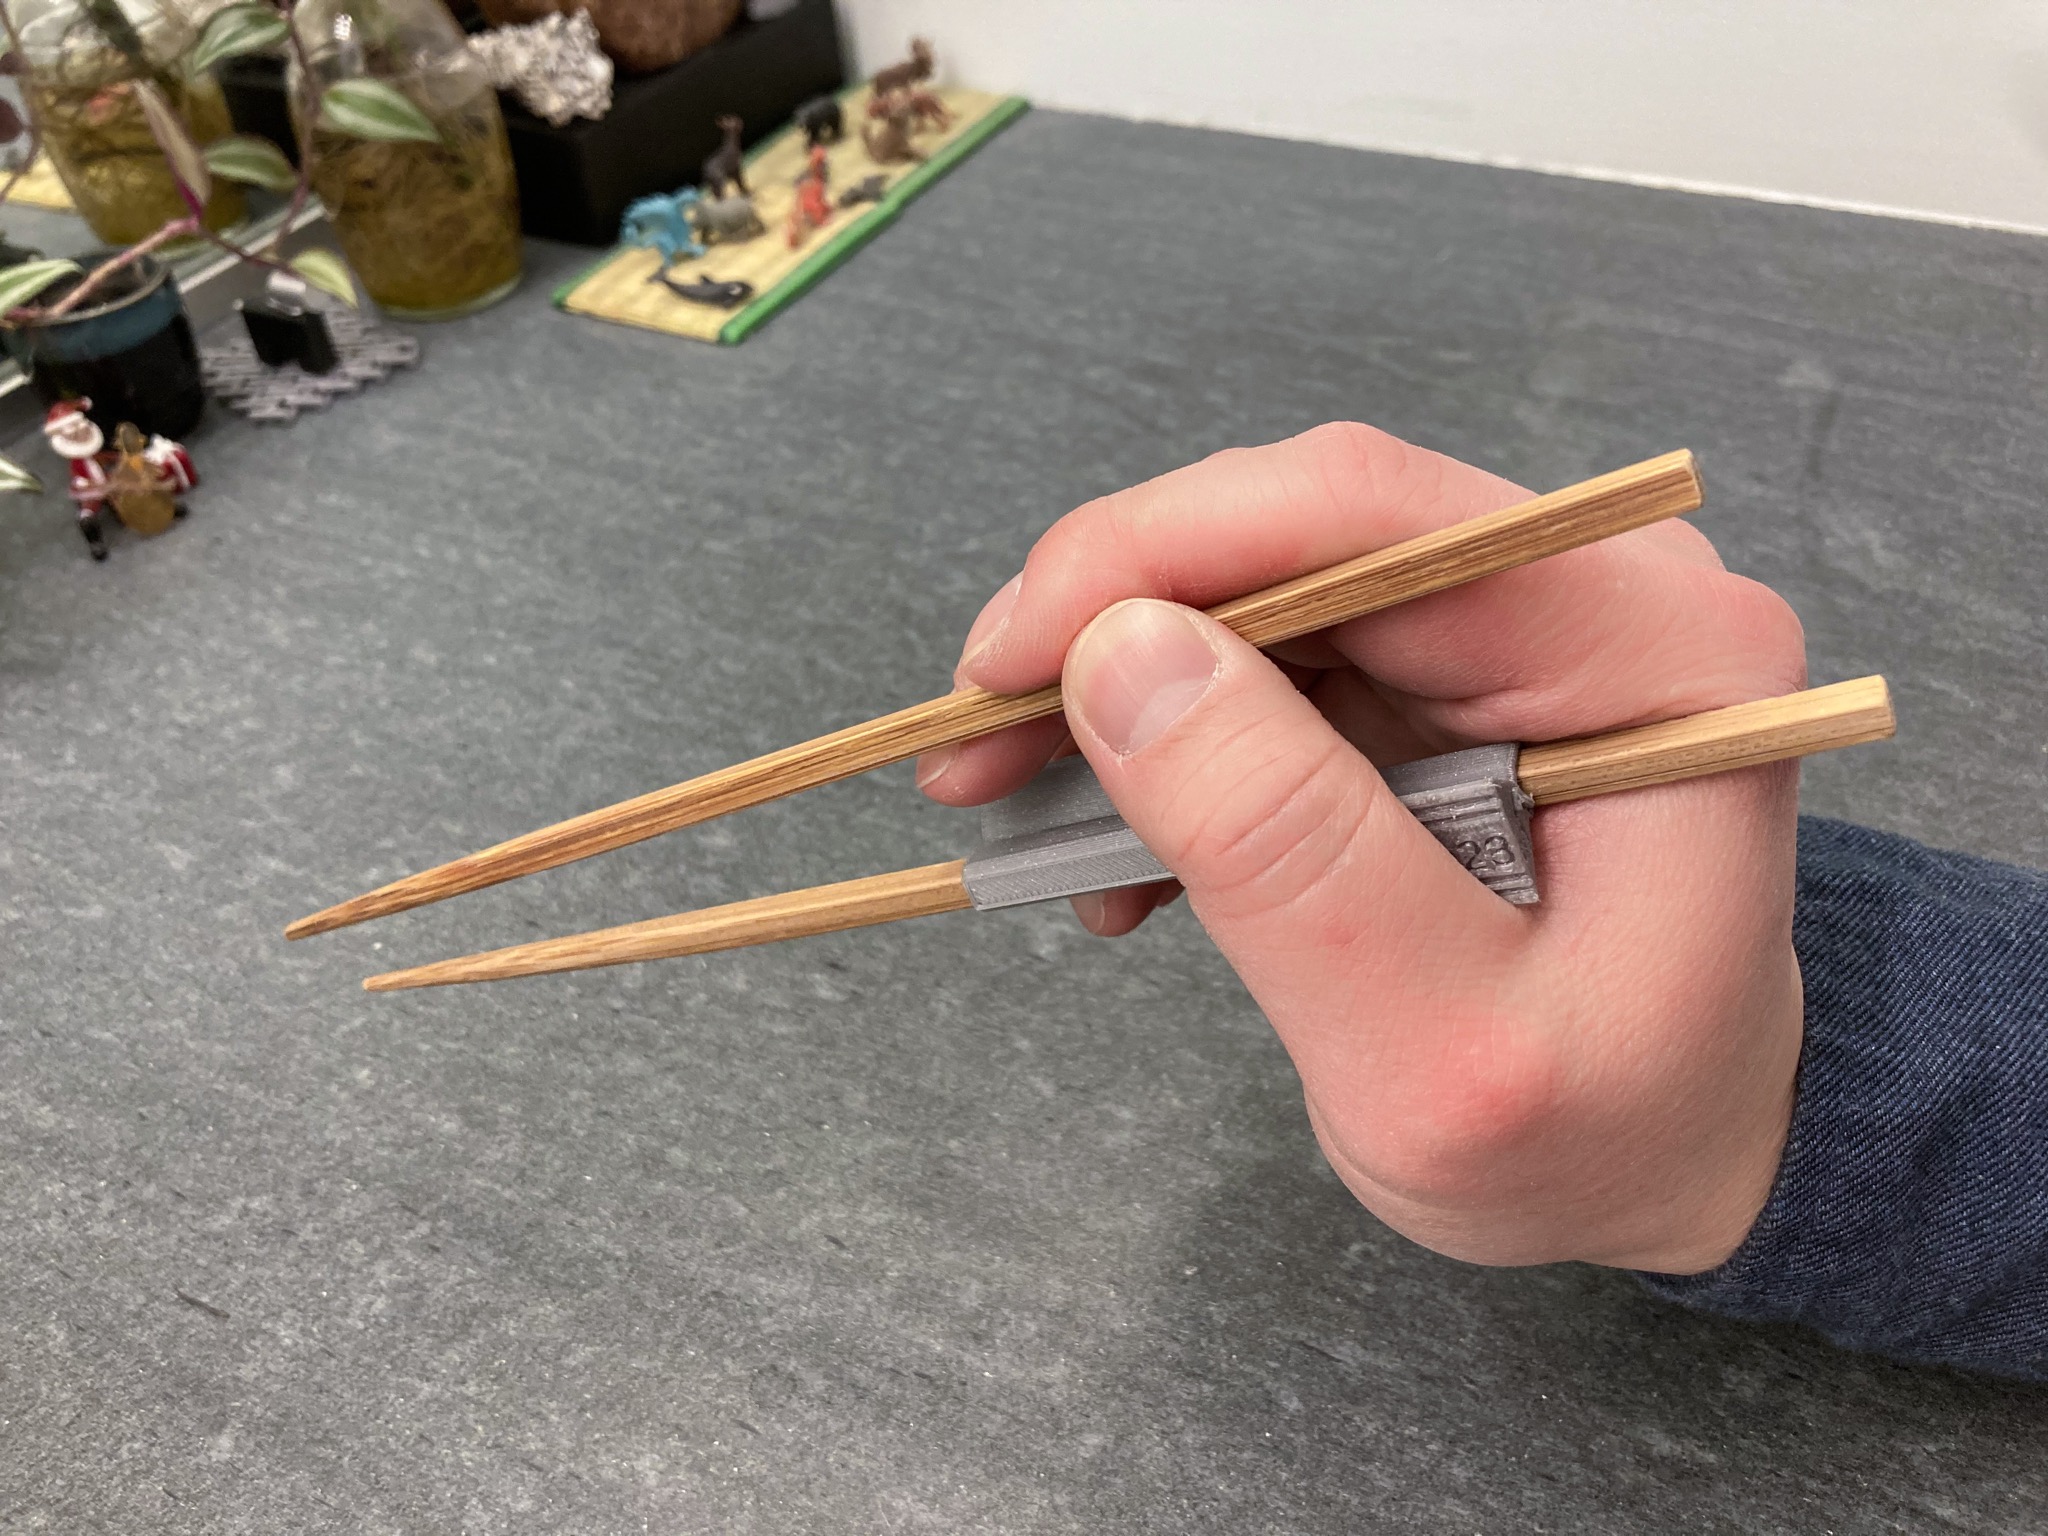
The chopstick buddie used as a thumb rest in the next picture is wedged in between the thumb base and the purlicue. This allows the hand to hold the bottom chopstick firmly.
Following chopstick buddies are printed by SLS (Selective Laser Sintering) with versatile plastic PA 2200.

Pictures of model B2
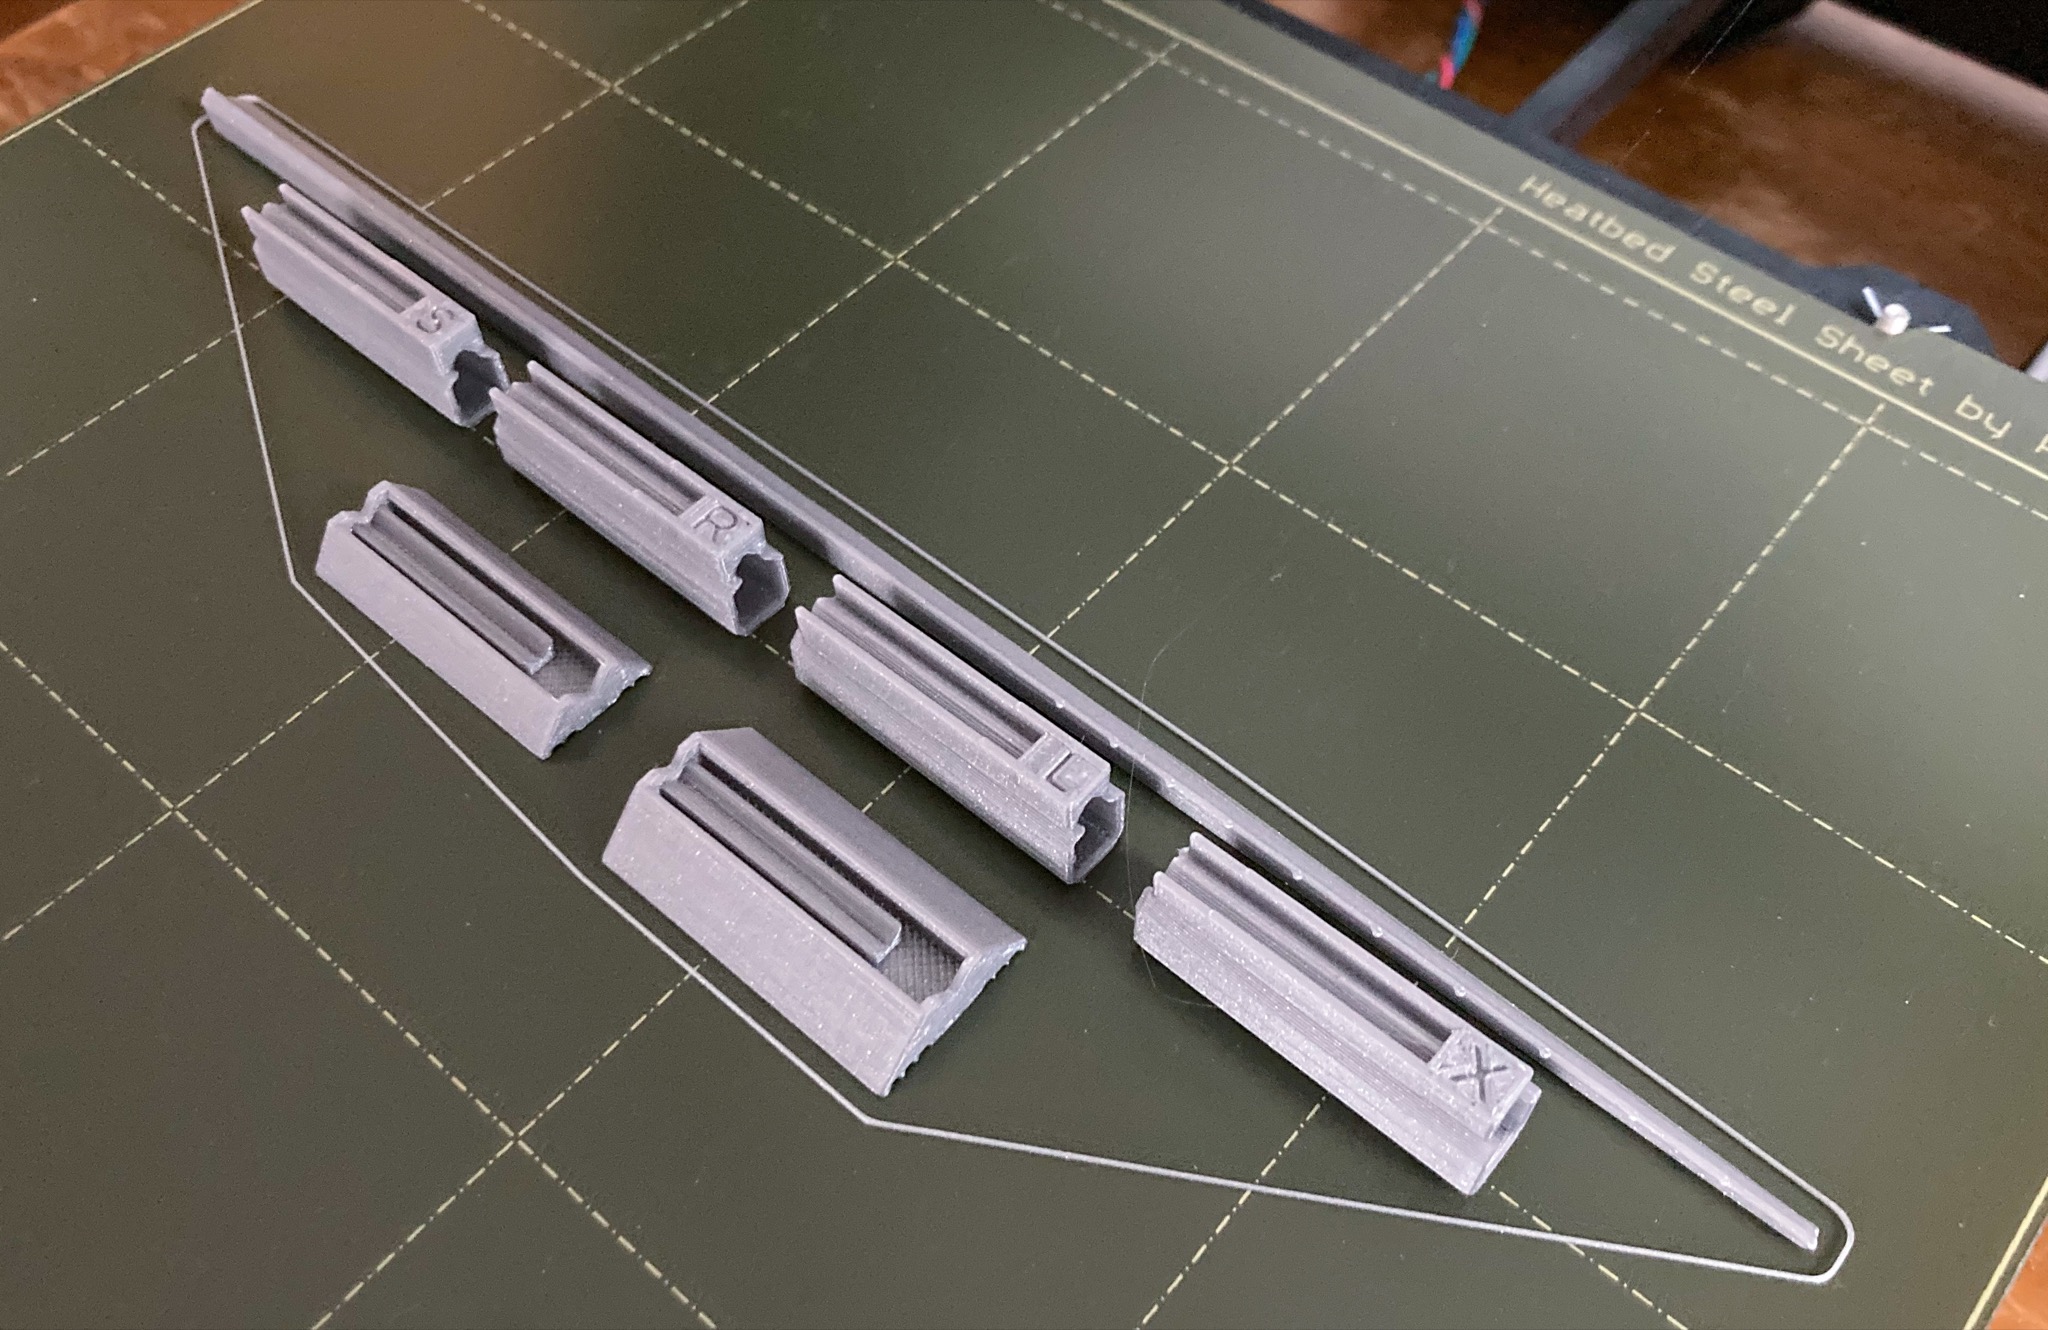
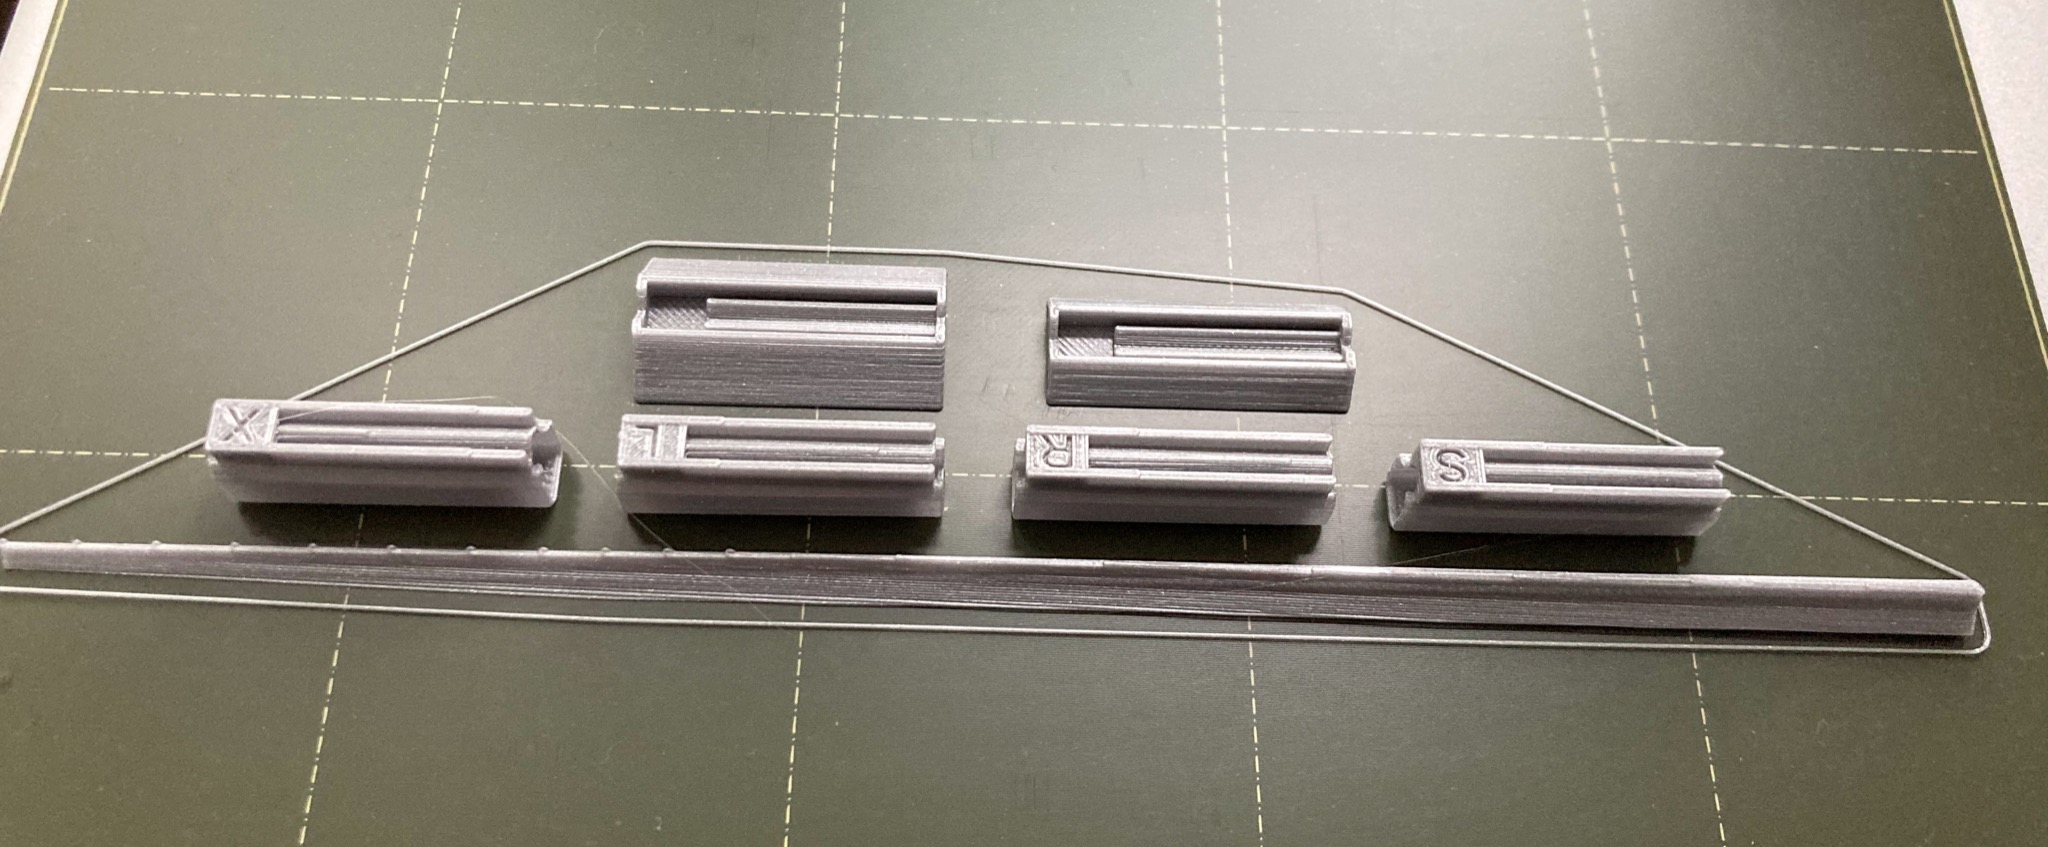
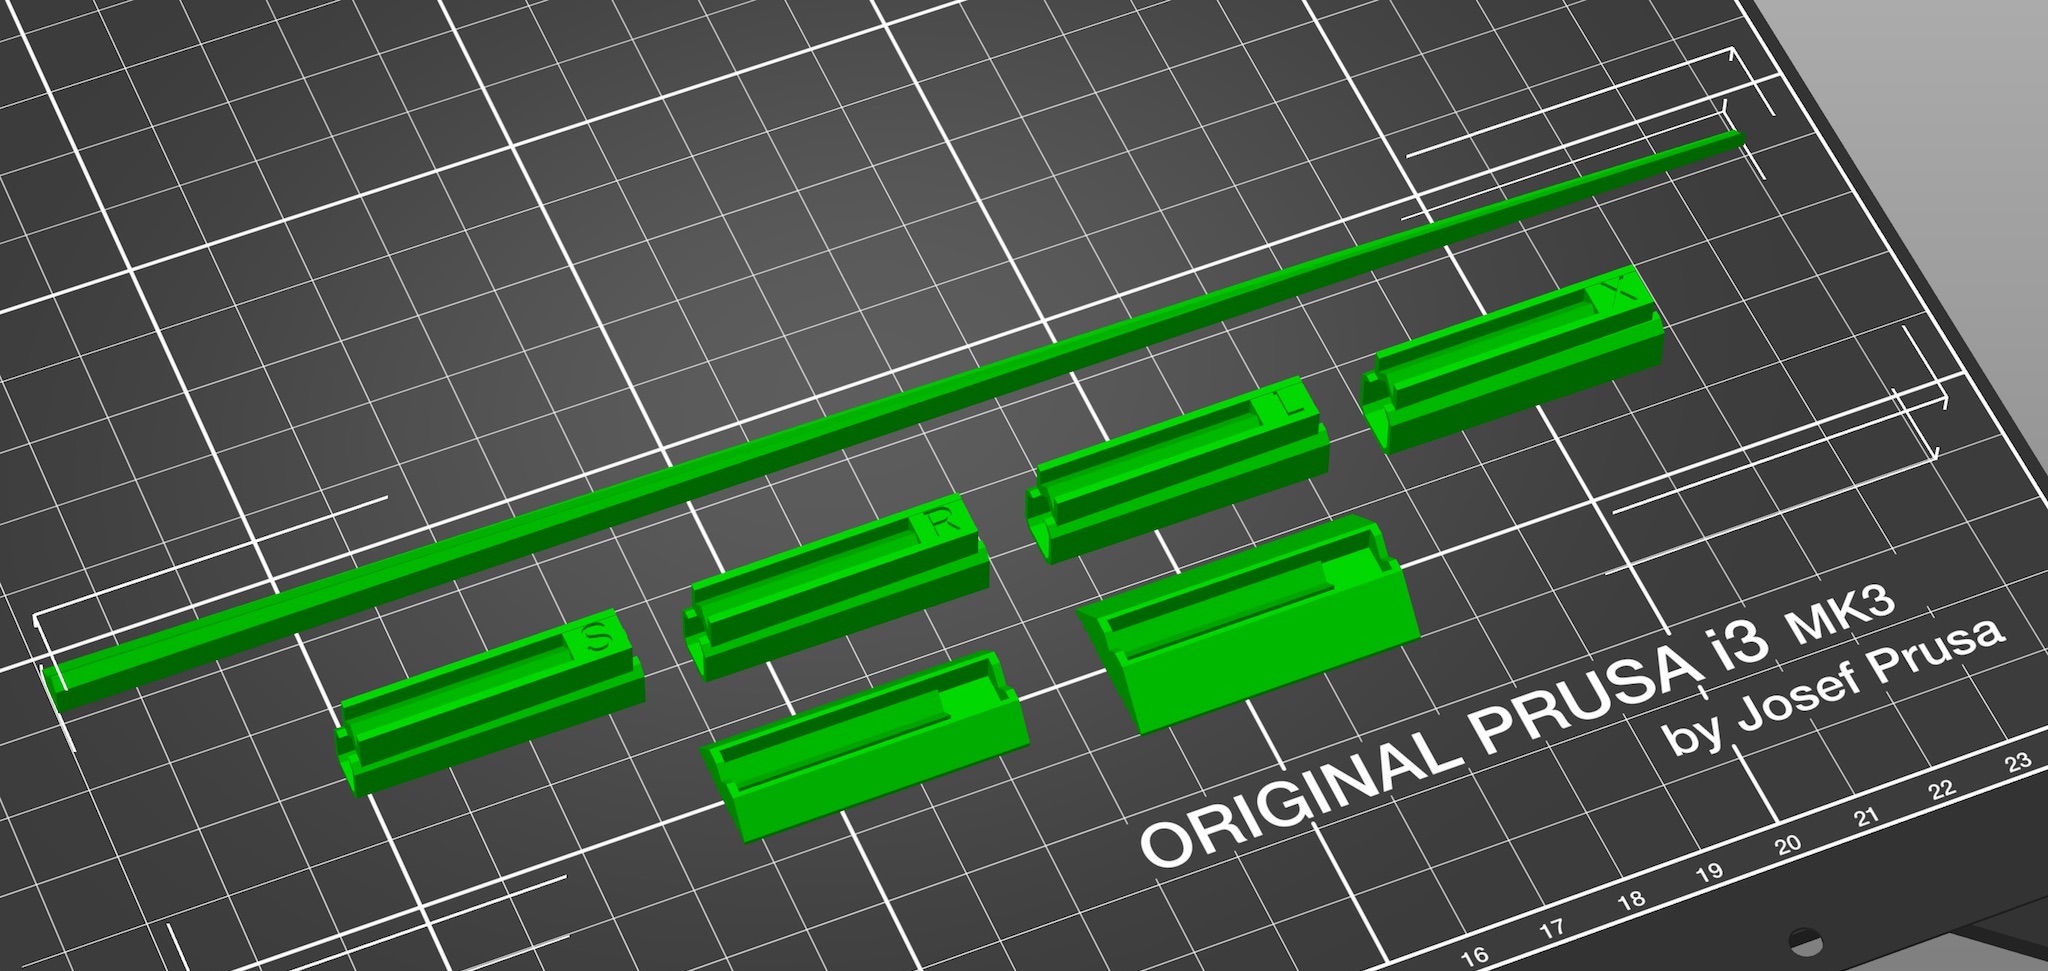
Following are pictures of model B chopstick buddies printed by FDM with PLA. The optional adjustment strip spans almost the entire print bed. It can be used to fasten a buddie to a chopstick.
Following chopstick buddies are printed by SLS (Selective Laser Sintering) with versatile plastic PA 2200.

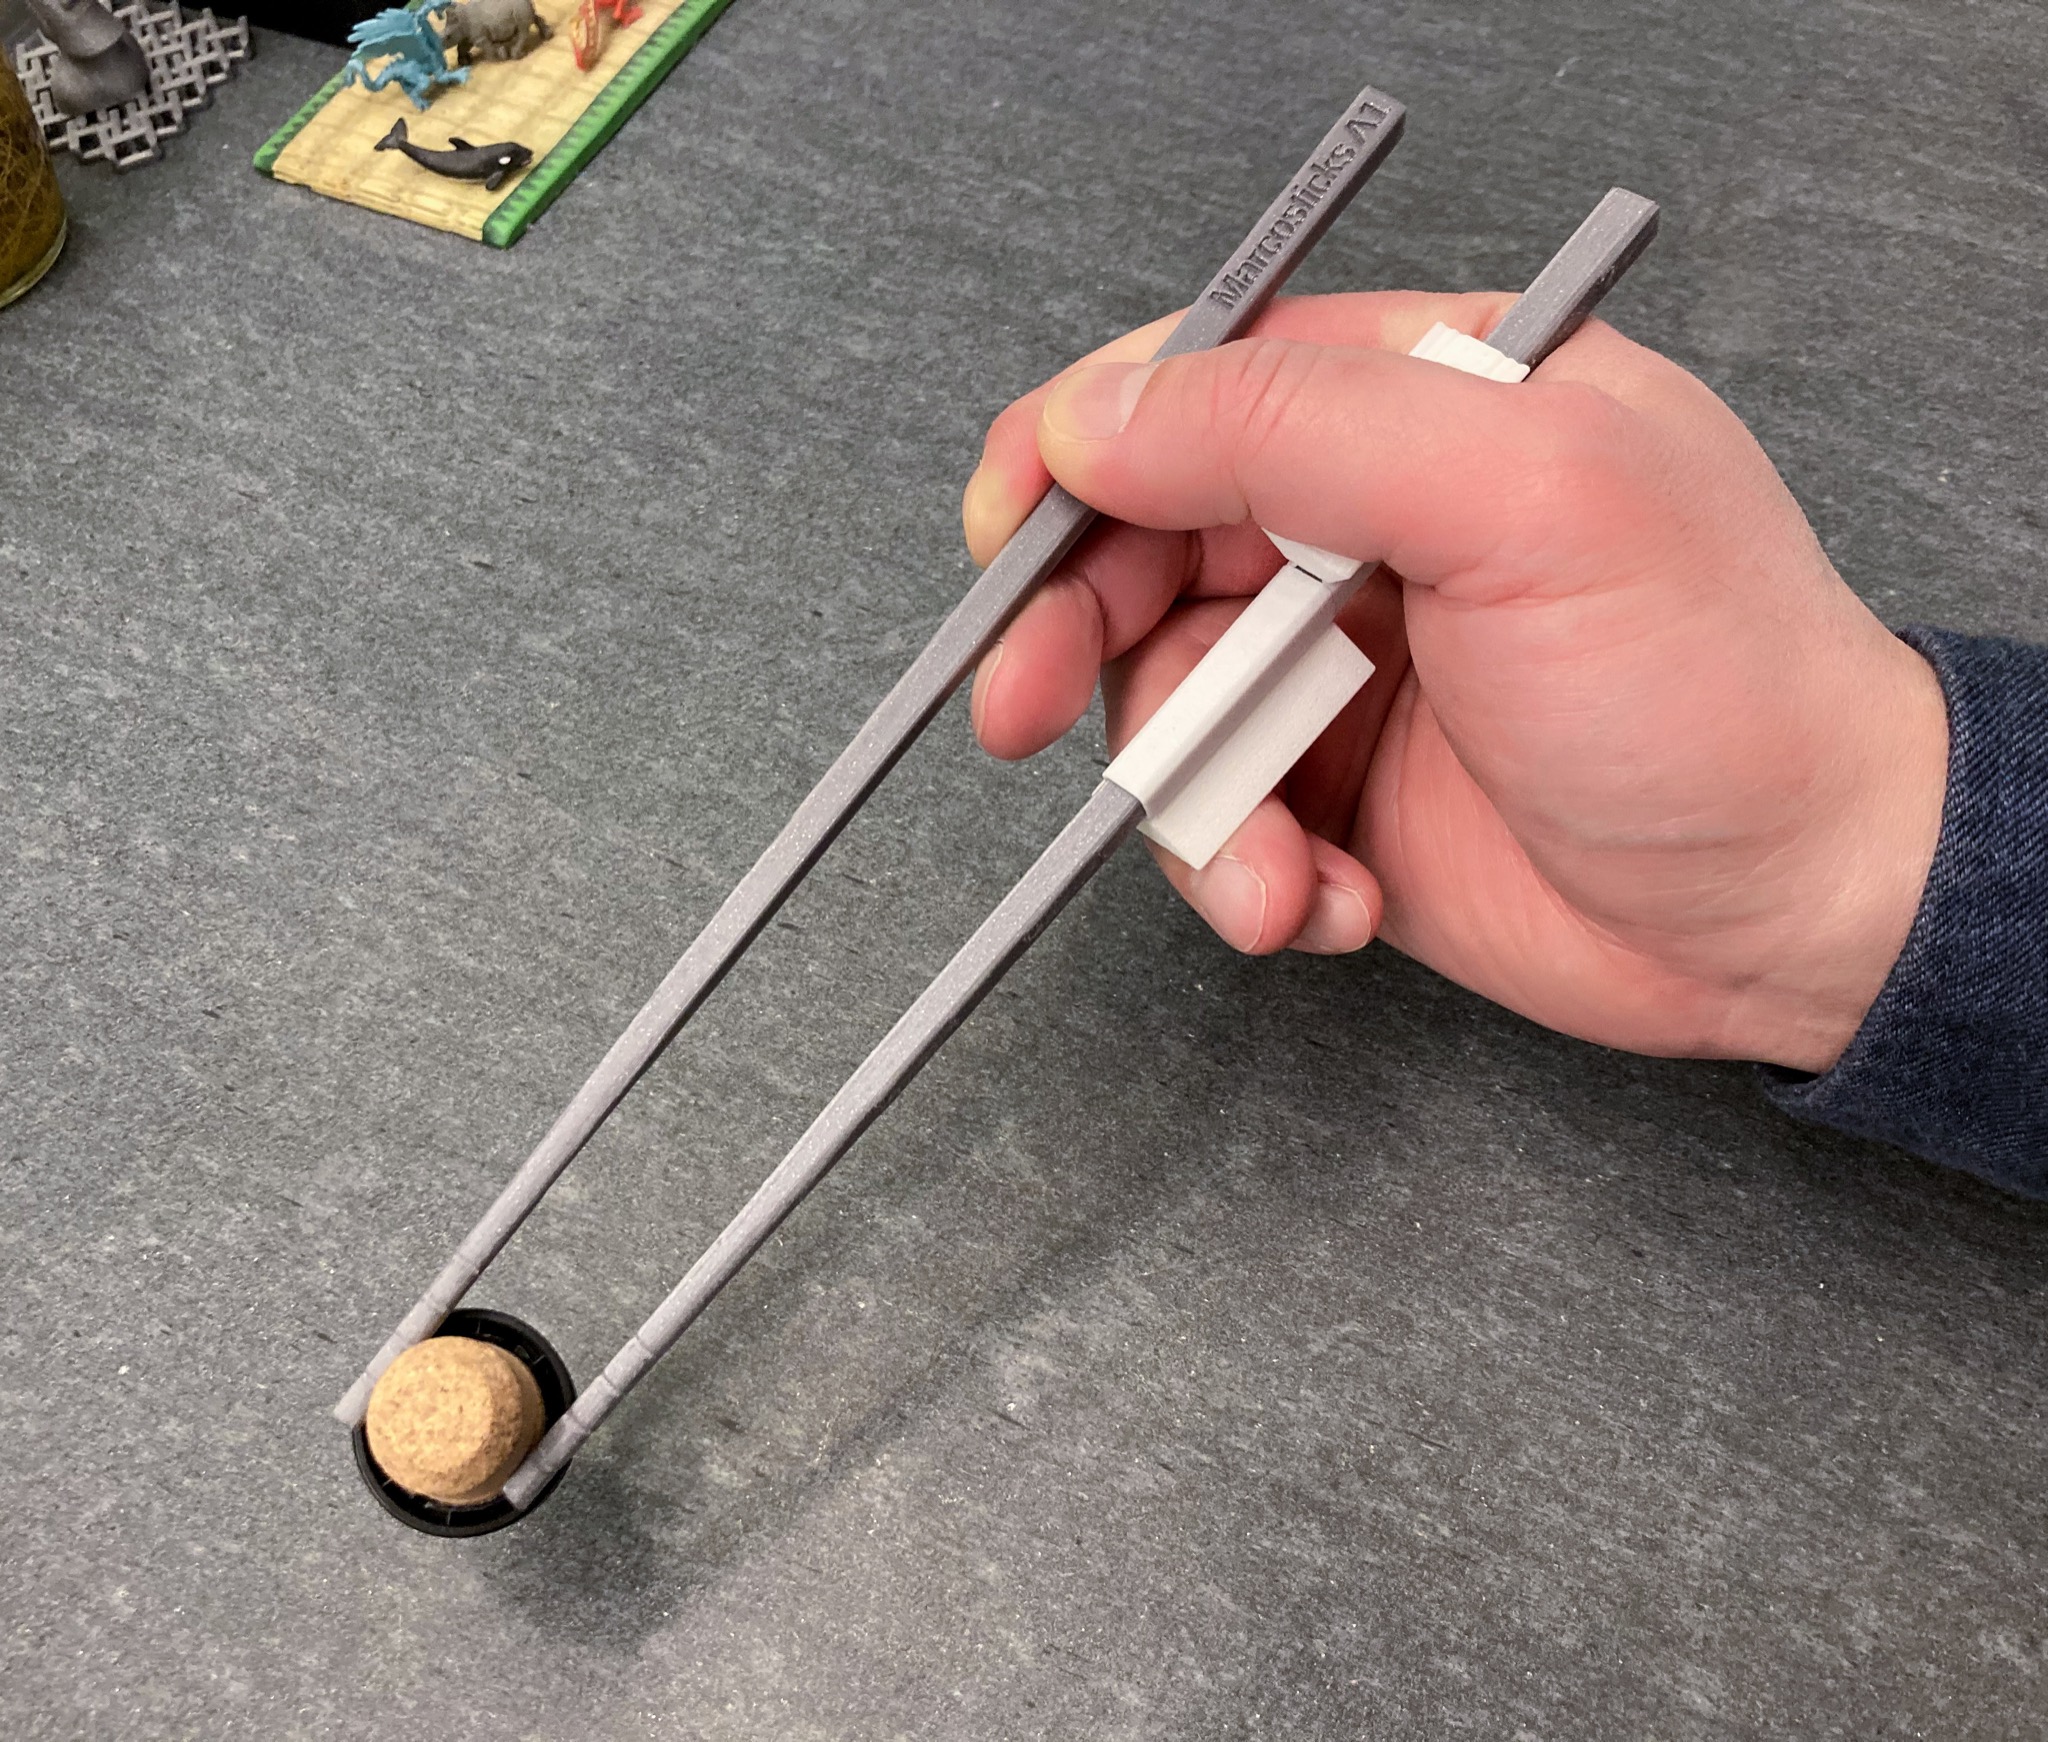
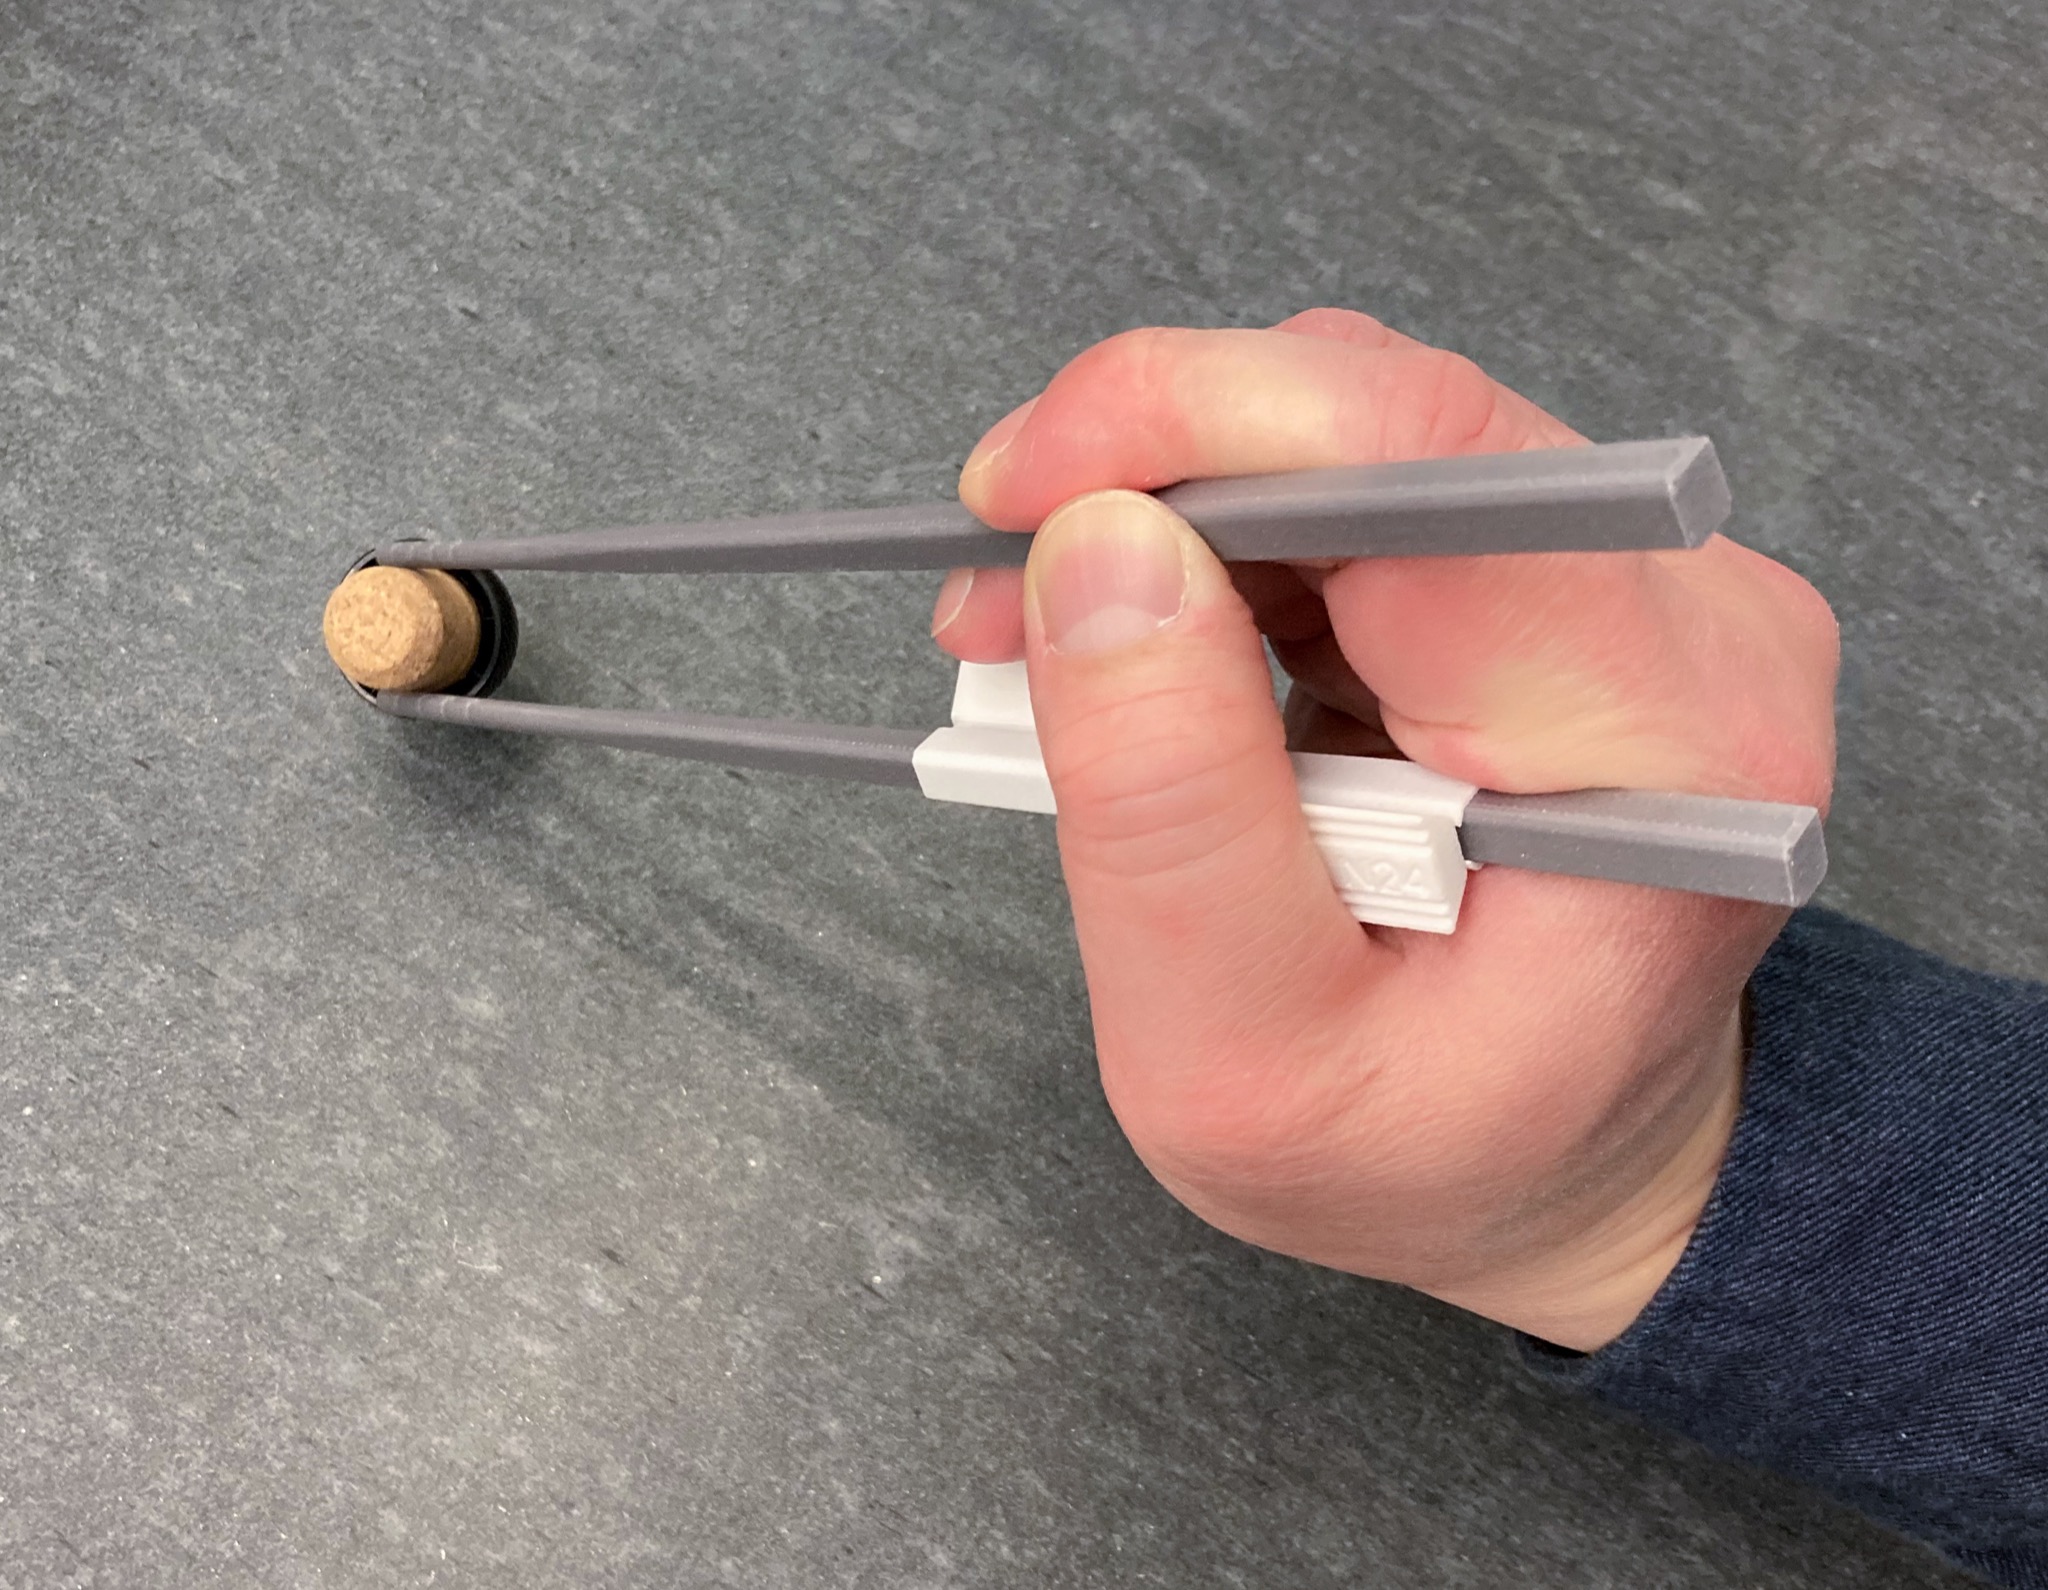
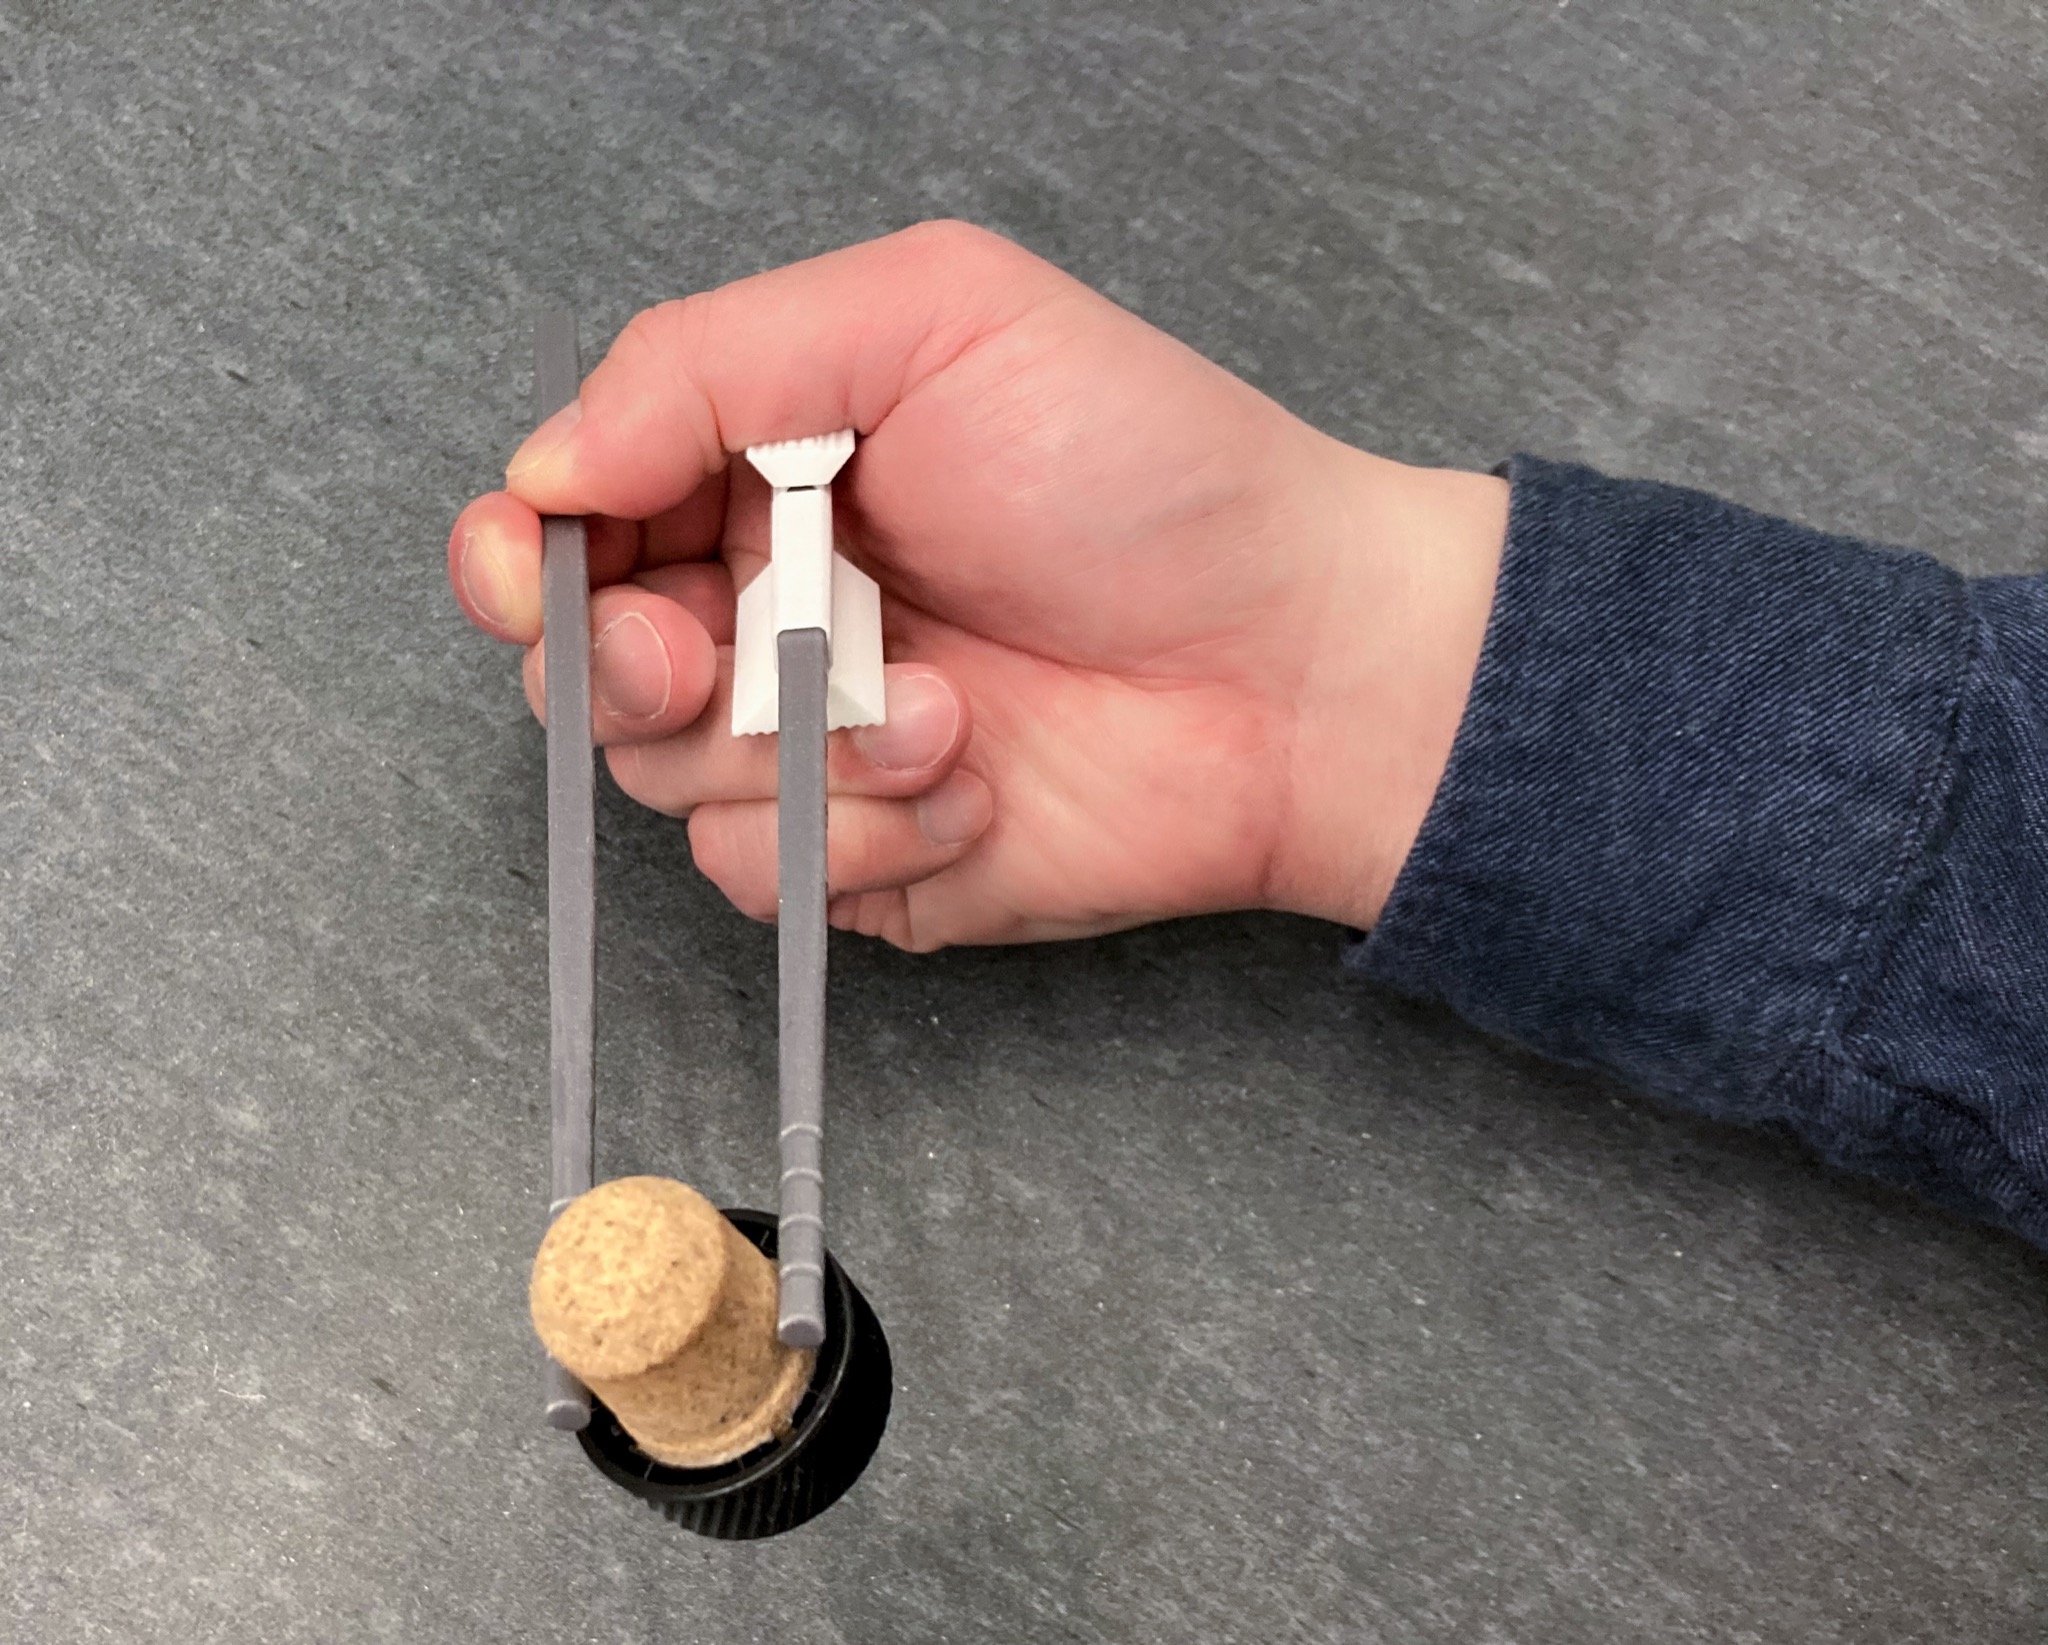
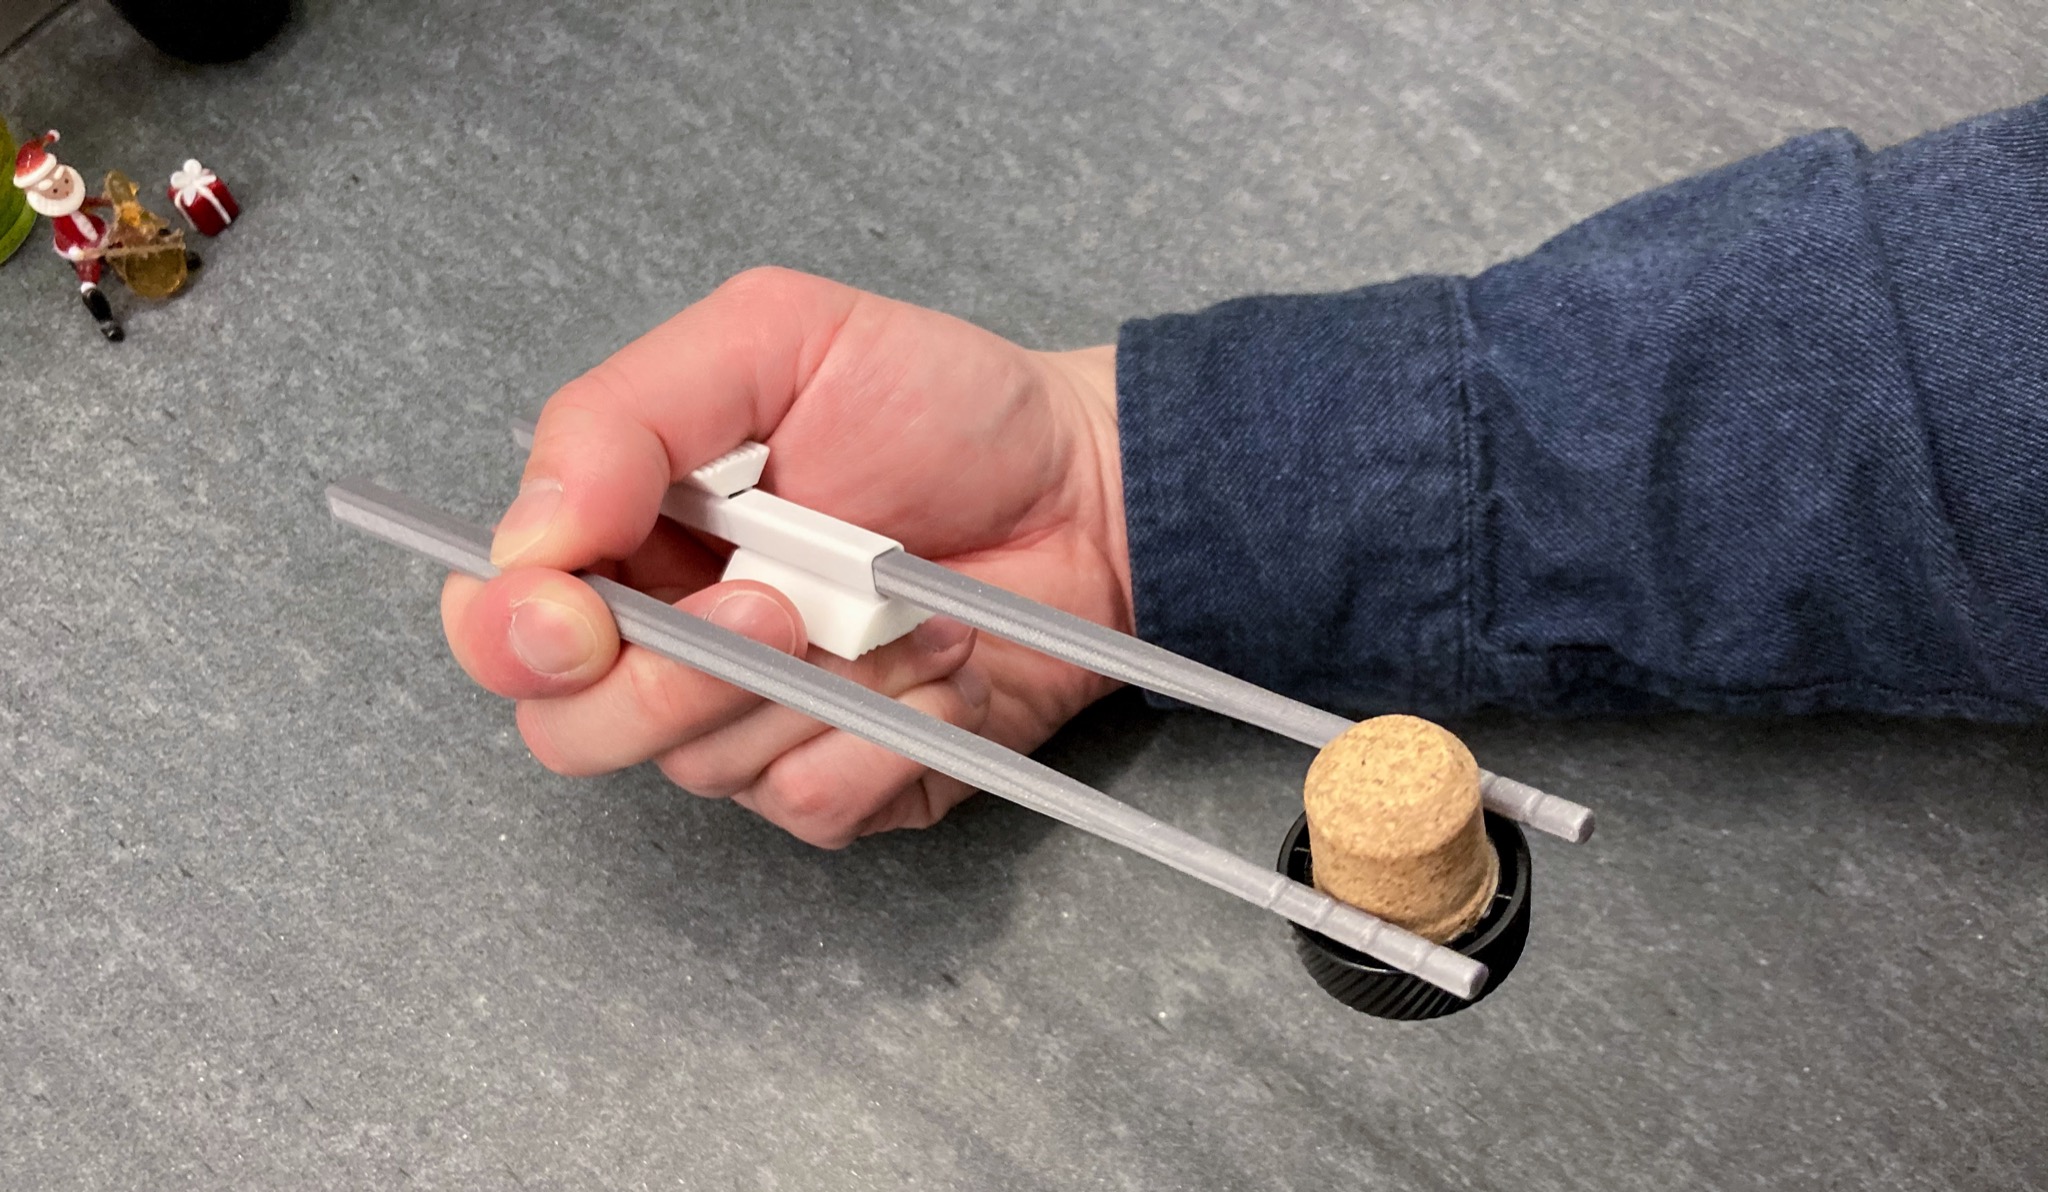
Following pictures show the same hand picking up a bottle cap with help from chopstick buddies, from various different perspectives.
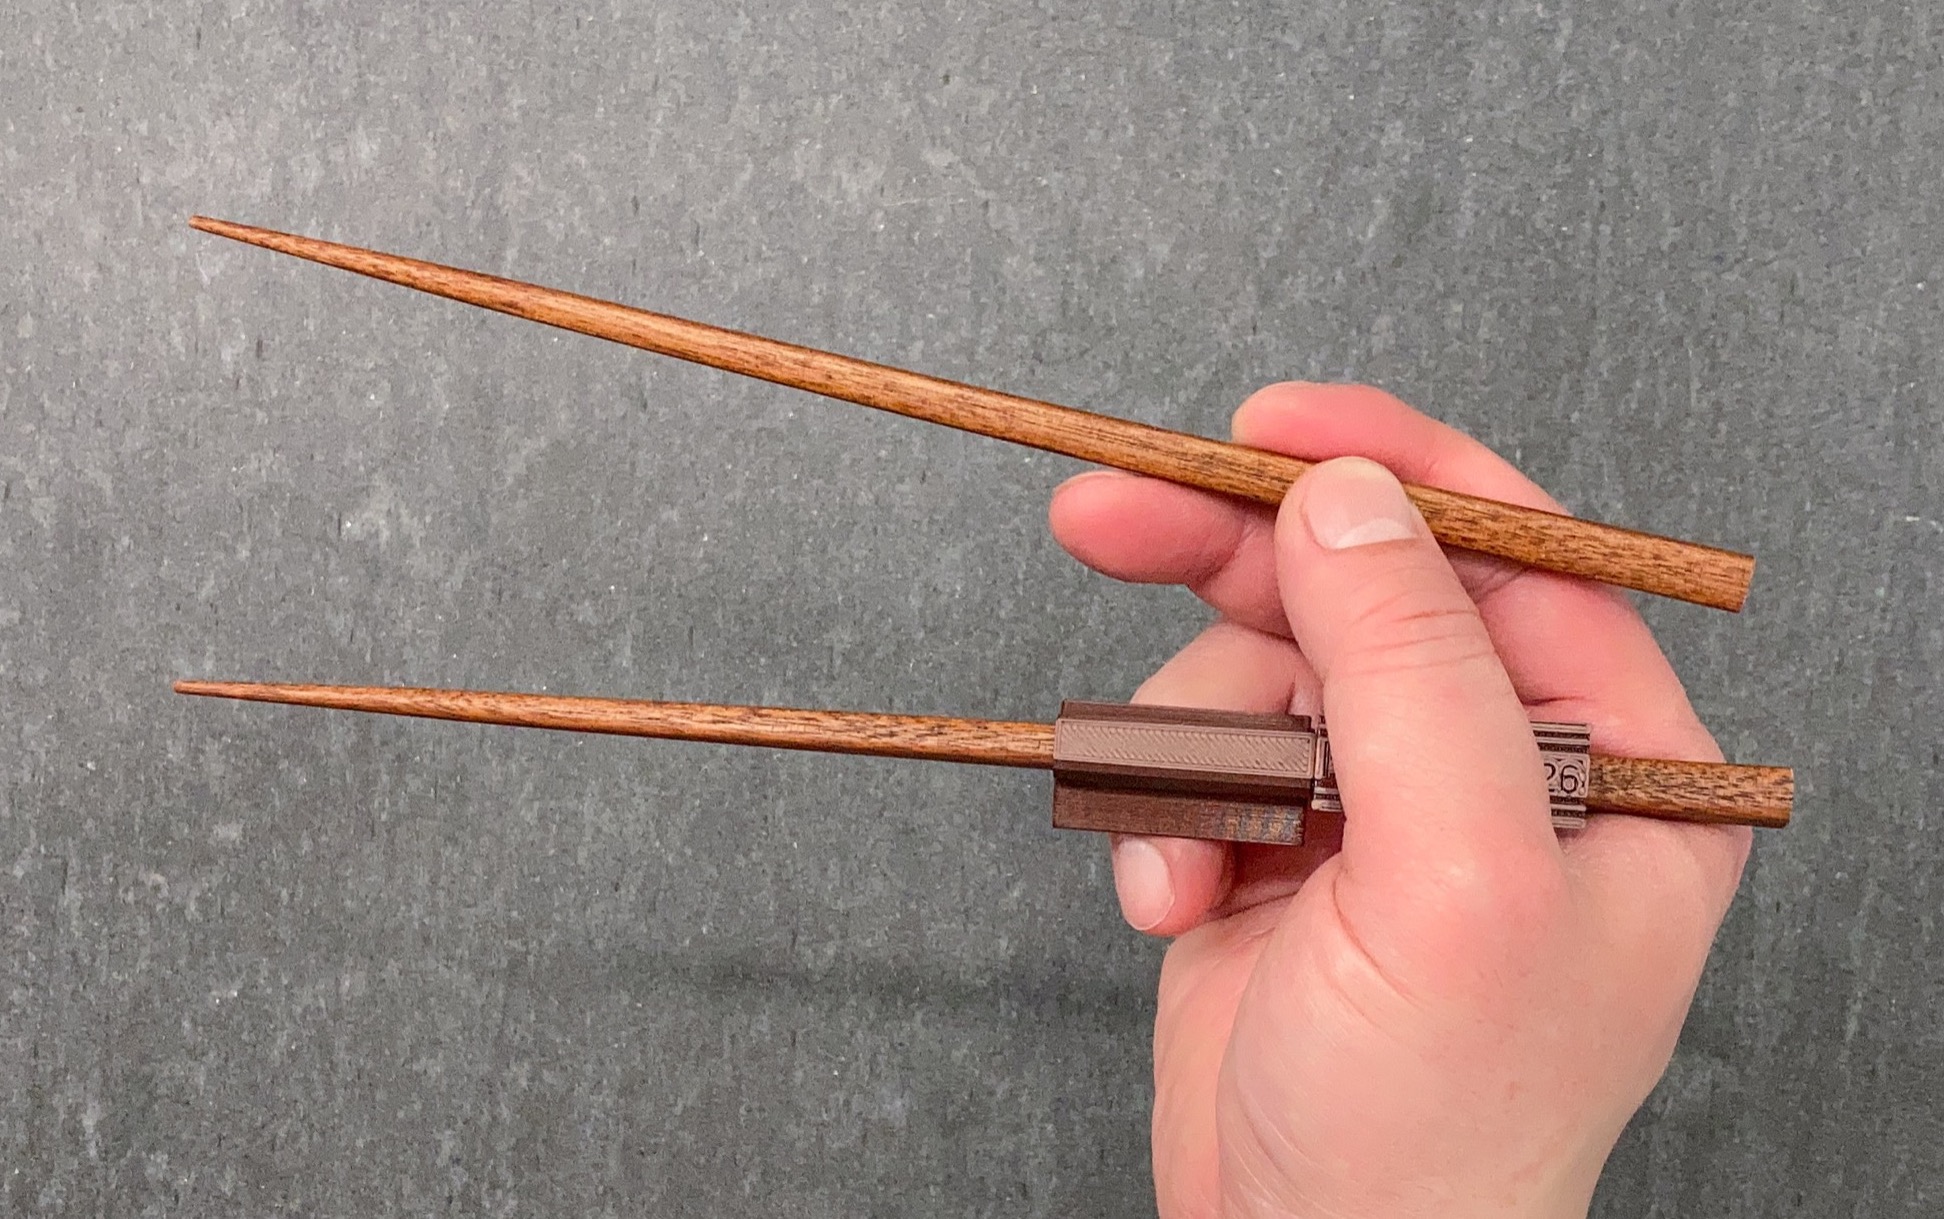
Here are pictures of chopstick buddies printed on Prusa MK3S. Extra large and large sleeves are needed to accommodate these pair of square chopsticks. They are wider than regular chopsticks.

Following are chopstick buddies printed in Prusament PLA Mystic Brown, a polychromatic filament. This filament is fascinating to look at from different angles and in different light sources.

Download 3D models
Model B1 (single-piece) can be found here:
- Hosted on marcosticks.org: B1_01 Chopstick Buddie – single-piece M23 PLA.zip
- Thingiverse 4808723
- Cults3D
- Prusa
- MyMiniFactory 163169
Model B2 (two-piece) can be found here:
- Version 3: added “huge” sleeve, in addition to small, regular, large and Xlarge. Caps have revised dome channels to accommodate the huge sleeve.
- Hosted on marcostigks.org: B2_03_Chopstick_Buddie_two_piece_M26_PLA.zip
- Version 2: original version uploaded to online model repos:
- Hosted on marcosticks.org: B2_02 Chopstick Buddie – two-piece M25 PLA.zip
- Thingiverse 4808742
- Cults3D
- Prusa
- MyMiniFactory 163171
3D printing instructions
Print in PLA. It’s the easiest to print for FDM (Fused Deposition Modeling). But note that regular PLA does not stand up to high heat. Don’t put chopstick buddies in a dishwasher – the high-heat sanitizing cycles will melt them.
The 3MF files are PrusaSlicer projects, with our own printer settings for start-up GCODE, for MKS3. It warms up the nozzle before attempting to do print bed calibration. It takes a bit longer than the built-in start-up sequence. But it does a better job. It also reduces filament oozing before printing starts. It has a custom wipe routine to clean the nozzle before the first line is put down. If you don’t like it, you can simply reset printer settings to your own default.
Individual STL files can be used by themselves in your own preferred slicer, if you don’t find the 3MF files useful, or you are not using a Prusa printer.
Set layer height to 0.20mm. You can use finer layers, if you really wish to. But 0.20mm works fines, and prints faster.
Enable “Detect bridging parameters” in PrusaSlicer, or the equivalent in your slicer. Some parts of chopstick buddies require bridging work (e.g. the triangular dome of the sleeve shell). By enabling this feature, you direct your slicer to pay special attention to areas that require bridging, for a better printed product.
Chopstick buddies can be printed with just 20% infill. You want them to be lightweight.
Post-print processing
The ends of a printed sleeve maybe be ragged, based on your slicer settings and your printer’s capabilities. Such ragged edges on the inside wall of the sleeve may cause the sleeve not slide all the way into a chopstick, to its intended target location. Use a deburring tool to clean inside edges of both ends of the sleeve, as needed. Otherwise, chopstick buddies do not require any specific post-print processing.
Similarly, for model B2, you may need to check for unexpected irregularities on cap and sleeve surfaces, where they connect via the mortise and tenon joint. These 3D models have been precisely generated with just enough gap between mortise and tenon, to ensure a tight fit. Any irregularities produced by the printer may interfere with this tight fit. Use a deburring tools or a file to fix these irregularities.
For general post-print processing, consult the following video.
Assembly and adjustments
Earlier sections of this article already touched upon the assembly of cap to sleeve. Various ways to fasten a chopstick buddie to a chopstick was described as well. For additional information, consult the following YouTube video.
#ChopstickCramp