Last Updated on January 30, 2022 by Staff
Training Marcosticks (model T) are designed to guide beginners and lifelong users alike to adopt a proper chopstick grip, the Standard Grip.
They allow learners to focus first on mastering the twirling of the top chopstick, from the closed posture to the open posture, and back. Learners can practice this twirling alone, based on principles of the planetary gear train, without having to simultaneously learn to secure the bottom chopstick using the required thumb pose. Such thumb pose can be mastered later as a second step.
To learn more about various learner and training tools marcosticks.org makes freely available, check out Training Marcosticks That Work. For other learner and training tools, consult the catalog at the 3D-printing page. You may 3d-print them yourself, even though these training tools are covered by issued patents or pending patent applications.
Table of Contents
How they help you
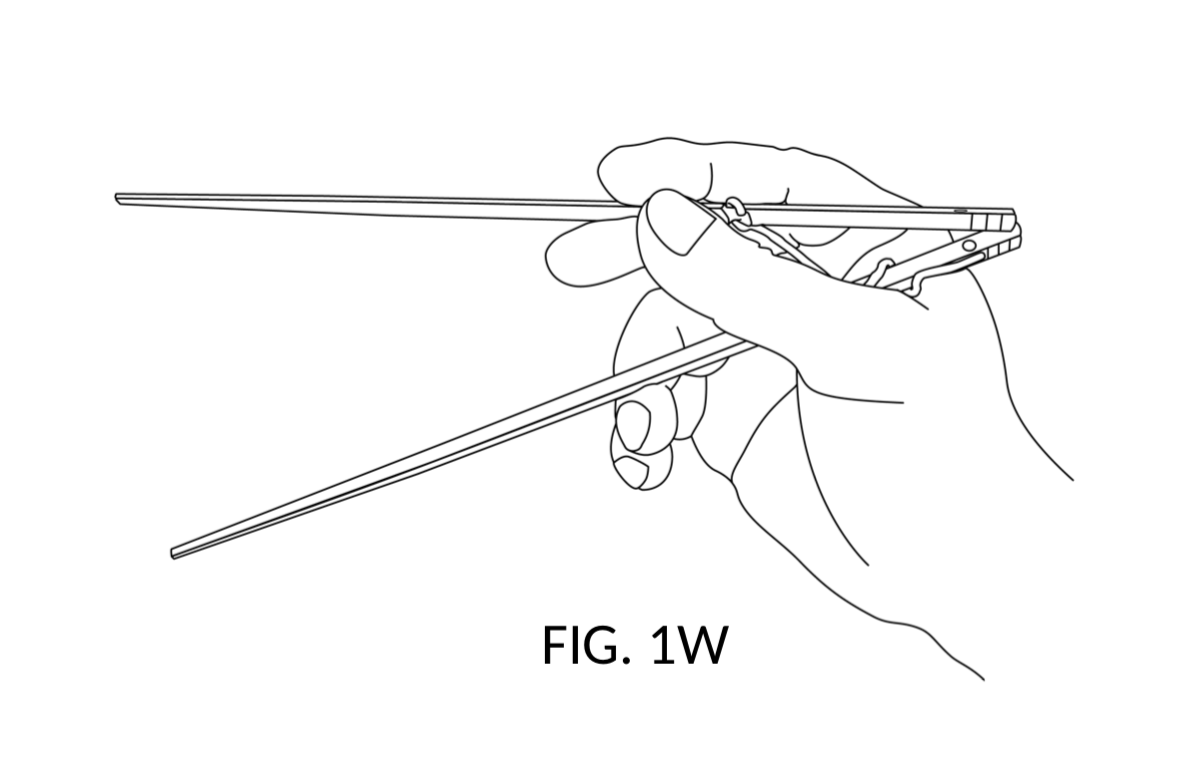
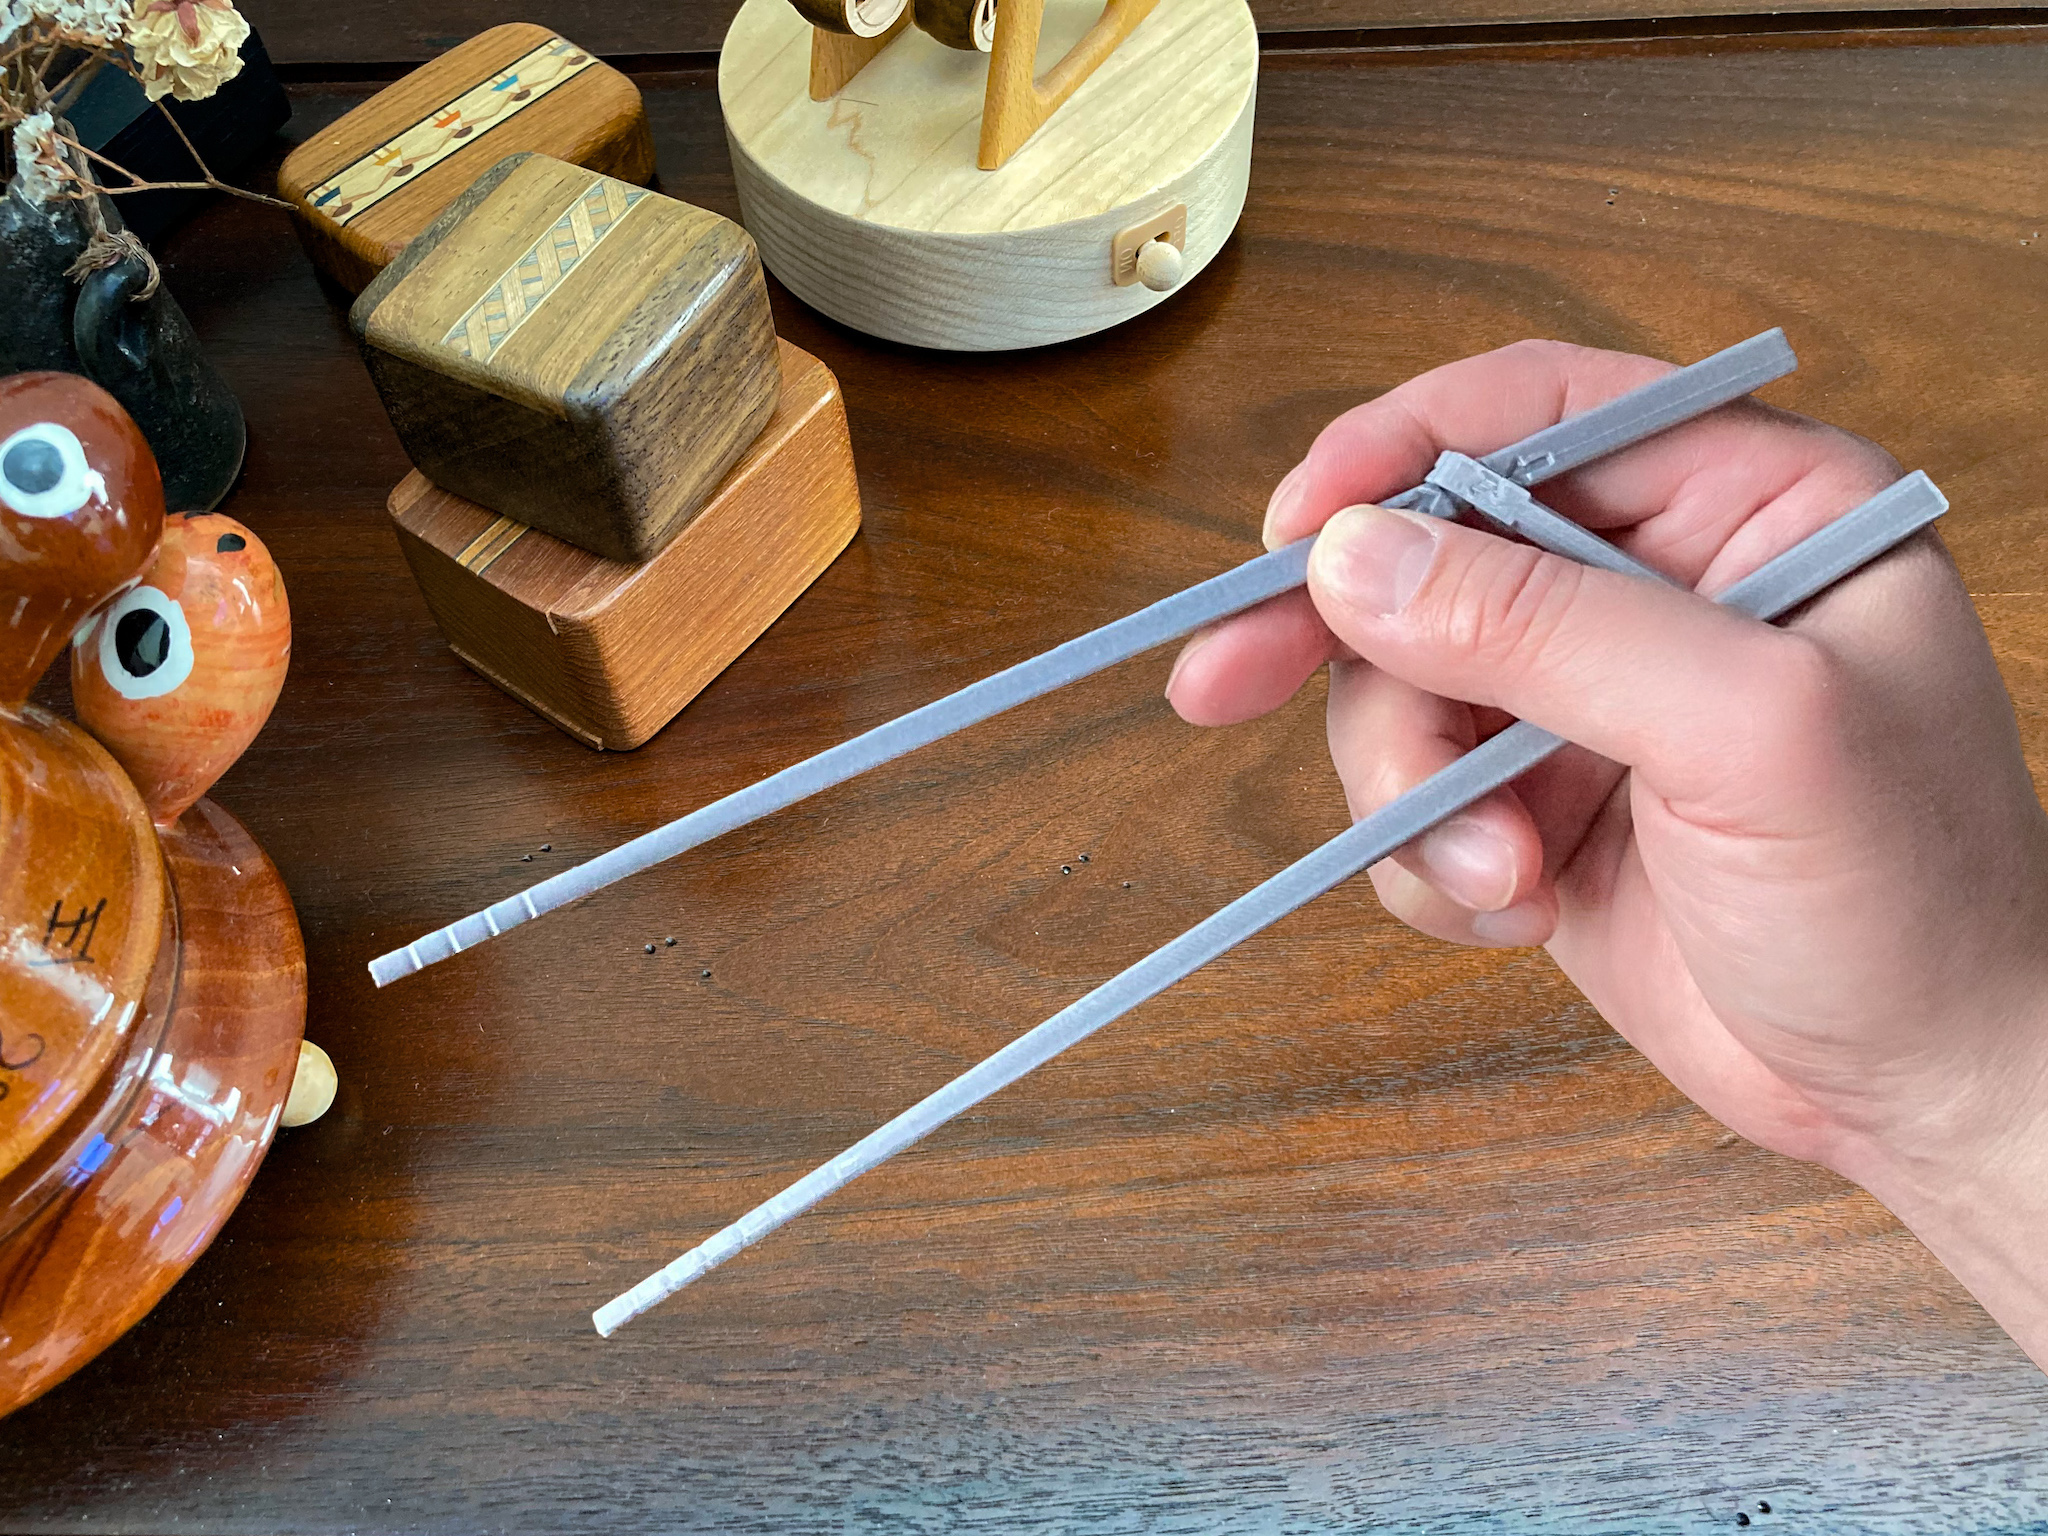
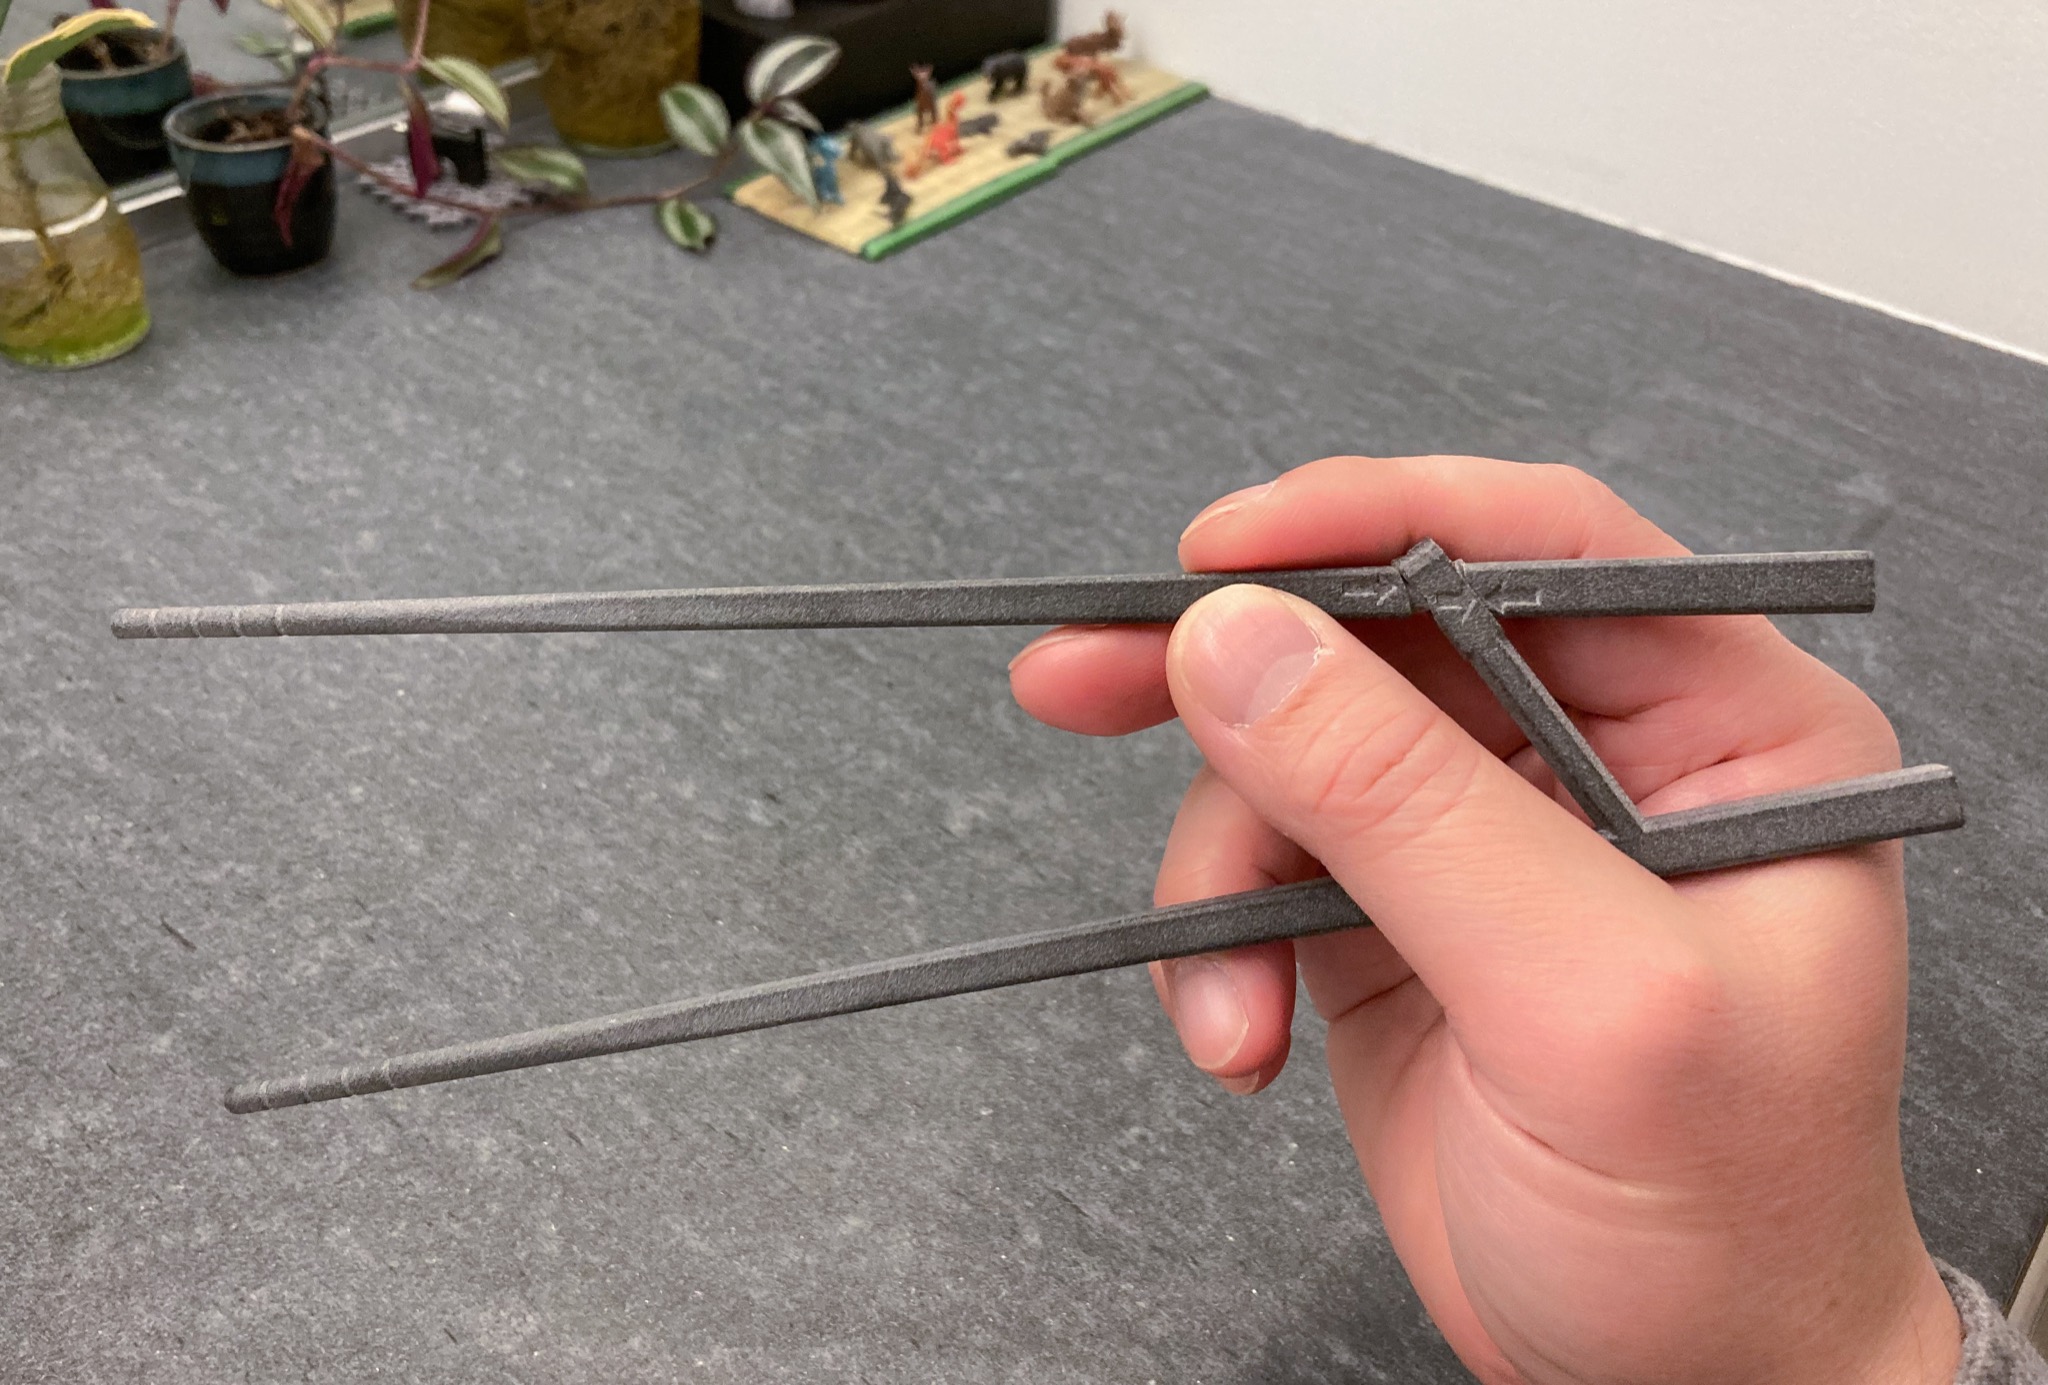
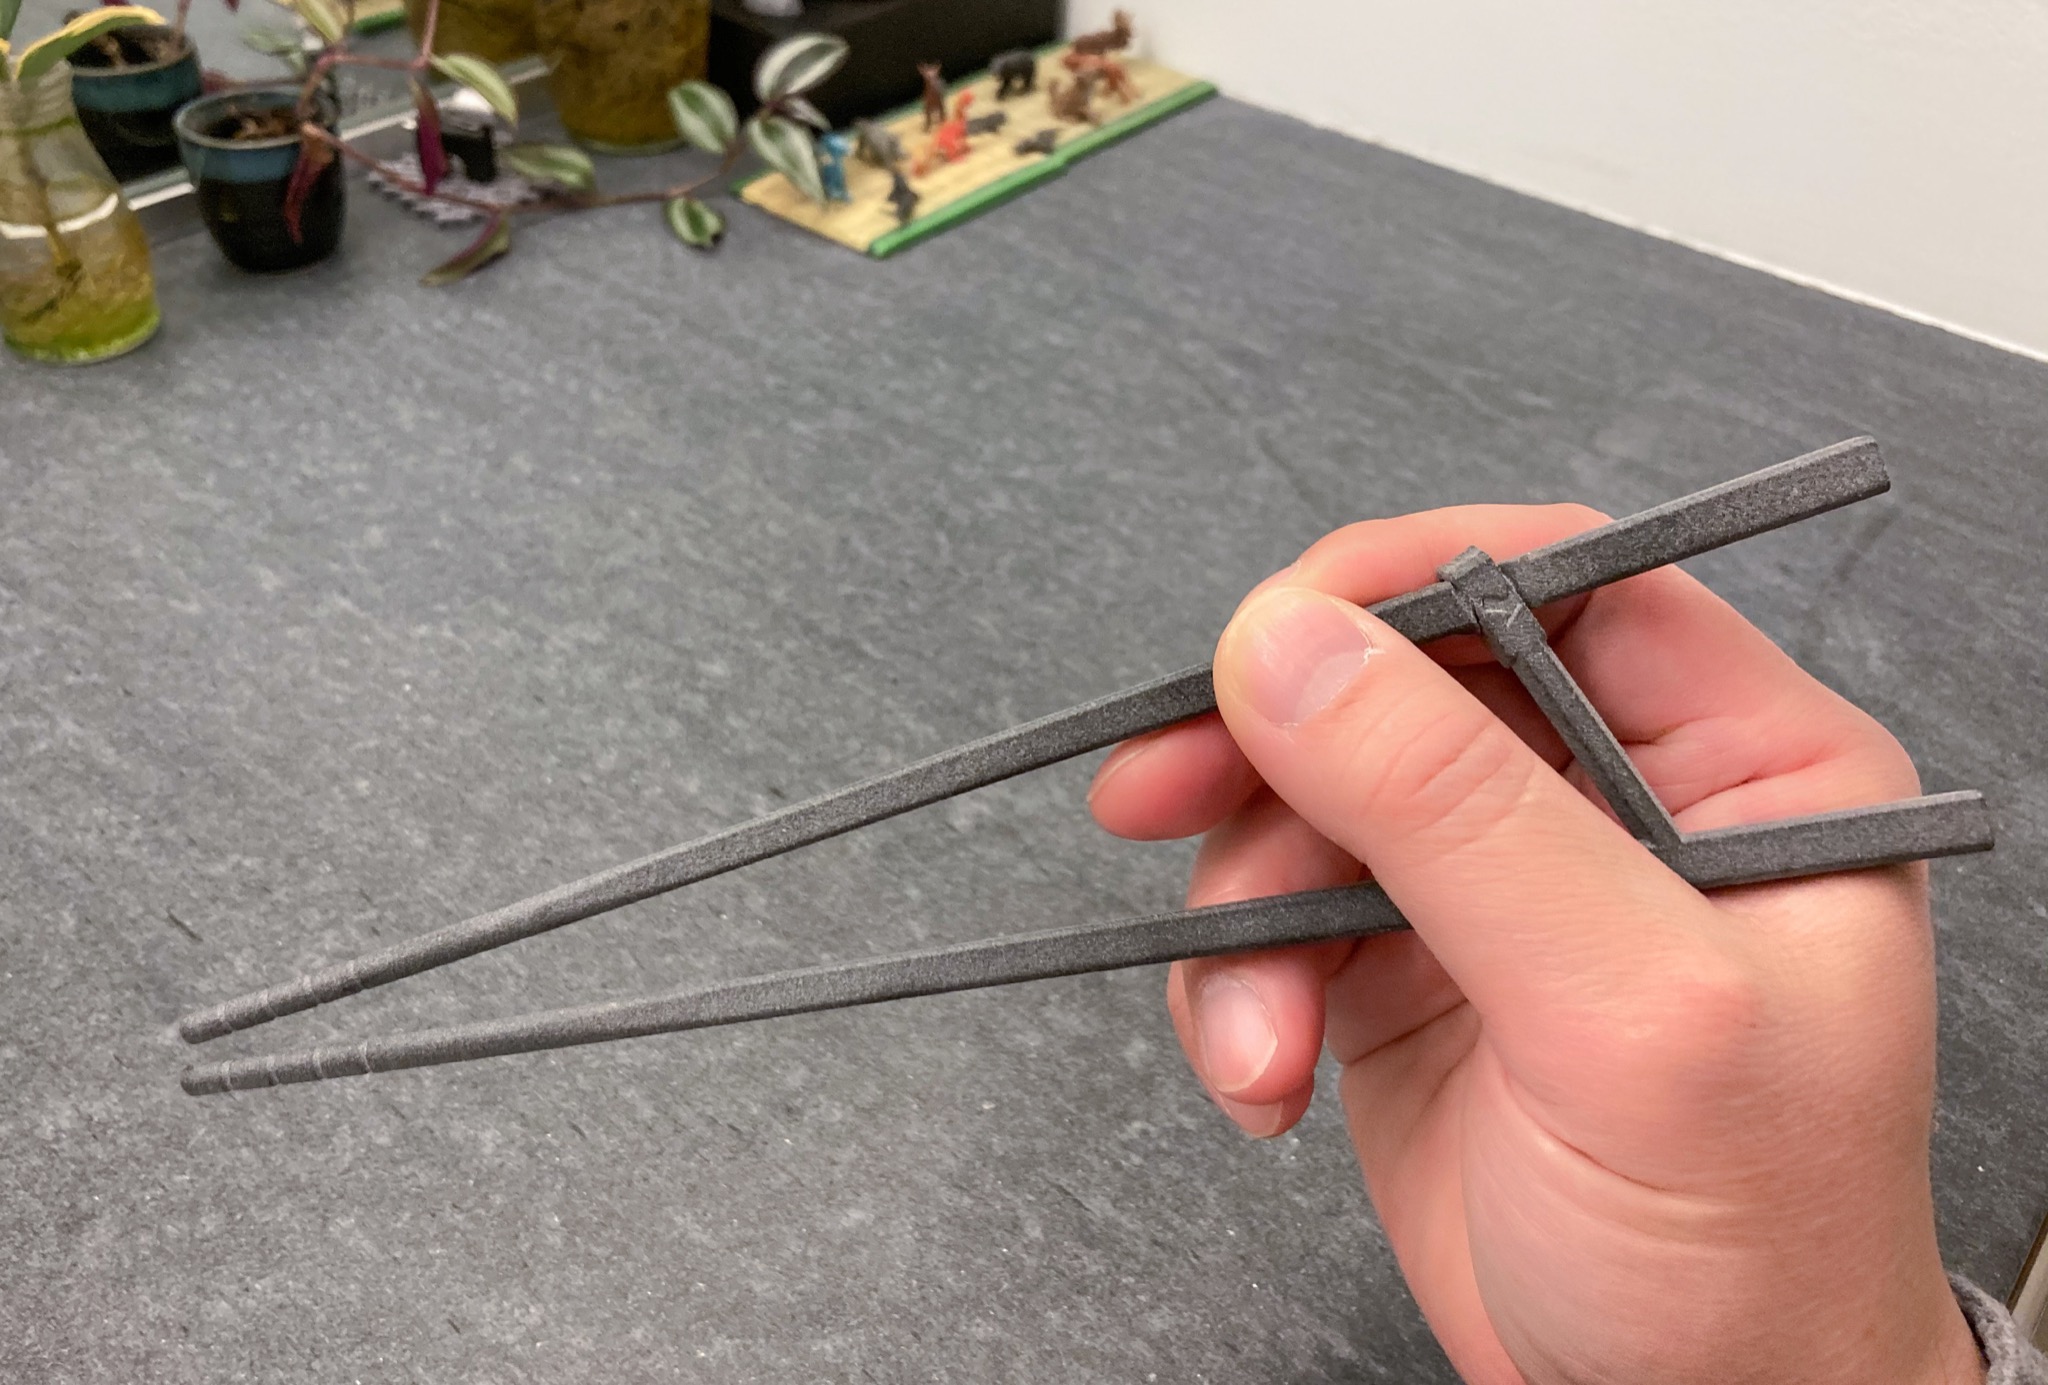
See how easy it is to position and secure both chopsticks in the video that follows. The learner first focuses on grabbing the top chopstick using the tripod hold. The thumb, the index finger and the middle finger securely grip the top chopstick, such that it cannot be pulled away by the left hand. Then the same fingers learn to twirl the same chopstick. After that, the thumb base and the ring knuckle learn to hold the bottom chopstick in place securely. That’s it.
Training Marcosticks come in various sizes. Most users will find the “Standard” size (shown above) adequate for daily uses. The next two video clips demonstrate the “Large” version, where the two chopsticks are separated farther by a longer connecting piece.
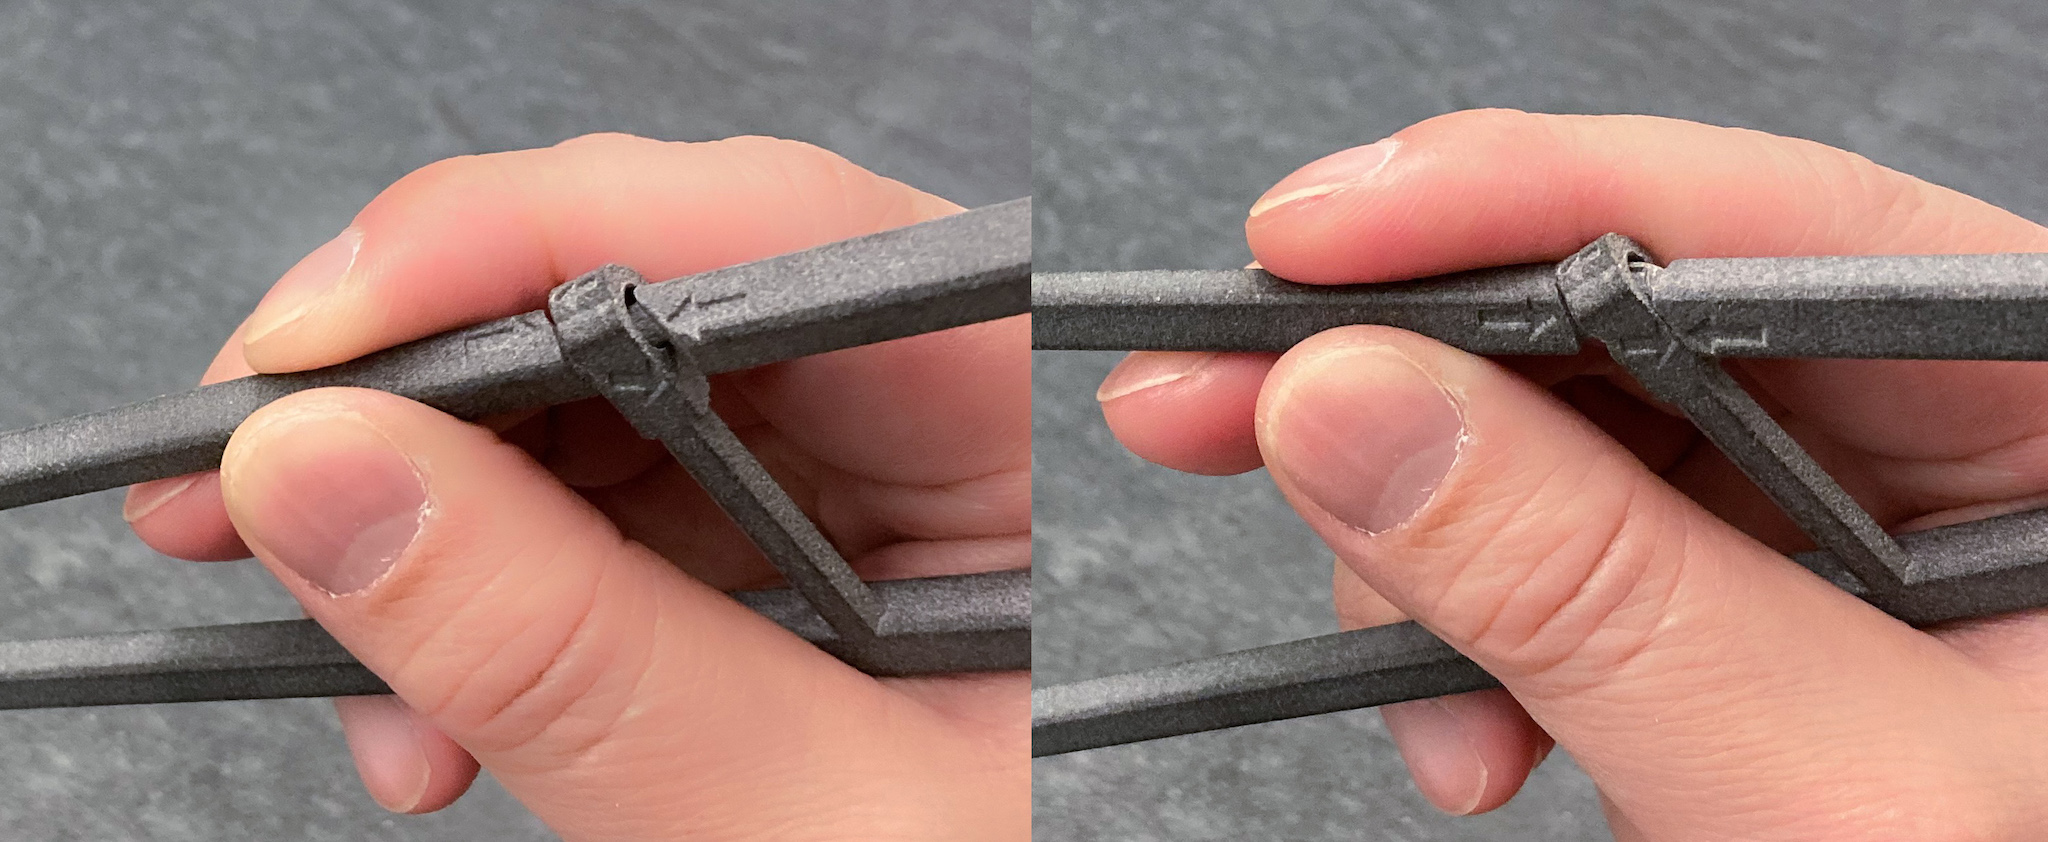
The slow-motion video below demonstrates compression capabilities of Training Marcosticks. They offer almost equivalent finger dynamics, dexterity and power, compared to plain chopsticks.
The slow-motion video below demonstrates the extension capabilities of Training Marcosticks.
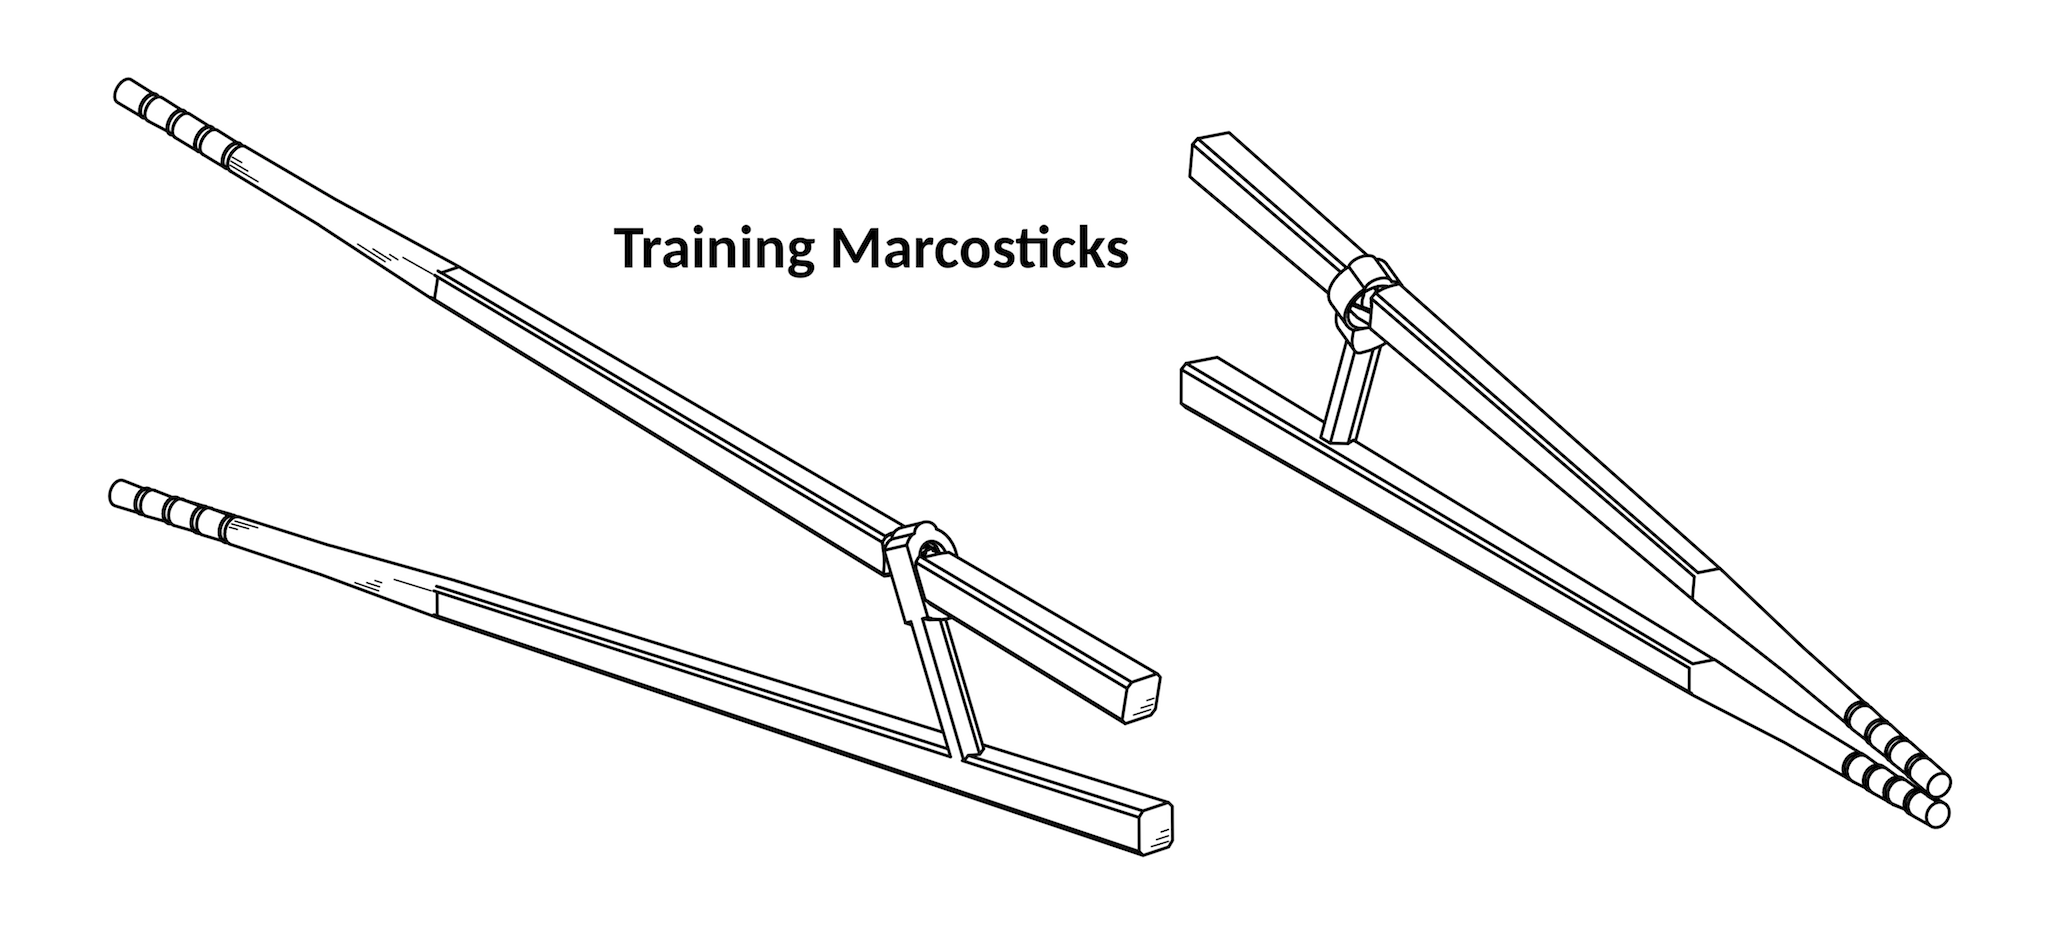
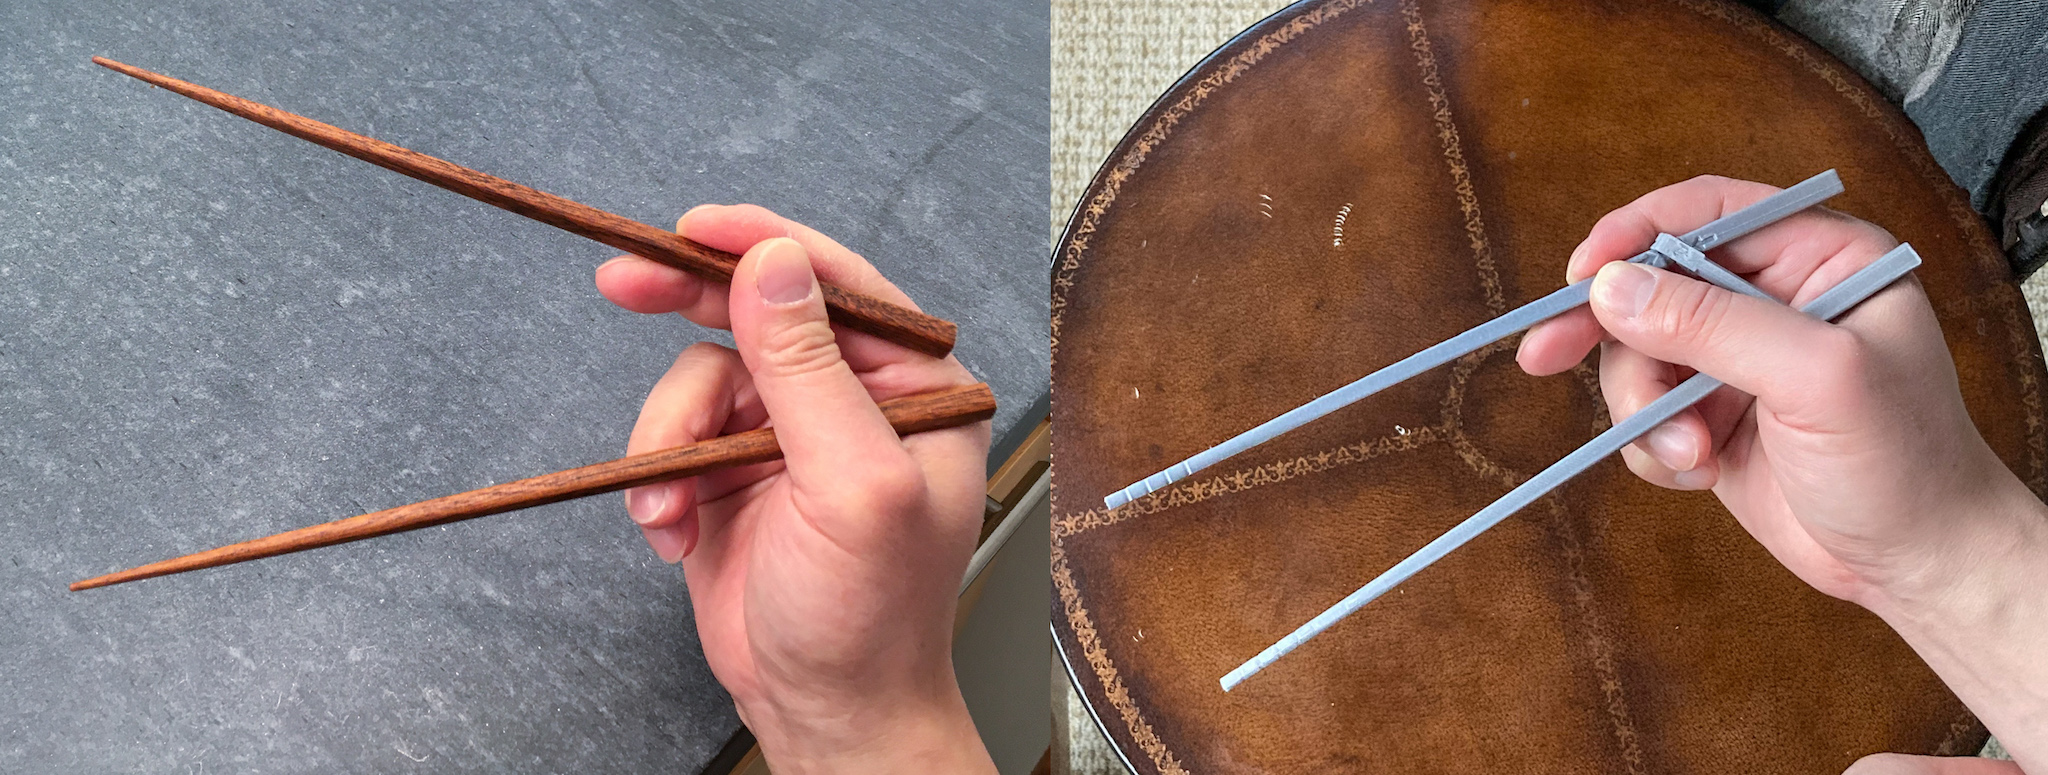
Following two images contrast training marcosticks (right) against plain chopsticks (left). You can visually confirm that training marcosticks teach identical Standard Grip motion as plain chopsticks. The only area in which training marcostick lags behind, is the maximum distance it can spread tips of the two sticks apart.

How they came about
As soon as we had volunteers try the first crude prototype of the ergonomic marcosticks, we realized that we would also need to invent training marcosticks that actually worked. While ergonomic marcosticks worked for advanced learners, beginners needed additional help. The challenge was figuring out how to achieve this training goal, without sabotaging finger dynamics required to twirl the Standard Grip.
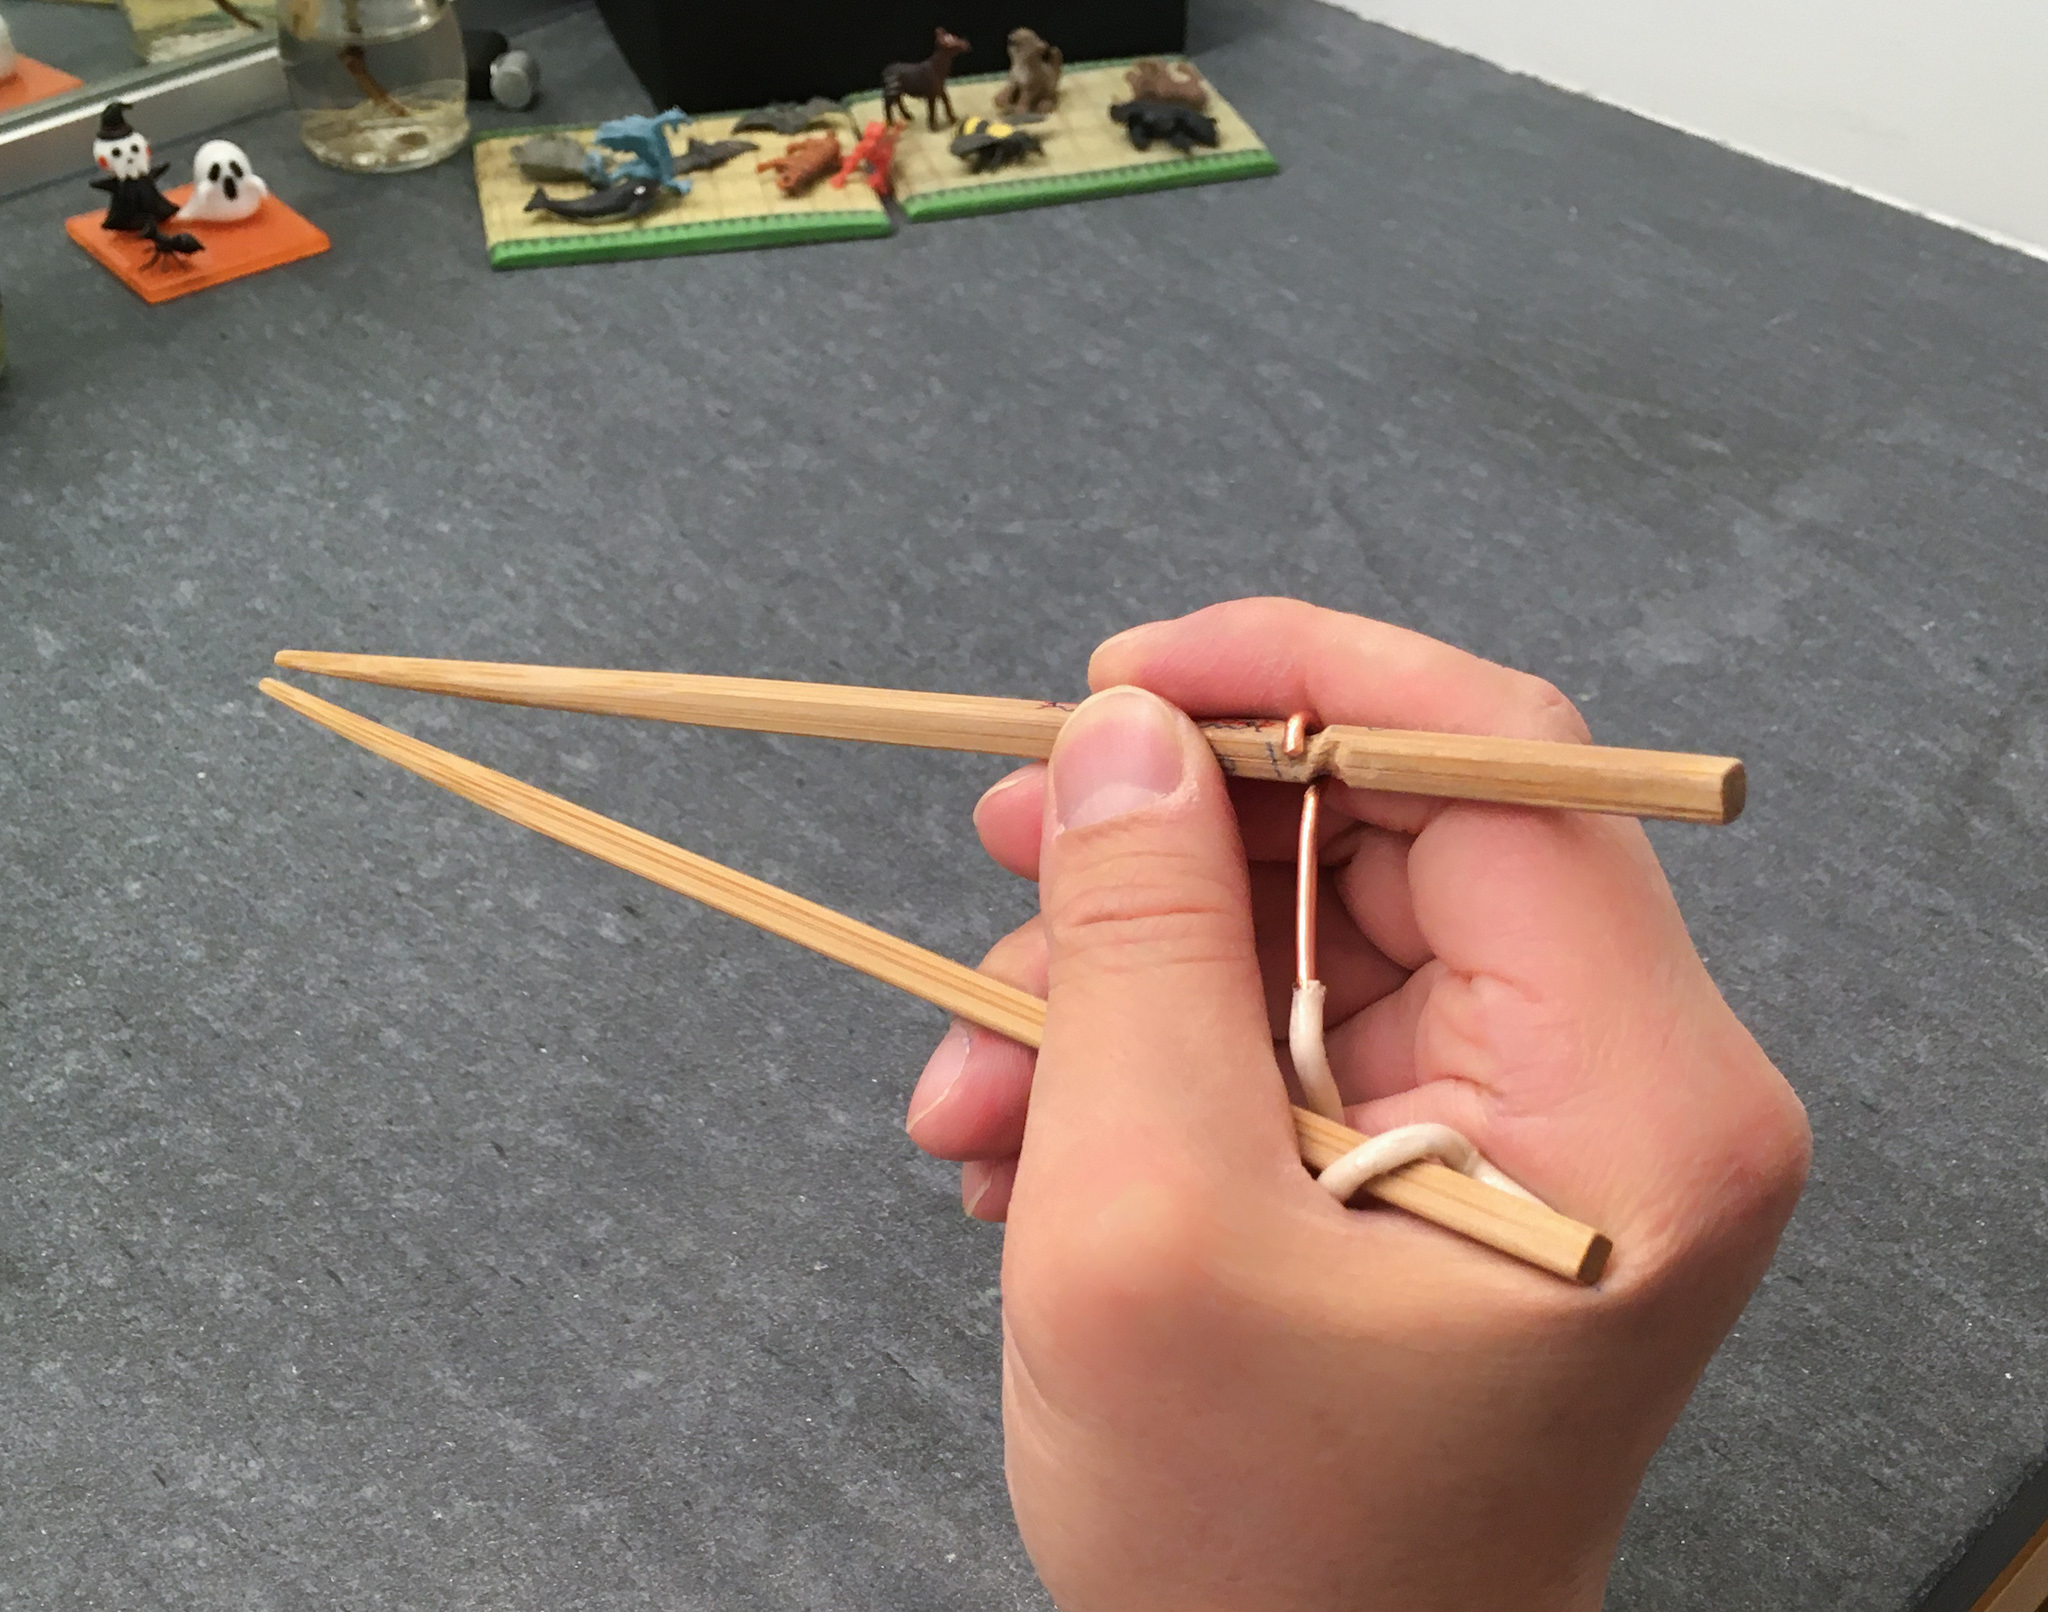
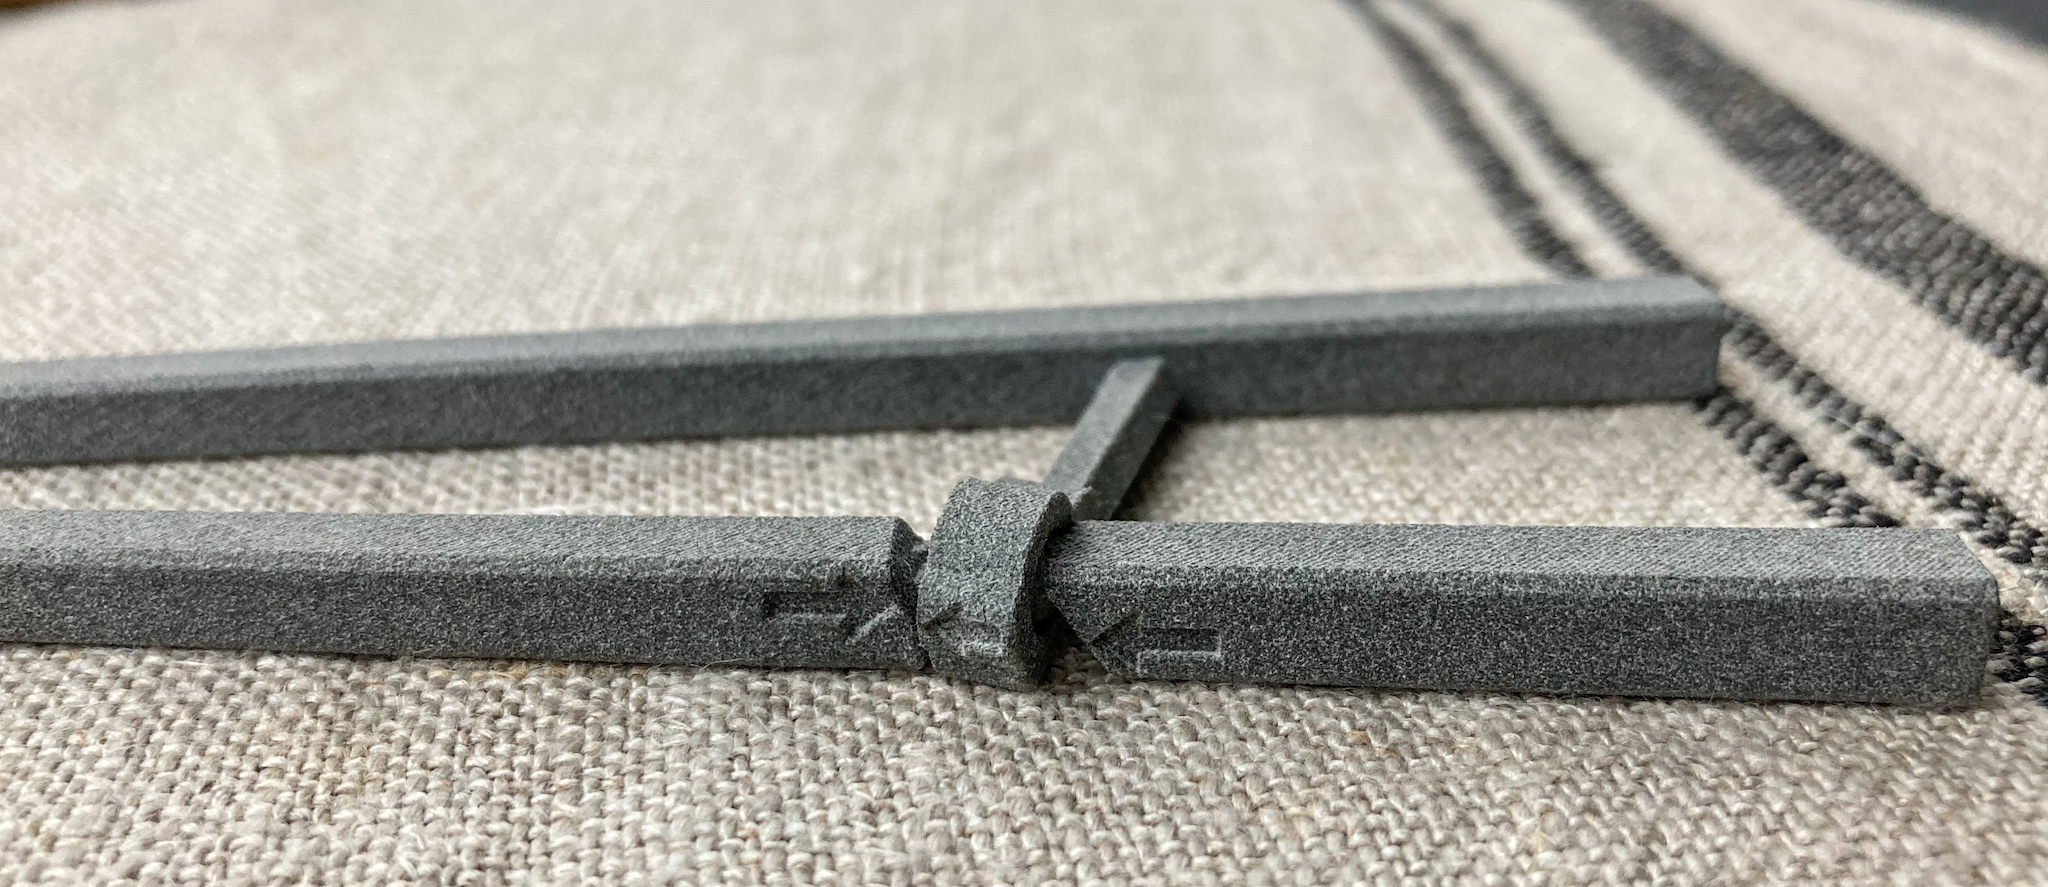
Iterations of prototypes eventually led to a design that worked, shown above. A solid copper wire is used to form the C-hook. The same copper wire extends down forming the coupling neck that connects the two chopsticks. It ends in a spiral, allowing it to grip the rear end of the bottom chopstick.
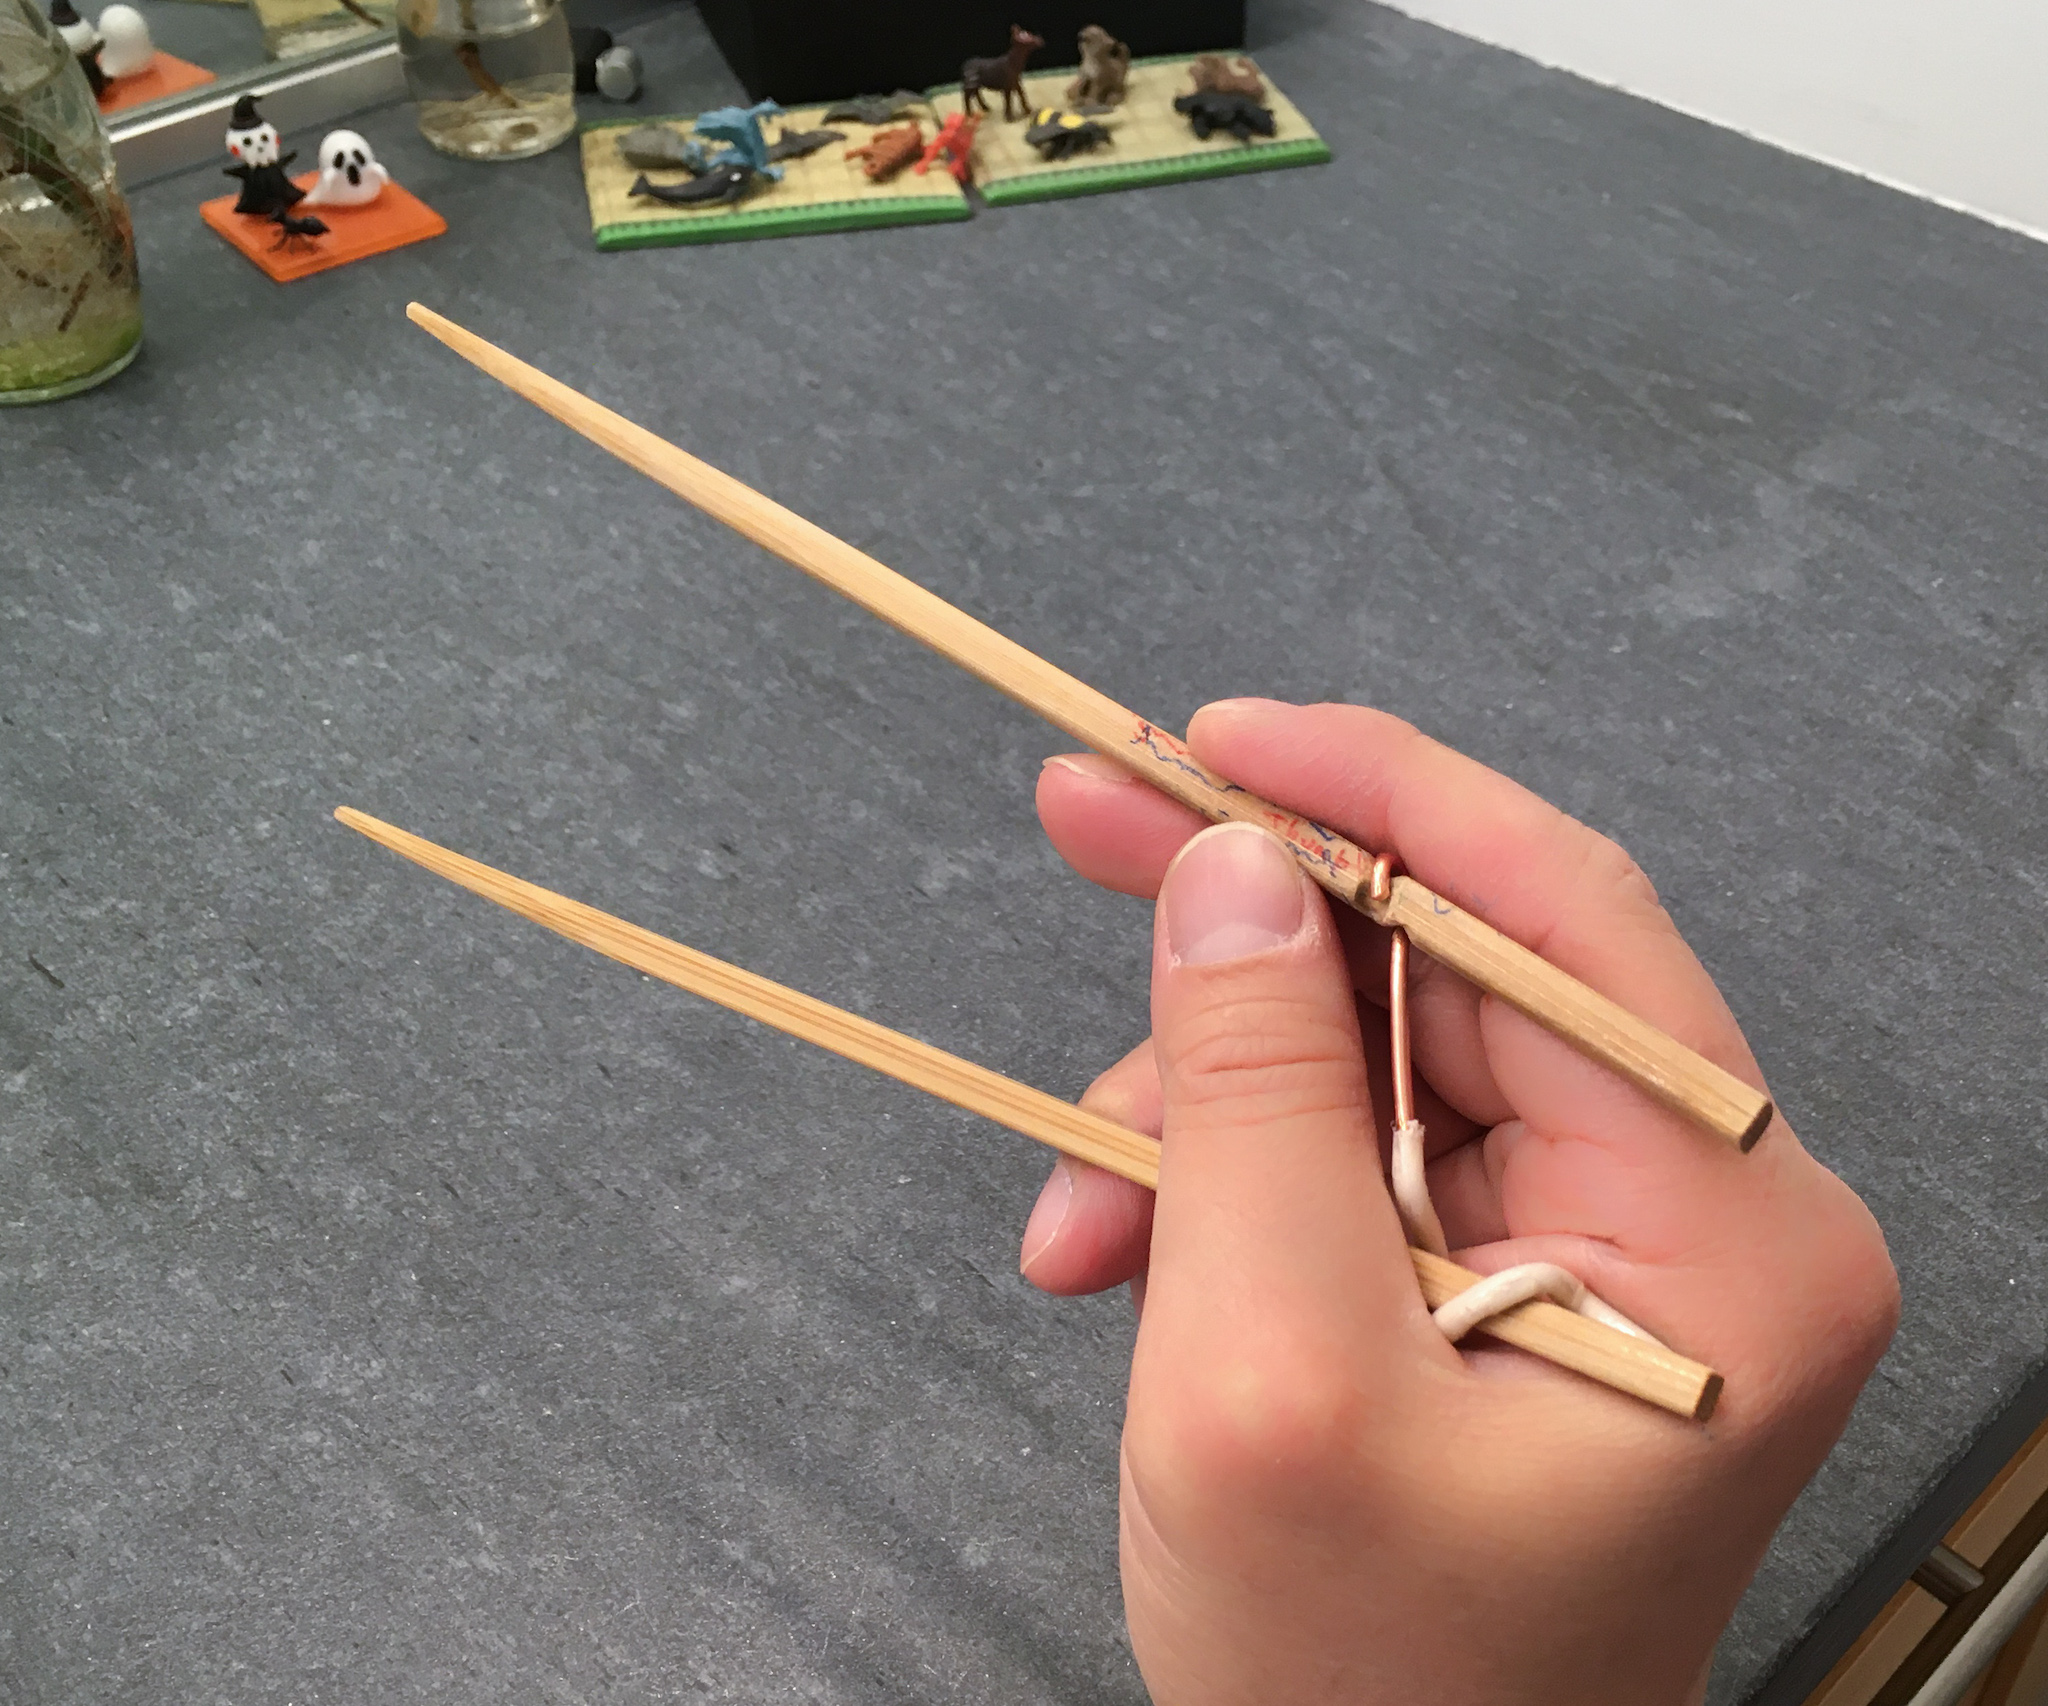
The groove carved into the top chopstick is shaped to allow the stick to rotate for 90° around the longitudinal axis, and only 90°. As the top chopstick rotates, the groove forces it to tilt at the same time. The picture above shows the prototype at the open-posture end of the twirling motion, where the top chopstick is tilted open.

Model T is a design not tried in the past by generations of inventors. The main reason is that nobody bothered to understand how fingers actually twirled chopsticks. Folks just assumed that chopsticks worked as a third-class Archimedean lever, which we now know is not true. Countless learning chopsticks continued to force the top stick to tilt, without a way for it to rotate at the same time. One example is shown above.
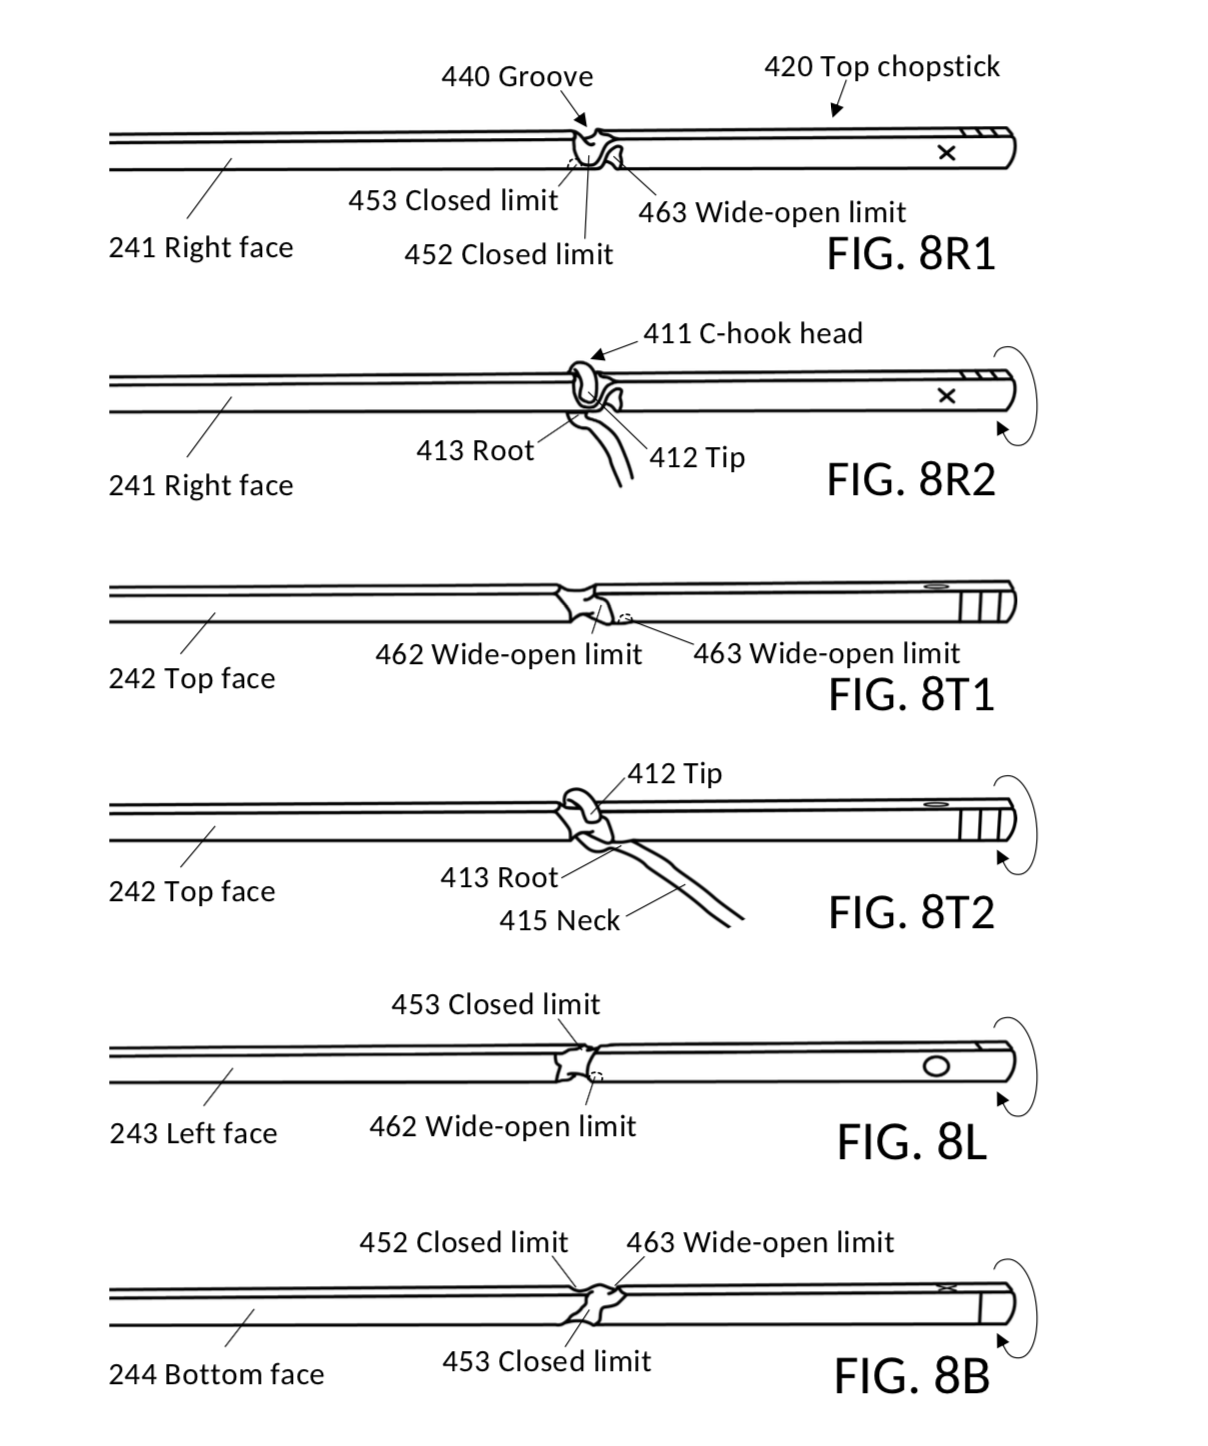
Training marcosticks that we patented instead explicitly allows the top stick to move in a combined motion incorporating both rotation and tilting, following exactly the path prescribed by Standard Grip. This allows fingers to twirl the top stick using the planetary gear train principle. Above drawing illustrates the coupling of the C-hook with the groove. It show how the groove forces the neck to tilt, as the stick rotates from the closed posture (FIG. 8R2) to the open posture (FIG. 8T2).
The patent filing was just to allow us to preempt anyone from claiming this design, so no one can stop enthusiasts from freely reproducing training marcosticks. We want to make it free for anyone to print them. We ask only that you label them Marcosticks, to further our cause. Please see our Mark-and-go license.
3D design considerations
Model T is the 3D-printable version of the original prototype. It is designed to be easily printed on most consumer-grade 3D printer. Some key design features include:
- Absolutely no need for printing support
- No need to assemble printed parts
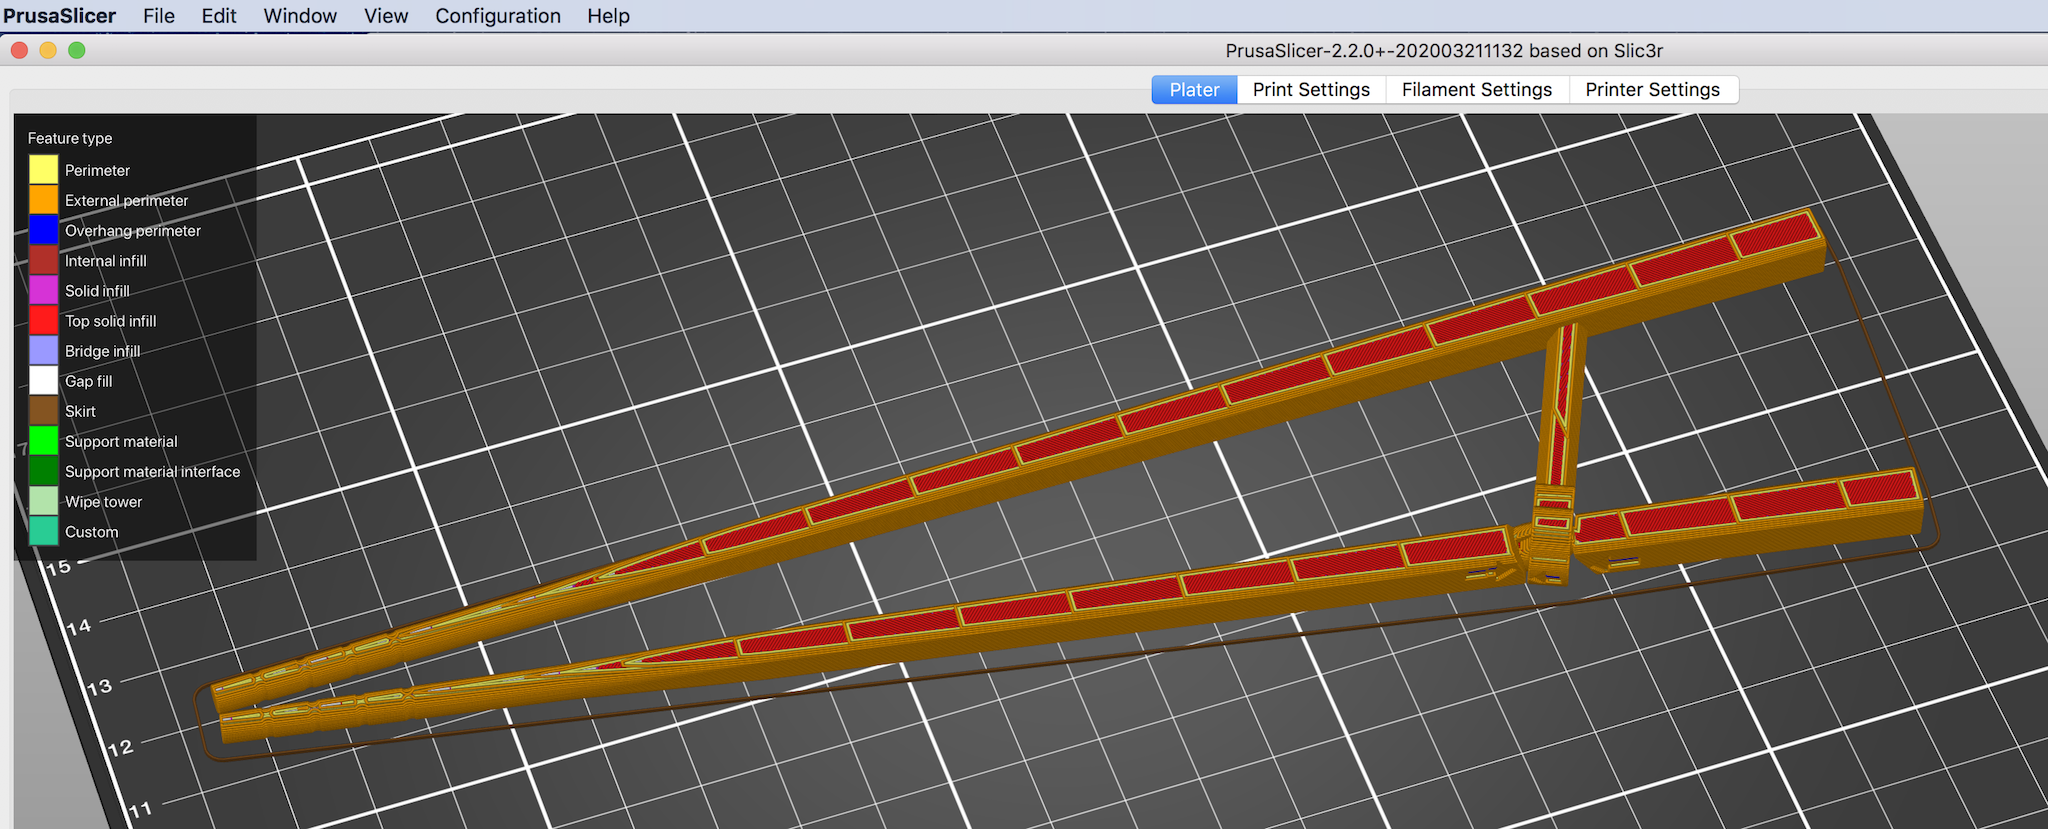
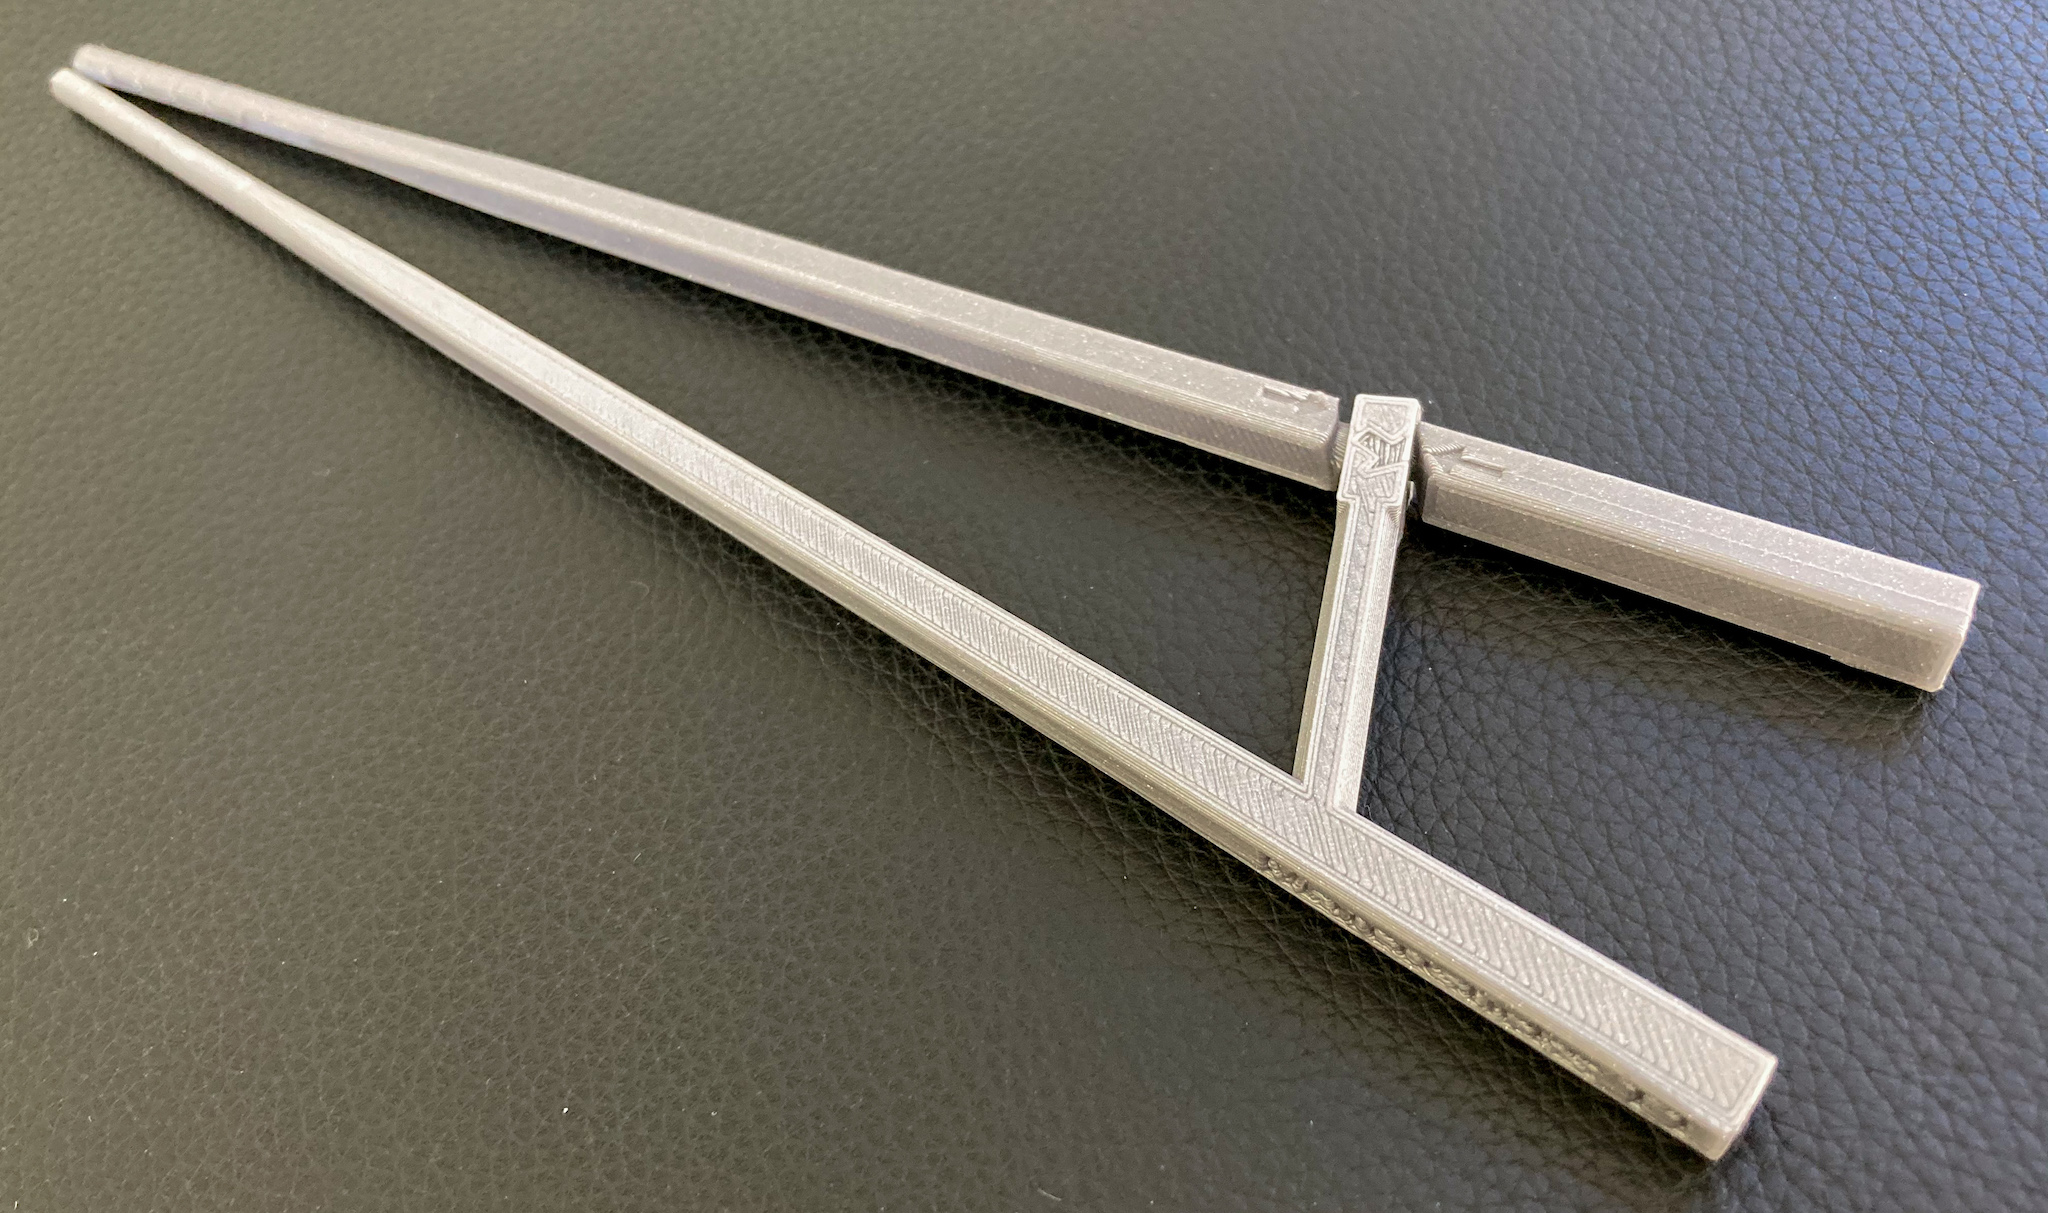
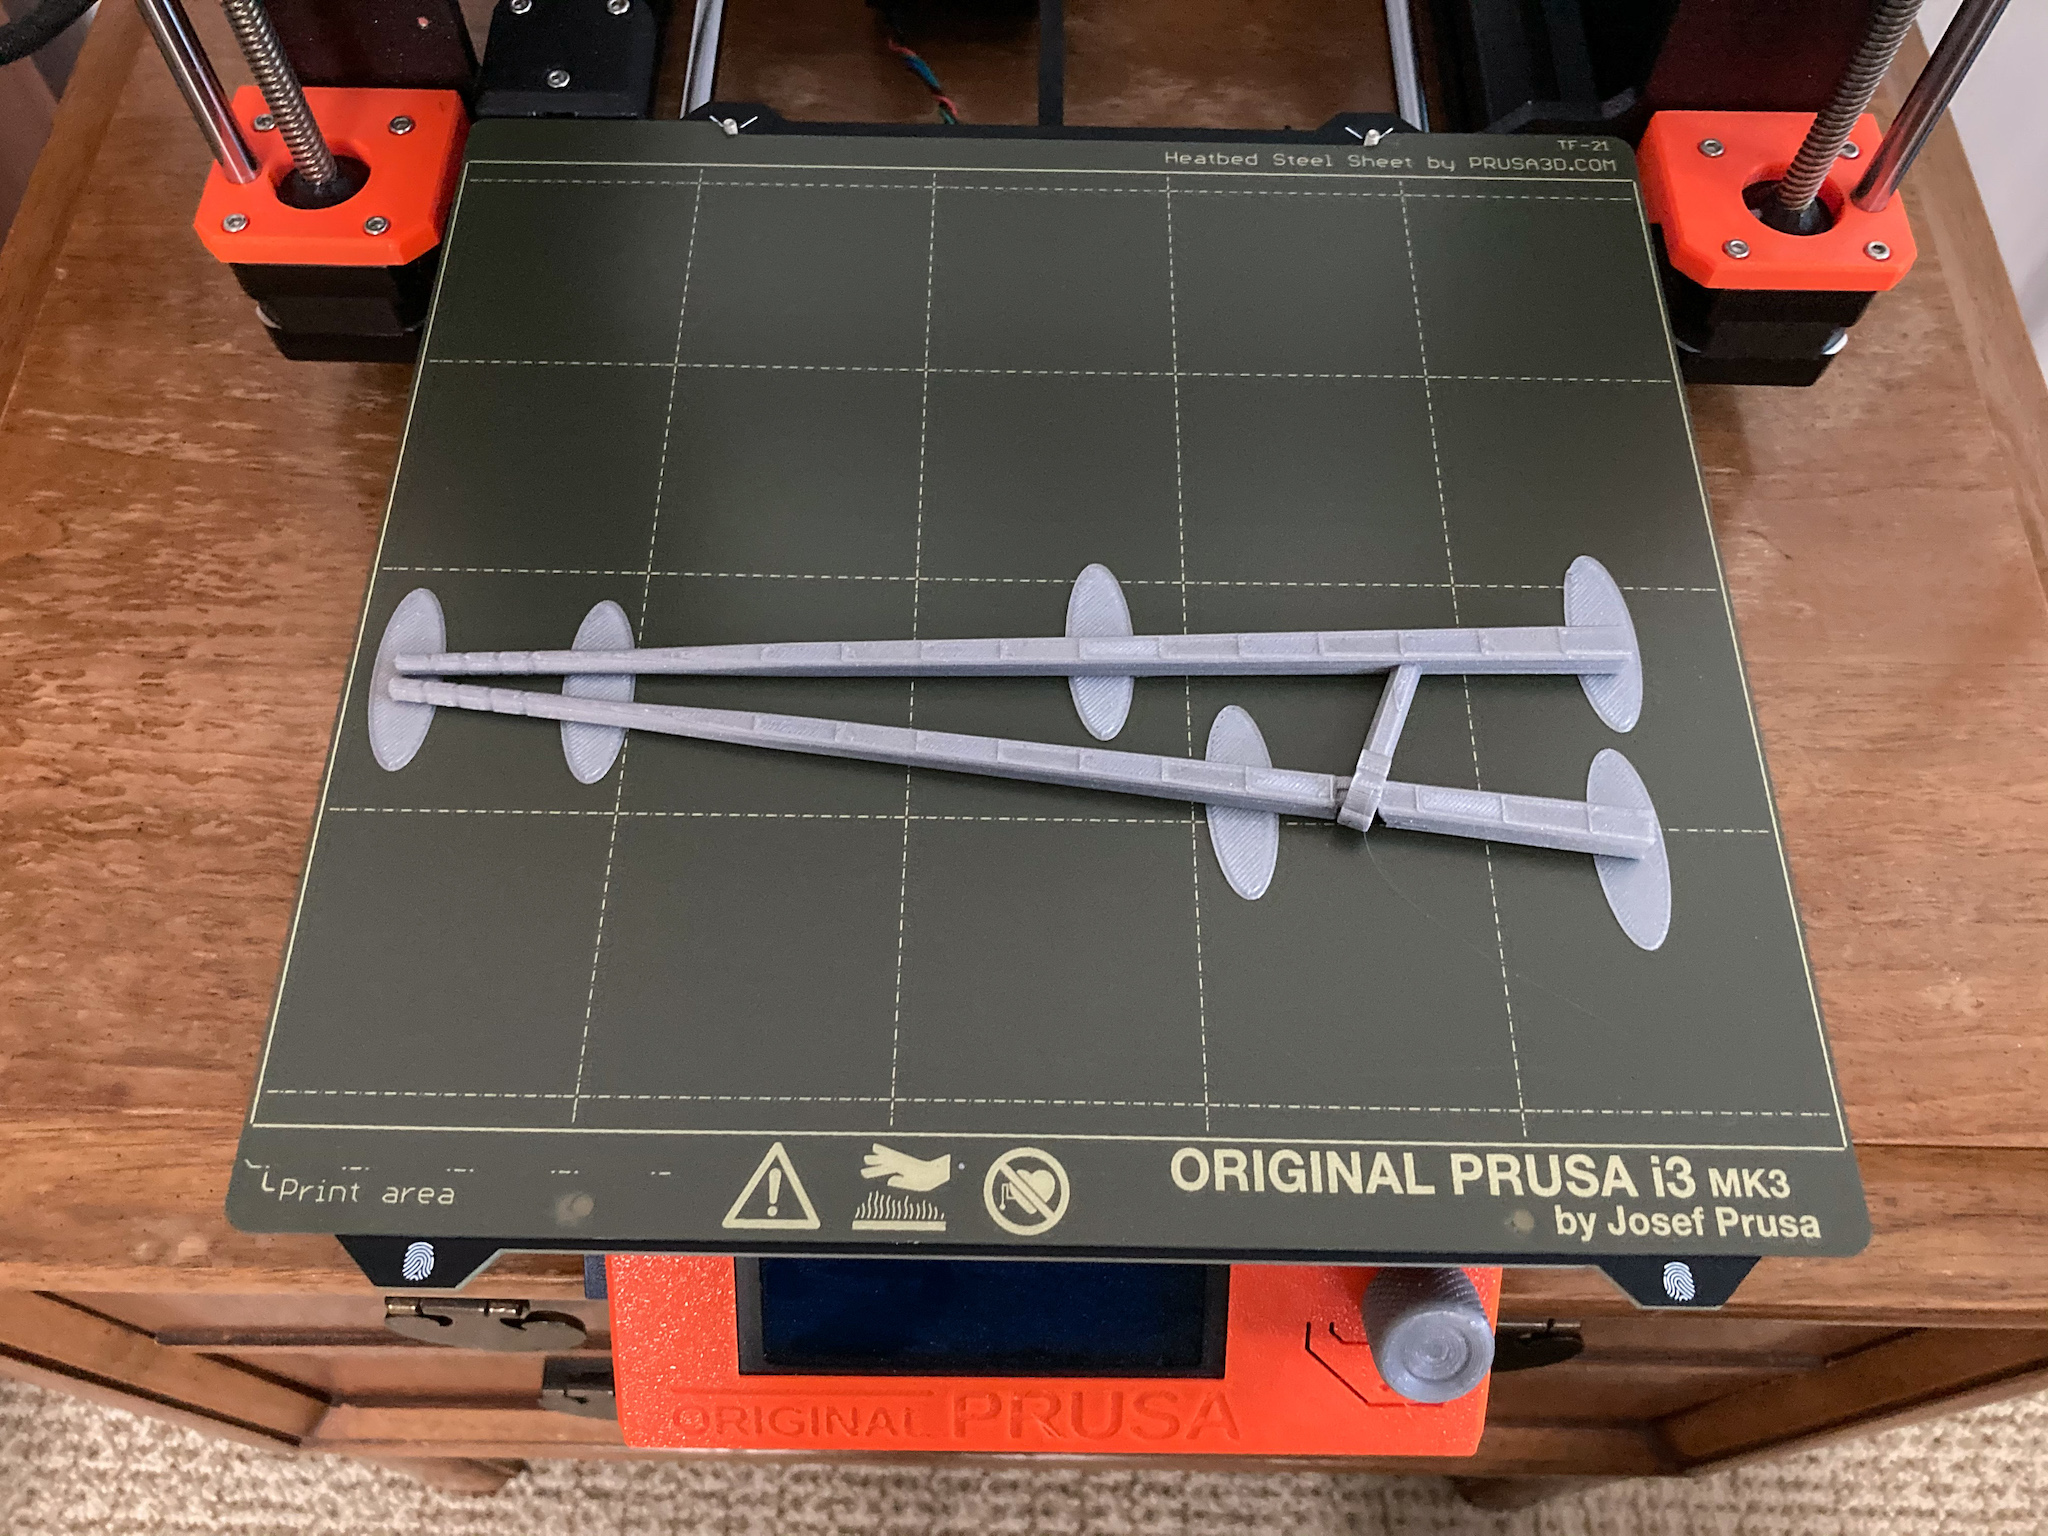
Some people have a fine-tuned printer, and an unblemished print bed. Assuming that you have dialed in a good first-layer Z height, you can simply print model T by itself, as shown above. The two sticks are printed flat against the print bed, without any support.
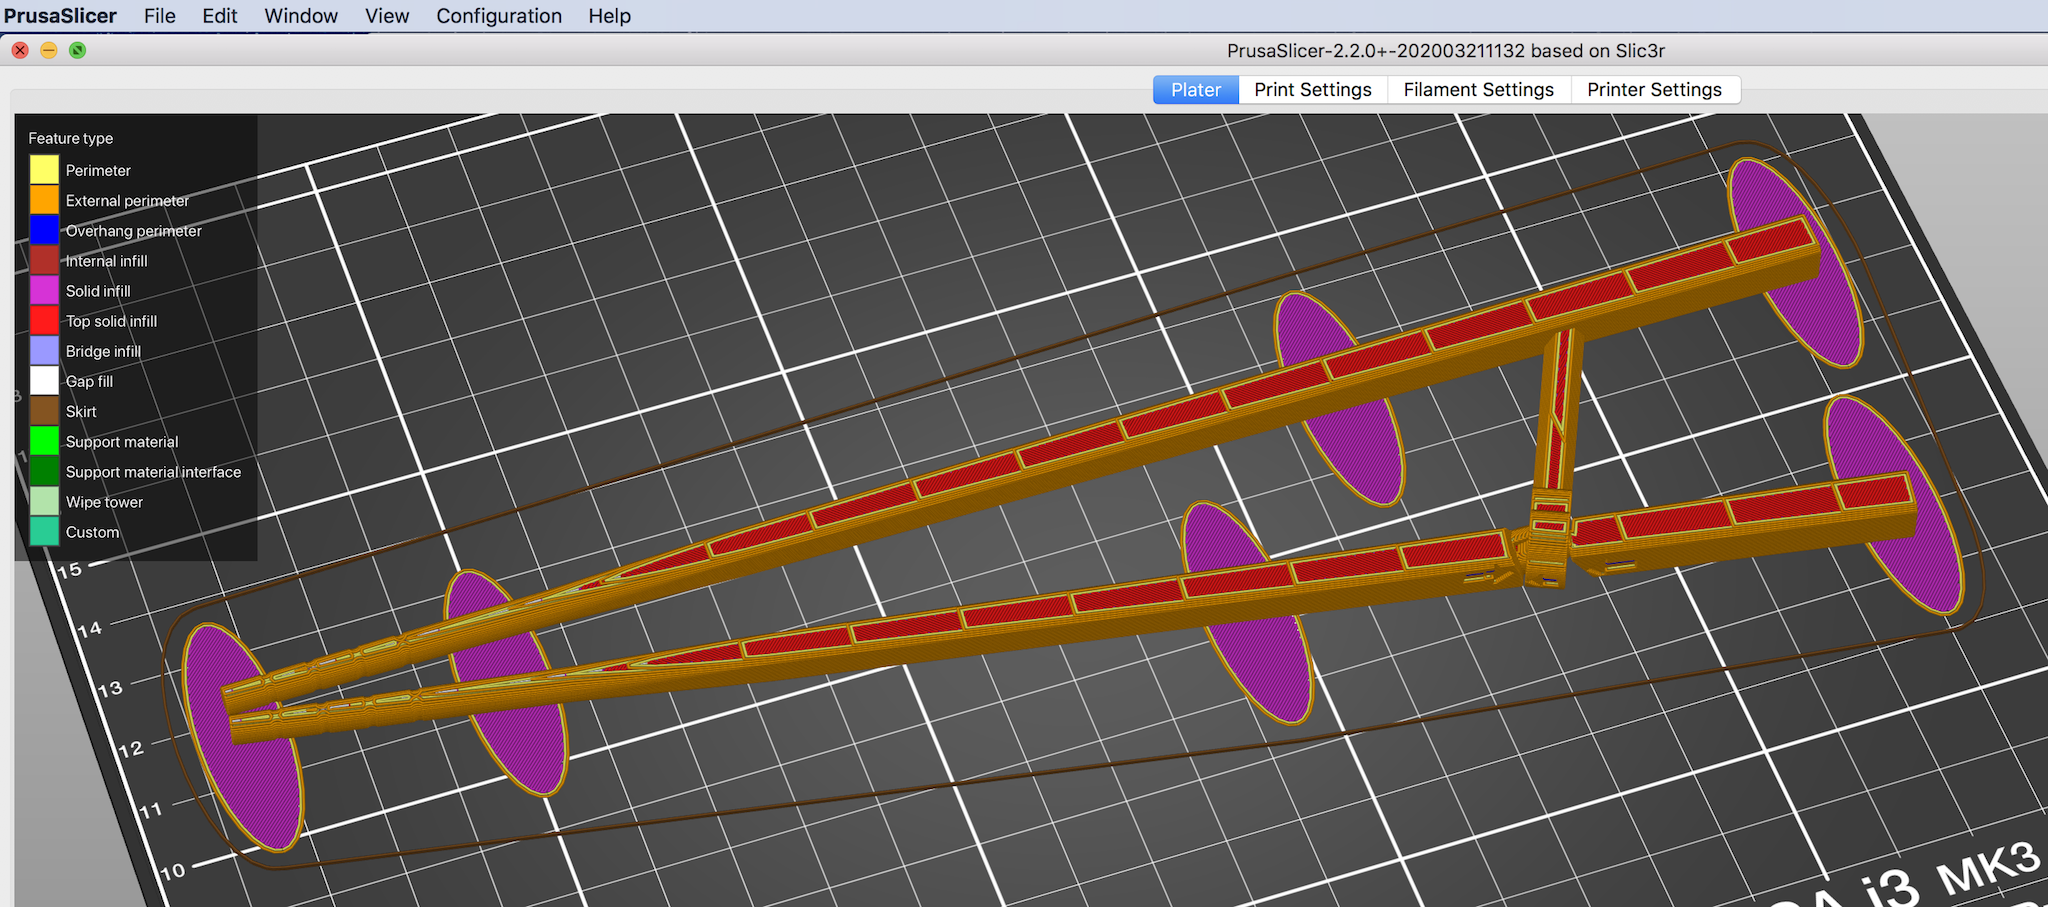
If you have experienced long and thin prints warping off the printer bed before, then we recommend that you add oval brims at key locations highlighted above.
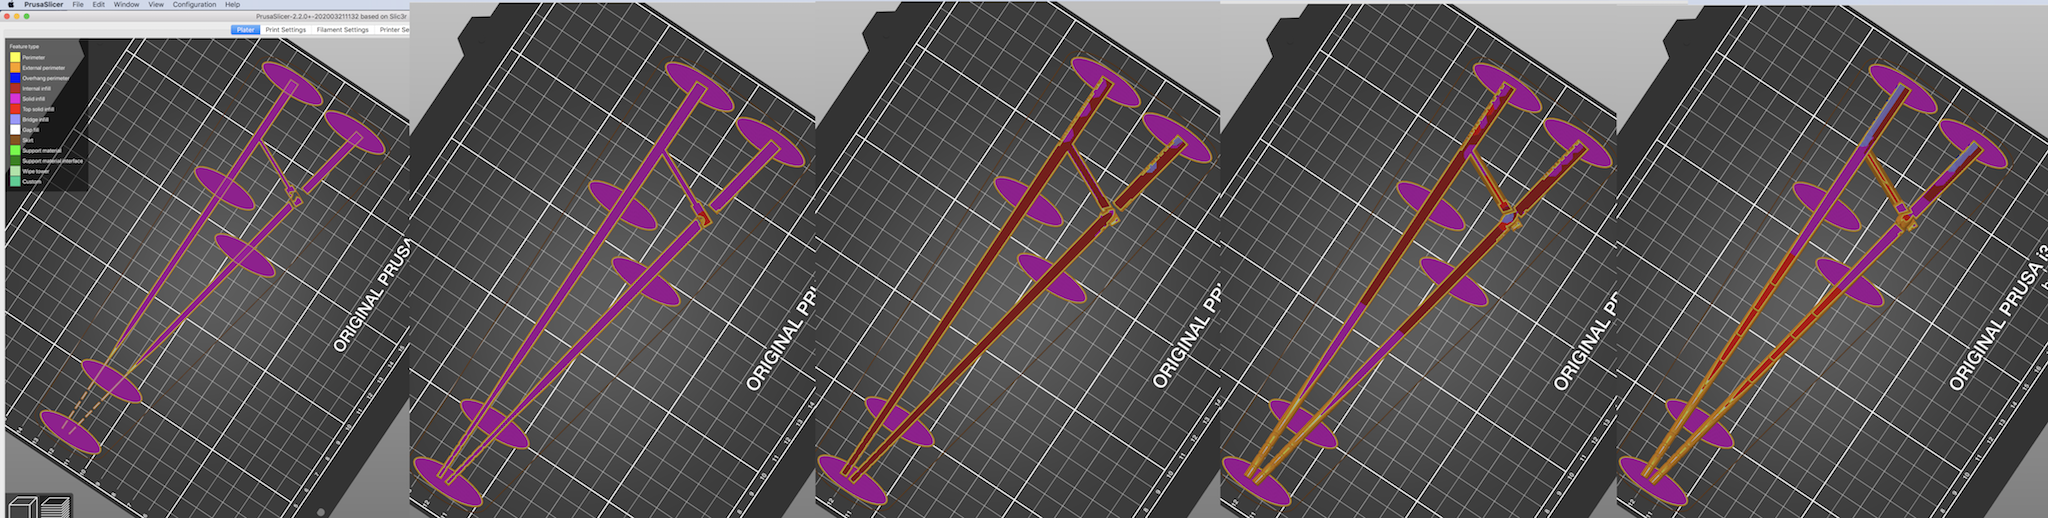
The picture above shows the first layer, the 5th, the 11th, the 22nd, and the 28th layer of the print. This sequence of images underline why brims are needed by some people. Note how tips of chopsticks start out as a thin line on the print bed. Only fine-tuned 3D printers can consistently print model T, without the use of brims.
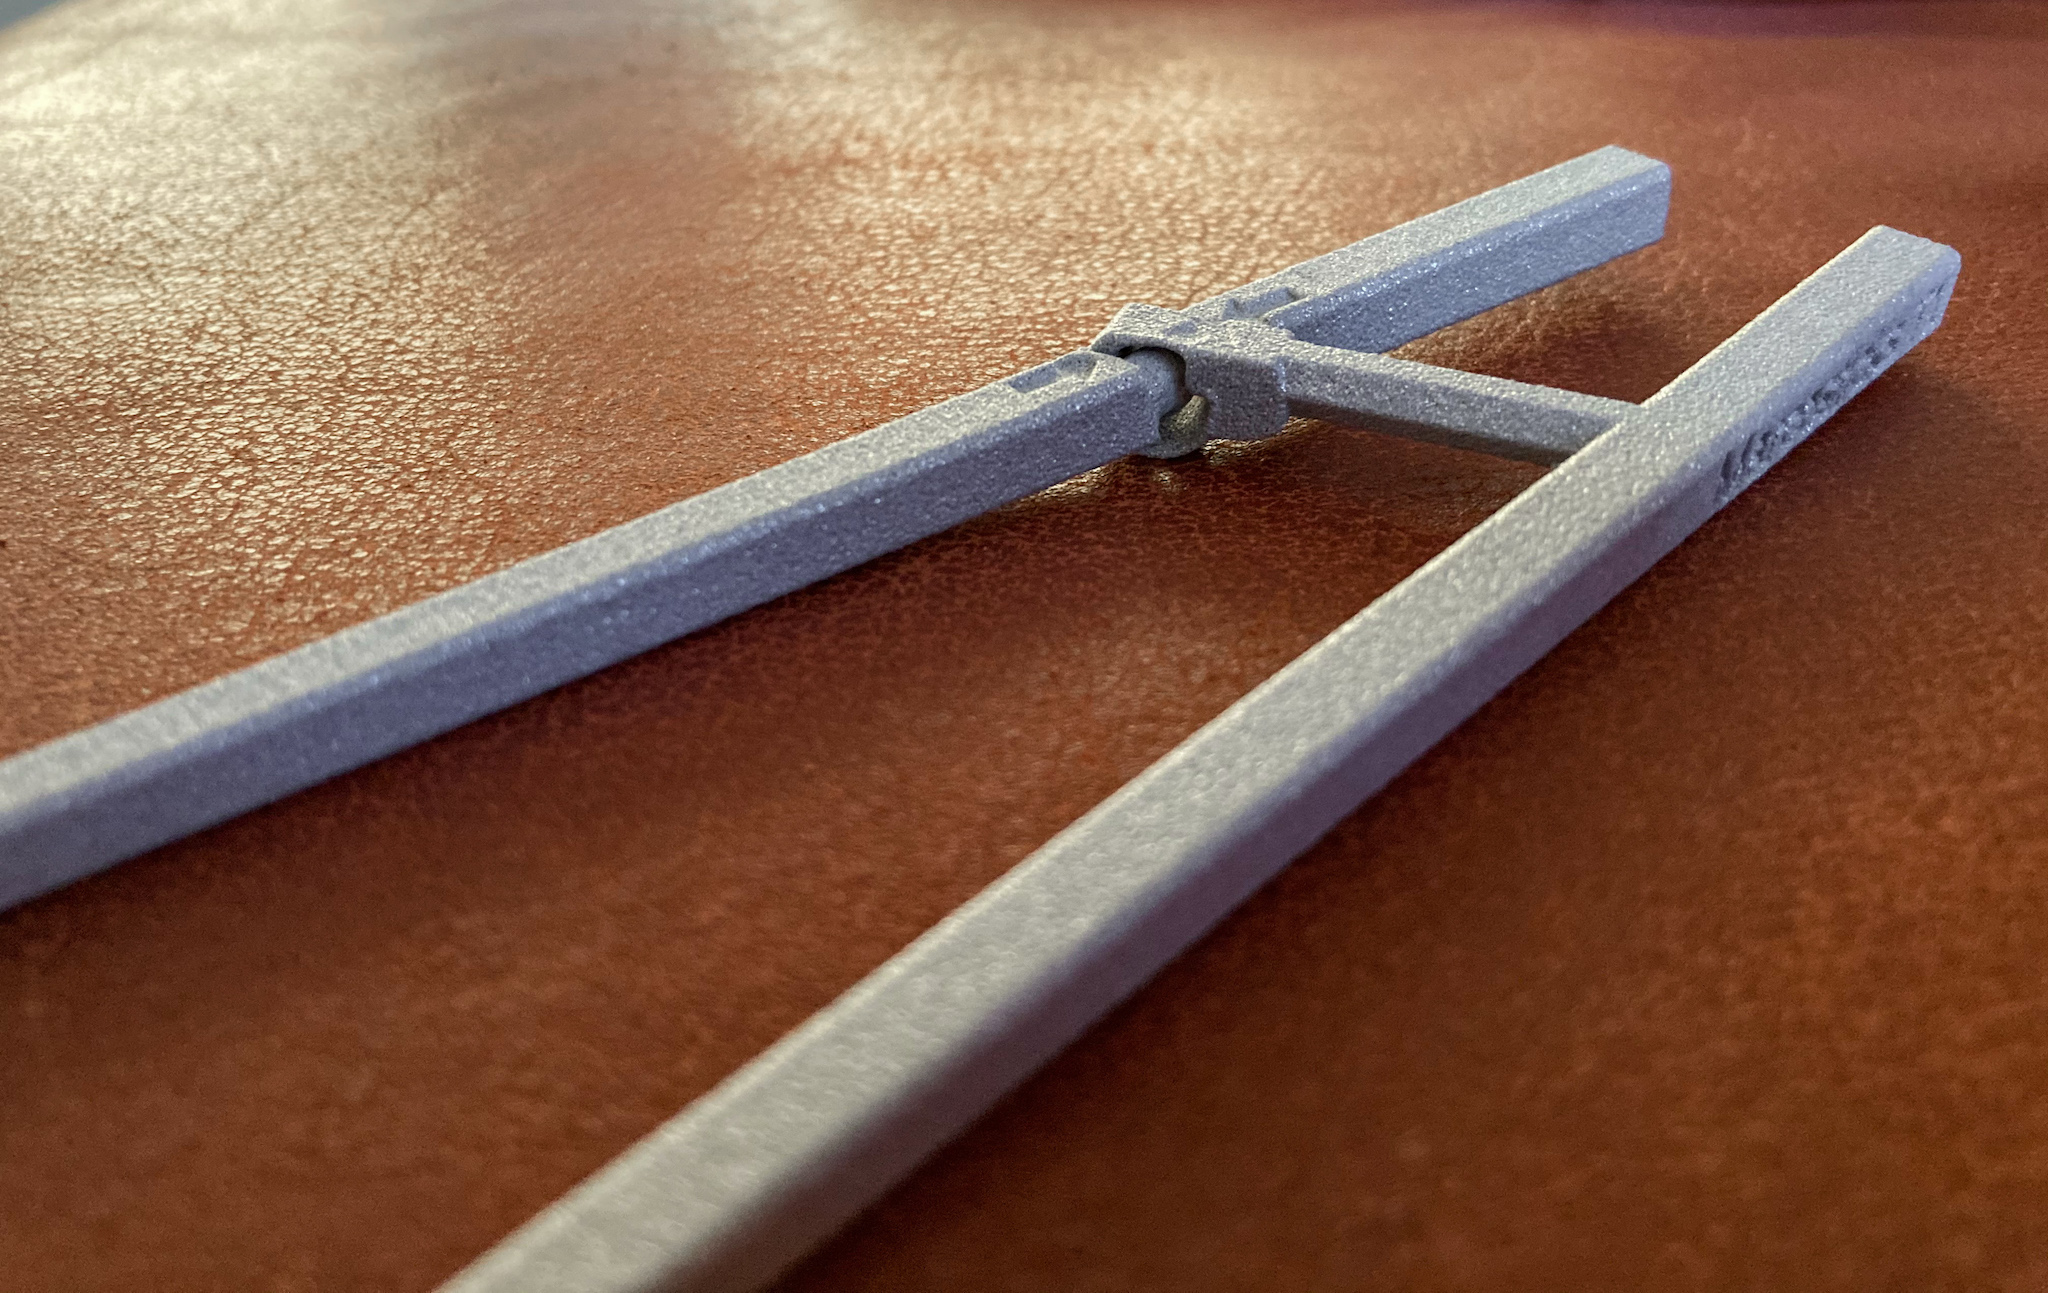
Coupling joint

The C-hook interlocks with the groove in Training Marcosticks, shown above. These two parts have been designed to be printed as articulate parts. Model T explicitly allows the top stick to move in a combined motion incorporating both rotation and tilting, following exactly the path prescribed by Standard Grip. This allows fingers to twirl the top stick using the planetary gear train principle.
More importantly, the ball joint is designed to teach and force fingers to follow the Standard Grip grip and motion. The groove carved into the top chopstick is shaped to allow the stick to rotate for 90° around the longitudinal axis, and only 90°. As the top chopstick rotates, the groove forces it to tilt at the same time. The C-hook and the groove thus serve as a teaching guide, coercing the user to learn the right twirling finger motions. See following pictures.
Successful prints
We designed model T to be printed on a wide variety of platforms. In general, you want to choose materials that are stiff and heat resistant. In terms of process, found that FDM (fused deposition modeling), SLS (Selective Laser Sintering), and MJF (Multi Jet Fusion) worked well.
Following are pictures of Training Marcosticks printed on our own Prusa printer, and then printed by various third-party print shots.
Prusament PLA is not a bad choice for home 3D-printing. It is almost stiff enough for actual use. But it has low heat tolerant, so don’t use it to eat hot noodle, even after you coat it in epoxy. Don’t try to wash it in a dishwasher. It will melt. But it is more than good enough printed as a training tool.
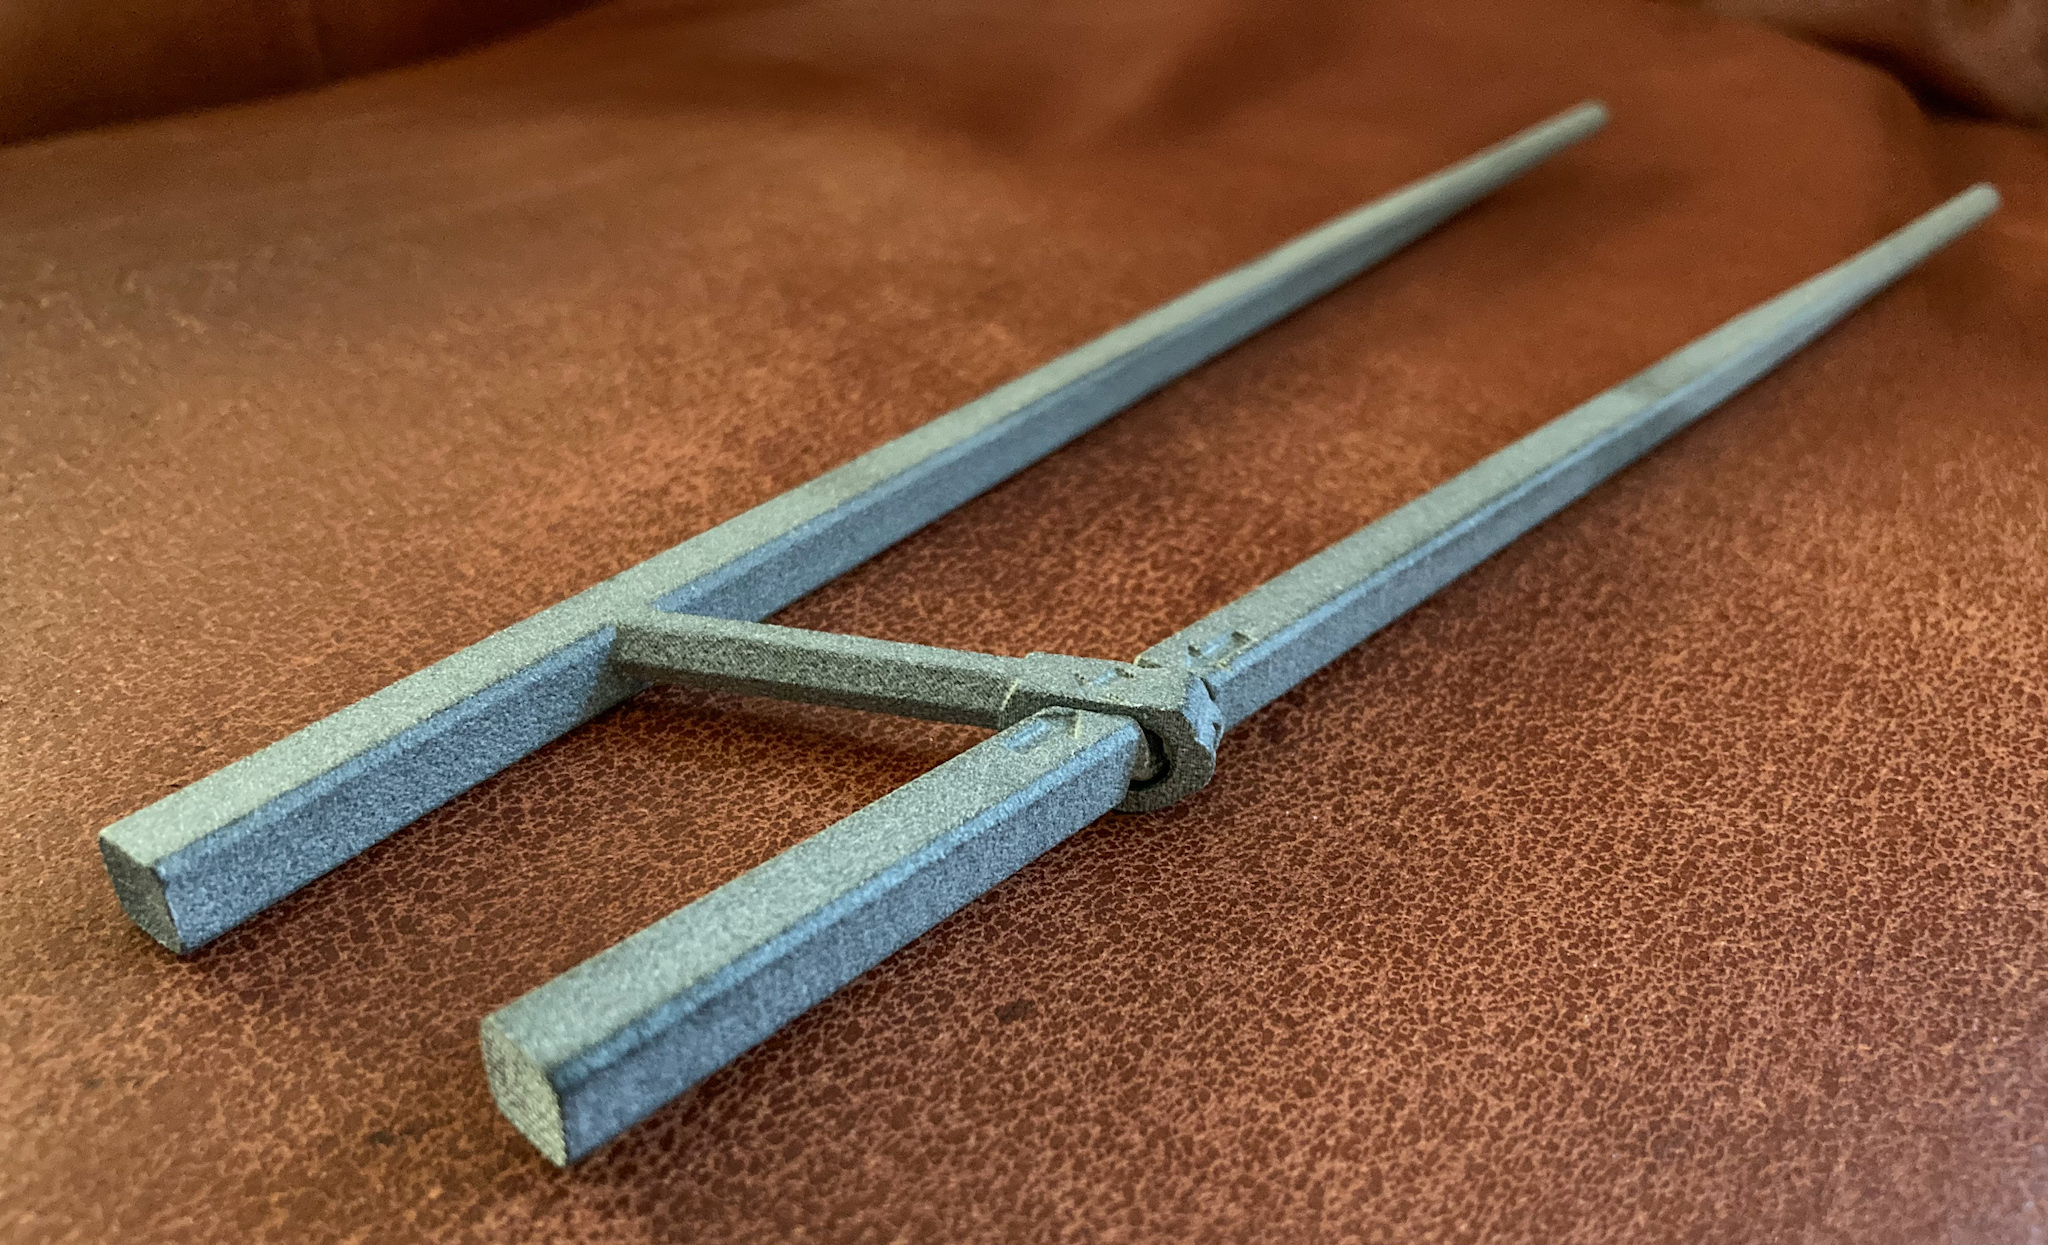
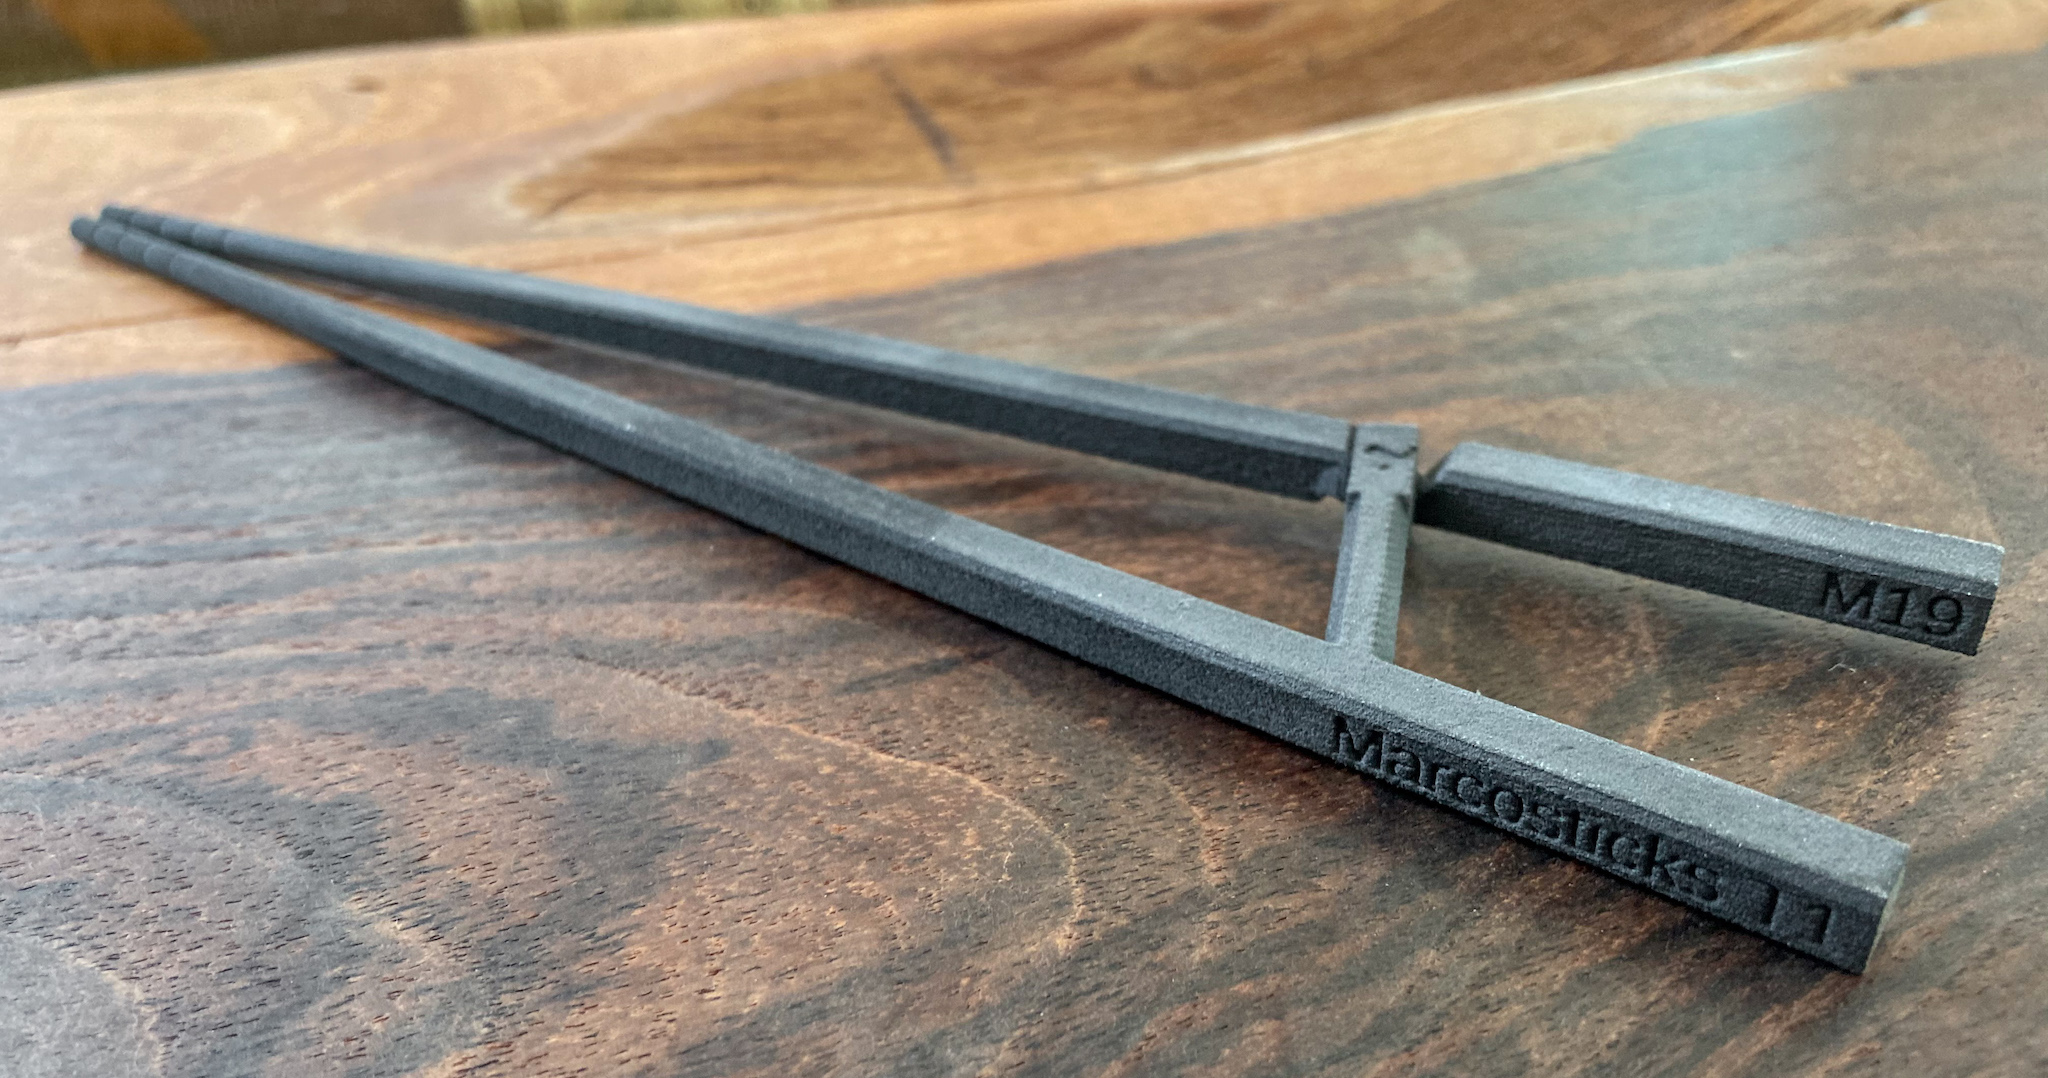
So far, we find that MJF (Multi Jet Fusion) to be the most cost-effective printing process for model T. When printed with Nylon PA12 40% Glass-filled, the result is simply perfect. At 17.8g, a pair of sticks weight slightly heavier than our PLA prints. Printed training marcosticks feel solid in the hand, with an almost smooth surface. The coupling joint was smooth, and required no lubrication, unlike PLA prints which required grinding and lubrication. MJF prints are comparable in stiffness to PLA prints. But these stand up to dishwasher temperature. If coated in epoxy, then MJF marcosticks can be used at the dinning table.
MJF as a process and PA12 glass-filled as material is a combination we can recommend. You can get this printed at Xometry for $16 (minimum order amount $30), and at Shapeways for $30. They are basically identical in quality, texture and weight. But we like the way Shapeways sliced the model better. And it appears that the Shapeways print has gone through post-print processing to make the surface smooth, even though their website and ordering page do not explicitly state this. The joint from Xometry came out a bit too lose. It seems like Xometry’s slicing was too parsimonious. But both were very usable.
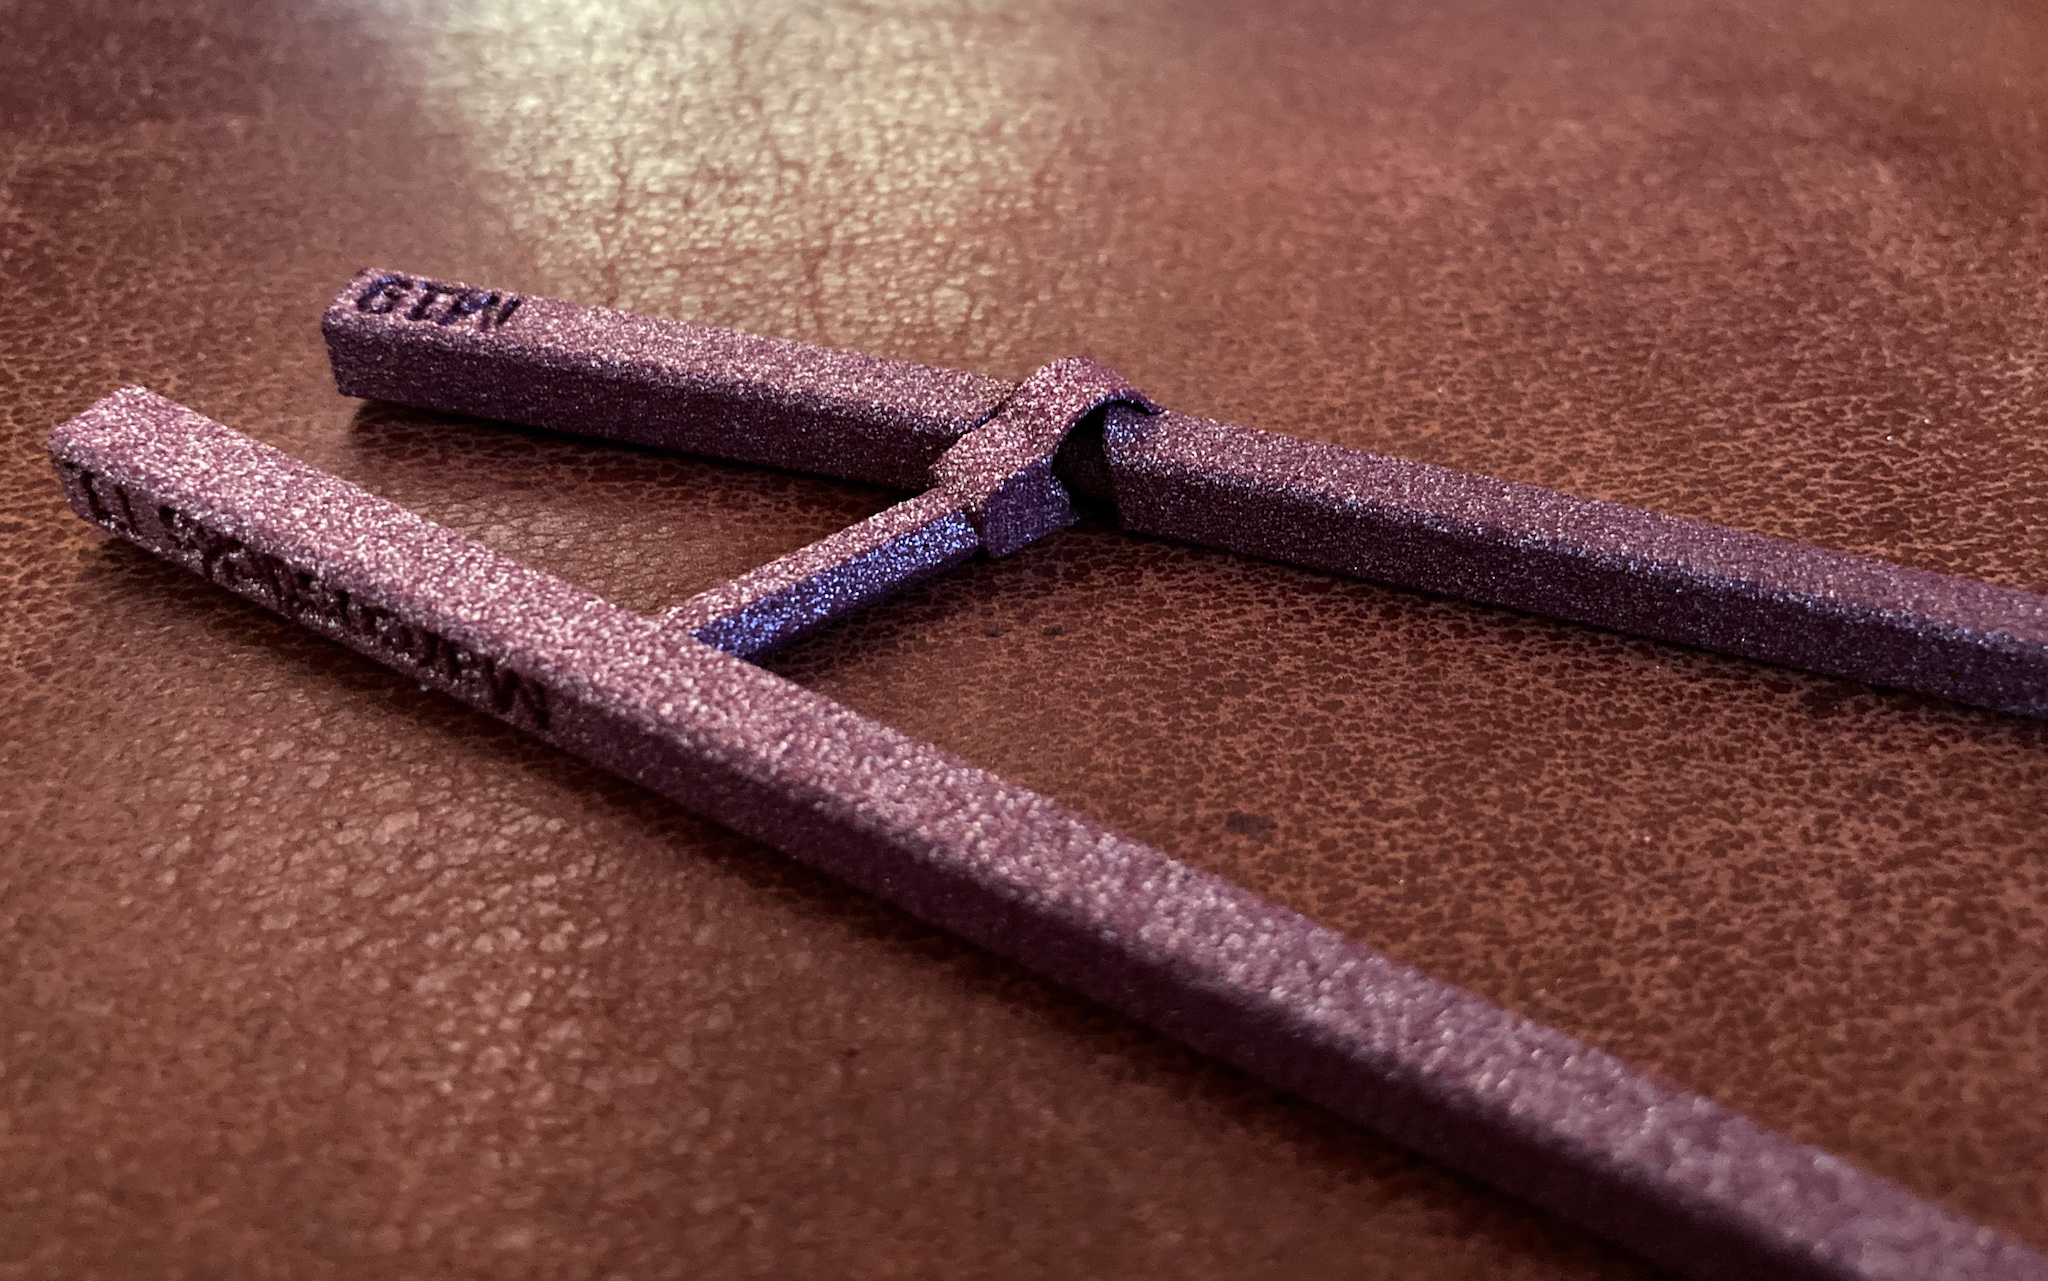
We had high hopes for these SLS (Selective Laser Sintering) Alumide prints. They stand up to high heat, and presumably were stiffer than PLA (at 3600 MPa flexural modulus). But they turned out to be soft and flexible, despite the impressive look. They also do not appear to be strong. While trying to unwarp the Alumide Bordeaux pair, we managed to twist off the rear end of the top stick, at the weakest point near the joint.
The Nylon Polyamide for MJF from i.materialise is not as stiff as PA12 40% Glass-filled. It feels as soft as the PA 2200 shown below. The print looks and feels marvelous. But it’s too soft.
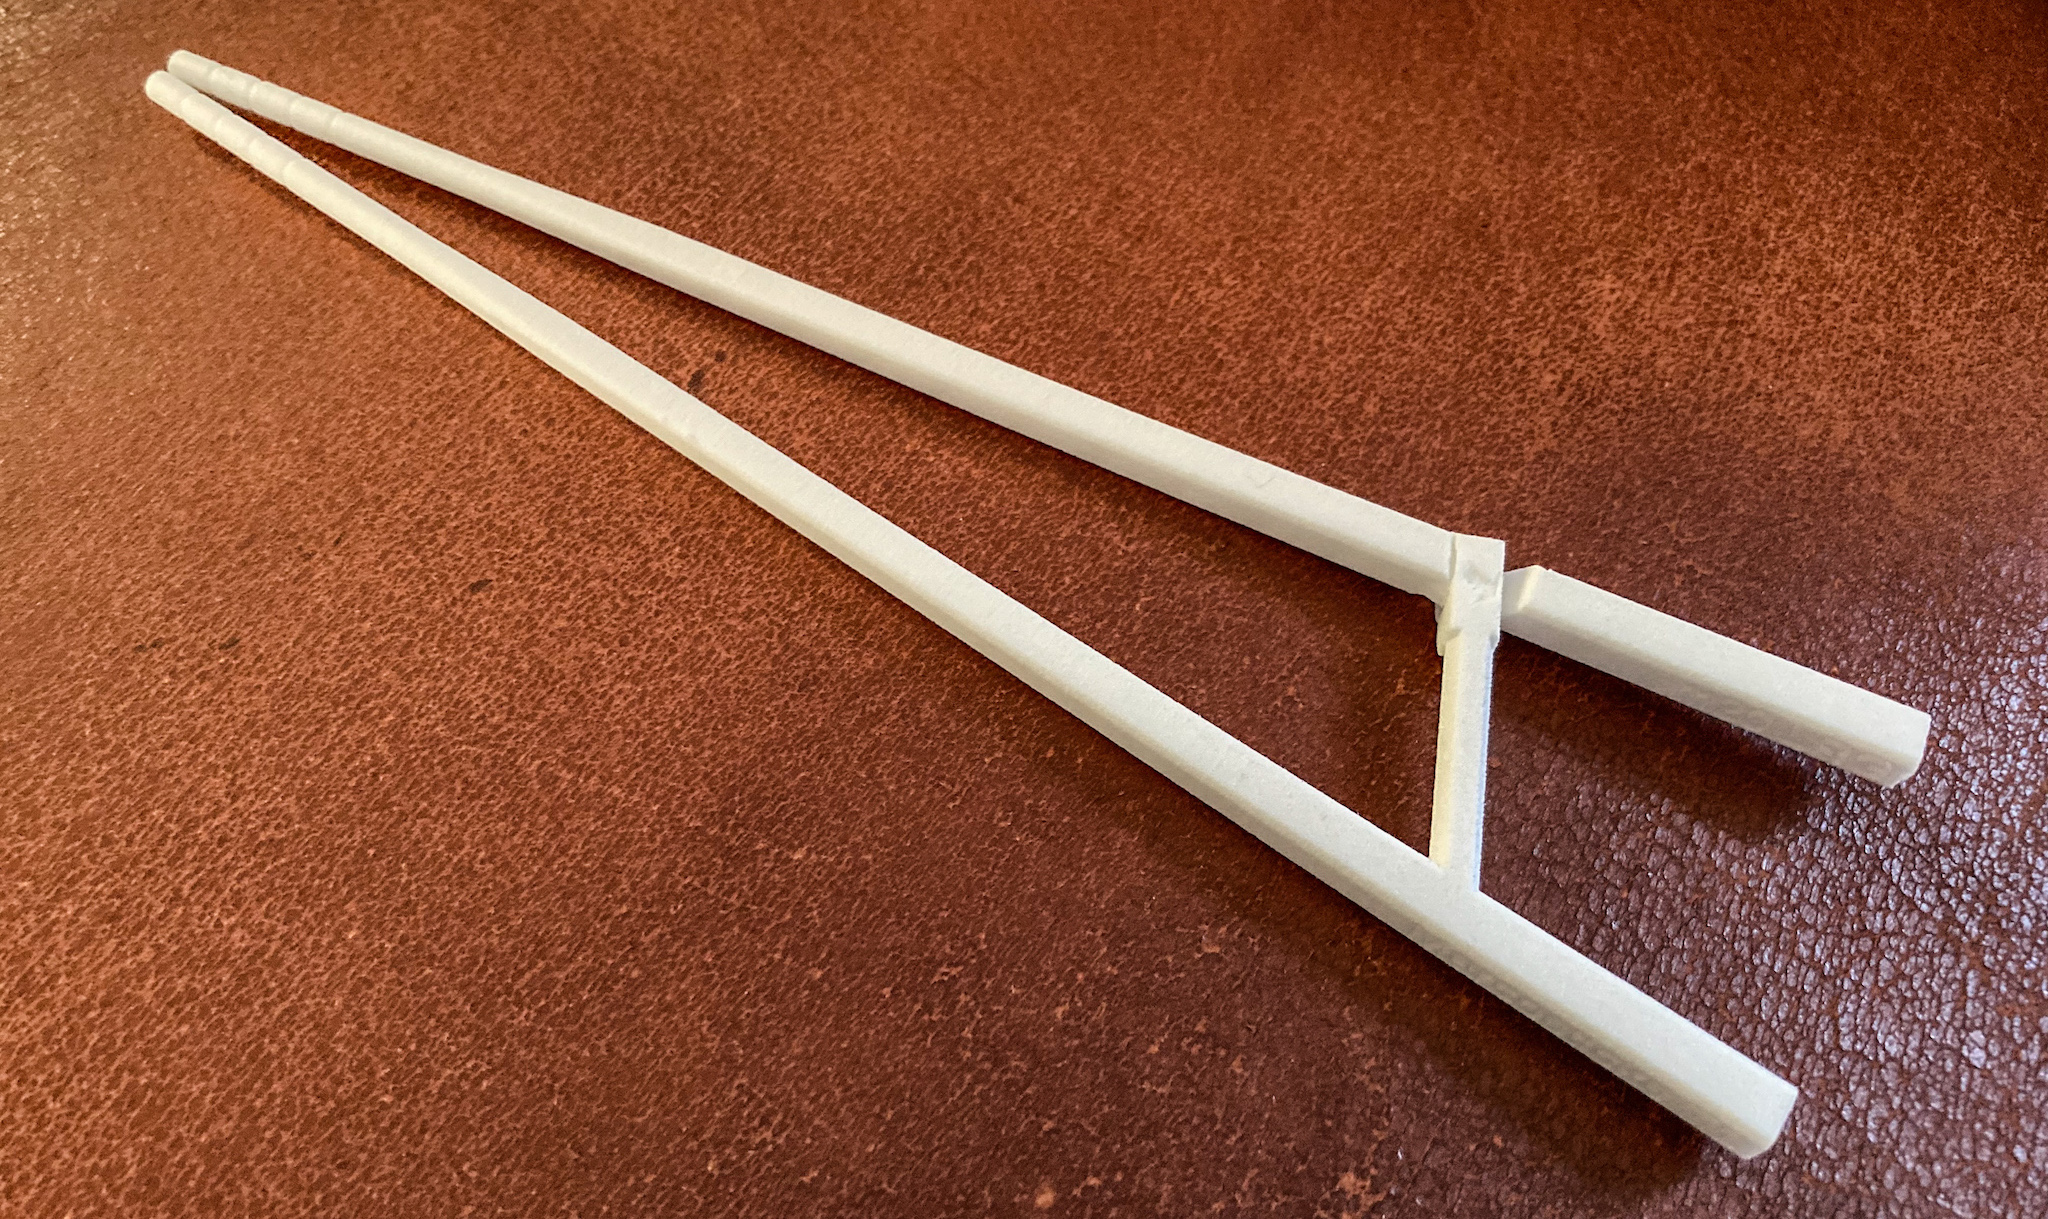
The SLS nylon PA 2200 print came out very nice. It is highly heat resistant (341°F). But sadly it was too soft and flexible. We knew this before ordering it (flexural modulus 1500 MPa). But still we want to give it a try. Yeah. It’s too soft even for practice uses.
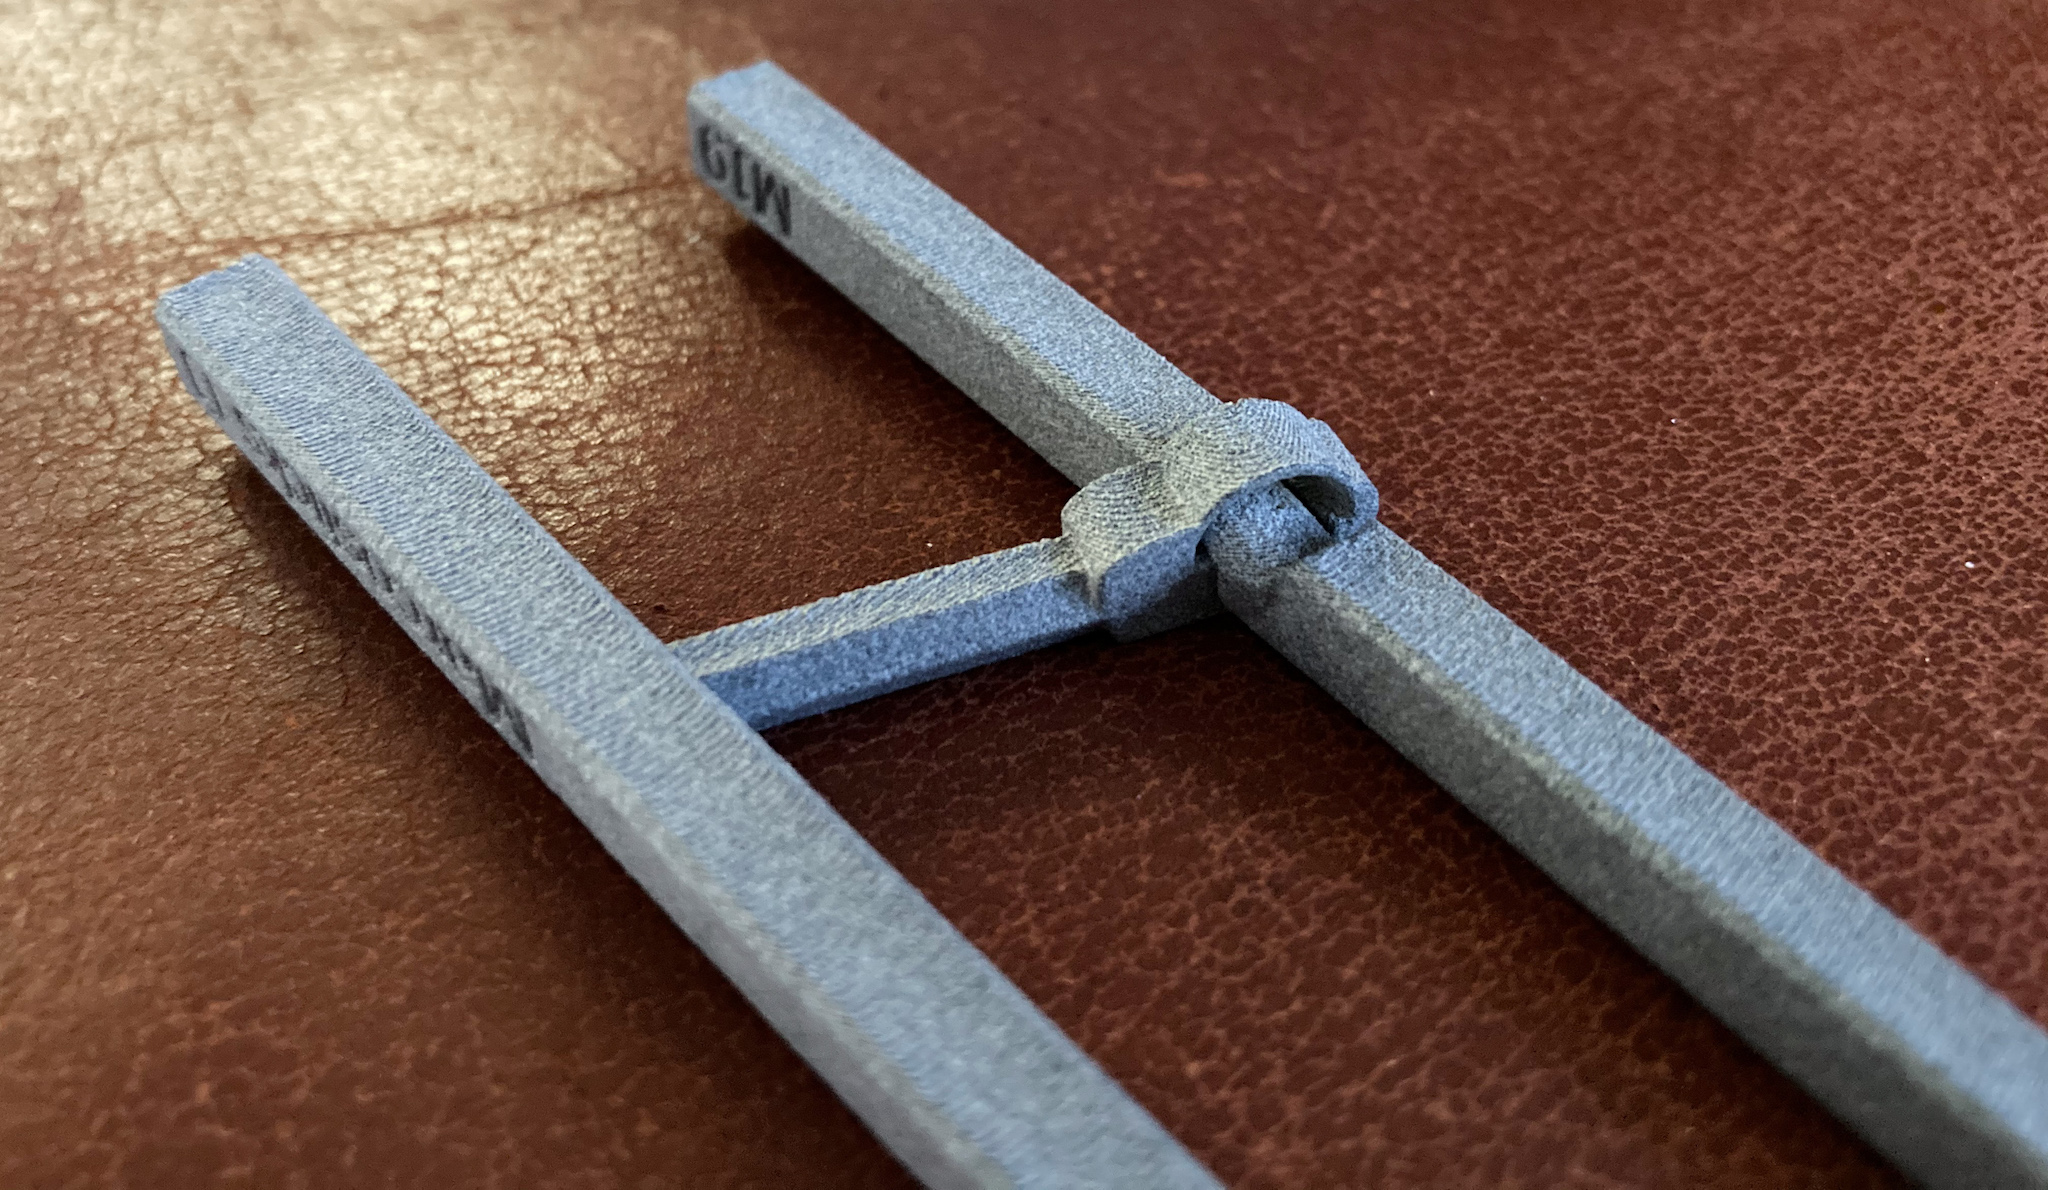
The PA11 Carbon-filled print is the only SLS print that was stiff enough. In fact, this one is even more stiff than MJF and PLA. The trade-off is that the surface is sandstone-like, and the joint doesn’t move smoothly without further processing. This print is lighter than the MJF print. But it’s even more heat resistant. This is a process and material we can recommend. You can get this printed at Sculpteo for $33 in Dec 2020.
Note that most print shops will tell you that gaps between the C-hook and the groove are too narrow. You will have to explicitly tell them that you take the risk that the two parts come out fused. In reality, all prints we did with MJF and SLS worked beautifully.
Each print shop has its own slicing software it seems. Even with the same process and material, prints came out different. Some ended up with bigger gaps between the two parts, and others less. But all worked. Only three pairs require us to snap the two parts apart explicitly. See the section on post-print processing about these gaps.
If you don’t want to print them yourself, or deal with third-party print shops, you can find partners who make training marcosticks here.
Download 3D models
Download this ZIP file: T1 Training Marcosticks – M22 PLA.
You will also find training marcosticks in the C1 Combo PLA file.
This package can also be found at Thingiverse 4682712.
You can print your own training marcosticks on your 3D printer. Most people have PLA filaments. These can be printed out in PLA in 0.20mm layers. If you don’t have a printer, you can get one from our partners. You can possibly get one made in materials stiffer than PLA, such as glass-filled nylon.
3D printing instructions
Print in PLA – it’s stiff enough for chopsticks.
The 3MF files are PrusaSlicer projects, with our own printer settings for start-up GCODE, for MKS3. It warms up the nozzle before attempting to do print bed calibration. It takes a bit longer than the built-in start-up sequence. But it does a better job. It also reduces filament oozing before printing starts. It has a custom wipe routine to clean the nozzle before the first line is put down. If you don’t like it, you can simply reset printer settings to your own default.
The STL files can be used direct in your own preferred slicer, if you don’t find the 3MF files useful, or you are not using a Prusa printer.
Set layer height to 0.20mm. You can use finer layers, if you really wish to. But 0.20mm works fines, and prints faster.
Enable “Detect bridging parameters” in PrusaSlicer, or the equivalent in your slicer. Some parts of marcosticks require bridging work. By enabling this feature, you direct your slicer to pay special attention to areas that require bridging, for a better printed product.
Add oval brims at strategic locations, to ensure that marcosticks do not warp off the print bed during printing. Brims can be easily trimmed with scissors, a flush cutter, or a deburring tool during post-processing.
Most marcosticks models require 100% infill, if you want sticks to be stiff enough for practice.
Post-print processing
The following video discussed in depth the post-print processing of training marcosticks.
If you are able to watch the above video, here are written instructions.
Trim oval brims off marcosticks using scissors, a flush cutter, or a deburring tool.
Training marcosticks contain articulate parts that are printed interlocked. They are the C-hook on the connecting rod, and the groove on the top chopstick. These two parts are printed with tight clearances. And they often come off the print bed “stuck” to each other. They are not really fused together during printing. You can snap them apart with a light push.

You will need to rub the two separated parts against each other, to smooth contact surfaces, in order to reduce friction. Note that the top chopstick have a rotational range of 90° around the longitudinal axis, and a 20° tilting range. As mentioned, the top chopstick follows the twirling path prescribed by the Standard Grip. You should move the top chopstick along this twirling path, to smooth contact surfaces.
Once you smooth the contact surfaces, apply tiny amounts of lubricant to these contact parts, with a micro screw driver, or a paper clip. When done properly, you should be able to hold the top chopstick, and freely dangle the bottom chopstick without resistance.
You should not use 3D-printed objects in real eating situations, without understanding food-grade filaments and food-safe coatings. Make sure you read information about the topic on the page 3D-print Your Own Marcosticks, before you attempt to use 3D-printed chopsticks to eat anything. We recommend that you only rehearse the Standard Grip with printed chopsticks, if you do not know how to make them safe for actual eating.
Pingback: Training Chopsticks 3D print model – BlingOrbit